Summary of Contents for QSC DCA Series
- Page 1 Cinema Accessories for DCA Series amplifiers XC-3 LF-3 SF-3 U S E R M A N U A L Two-way crossover with delay Low-frequency filter with delay Subwoofer filter *TD-000079-00* TD-000079-00 rev. B...
-
Page 2: Explanation Of Graphical Symbols
• Maintain reliable earthing (grounding) of all rack- mounted equipment. ©Copyright 1998, 2002 QSC Audio Products, Inc. All rights reserved. “QSC,” “DCA,” “DataPort,” and the QSC logo are registered trademarks of QSC Audio Products, Inc. CAUTION RISK OF ELECTRIC SHOCK... -
Page 3: Table Of Contents
Factory-installed SIPs...11 Factory switch settings...11 Recommended amplifier settings...11 Illustrations: Setup flow chart, SF-3 front and rear, low-pass/high-pass SIP selection chart, SIP identifier chart. MOUNTING TO AMPLIFIER APPLICATION EXAMPLE... WARRANTY INFORMATION HOW TO CONTACT QSC AUDIO PRODUCTS ...12 ...13 ...14 ...15... -
Page 4: Introduction And Description Of Each Model
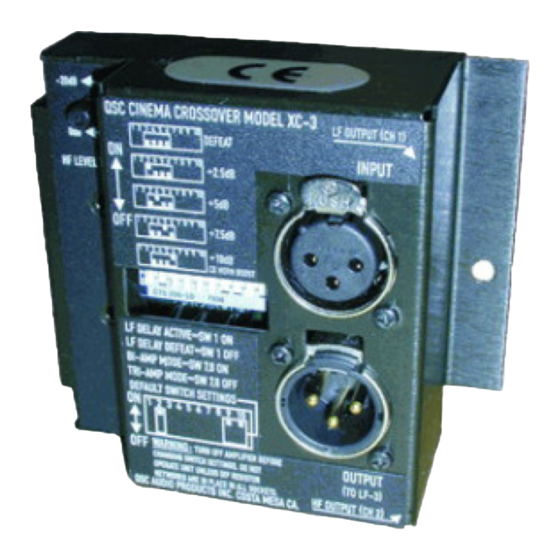
INTRODUCTION & DESCRIPTION OF EACH MODEL Introduction This manual covers setup and operation of cinema crossover accessories for QSC DCA Digital Cinema Amplifiers. There are three models: the XC-3 crossover, the LF-3 low frequency filter, and the SF-3 subwoofer filter. Together with DCA amplifiers, they allow you to assemble any type of cinema sound system, mono or multi-channel. -
Page 5: Configuring The Accessories
CONFIGURING THE ACCESSORIES Configuring the Accessories Configure each accessory before you mount it to the ampli- fier. If an accessory is already mounted to an amplifier, always turn the amplifier off before changing switch set- tings, changing input or output connections, or detaching the accessory. -
Page 6: Setting Up The Xc-3
XC-3 Setting up the XC-3 Setting up the XC-3 requires setting the DIP switches and selecting/inserting SIP resistors into the appropriate sockets. DIP switches #2, #9, and #10 must be set to the ON position (default settings for the XC-3). The flowchart below takes you through all the steps necessary before mounting the accessory to the amp. -
Page 7: Factory-Switch Settings
XC-3 XC-3 Factory Switch Settings When shipped from the factory, the DIP switch settings should be set as follows: Switches 7 & 8 ON: sets XC-3 to Biamp mode Switch 1 ON: activates LF delay Switches 3 through 6 OFF: HF boost disabled Switches 2, 9, and 10 ON: Factory default settings for proper operation. -
Page 8: Setting Up The Lf-3
LF-3 Setting up the LF-3 Setting up the LF-3 requires setting the DIP switches and selecting/inserting SIP resistors into the appropriate sockets. DIP switches #2 and #4 through #9 must be set to OFF, and switch #3 set to ON (factory default for proper operation). -
Page 9: Factory-Installed Sips
LF-3 LF-3 Factory-installed SIPs 350 Hz, both channels (18 k SIP resistor installed in J6 and J8) Delay 1.4 milliseconds, both channels (22 k SIP resistor installed in J1 and J2) LF-3 Factory Switch Settings When shipped from the factory, the DIP switch settings should be set as follows: Switch 1 and Switch 10 ON: Switch 2 and Switches 4 through 9 OFF: Required default setting for proper operation of the LF-3 Switch 3 ON:... -
Page 10: Setting Up The Sf-3
SF-3 Setting up the SF-3 Setting up the SF-3 requires setting the DIP switches, and selecting/inserting SIP resistors into the appropriate sockets. DIP switches #1 through #6 and #10 must be set to OFF (factory default for proper operation). The flowchart, right, takes you through all the steps necessary before mounting the accessory to the amp. -
Page 11: Factory-Installed Sips
SF-3 SF-3 Factory-installed SIPs fHP= 30 Hz (27 k SIP resistor in J2) fLP= 250 Hz (22 k SIP resistor in J6) SF-3 Factory Switch Settings When shipped from the factory, the DIP switch settings should be set as follows: Switches 1 through 6 and Switch 10 OFF: Default setting for SF-3 Switches 7 &... -
Page 12: Mounting The Accessories
MOUNTING- All Models Mounting the Accessories An accessory may be mounted with the amplifier either in or out of the rack, even if the amp is installed with rear rack ears. 1. Turn off the amplifier before installing the accessory. 2. -
Page 13: Application Example
APPLICATION EXAMPLE- Setting up the DCA Accessories in the Cinema Sound System Setting up the DCA accessories in the B chain of the cinema sound system primarily involves setting the trim levels on the XC-3, LF-3, and SF-3. This requires the cinema processor’s internal pink noise generator and an acoustical real-time spectrum analyzer. -
Page 14: Maintenance And Warranty
QSC dealer or contact QSC’s Technical Services Group. Disclaimer QSC Audio Products, Inc. is not liable for any damage to speakers, amplifiers, or any other equipment that is caused by negligence or improper installation and/or use of the LF-3, SF-3, or XF-3. Due to the possibility of the user installing a SIP resistor improperly or of an incorrect value, QSC Audio Products, Inc. -
Page 15: How To Contact Qsc Audio Products
Technical Services (714) 957-7150 or (800) 772-2834 toll free (U.S.A. only) FACSIMILE (FAX) NUMBERS: +1 (714) 754-6174 Sales & Marketing FAX +1 (714) 754-6173 Technical Services FAX ADDRESS: QSC Audio Products, Inc. 1675 MacArthur Boulevard Costa Mesa, CA 92626-1468 USA... - Page 16 © Copyright 1998, 2002 QSC Audio Products, Inc. All rights reserved. “QSC” and the QSC logo are registered with the U.S. Patent and Trademark Office. QSC Audio Products, Inc., 1675 MacArthur Boulevard Costa Mesa, California 92626 USA PH: (714) 754-6175 FAX: (714) 754-6174...


Need help?
Do you have a question about the DCA Series and is the answer not in the manual?
Questions and answers