Table of Contents
Advertisement
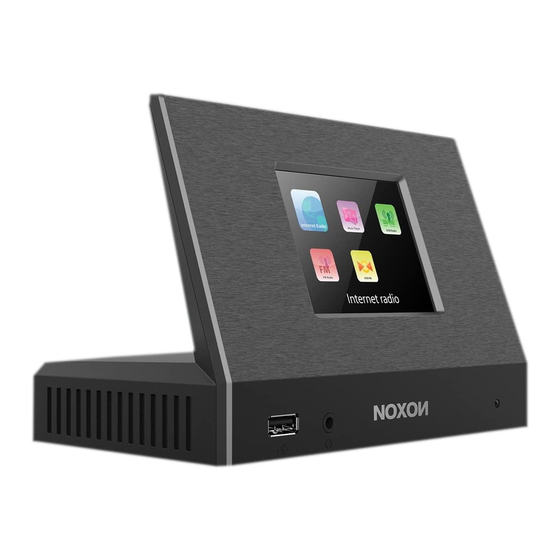
Internet Radio with FM/DAB/DAB+/FM
Adaptor
A120+
User Manual
Thank you very much for buying the A120+. In order to let you freely operate the product and
fully enjoy the overbalancing happiness it brings you, we have introduced each function of the
player in detail in this user manual. Please carefully read this user manual before use and keep
for future reference.
Advertisement
Table of Contents

Related Manuals for Noxon A120 Plus


Summary of Contents for Noxon A120 Plus
- Page 1 Internet Radio with FM/DAB/DAB+/FM Adaptor A120+ User Manual Thank you very much for buying the A120+. In order to let you freely operate the product and fully enjoy the overbalancing happiness it brings you, we have introduced each function of the player in detail in this user manual.
-
Page 2: Table Of Contents
Table of Contents 1. Network Requirement 2. Safety Precaution 3. Appearance and Key Description 4. Getting Started 5. A120+ Functions Main Menu System Settings Internet Radio Spotify Connect Music Player DMR (DLNA streaming) Bluetooth 5.10 Sleep 5.11 Alarm 5.12 Extra Features 6. -
Page 3: Network Requirement
These might lead to damage to the device. • If the NOXON NOVA II is moved from a cold environment into a warmer one, do let it adapt to the new temperature before operate the device. Otherwise, it might lead to condensation and cause malfunctions in the device. - Page 4 NOVA II is extremely dirty, it may be wiped off with a slightly moist cloth. Make sure the device is dried off after cleaning. • When you are necessary to ship the NOXON NOVA II, store it in its original package. Save the package for this purpose. Disposal •...
-
Page 5: Appearance And Key Description
3. Appearance and Key Descriptions Description Functions 3.2” TFT Color Screen Display Remote control receiver Receive infrared signal from remote USB port USB playback (no charging function) Earphone out jact 3.5mm jack for earphone out FM/DAB Antenna socket Strengthen the DAB/FM receiption Optical Out SPDIF Optical digital output... -
Page 6: Remote Controller
Coaxial Out SPDIF Coaxial digital output Line Out-R 3.5mm jack for speaker connection – Right channel Line Out-L 3.5mm jack for speaker connection –Left channel LAN port Ethernet connection DC IN Power supply Remote Controller Use your thumb to press the lid of the battery compartment and pull it out. -
Page 7: Getting Started
Never throw batteries into an open fire or expose them to high temperatures. Failure to observe these guidelines may cause fluid to escape from the battery, which can cause skin irritation. In case of contact: Wash off the fluid with plenty of clear water Do to rub your eyes. - Page 8 At the first time operation, system asks if you want to start the Setup Wizard. Select YES to continue the setup. Details of the Setup Wizard can be referred to Section 5.2.1 below. After choosing NO, the next screen asks if you would like to run the wizard next time A120+ is started.
-
Page 9: A120+ Functions
Allow to share your media to A120+, which is the device name for music streaming. Add the audio files and folders you want to share with A120+ to the media library. 5. A120+ Functions Main Menu Under the main menu, you can select the following modes: Internet Radio, Spotify Connect, Media Player, DAB, FM, Bluetooth, Sleep and Alarm. - Page 10 • Time/date Display format Select 12 or 24 as the time format. Auto-update The time and date can be updated manually or automatically from DAB, FM or network. Auto-update works with data sent over DAB, FM or the Internet. The clock is only updated when in a corresponding mode, so it is best to select a mode you use regularly.
- Page 11 For the wireless connection, you will be asked for input encryption in the next step. Standard encrypted network To enter the network’s key, use the navigate reel or direction keys on the remote control to move the cursor through the characters and press OK to confirm. As each character is selected, the key is built up near the top of the display.
- Page 12 Skip WPS Enter key as for a standard encrypted network. For more information on setting up a WPS encrypted network, see your WPS router’s instructions. • Completion A120+ attempts to connect to the selected network. It will show connected if the setup is successful. If connecting fails, A120+ returns to a previous screen to try again.
- Page 13 and loudness settings. Press EQ on the remote control to quick enter equalizer menu. 5.2.3 Network • Network wizard Enter to search AP SSID, then input the WEP / WPA key or choose Push Button/Pin/Skip WPS to connect to the wireless network. •...
-
Page 14: Internet Radio
5.2.4 Time/Date Set the time manually or auto update, time format, time zone and daylight. 5.2.5 Language The default language is English. Change it as your preference. 5.2.6 Factory reset A factory reset resets all user settings to default values, so that time and date, network configuration and presets are lost. -
Page 15: Last Listened
If you are already listening to an Internet radio station, you can press to quickly return to the last visited branch of the menu tree, rather than MENU to go to the first menu of Internet radio mode. 5.3.1 Last listened When Internet radio mode restarts, the last-listened station is selected. -
Page 16: My Added Stations
Visit the portal website at www.wifiradio-frontier.com If this is your first visit to the portal, register for a new account, entering the following information: access code, your e-mail address, password, radio model. If you already have an account and wish to add an additional radio, log in to your account and select My preferences >... -
Page 17: Spotify Connect
5.4.1 Spotify Connect Using This Device With Spotify Connect A better way to listen at home Spotify Connect lets you play Spotify through your home speakers or TV, using the Spotify app as remote. You’ll need Spotify Premium to use Connect – see details overleaf. Step 1. -
Page 18: Shared Media
return to the music list. 5.5.1 Shared media It you have set up shared media, you should see an entry consisting of <computer name>: <Shared media name>. If you have more than one computer sharing media, the alternatives are listed. Select the shared media you want to play. From this point on, the menus are generated from the shared media server. -
Page 19: Dmr (Dlna Streaming)
the information: UPnP: track/artist/progress bar/track times, album, codec/sampling rate, playback buffer and today’s date. 5.5.4 USB playback From this point on, menus are generated from the folders on the USB device. Browse folders with direction keys on the remote control. The display shows folder and file names (not necessarily track names). - Page 20 Open Windows Media Player to enable Allow remote control of my Player. Right click any music in the library and choose Play to A120+. A box of music playback pops up for the streaming.
-
Page 21: Dab
5.6.2 Control on Smartphone / Tablet You may search (with keyword: DLNA) and install any free or commercial DLNA Apps from Google Play or Apple Store if you are using Android mobile, tablet or iPhone / iPad. It is suggested to use iMediaShare on Android mobile, tablet or iPhone/iPad. Procedures for playing shared music on the app are as follows: Select A120+ as the player. -
Page 22: Now Playing Information
automatically performs a full scan to see what stations are available. You may also need to start a scan manually to update the list of stations for one of the following reasons: Available stations change from time to time. If reception was not good for the original scan, this may result in an empty or incomplete list of available stations. - Page 23 rate/codec/channels and today’s date. 5.7.4 Settings • Dynamic range compression (DRC) If you are listening to music with a high dynamic range in a noisy environment, you may wish to compress the audio dynamic range. This makes quiet sounds louder, and loud sounds quieter. You can change DRC as off, low or high. •...
-
Page 24: Bluetooth
track title and contact details. If no information is available, just the frequency is shown. Stereo broadcasts are indicated with an icon at the top of the screen, To view further information about the broadcast, press INFO. Each time you press INFO, another set of information is displayed, cycling through RDS text, further RDS text (station/programme type), frequency and today’s date. -
Page 25: Sleep
5.10 Sleep To set the sleep timer, select Sleep in the Main menu or press SLEEP/SNOOZE on the remote control. Choose sleep period option from Sleep OFF, 15 MINS, 30 MINS, 45 MINS or 60 MINS. Once you select a sleep period, the system returns to the main menu. Press to return to the Now playing screen. -
Page 26: Extra Features
5.12 Extra Features 5.12.1 Headphone jack A120+ featured with headphone jack for you to continue enjoying the music in vary environments, such as noisy background, or the area that requires every one keeping silent. It is recommended to reduce the volume before put on the headphones. After the headphones are positioned properly, increase the volume to the desired level. - Page 27 Once the smartphone / tablet has accessed to the device, they will be automatically connected next time when you open the app again. Select your desired mode in the main page. You may then control the selected mode on your smartphone / tablet and on the display of the device simultaneously.
- Page 28 Go to Spotify app to choose the music from your Spotify playlist. Tap the Spotify icon on the Spotify app, then choose the preferred device (NOXON NOVA II). It should be displayed in the Spotify app. Once selected, music will be streaming to the device.
- Page 29 • Manual search or scan the stations from the app. From the app, you can also control to operate STANDBY/ON, EQUALIZER, CHANGE PIN and RENAME of the device under SETTING menu For CHANGE PIN setting, please also refer to Section 5.2.3. RadioVIS is a channel for broadcasters to deliver Slideshows over the Internet.
-
Page 30: Troubleshooting
6. Troubleshooting Error Remedy The device does not switch Check it the power adaptor is connected properly. No sound. 1. Turn on the sound as it may be muted 2. Increase the volume. 3. Pull any connected headphone or speaker from the connector jack. - Page 31 – use an USB drive instead. NetRemote does not show or 1. Reopen the App. connect to A120+ 2. If you have several streaming from several devices at the same time, it may cause crash, reboot A120+ and/or your device. A120+ may process large amount of data after a period All other undetermined cases.
-
Page 32: Specifications
7. Specification Model number A120+ Description Internet radio with FM/DAB/DAB+/BT adaptor Display 3.2", 320 x 240, TFT colour display Network supported IEEE 802.11b/g/n wireless (WiFi) 10/100 Ethernet (LAN) Frequency band WiFi : 2.400 - 2.4835 GHz Bluetooth: 2.4GHz - 2.48 GHz WiFi: 17.432dBm Max. - Page 33 Use only the power supply listed in the user instructions This product operates under Wi-Fi mode at 2.412-2.472GHZ and is designated only to be used inside a normal household environment. This product is suited for this purpose within all EU counties.
Need help?
Do you have a question about the A120 Plus and is the answer not in the manual?
Questions and answers