Sign In
Upload
Download
Table of Contents
Contents
Add to my manuals
Delete from my manuals
Share
URL of this page:
HTML Link:
Bookmark this page
Add
Manual will be automatically added to "My Manuals"
Print this page
×
Bookmark added
×
Added to my manuals
Manuals
Brands
SI Analytics Manuals
Laboratory Equipment
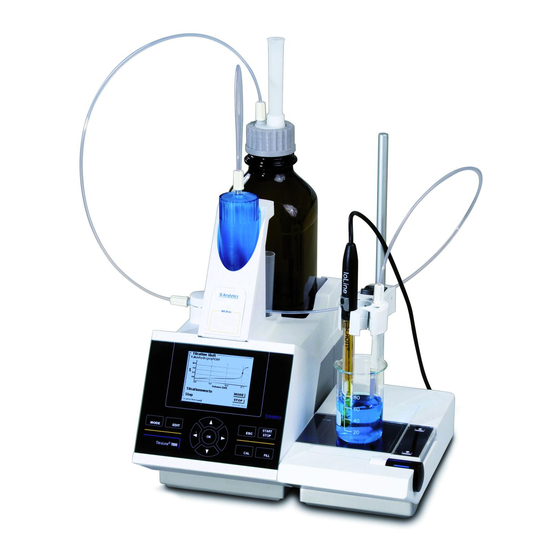
TitroLine 6000
Operating instructions manual
SI Analytics TitroLine 6000 Operating Instructions Manual
Titrator
Hide thumbs
1
2
3
4
5
6
7
8
9
10
11
12
13
14
15
16
17
18
19
20
21
22
23
24
25
26
27
28
29
30
31
32
33
34
35
36
37
38
39
40
41
42
43
44
45
46
47
48
49
50
51
52
53
54
55
56
57
58
59
60
61
62
63
64
65
66
67
68
69
70
71
72
73
74
75
76
77
78
79
80
81
82
83
84
85
86
87
88
Table Of Contents
89
page
of
89
Go
/
89
Contents
Table of Contents
Bookmarks
Table of Contents
Operating Instructions
Important Notes
Status at Time of Printing
Technical Specifications
Summary
General Provisions
Measuring Input
Interchangeable Units
Warning and Safety Information
Unpacking and First Operation
Unpacking and First Operation of the Titrator
Installing the Z 300 Rod Foot Plate
Connection and Installation of Titrator and Magnetic Stirrer TM 235
Back Panel of the Titrator Titroline
Connection Ports of the Titroline
Connecting a Printer
Connection of Analytical Balances
Connection of si Analytics ID Electrodes to Titroline 7000
Setting the Language of the Country
Interchangeable Unit WA
Installing the Interchangeable Unit
Positioning and Replacing an Interchangeable Unit
Placing an Interchangeable Unit
Removing an Interchangeable Unit
Programming the Titration Unit
Initial Filling or Rinsing of the Entire Interchangeable Unit
Replacing the Glass Cylinder and the PTFE Piston
Working with the Titrator Titroline 6000/7000
Front Keyboard
Display
Chapter 3.4, External PC Keyboard
Manual Controller “Mouse“
External PC Keyboard
Menu Structure
Main Menu
Automatic Titration
Calibration (CAL Menu)
Manual Titration
Dosage
Preparing Solutions
Method Parameters
Method Editing and New Method
Default Methods
Copy Methods
Delete Methods
Print Method
Change Method Parameters
Method Type
Titration Mode
Linear Titration
Dynamic Titration
End-Point Titration
Ph Stat Titration
Result
Calculation Formula
Sample Weight and Volume (Sample Quantity)
Formula Unit
Formulae for the Preparation of Solutions
Meaning of Individual Factors
Note on Volume Correction
Decimal Digits
Statistics
Global Memories
Titration Parameters
Generally Applicable Titration Parameters
Dynamic Control
Attenuation Setting
Titration Direction
Pretitration
Titration End
Dead-Stop Titration and Polarisation Voltage
Titration Parameter Ph Stat Titration
Determination of Enzyme Activity
Dosing Parameter
Sample Identification
Documentation
System Settings
Calibration Settings
Interchangeable Unit - Reagents
RS232 Settings
Date and Time
Password
Reset
Printer
Device Information
System Tone
Software Update
Data Communication Via RS-232- and USB-B Interface
Chaining Multiple Devices
Instruction Set for RS-Communication
Connection of Analytical Balances and Printers
Balance Data Editor
Connection of Printers
Connection of Autosampler
Connection of Sample Changer TW Alpha Plus
Connection of Sample Changer TW 7400
Using Software Titrisoft
Titrisoft 3.0
Titrisoft 2.75
Maintenance and Care of the Titroline 6000/7000
Heavy Strain
Normal Strain
Interrupted Use
Storage and Transportation
Recycling and Disposal
Index
Advertisement
Quick Links
1
Operating Instructions
2
Unpacking and First Operation
3
Working with the Titrator Titroline
4
Method Parameters
5
System Settings
6
Maintenance and Care of the Titroline
Download this manual
Operating Instructions
TitroLine® 6000/7000
TITRATOR
Table of
Contents
Previous
Page
Next
Page
1
2
3
4
5
Advertisement
Table of Contents
Need help?
Do you have a question about the TitroLine 6000 and is the answer not in the manual?
Ask a question
Questions and answers
Related Manuals for SI Analytics TitroLine 6000
Laboratory Equipment SI Analytics TitroLine 7500 KF Operating Instructions Manual
Titrator (75 pages)
Laboratory Equipment SI Analytics TitroLine 7000 Operating Instructions Manual
Titrator (89 pages)
Laboratory Equipment SI Analytics TITRONIC 300 Operating Manual
Piston burette (56 pages)
Laboratory Equipment SI Analytics SLK 12 Operating Instructions Manual
Laboratory hot plate (44 pages)
Laboratory Equipment SI Analytics TW alpha plus Operating Manual
Titration sample changer. (20 pages)
This manual is also suitable for:
Titroline 7000
Table of Contents
Print
Rename the bookmark
Delete bookmark?
Delete from my manuals?
Login
Sign In
OR
Sign in with Facebook
Sign in with Google
Upload manual
Upload from disk
Upload from URL


Need help?
Do you have a question about the TitroLine 6000 and is the answer not in the manual?
Questions and answers