Sign In
Upload
Download
Table of Contents
Contents
Add to my manuals
Delete from my manuals
Share
URL of this page:
HTML Link:
Bookmark this page
Add
Manual will be automatically added to "My Manuals"
Print this page
×
Bookmark added
×
Added to my manuals
Manuals
Brands
SRM Manuals
Bicycle Accessories
PowerMeter 7
Short manual
SRM PowerMeter 7 Short Manual
Hide thumbs
1
2
Table Of Contents
3
4
5
6
7
8
9
10
11
12
13
14
15
16
17
18
19
20
21
22
23
24
25
26
27
28
page
of
28
Go
/
28
Contents
Table of Contents
Bookmarks
Advertisement
Table of Contents
1
Table of Contents
2
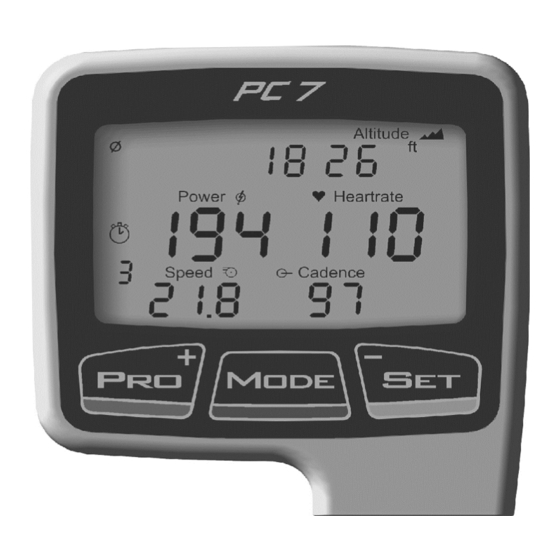
Buttons and Views
3
Installation of the SRM Training System Cadence Magnet
3.1
Powermeter and Sensor Alignment
3.2
Speed Transmitter and Handlebar Clip
4
Wake up from Sleep Mode
5
Real-Time Training Data Menu
5.1
Average Training Data Menu
5.2
Maximum Training Data Menu
5.3
Time/Date Menu
6
Sensor Pairing
7
Setting the Zero Offset / Altitude
8
Setup Menu
9
SRM Software
10
FCC Compliance Declaration
Download this manual
Training System
www.SRM.de
PowerMeter 7
PowerControl 7
Short Manual
Table of
Contents
Previous
Page
Next
Page
1
2
3
4
5
Advertisement
Table of Contents
Need help?
Do you have a question about the PowerMeter 7 and is the answer not in the manual?
Ask a question
Questions and answers
Related Manuals for SRM PowerMeter 7
Bicycle Accessories SRM X-Power User Manual
Powermeter pedal (20 pages)
Bicycle Accessories SRM Training System User Manual
(20 pages)
Bicycle Accessories SRM PC8 Quick Start Manual
(24 pages)
Bicycle Accessories SRM EXAKT Manual
(26 pages)
Bicycle Accessories SRM Quarter Turn adapter Manual
(2 pages)
Bicycle Accessories SRM PowerControl VI Getting Started
(8 pages)
This manual is also suitable for:
Powercontrol 7
Table of Contents
Save PDF
Print
Rename the bookmark
Delete bookmark?
Delete from my manuals?
Login
Sign In
OR
Sign in with Facebook
Sign in with Google
Upload manual
Upload from disk
Upload from URL


Need help?
Do you have a question about the PowerMeter 7 and is the answer not in the manual?
Questions and answers