Advertisement
Quick Links
Symmetrikit
CHAIR
INSTRUCTION MANUAL
Medium and Large models
from January 2010
Patents Pending
Bromyard Road, Ledbury HEREFORDSHIRE HR8 1NS, UK
Bromyard Road, Ledbury HEREFORDSHIRE HR8 1NS, UK
Tel: 01531 635388 Fax 01531 638059
Tel: 01531 635388 Fax 01531 638059
Email: sales@helpinghand.co.uk www.helpinghand.co.uk
Email: sales@helpinghand.co.uk www.helpinghand.co.uk
Symmetrikit is a division of The Helping Hand Company
PAGE 1
PAGE 24
Advertisement

Related Manuals for Helping Hand Symmetrikit Medium

Summary of Contents for Helping Hand Symmetrikit Medium
- Page 1 Bromyard Road, Ledbury HEREFORDSHIRE HR8 1NS, UK Bromyard Road, Ledbury HEREFORDSHIRE HR8 1NS, UK Tel: 01531 635388 Fax 01531 638059 Tel: 01531 635388 Fax 01531 638059 Email: sales@helpinghand.co.uk www.helpinghand.co.uk Email: sales@helpinghand.co.uk www.helpinghand.co.uk Symmetrikit is a division of The Helping Hand Company PAGE 1 PAGE 24...
-
Page 2: Table Of Contents
In order for the user to be well supported it is essential NOTES that the seating system be adjusted properly to fit. The following guide will explain how to simply adjust the chair and give tips on correct settings. Introduction Guarantee Cautions Safety Instructions... -
Page 3: Introduction
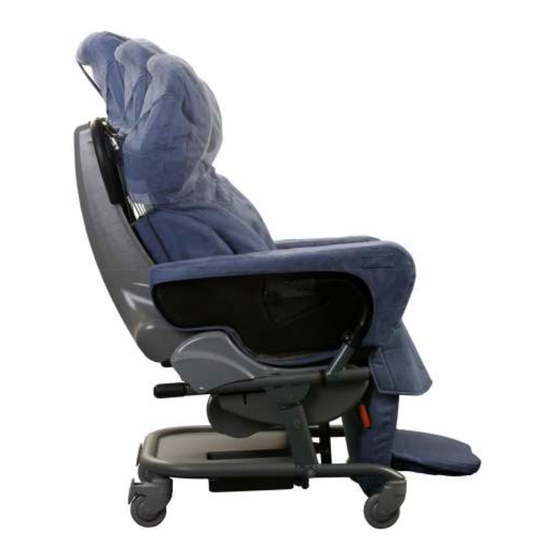
INTRODUCTION C4) 4 Point Chest Harness Standard Your Symmetrikit chair has been designed specifically for the use of those who require maximum support in order to maintain their comfort and posture. Great care has been taken to ensure that your chair is simple to use and easy to maintain. -
Page 4: Guarantee
GUARANTEE Model Size C3) Groin Harness Serial No Padded as standard (SA2820/2825) Manufactured First remove the seat cushion and fit the rear mounting straps around the lower The above chair, including upholstery and covers, is guaranteed against backrest bar (outside the cover). Now place faulty materials and faulty workmanship for a period of TWELVE MONTHS the main part of the harness on the seat with from the date of manufacture. - Page 5 This chair is capable of passive joint movement, it should only be used following therapeutic advice. Seating requirements may change. The user should be regularly reassessed C2) 4 Point Lap Strap to ensure that the chair is adjusted appropriately. It is recommended that therapists and carers complete the following Standard or padded checklist when assessing the appropriate use of Symmetrikit chairs.
- Page 6 1) Seat depth. To set the seat depth locate the handle at the rear of the seat. The handle can be swung out to increase leverage. Wind the handle clockwise to shorten the seat and anticlockwise to lengthen it. C) Harnesses When the seat depth is correct the back of the users calf should be around PLEASE FAMILARISE YOURSELF WITH THESE PRODUCTS BEFORE USE.
- Page 7 Inside the zips you will find the adjuster screws (arrowed) loosen B) Pommels these with supplied. The footplate can now slide to the required height. There are two alternative When the height is correct all of the pommels available for the underside of the user’s thigh should chair.
- Page 8 Power the chair off the mains:- Together with a battery charger, you will also receive a chair transformer. 3) Leg rest angle (Power) This is the unit with the curly wire shown below. The transformer allows you to use the chair if the battery is flat or if you The angle of elevation of the leg rest wish to use the chair while the battery is charging.
-
Page 9: Adjustments
Care instructions:- Regular maintenance will ensure that your chair gives many years of reliable service. We recommend that the chair is inspected and serviced annually. In cases where the chair is subject to excessive loads i.e. used by a person with repetitive or destructive movement patterns that the chair is inspected monthly. -
Page 10: Swing Out Arms
Your Symmetrikit chair can be fitted with a variety of back designs to suit from the most simple to most complex needs. The fitting and adjustment of these backs is described below. 12) Swing out arms 6) Finger form (for complex Firstly ensure that the chair needs) occupants are clear of the folding... - Page 11 11) Arm rest width adjustment (Seat Width) After adjusting a To adjust the width between Fingerform back or the arms, loosen the adjuster fitting a new type screws move the arm in or out of back refit the as required. There is a back shell.
-
Page 12: Notes
10) Tilt in space Both power and manual chairs 8) Back rest angle (Power) have a Tilt in Space function. This allows the whole chair to The angle of elevation back rest can be tilted forwards or back wards easily be altered. independently of any recline or leg rest settings.
Need help?
Do you have a question about the Symmetrikit Medium and is the answer not in the manual?
Questions and answers