Table of Contents
Advertisement
Advertisement
Table of Contents

Related Manuals for Mitsubishi S 12 R


Summary of Contents for Mitsubishi S 12 R
- Page 1 Users guide and maintenance manual Mitsubishi Diesel engine S 12 R...
-
Page 2: Limited Warranty
INTRODUCTION Limited Warranty The manufacturer, at its option, will repair or replace any parts returned intact to the manufacturer only when the manufacturer, upon inspection, determines to be defective in material and/or workmanship. The foregoing shall constitute the limited warranty provided by the manufacturer. The manufacturer will provide the limited warranty only to the user with whom the manufacturer concludes the original contract, and shall not provide the limited warranty to a user to whom the ownership of the product may be transferred. -
Page 3: Important Information
• If this manual is misplaced, obtain a new copy Since there are many actions that cannot be per- from a Mitsubishi dealer as soon as possible. formed or must not be performed, it is not possi- ble to indicate every caution in this manual or on warning labels. - Page 4 INTRODUCTION Warnings The following two methods are used to call the attention of the operators and maintenance personnel to the potential danger of the engine. • Warning statements in the manual • Warning labels affixed on the engine Warning Statements The warning statements in this manual describe potential danger in operating, inspecting or maintaining the engine by using the following five classifications to indicate the degree of potential hazard.
- Page 5 INTRODUCTION Explanation of Terms Abbreviations, Standards and Others • API = American Petroleum Institute • ASTM = American Society for Testing and Materials • JIS = Japanese Industrial Standards • MIL = Military Specifications and Standards (U.S.) • MSDS = Material Safety Data Sheet •...
- Page 7 CONTENTS Chapter 1 Use only specified fuel, engine oil and BASIC SAFETY PRECAUTIONS coolant (LLC)............ 1-4 Warning Fire and Explosion ....1-1 Handle LLC carefully ........1-4 Keep flames away..........1-1 Properly dispose of drained oil and LLC ..1-4 Keep engine and surrounding area clean ..1-1 Caution Service Battery .....
- Page 8 Fuel System ............. 3-1 Perform all specified pre-start inspections and periodic in- Pouring fuel............... 3-1 spections..............4-1 Bleed the fuel system ..........3-2 Use only genuine Mitsubishi parts......4-1 Fuel ............. 4-2 Fuel filters ..............3-2 Fuel injection pump........... 3-2 Recommended Fuel ......... 4-2 Priming pump cap tightening method .......
- Page 9 CONTENTS Corrosion of aluminum parts........4-7 Inspection of Damper ........6-3 Pitting and clogging of radiator ......... 4-7 External inspection of damper ........6-3 Filters...........4-8 Damper temperature management......6-3 Electrical Parts........4-8 Fuel System ........6-4 Cautions in Operating Engine in Cold Inspection of Fuel Control Linkage Ball Joints . 6-4 Weather Season........4-9 Cleaning Fuel Tank ..........
- Page 10 TROUBLESHOOTING fig.2-14 Turning gear position(Shaft pushed in) ..2-6 General Precautions......9-1 fig.2-15 Turning gear position(Turning shaft) ....2-6 Contact a Mitsubishi Dealer for Repair Service 9-1 fig.3-1 Using the priming pump .......3-2 Examination before Work......... 9-1 fig.3-2 Fuel filters ............3-2 Notes Regarding Contamination ...... 9-1 fig.3-3 Fuel injection pump ........3-2...
- Page 11 CONTENTS List of Tables fig.4-3 Recommended oil viscosity according to air tem- perature............4-4 Table 3-1 Specific gravity of electrolyte ....3-6 fig.6-1 Inspecting the V-belt and adjusting the belt ten- Table 4-2 Fuel Use Limit Property Guideline...4-3 sion.............. 6-2 Table 4-3 Water quality standards......4-5 fig.6-2 Inspecting the damper.........
-
Page 13: Keep Flames Away
Chapter 1 BASIC SAFETY PRECAUTIONS Warning Fire and Explosion Keep flames away Check for fuel, oil and exhaust gas leaks Store fuel and engine oil in a well-ventilated area. Inspect fuel, oil and exhaust pipes regularly for Make sure that the caps of fuel damage and looseness. -
Page 14: Inspection And Maintenance
Chapter 1 BASIC SAFETY PRECAUTIONS Warning Stay Clear of All Rotating and Moving Parts Install protective covers on rotat- Lock out and Tag out ing parts Be sure to lock out and tag out before starting inspection and maintenance. Make sure the protective covers of Lockout and tagout are effective methods of cutting the engine are correctly installed. -
Page 15: Warning Be Careful Of Burns
Chapter 1 BASIC SAFETY PRECAUTIONS Warning Be Careful of Warning Be Careful of Burns Exhaust Fume Poisoning Do not touch engine during oper- Perform engine operation in a ation or immediately after opera- well-ventilated site tion Exhaust gas from the engine contains carbon monoxide and Do not touch the main and exhaust other harmful substances. -
Page 16: Warning Be Careful When Lifting Engine
Use a stable work platform to Drained LLC is harmful. Do not dispose of into con- stand on when working on the ventional sewage. Contact a Mitsubishi dealer for upper part of the engine and the disposal of drained LLC. -
Page 17: Caution Service Battery
Chapter 1 BASIC SAFETY PRECAUTIONS Caution Service Bat- Caution When Abnor- tery mality Occurs Handle battery carefully If engine overheats, conduct cool- ing operation before stopping • Batteries release flammable engine hydrogen gas and oxygen. Never use flames or generate If the engine overheats, do not stop the engine sparks near the battery since immediately. -
Page 18: Never Modify Engine
Warm-up operation circulates lubricants in the If there is a need to modify the engine, please con- engine and contributes to a longer service life and tact a Mitsubishi dealer. economical operation. Do not conduct warm-up operation for an extended Never break seals period of time. -
Page 19: Conduct Proper Maintenance Of Air Cleaner
Chapter 1 BASIC SAFETY PRECAUTIONS Conduct proper maintenance of Use appropriate tools for mainte- air cleaner nance work The major cause of abnormal wear on engine parts Use appropriate tools according to the type of is dust entering with intake air. Worn parts result in maintenance work, and use them correctly. -
Page 20: Caution About Warning Labels
If warning labels are damaged or missing, replace with new labels. If a part of the engine with warning label is replaced with new part, also attach new warning label to the new part. To obtain replacement warning labels, contact a Mitsubishi dealer. fig.1-1 Warning labels... -
Page 21: Engine External Diagrams
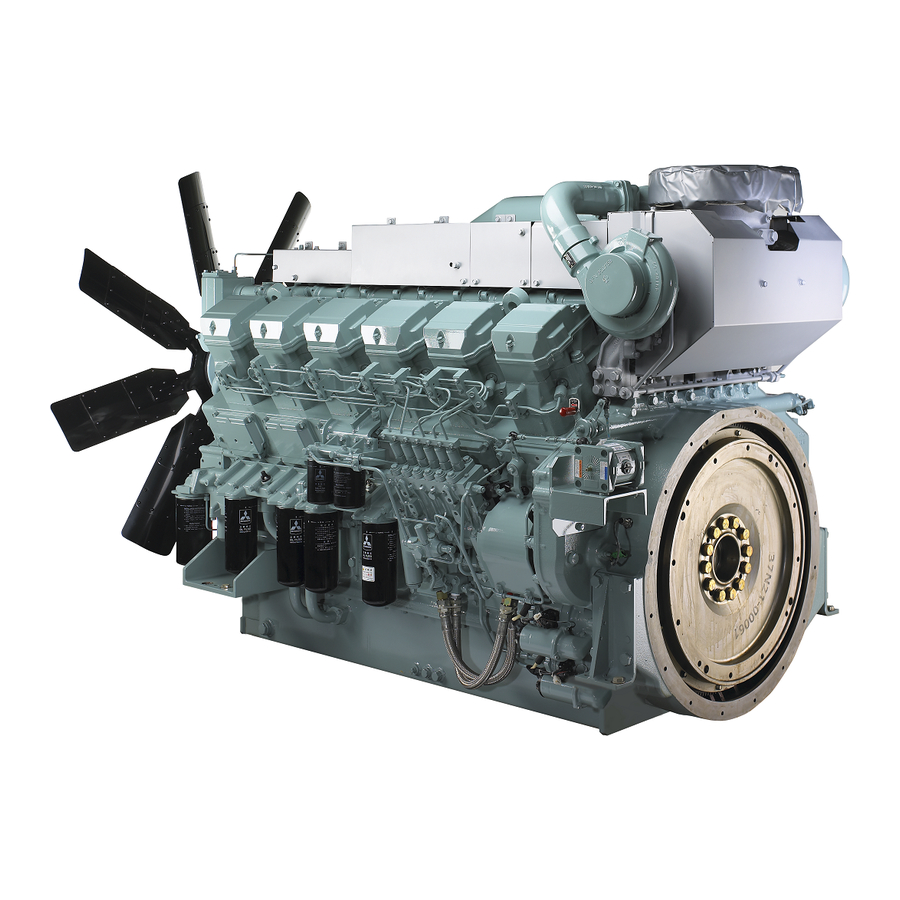
Chapter 2 NAME OF PARTS Engine External Diagrams The external diagram is for standard type of the engine. The installed equipment and shapes differ on the engine type. Left View Oil cooler Fuel filters Rear hanger Thermostat case Front hanger Turbochargers Air inlet Breather... -
Page 22: Equipment And Instrument
Chapter 2 NAME OF PARTS Equipment and Instrument Starting and Shutdown Devices The shape and type of the starting and shutdown devices may vary from those described below depending on the engine specifications. Start Switch TART When the start switch on the operation panel is pressed, starting air is supplied to the air starter sys- tem and cranks the engine. -
Page 23: Oil Pressure Unit
Chapter 2 NAME OF PARTS Instruments This section describes about devices which transmit signals to necessary instruments of the engine in opera- tion. Please read carefully and understand functions of each device. Oil Pressure Unit Oil pressure The oil pressure unit is installed above the oil filter for unit the detection of engine oil pressure. -
Page 24: Oil Pressure Switch
If the cause of the problem is unknown, contact a Mitsubishi dealer. Protection devices installed on the engine and their types (setting values) and shapes vary depending on the engine specifications. The following describes the typical protection devices installed in a Mitsubishi engine. Oil Pressure Switch... -
Page 25: Air Cleaner Indicator
Chapter 2 NAME OF PARTS Air Cleaner Indicator utton When the air cleaner element is clogged, the indicator alarms with its red signal. Be sure to clean the element immediately when alarm signal is shown. Signal After cleaning, press the bottom on top of the indicator to re-set the alarm signal. -
Page 26: Using Turning Gear
Chapter 2 NAME OF PARTS Using Turning Gear Before starting the engine, return (pull out) the turning gear to the original position. Starting the engine with the turning gear pushed in not only damages the ring gear but also may result in personal injury. 1 Loosen the two bolts, and remove the plate from the shaft groove. -
Page 27: Preparation For Operation Of New Or Over Hauled Engine
Chapter 3 OPERATION Chapter 3 OPERATION Preparation for Operation of New or Overhauled Engine Before operating a new or overhauled engine, do the following inspection. For second operation onward, do the following normal operation outlined on page 3-8 "Normal Engine Operation". -
Page 28: Fuel Filters
Chapter 3 OPERATION Bleed the fuel system [Unlock ] [Prime] [Lock] Turn conterclockwise while pressing When fuel overflows from the air vent plug, Turn counterclockwise Move cap up wipe thoroughly with a cloth. Spilled fuel is a and down fire hazard. After bleeding, lock the priming pump cap securely. -
Page 29: Priming Pump Cap Tightening Method
If the head packing is damaged, the priming pump or feed pump must be replaced. Con- tact a Mitsubishi dealer. If the priming pump cap is not tightened firmly, internal threads can wear quickly due to friction caused by engine vibrations, resulting in sudden ejection of the priming pump cap to cause a fuel fig.3-5 Priming pump cap packing... -
Page 30: Lubricating System
Chapter 3 OPERATION Lubricating System Pouring engine oil 1 Remove the cap from the oil filler located on the left side of the engine. 2 Pour engine oil of the specified type. Specified engine oil:Class CD or CF (API Service Classification) Engine oil capacity Oil pan: 150 L [39.63 U.S. -
Page 31: Cooling System
Chapter 3 OPERATION Cooling System Pouring coolant 1 Make sure the drain cocks on the engine and water pump are closed firmly. 2 Remove the radiator cap, and pour undiluted LLC. Note:(a) Determine the amounts of LLC and water to be poured by using the LLC concentra- rain cocks tion chart. -
Page 32: Checking Battery
Chapter 3 OPERATION Checking Battery If electrolyte is spilled on the eyes, skin or clothes, wash immediately with plenty of water. If electrolyte enters the eyes, flush immediately with lots of fresh water and see a physician. Do not use flames near the battery. When handling the battery, be careful of sparks generated by accidental shorting. -
Page 33: Starting And Stopping
Chapter 3 OPERATION Test Operation To conduct a test operation, follow the procedures below. Note: Refer to "Normal Engine Operation" (3-8) to operate the engine. Starting and stopping 1 Start the engine. 2 Operate the engine at low idling speed (600 to 650 min ) under no load for 5 to 10 minutes for a warm-up operation. -
Page 34: Normal Engine Operation
Check the engine exterior carefully. If an abnor- mality is found, be sure to repair or contact a Mitsubishi dealer. Before starting the engine, clean the top surface of the battery with wet cloth. -
Page 35: Checking Engine Oil Level
Chapter 3 OPERATION Draining Water from Fuel Tank When handling fuel, make sure there are no flames or heat source in the area. Wipe any spilled fuel completely. Spilled fuel can ignite and cause fire. Do not remove the strainer when filling the fuel tank. Use fuel specified in "Fuel"... -
Page 36: Checking Coolant Level
Chapter 3 OPERATION Checking Coolant Level Stand the lever to urn cap about upright position half a turn Remove the radiator cap only after the engine cools to room temperature. Place a cloth over the cap, and turn the cap about a half turn or stand the lever to upright position to release internal pressure. -
Page 37: Inspection Of Air Tank Air Pressure
Chapter 3 OPERATION Inspection of Air Tank Air Pressure Check the air pressure gage to see if the air pres- Air pressure sure in the air tank conforms to the standard. gages Air tank internal pressure standard: 2.94 MPa (30 kgf/cm ) [426 psi] fig.3-21 Inspection of air tank air pressure 3-11... -
Page 38: Starting
Chapter 3 OPERATION Starting During warming-up operation The starting method varies depending on the appli- cation and specifications. Start the engine accord- During warming-up operation, check if the oil pres- ing to the specified procedure. sure is in the range of standard value. Also, make sure the oil pressure gage is operating properly. -
Page 39: Inspection During Operation
Chapter 3 OPERATION Operation Inspection during operation Check for leakages. Inspect the exterior of the engine to make sure Do not approach rotating parts while in opera- there is no leakage from joints. tion. Entanglement by rotating parts can cause Check to make sure the engine does not produce serious injury. -
Page 40: Emergency Stop
Manual stop lever Inspection After Stopping Inspect the engine parts to make sure there is no fuel, oil or coolant leakage. If a fuel or oil leak is found, repair the leakage or contact a Mitsubishi dealer. 3-14... -
Page 41: Cautions Concerning Maintenance
LLC is a potent alkaline solution. Do not drink or Use only genuine Mitsubishi parts. allow it to enter your eyes. When replacing new parts, use only genuine Mit- subishi parts. To obtain new parts, contact a Mitsubishi dealer. -
Page 42: Recommended Fuel
Use commercially available diesel fuel (JIS K2204). Note: Some Class-A heavy oils are unsuitable for Diesel fuel use in the Mitsubishi diesel engine. Use fuel that meets the Use Limit Property Guideline Compliance for Diesel Fuel. If the engine is continuously... -
Page 43: Table 4-2 Fuel Use Limit Property Guideline
Chapter 4 MAINTENANCE Table 4-2 Fuel Use Limit Property Guideline Property Recommend use limit Current use limit Remarks JIS K2204, 2205 Diesel fuel: 50 ° C or higher Flash point As stipulated by regulation Class-A heavy oil: 60 °C [140 °F] or higher First distillation 170 °C [338 °F] or... -
Page 44: Engine Oil
Chapter 4 MAINTENANCE Engine Oil Recommended Engine Oil Use class CD (recommended) and CF engine oils. Class CE and CF-4 engine oils are designed for diesel fuel with a sulfur content of less than 0.5% and less than 0.2%, respectively. Since the sulfur content of most Class-A heavy oil exceeds 0.5%, do not use Class CE or CF-4 engine oil when using Class-A heavy oil as fuel. -
Page 45: Coolant
Chapter 4 MAINTENANCE Coolant Recommended Coolant Water used in the engine cooling system must be soft water. The water quality must meet the following requirements. Water quality should meet with recommended limit, however, within limit is acceptable. Table 4-3 Water quality standards Main adverse effect Chemical Item... -
Page 46: Maintenance Of Llc
Table 4-4 Recommended brands of LLC age. Manufacturer Brand For disposal of used coolant, consult a Mitsubishi Nippon Oil Corporation Super Coolant X dealer. Mitsubishi Fuso Truck & Fuso Diesel Long Life... -
Page 47: Importance Of Llc
Chapter 4 MAINTENANCE Importance of LLC Examples of Abnormalities Caused by LLC Today's trend is toward smaller and more light- weight engines offering greater output, lower fuel consumption and lower exhaust emission level. Pitting on iron parts Conditions to which engine coolant is subjected are Amines are generally effective in suppressing the becoming severer due to longer operating hours, rusting of ferrous metals, but they are said to cause... -
Page 48: Filters
When replacing filters, use genuine Mitsubishi parts. Do not wash and reuse cartridge-type filters. Always use new filters. -
Page 49: Weather Season
Chapter 4 MAINTENANCE Cautions in Operating Engine in Cold Weather Season When the ambient temperature is low, fuel and Battery engine oil become thick and coolant can freeze, thus making it difficult to start the engine or causing damage to the cylinder heads. To prevent these Never use flames near the battery, and be care- problems, observe the following directions. -
Page 51: Periodic Maintenance Chart
(When operating the engine for the adjustment of determine the most appropriate service inter- peripheral devices, limit the operating time to 10 vals. (Feel free to consult a Mitsubishi dealer minutes.) regarding service intervals.) Once every month: Operate the engine under load (for 15 to 30 minutes with more than 1/2 load). -
Page 52: General Definition Of Regular-Use Engine
Chapter 5 PERIODIC MAINTENANCE CHART General Definition of Regular-Use Engine, Emergency Engine and General-Purpose Engine General definition of regular-use engine An engine operated with a constant base load for the purpose of generating electric power, which is used independently or in combination with commer- cial power supply. - Page 53 Chapter 5 PERIODIC MAINTENANCE CHART Periodic Maintenance Chart for Engine in Regular Use Table 5-1 Periodic Maintenance Chart for Engine in Regular Use (1 / 2) Service item Page Every 50 ser- ∗ vice hours or Draining Water from the Fuel Tank every month ∗...
- Page 54 Chapter 5 PERIODIC MAINTENANCE CHART Table 5-1 Periodic Maintenance Chart for Engine in Regular Use (2 / 2) Service item Page Conduct a Major Overhaul Disassemble engine-clean, check and change major parts. <Parts to be changed> Inlet and exhaust valve seats, inlet and exhaust valves, valve rotators, valve cotters, rocker arm adjusting screws, valve push rods, bridge caps, cam- shaft bushings, camshaft expansion plugs, main bearings, cylinder liners, main bearing cap bolts and washers, piston rings, connecting rod bearings,...
- Page 55 Chapter 5 PERIODIC MAINTENANCE CHART Periodic Maintenance Chart for Emergency Engine Table 5-2 Periodic Maintenance Chart for Emergency Engine (1 / 3) Service item Page 3−8 Conducting External Inspection.(Check for leakage of fuel, oil and coolant.) 3−1 Checking the Fuel Level in the Fuel Tank Checking Engine Oil Level Checking Coolant Level 3-10...
- Page 56 Chapter 5 PERIODIC MAINTENANCE CHART Table 5-2 Periodic Maintenance Chart for Emergency Engine (2 / 3) Service item Page ∗ Analyzing Engine Oil Properties Lubrication Inspection and Adjustment of Engine Oil Pressure system ∗ (Maintenance operation) ∗ Inspection of Water Pump Inspection, Disassembly and Cleaning of Electromagnetic Valve ∗...
- Page 57 Chapter 5 PERIODIC MAINTENANCE CHART Table 5-2 Periodic Maintenance Chart for Emergency Engine (3 / 3) Service item Page Cleaning Fuel Tank Inspection and Cleaning Radiator Fins 6-10 Cleaning and Inspecting Air Cleaner Element 6-12 ∗ Checking Oil Cooler for Soiling, Clogging and Leakage ∗...
- Page 58 Chapter 5 PERIODIC MAINTENANCE CHART Periodic Maintenance Chart for General-Purpose Power Supply Engine Table 5-3 Periodic Maintenance Chart for General-Purpose Power Supply Engine (1 / 2) Service item Page Draining Water from Fuel Tank Every 50 ser- vice hours or Draining Water Air Starter Strainer 6-15 every month...
- Page 59 Chapter 5 PERIODIC MAINTENANCE CHART Table 5-3 Periodic Maintenance Chart for General-Purpose Power Supply Engine (2 / 2) Service item Page Conducting Major Overhaul ∗ Disassemble engine-clean, check and change major parts. ∗ Inspection and Testing of Fuel Injection Pump(Replace parts, if necessary.) ∗...
-
Page 61: External View
Check the engine exterior carefully. If an abnor- mality is found, be sure to repair or contact a Mitsubishi dealer. Before starting the engine, clean the top surface of the battery with wet cloth. -
Page 62: Belt Tension
Chapter 6 PERIODIC INSPECTION AND MAINTENANCE PROCEDURES Inspection of V-belt and Adjustment of Belt Tension If damage or surface separation is found on the V-belt during inspection, replace the V-belt. Keep oil and grease away from the belt, since they may cause the belt to slip and shorten the service life. Excessive V-belt tension can cause rapid wear of the alternator bearing and shorten the service life of the belt. -
Page 63: Inspection Of Damper
For proper operation, heat of the vibration damper must be dissipated from its surface to prevent excessive damper heating. Mitsubishi inspects each engine before shipment to ensure proper operating temperature of the vibration damper. However, the vibration damper temperature varies depending on ambient conditions. -
Page 64: Fuel System
[0.004 in.], replace the ball joints. 0.1 mm [0.004 in.] If the ball joint attached with a seal is loose, consult a Mitsubishi dealer. If the seal on the ball joint is broken, the warranty Lever may be invalidated. fig.6-4 Inspection of the fuel control linkage for... -
Page 65: Changing Fuel Filters
Chapter 6 PERIODIC INSPECTION AND MAINTENANCE PROCEDURES Changing Fuel Filters When handling fuel, make sure there are no flames near the engine. Wipe any spilled fuel completely. Spilled fuel can ignite and cause fire. 1 Clean the area around the fuel filters. 2 Place a fuel receiving tray under the fuel filters. -
Page 66: Lubricating System
3 Using the provided filter wrench, remove each oil filter. Note: Check the filter elements in the removed oil filter for metal particles. If metal particles are found, consult a Mitsubishi dealer. Also change the oil filters whenever the filter alarm Oil filter turns on. -
Page 67: Pouring Engine Oil
If fuel is mixed with the engine oil, the oil will smell like fuel. If water is mixed with the engine oil, the oil will be milky white. If fuel and/or water is mixed with the engine oil, contact a Mitsubishi dealer. Note: Regarding replenishment of engine oil, refer to "Lubricating System" (3-4). -
Page 68: Changing Governor Oil Filter
Chapter 6 PERIODIC INSPECTION AND MAINTENANCE PROCEDURES Changing Governor Oil Filter To drain oil or change oil filters, wear gloves. Hot engine oil and parts may cause burns. 1 Place the oil receiving tray under the governor ir vent plug filter. -
Page 69: Changing Coolant
For disposal of used cool- fig.6-14 Radiator cap ant, consult a Mitsubishi dealer. The service life of LLC is 2 years. Be sure to change coolant at least once every 2 years. -
Page 70: Pouring Coolant
Chapter 6 PERIODIC INSPECTION AND MAINTENANCE PROCEDURES Pouring coolant 1 Make sure the drain cocks on the engine and water pumps are closed tightly. 2 Remove the expansion tank cap, and pour undiluted LLC. Note:(a) Determine the amounts of LLC and water to be poured by using the LLC concentration chart. (b) Regarding coolant, refer to "Coolant"... -
Page 71: Inlet Exhaust System
Chapter 6 PERIODIC INSPECTION AND MAINTENANCE PROCEDURES Inlet Exhaust System Inspection of Turbocharger Make sure the engine is cool before inspecting the turbocharger. Also check that the compressor wheel is not rotating before inspection. Disconnect the pipe from the air inlet side. Hold the compressor wheel nut by hand and turn the wheel to feel for looseness and listen for abnor- mal noise. -
Page 72: Cleaning And Inspecting Air Cleaner Element
Chapter 6 PERIODIC INSPECTION AND MAINTENANCE PROCEDURES Cleaning and Inspecting Air Cleaner Element Element Do not service the air cleaner while the engine is running. Maintenance of the air cleaner while the engine is in operation can cause dust to enter the engine and result in rapid wear of parts, leading to a shorter service life. -
Page 73: Electrical System
Chapter 6 PERIODIC INSPECTION AND MAINTENANCE PROCEDURES Electrical System Inspection of Starters Do not set the starter switch to the START position. Otherwise, the engine may start operating unex- pectedly. 1 Check the exterior of the starters for damage. 2 If the starters are dusty, blow dirt using com- pressed air. -
Page 74: Checking Battery
Chapter 6 PERIODIC INSPECTION AND MAINTENANCE PROCEDURES Checking Battery If electrolyte is spilled on the eyes, skin or clothes, wash immediately with plenty of water. If electrolyte enters the eyes, flush immediately with lots of fresh water and see a physician. Do not use flames near the battery. -
Page 75: Air Starter System
Chapter 6 PERIODIC INSPECTION AND MAINTENANCE PROCEDURES Air Starter System Draining Water and Cleaning Air Starter Strainer 1 Close the starter valve handle of the air starter Air starter Air starter tank. inlet outlet 2 Remove the drain plug of air starter strainer and drain water from the air strainer. -
Page 76: Draining Water From Air Starter Compressor
Chapter 6 PERIODIC INSPECTION AND MAINTENANCE PROCEDURES Draining Water from Air Starter Compressor 1 Check the starter valve handle of the air strainer tank. 2 Remove the drain plug and drain water from the air strainer compressor. 3 Install the drain plug after draining water. 4 Open the starter valve handle of the air starter tank slowly. -
Page 77: Preparation For Storage
Chapter 7 LONG-TERM STORAGE Long-term storage The following describes the method to store the Note:(a) Store the engine in a well-ventilated indoor engine in a non-operable condition for more than location. three months and the method for storing the engine (b) Coolant does not need to be drained since in an operable condition for more than three it contains long life coolant. -
Page 78: Starting The Engine
Chapter 7 LONG-TERM STORAGE Storing Engine in Operable Con- Using Engine after Storage dition for More Than 3 Months 1 Remove the cover from the engine. 2 Connect a fully charged battery. When the engine is not operated during storage of 3 Remove the covers from the starters and alter- more than three months, internal engine parts can nator. -
Page 79: Lifting Engine Carefully
Chapter 8 TRANSPORTATION Lifting Engine Carefully Rear hanger To lift the engine, use wire ropes, shackles Front hanger and slings capable of supporting the weight of the engine. Attach slings to the hangers provided on the engine to lift the engine. Keep the engine balanced during lifting by considering the engine's center of gravity. -
Page 81: Troubleshooting
Chapter 9 TROUBLESHOOTING General Precautions Contact a Mitsubishi Dealer for Notes Regarding Parts Handling Repair Service Handle parts carefully. When replacing parts, use only genuine parts by Repairing a malfunctioning engine may require referring to the parts catalog. special equipment or potentially dangerous work,... -
Page 82: How To Troubleshoot
Add fuel, and bleed fuel system. Refer to Empty fuel tank "Fuel System" (3-1). Damaged fuel pipe Consult a Mitsubishi dealer. Tighten connection. Consult a Mitsubishi Loose fuel pipe connection dealer Improper fuel Use proper fuel. Refer to "Fuel" (4-2). -
Page 83: Exhaust Smoke Is White Or Blue
Refer to "Cleaning and Inspecting Air Cleaner Ele- (clogged air cleaner) ment" (6-12). Engine overcooling Cover the radiator or consult a Mitsubishi dealer. Replace fuel filters. Refer to "Changing Fuel Filters" Clogged fuel filter (6-5). Insufficient cooling (overheating) Consult a Mitsubishi dealer. -
Page 84: Fuel Consumption Is High
Remedy Improper fuel Use proper fuel. Refer to "Fuel" (4-2). Incorrect valve clearance Consult a Mitsubishi dealer. Faulty fuel feed pump Consult a Mitsubishi dealer. Low compression pressure Consult a Mitsubishi dealer. (worn piston liners, worn piston rings, etc.) Clean air cleaner element, or replace if necessary. -
Page 85: Engine Overheats
Chapter 9 TROUBLESHOOTING Engine Overheats Table 9-8 Engine Overheats Cause Remedy Radiator, heat exchanger leakage Consult a Mitsubishi dealer. Low coolant level Add coolant. Faulty water pump Consult a Mitsubishi dealer. Faulty thermostat Consult a Mitsubishi dealer. Engine Oil Pressure is Faulty... -
Page 87: Main Specifications
Approx.125 [33.03] (in engine only) (liter [U.S. gallon]) Electrical start Starting system (air motor type or direct air type) (only for type-1) 24 V - 7.5 kW × 2 Starter Alternator 24 V - 30 A Mitsubishi TD15 or TD13 × 2 Turbocharger 10-1...
Need help?
Do you have a question about the S 12 R and is the answer not in the manual?
Questions and answers