Advertisement
DIGITAL
THICKNESS
GAUGE
O p e r a t i o n
M a n u a l
This Thickness Meter is small in size, light in
weight, easy to carry. Although complex and
advanced, it is convenient to use and operate.
Its ruggedness will allow many years of use
if proper operating techniques are followed.
Please read the following instructions carefully
and always keep this manual within easy reach.
Advertisement
Table of Contents

Summary of Contents for Euromag TM-8812
- Page 1 DIGITAL THICKNESS GAUGE O p e r a t i o n M a n u a l This Thickness Meter is small in size, light in weight, easy to carry. Although complex and advanced, it is convenient to use and operate. Its ruggedness will allow many years of use if proper operating techniques are followed.
-
Page 2: Table Of Contents
TABLE OF CONTENTS 1. FEATURES page 3 2. SPECIFICATIONS page 3 3. FRONT PANEL DESCRIPTIONS page 4 page 5 4. MATERIAL SELECTION 5. CALIBRATION page 6 6. MEASURING PROCEDURE page 6 7.MEASURING BY VELOCITY SETTING page 6 8. BATTERY REPLACEMENT page 7... -
Page 3: Features
1.FEATURES • Used the exclusive Micro-computer LSI circuit and crystal time base to offer high accuracy measurement. • With high power of emission and broad band of receiving sensitivity, the gauge can match probes of different frequencies. That makes it easy to measure the rough surface, even cast iron. -
Page 4: Front Panel Descriptions
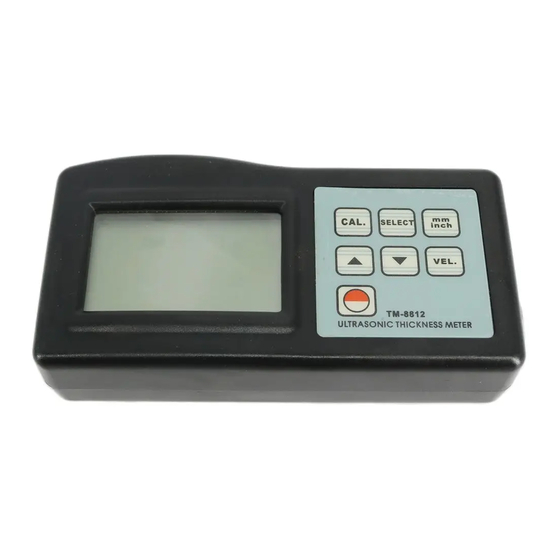
3. FRONT PANEL DESCRIPTIONS 3-11 3-14 3-12 3-10 3-13 Sensorplug Calibration key Display Minus key mm/inch key 3-10 Battery Compartment/Cover Power key 3-11 Coupling indicator Material selection key 3-12 Standard block Plus key 3-13 Velocity key Ultrasonic sensor 3-14 RS232C interface... -
Page 5: Material Selection
4. MATERIAL SELECTION Press the power key 3-4 to turn on the unit. Press the Material Selection key 3-5 and the display 3-2 will show the code ‘cdxx’ or ‘xxxx’. ‘cd’ is the abbreviation for’ code’ and ‘xx’ is one numberamongOl~ll. ‘xxxx’ is a 4-digit number which is the sound velocity of material defined by the user. -
Page 6: Calibration
5. CALIBRATION Drop a little oil on the 5 mm standard block 3-12. Press the Calibration key 3-8, the ‘CAL’ be shown on the Display. ‘CAL is the short for calibration. • Press the sensor 3-7 on the standard block. The coupling symbol (( )) is on if coupling well. -
Page 7: Battery Replacement
as the known thickness. In such a case, the set value is the velocity of the material to measure, by which you can measure any unknown thickness of same material. To browse the velocity, if only press the VEL key 3-13. To quit browsing, if only press the VEL key 3-13 again or wait till the meter automatically show’... - Page 8 Euromag International SRL Via Torino 3-35035 - Mestrino - PADOVA - ITALY Tel. +39/049.9005064 - Fax. +39/049.9007764 euromag@euromag.com - www.euromag.com...


Need help?
Do you have a question about the TM-8812 and is the answer not in the manual?
Questions and answers