
Subscribe to Our Youtube Channel
Related Manuals for Vivitar DC-1012


Summary of Contents for Vivitar DC-1012
- Page 1 Bluetooth Speaker with calendar WIRELESS RECHARGEABLE BATTERY ALARM SNOOZE CLOCK BUTTON DC-1012 USER’S MANUAL...
- Page 2 Important Safety Precautions When using your Vivitar Bluetooth Speaker Clock, basic safety precautions should always be followed, including the following: 1. READ ALL INSTRUCTIONS BEFORE USING YOUR SPEAKER. 2. Do not use your speaker near water. Clean using a soft cloth or paper towel.
-
Page 3: Package Contents
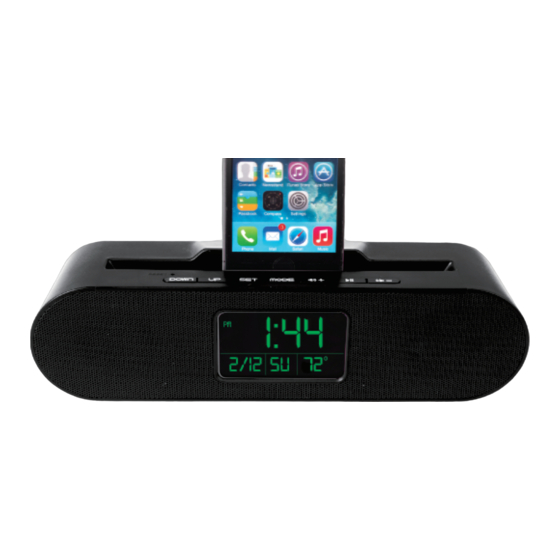
Introduction Thank you for purchasing your Vivitar Bluetooth Speaker Clock, item V60030BT. You can use your speaker with iPads, iPhones, iPods and many other types of smartphones and Bluetooth devices to stream music. In order to get the best results when using this device, please read this manual first before using. - Page 4 A Quick Look at Your Device DOWN Indicator Light MODE Micro USB ON/OFF Charging Port Switch Front View Rear View...
-
Page 5: Charging Your Speaker
Charging Your Speaker Your speaker has a built-in, rechargeable lithium ion battery. To avoid damage, do not attempt to remove the battery. The full performance of the battery is only achieved after a few charging-dis- charging cycles. Charge the battery fully before first use. To do so, follow the steps below: 1. - Page 6 2. Go to the Bluetooth Manager of your Bluetooth device. 3. Search Bluetooth devices and select “Vivitar BT clock” to start connecting. 4. Enter “0000” if your device asks for the PIN code. 5. Once paired, the LED Indicator Light will stop blinking and steadily shine blue. Note that...
- Page 7 Using Your Speaker: Listening to Music Powering Your Speaker On and OFF 1. Slide the On/Off Switch to the ON position in order to power on your speaker. If you have already paired your speaker to your Bluetooth device, they will automatically remain paired each time you power on your speaker.
- Page 8 Using Your Speaker: Setting the Date & Time 1. Press the MODE button repeatedly until the symbol “TIME” is displayed in the upper right hand corner of the display screen. 2. Press the SET button to enter the date and time settings mode. 3.
- Page 9 Using Your Speaker: Setting the Alarm Clock 1. Press the MODE button repeatedly until the symbol “AL” is displayed in the upper right hand corner of the display screen. 2. Press the SET button to enter the alarm setting mode. 3.
- Page 10 Using Your Speaker: Turning the Alarm On 1. Press the MODE button repeatedly until the symbol “AL” is displayed in the upper right hand corner of the display screen. 2. Press the DOWN and UP buttons repeatedly to choose between turning on the alarm ( ) by itself, or turning it on with snooze ( ) or turning it off.
- Page 11 Using Your Speaker: Additional Functions Temperature Display When the symbol “TIME” is displayed in the upper right hand corner of the display screen, press the DOWN button repeatedly to select between °C and °F. If the “TIME” symbol is not on the screen, press the MODE button repeatedly until it appears.
-
Page 12: Maintenance And Care
Maintenance and Care -Before using your speaker, inspect the ports to make sure that they are clear of dust and debris before charging or inserting any cables. -Use a soft cloth to clean your speaker. Never use any harsh chemicals or detergents. Make sure your speaker is dry before using. -
Page 13: Fcc Statement
FCC Statement Changes or modifications not expressly approved by the party responsible for compliance could void the user’s authority to operate the equipment. This device complies with Part 15 of the FCC Rules. Operation is subject to the following two conditions: (1) this device may not cause harmful interference, and (2) this device must accept any interference received, including interference that may cause undesired operation. - Page 14 Vivitar One Year Warranty This warranty covers the original consumer purchaser only and is not transferable. This warranty covers products that fail to function properly UNDER NORMAL USAGE, due to defects in material or workmanship. Your product will be repaired or replaced at no charge for parts or labor for a period of one year.
- Page 15 Vivitar One Year Warranty (continued) NO WARRANTIES, WHETHER EXPRESS OR IMPLIED, INCLUDING, BUT NOT LIMITED TO, ANY IMPLIED WARRANTIES OF MERCHANTABILITY OR FITNESS FOR A PARTICULAR PURPOSE, OTHER THAN THOSE EXPRESSLY DESCRIBED ABOVE SHALL APPLY. DISTRIBUTOR FURTHER DISCLAIMS ALL WARRANTIES AFTER THE EXPRESS WARRANTY PERIOD STATED ABOVE. NO OTHER EXPRESS WARRANTY OR GUARANTY GIVEN BY ANY PERSON, FIRM OR ENTITY WITH RESPECT TO THE PRODUCT SHALL BE BINDING ON DISTRIBUTOR.
Need help?
Do you have a question about the DC-1012 and is the answer not in the manual?
Questions and answers