
Related Manuals for P1PE P72800A


Summary of Contents for P1PE P72800A
- Page 1 PETROL PRESSURE WASHER Models P72800A, P73200A, P73200T, PGP200PWA & PGX200PWT User Manual...
- Page 2 First edition - April 2017 Page 2...
- Page 3 CONTENTS SAFETY 4 - 6 QUICK START 7 - 12 STARTING PROCEDURE 13 - 14 STOPPING - SHUTDOWN PROCEDURE USING THE MACHINE 16 - 18 MAINTENANCE 19 - 24 TROUBLESHOOTING SPECIFICATION PART LOCATIONS DECLARATIONS OF CONFORMITY RECYCLING & PRODUCT DISPOSAL CONTACT DETAILS MANUAL UPDATES WARRANTY...
-
Page 4: Safety
SAFETY 1.1. General safety notes. 1.1.1. The operator of the machine is responsible for, and has a duty of care in making sure that the machine is operated safely and in accordance with the instructions in this user manual. Keep the manual safe and pass it on if the machine is loaned or sold to another user. - Page 5 1.2.4 DO NOT use in an enclosed area or a 1.5.1. Electricity can kill - NEVER use moving vehicle. pressure washer jet to come into contact with LIVE or ENERGISED equipment. It can also 1.3. General fuel safety. cause severe burns. 1.5.2.
-
Page 6: Safety
1.8.3. See CERTIFICATE of CONFORMITY parts and flammable materials clear of the section for Outdoor Noise declaration of exhaust at all times. conformity. 1.9.15. NEVER under any circumstance attempt to repair the high pressure hose. You MUST instead replace any damaged hose or other high pressure components. -
Page 7: Quick Start
QUICK START 2.1. This guide is meant to serve as a quick reference for operating your Pressure washer it is for convenience and the user should read the safety section first. FOR OUTDOOR USE ONLY. This Pressure washer produces carbon monoxide - a poisonous, colourless & odourless gas that can cause death or serious injury. - Page 8 2.5. Rubber feet assembly. Using the bolts supplied attach the brackets with the rubber feet on to the frame. Insert the bolts from the outside of the unit towards the inside and secure the bolts with the cap nuts provided using 10mm wrenches.
- Page 9 2.7. Handle assembly. The handle assembly is folded down for transportation, pull handle upwards and lock into position using the knob on the right hand side of the machine as viewed from the rear of machine. To undo knob pull outwards, raise the handle and release knob so that it locates the hole in frame.
- Page 10 2.9. Wand/Gun – trigger assembly. Attach the wand into the handle as shown below. Start off gently so that you do not cross thread the attachments. Screw into place in a clockwise direction. Tighten using a suitable spanner but DO NOT over tighten.
- Page 11 2.10. Adding engine oil. See adding pump oil section 2.12. To add oil you must make sure that the machine is on a flat level and stable surface. Remove the oil filler cap/dipstick. Using a suitable funnel fill with oil to the top of the oil filler neck thread. From empty the engine takes 600ml of SAE15W40 oil.
- Page 12 2.12. Adding pump oil (Only on the following models P73200T/PGX200PWT). See adding engine oil section 2.10. Adding pump oil – From empty the pump takes 300ml of SAE15W40. To check oil level view the sight glass the level should be at the midway point. If the level is low undo the Vent plug and top up with oil using a suitable funnel.
-
Page 13: Starting Procedure
STARTING PROCEDURE Before starting make sure machine is clear of materials and all non-essential persons. The machine is shipped without fuel & oil therefore you MUST fill the engine with fuel & oil before starting the engine. Failure to do so will result in engine damage which will not be covered by warranty. 3.1. -
Page 14: Starting Procedure
3.2. Starting procedure. – from warm i.e. machine has been run recently. The water must be turned on prior to starting the washer, pull the spray trigger to ensure water is moving the through the lines and out the nozzle without any leaks before starting the unit. Failure to do this will result in damage to the seals which will not be covered under warranty Starting procedure for a warm engine. -
Page 15: Stopping - Shutdown Procedure
STOPPING – SHUTDOWN PROCEDURE NEVER disconnect the high-pressure hose from the pump or spray gun while the system is pressurised. Relieve pressure by squeezing the spray gun trigger after the engine has been turned OFF. 4.1. Before stopping/shutting down the machine allow the engine to cool down for a few minutes, by allowing it to run at low speed. -
Page 16: Using The Machine
USING THE MACHINE You MUST STOP using the machine if any of the following occur. • The engine speed changes with no control. • In case of misfire • In case of high vibration. The water must be turned on prior to starting the washer, pull the spray trigger to ensure water is moving the through the lines and out the nozzle without any leaks before starting the unit. -
Page 17: Using The Machine
reliability of this machine prior to any operation. Using the machine. ALWAYS Start slowly with half throttle and keep a firm grip on lance. 5.2.1. Before starting the machine you MUST connect to and turn on a water supply and high pressure hose to the machine, connect the lance and trigger assembly. - Page 18 NEVER use chemicals or caustic liquids that cause bodily injury and/or property damage. You MUST always follow the manufacturer’s advice and guidance on how to use detergents 5.2.4.1. To apply detergent, follow these steps: Fit black soap nozzle, prepare detergent solution as required by job, place small filter end of detergent siphoning tube into detergent container.
-
Page 19: Maintenance
MAINTENANCE Always stop the engine and unplug the spark plug before doing any repairs or maintenance. Never touch the rotating nylon cord or blade. Check and maintain fuel & oil levels regularly, and maintain the correct levels. Frequently check at regular intervals for the tightness of all nuts, bolts and screws. If the machine vibrates badly stop the machine and take it to a service dealer. - Page 20 6.1. Spray system. High pressure fluid discharge from leaks (even pin-sized) or ruptured components can pierce skin and inject fluid into the body. Injection injury can result in blood poisoning and/or severe tissue damage leading to infection, gangrene, and possibly amputation. 6.1.1.
- Page 21 6.3. Spark plug. The spark plug MUST be fully tightened otherwise the engine will overheat causing and damage to cylinder head may occur. Always complete the following steps after the engine has been turned off and allowed to cool down. DO NOT allow any debris to enter the cylinder.
- Page 22 6.4. Air filter. DO NOT operate the engine without the air filter being fitted it will cause engine damage and will not be covered under warranty. To remove the air filter undo the securing wing nut, remove cover and air filter element. Remove the foam section and wash the filter in soapy water and rinse with fresh water allow to fully dry before re-inserting foam filter.
- Page 23 6.5.2. Checking oil level. 6.5.2.1. Remove the oil filler cap/dipstick and check that the oil is at the top of the filler neck thread. 6.6. Cleaning. 6.6.1. DO NOT allow the air intakes to become blocked. If dust or debris accumulates in the Pressure Washer, clean the Pressure Washer with a damp cloth or soft bristle brush.
- Page 24 6.8. Long term storage. Fuel and its vapors can ignite and causing fires. You MUST select a well-ventilated storage area away from sources of heat, flame, or sparks. A hot engine can ignite flammable materials. Always let the engine cool at least 15 minutes before storing. 6.8.1.
-
Page 25: Troubleshooting
TROUBLESHOOTING Possible corrective actions; 1. Clean or replace filter. 7.1. If troubleshooting does not solve 2. Move throttle control to fast position. the problem, contact your dealer or the 3. Take engine to an authorized servicing manufacturer directly. Use only original dealer and/or contact after sales service. -
Page 26: Specification
SPECIFICATION P72800A P73200A P73200T PGP200PWA PGX200PWT Engine type P1-210 P1-210 P1-210 Honda GP200 Honda GX200 Rated power - Displacement – Starting Recoil Recoil Recoil Recoil Recoil method Oil type SAE15W40 SAE15W40 SAE15W40 SAE15W40 SAE15W40 Oil quantity – Unleaded Unleaded Unleaded... -
Page 27: Part Locations
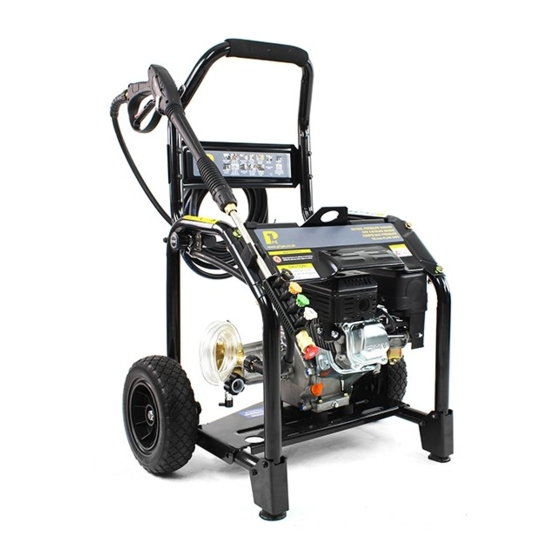
PART LOCATIONS Part locations may vary from machine to machine but will be in the general area as identified in pictures below. First edition - April 2017 Page 27... -
Page 28: Declarations Of Conformity
10. DECLARATIONS OF CONFORMITY Genpower Ltd confirms that these products conform to the following CE Directives; 2006/42/EC Machinery Directive 2004/108/EC EMC Directive 2000/14/EC, Amended by 2005/88/EC Noise Emissions Directive 97/68/EC_2010/26/EC NRMM Emissions Directive First edition - April 2017 Page 28... -
Page 29: Recycling & Product Disposal
Customer services section on our website 11.6. The following symbol means that you at www.p1pe.co.uk should ‘Reduce – Reuse – Recycle’. If you require a hard copy of Warranty details please contact aftersales on aftersales@genpower.co.uk 11.7. - Page 30 First edition - April 2017 Page 30...
- Page 31 First edition - April 2017 Page 31...
- Page 32 GENPOWER LTD Isaac Way, London Road Pembroke Dock, UNITED KINGDOM, SA72 4RW T: +44 (0) 1646 687 880 F: +44 (0) 1646 686 E: service@genpower.co.uk www.p1pe.co.uk...
Need help?
Do you have a question about the P72800A and is the answer not in the manual?
Questions and answers