Table of Contents
Advertisement
Advertisement
Table of Contents

Subscribe to Our Youtube Channel
Related Manuals for Hisense 32W22


Summary of Contents for Hisense 32W22
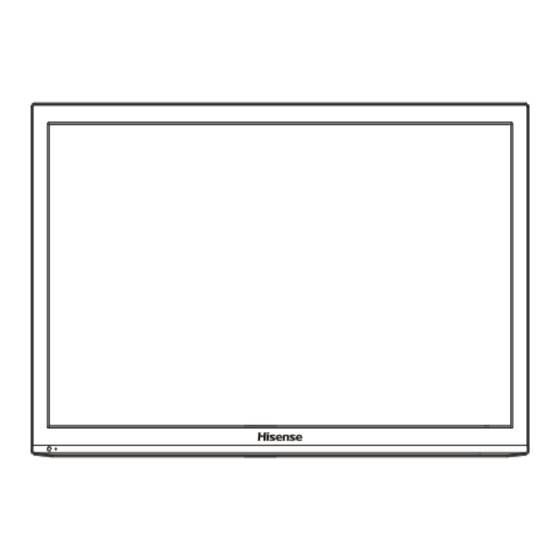
- Page 1 Model:32W22 English...
-
Page 2: Fcc Statement
HDMI Licensing LLC. Hisense and associated logos where applicable are registered trademarks of Hisense Group in the United States and/or other countries. All other trademarks are property of their respective owners. 2011 Hisense USA, Corporation. All Rights Reserved. - Page 3 Warning: To avoid any injury caused by lean of the product, please always ensure the whole product was placed within the table surface in horizontal.
- Page 4 Important Safety Instructions 19. If an outside antenna or cable system is connected to the 1. Read these instructions. 2. Keep these instructions. unit, be sure the antenna or cable system is grounded to 3. Heed all warnings. provide some protection against voltage surges and built- up static charges, Section 810 of the National Electrical 4.
-
Page 5: Power Source
Important Safety Instructions HOW TO HANDLE THE LCD PANEL: End of life directives Do not press hard or jolt the LCD panel. It may cause the LCD panel glass to break and injury may occur. Your TV also contains material that can be recycled and If the LCD panel is broken, make absolutely sure that you reused. - Page 6 Contents Getting Started Accessories List....................2 Installing the Stand ..................2 Viewing the Control Panel ................3 Viewing the Remote Control ................4 Installing Batteries in the Remote Control ............5 Making Connections ..................6 Basic Features Turning your TV on or off ................10 Selecting the Input Source ................10 Changing Channels / Volume .................10 Shortcuts Instructions ..................10...
-
Page 7: Accessories List
Getting Started Accessories List USER MANUAL Warranty Card User Manual Warranty Card Remote Control Battery × 2 Screws: (ST4×12F)×4 Installing the Stand NOTES 1. The LCD display is very fragile, and must be protected at all times when removing the base stand. Be sure that no hard or sharp object, or anything that could scratch or damage the LCD display, comes into contact with it. -
Page 8: Viewing The Control Panel
Getting Started Viewing the Control Panel MENU INPUT INPUT CH V VOL V Remote sensor Power indicator Item Description Receives remote signals from the remote control. Power Sensor Do not put anything near the sensor, as its function may be affected. Power Indicator The light is red in standby mode,and it's green when your TV turns on. -
Page 9: Viewing The Remote Control
Program Your Universal Cable or Satellite Remote Control to Operate Your New Hisense Television! If you would like to program your other household remote controls to your new Hisense television, please consult the User’s Manual supplied by your Cable or Satellite provider. The Cable or Satellite providers’ User’s Manuals should include instructions... -
Page 10: Installing Batteries In The Remote Control
NOTES If the Hisense code associated with your Cable or Satellite provider is not listed above, if the code above does not work, or if you cannot locate the instructions for programming your household remote to your television, call your local Cable or Satellite provider’s customer service center. -
Page 11: Making Connections
Getting Started Making Connections PC/DVI HDMI1 HDMI2 HDMI3/DVI PC/DVI HDMI1 HDMI2 HDMI3/DVI HDMI1 HDMI2 HDMI3 PC/DVI Item Description ANT/CABLE IN Connect an antenna or cable TV to this jack. HDMI (High-Definition Multimedia Interface)provides an HDMI/DVI uncompressed.Support: 480i\480p\576i\576p\1080i\1080p Connect to a DVD player, Digital Set-Top-Box, or other A/ V devices with component (YP ) video and audio output COMPONENT IN... - Page 12 Getting Started NOTES Check the jacks for position and type before making any connections. Loose connections can result in image or color problems. Make sure that all connections are tight and secure. Not all A/V devices have the ability to connect to a TV, please refer to the user’s manual of your A/V device for compatibility and connections procedure.
- Page 13 Getting Started Connecting an A/V Device with Component (YP ) Cable 1. Use a component cable to connect the external A/V device’s component output jacks to the TV’s YP jacks. Use an audio cable to connect the external A/V device’s component audio jacks to the TV’s AUDIO (L/R) jacks. 2.
- Page 14 Getting Started Connecting a PC with VGA Cable 1. Use a VGA cable to connect the PC’s VGA output jack to the TV’s VGA jack. Use an audio cable to connect the PC’s audio output jack to TV’s VGA AUDIO IN jack. 2.
-
Page 15: Turning Your Tv On Or Off
Basic Features Turning your TV on or off Shortcuts Instructions To turn your TV on or off (standby mode): Aspect - Select the screen aspect ratio from Normal, Wide, Zoom and Cinema. 1. Plug the power cord into an AC power outlet. 2. -
Page 16: Turning Your Tv For The First Time
Basic Features Turning your TV for the First Time The Initial Setup menu appears the first time you turn on the Select Picture Mode TV. It will assist you to specify the Energy Saving mode. Press ◄ / ►button on the remote control to select Home Connect your TV’s power cord to a power outlet, then press Mode or Retail Mode. -
Page 17: To Use The Main Menu
Basic Features To Use the Main Menu Press MENU to display the main menu or return to the previous menu or close the main menu. Press ◄/► to highlight the desired menu icon, and press OK to select. NOTE If no buttons are pressed,the menu will close automatically after about 10 seconds. Using the Picture Menu Advanced Settings - Access advanced video settings such as Aspect Ratio,Noise Reduction,and Dynamic Contrast. -
Page 18: Using The Sound Menu
Basic Features Using the Sound Menu Using the Time Menu You can adjust: You can adjust: Sound Mode - Adjust the Sound Mode. You can select Stan Sleep Timer - Set a timer for the TV to turn off automatically. -dard,Music,Movie,Sports,User. -
Page 19: Using The Lock Menu
Basic Features CC Mode - Turn Closed Captioning on/off. Setup Wizard - Set the first time installation. Analog CC - Set Closed Captioning for standard Using the Lock Menu (analog) program. Digital CC - Set Closed Captioning for digital program. Option - Adjust the digital Closed Captioning setting. -
Page 20: Using The Channel Menu
Basic Features For the United States, the rating setting basically include U.S. Movie Ratings the following options: TV, MPAA. Rating Defined as TV - The TV rating compose of two aspects: age-based and content-based. General audience Parental Guidance suggested PG-13 Parents strongly cautioned Restricted NC-17... -
Page 21: Pc Setting
Basic Features PC Setting Press button to select MEDIA in the Source menu, then press OK button to enter. Press INPUT to select VGA source. Press MENU to enter the main menu, Press ◄ / ► button to select Setup menu. Press ▼... - Page 22 Basic Features Press ◄ / ► button to select the file you want to watch in the file Press ◄ / ► button to select menu in the bottom you want to run, then press OK button to operate. selecting menu, then press OK or button to display picture.
-
Page 23: Trouble Shooting
Other Information Trouble Shooting When there is something wrong with your TV, you can try turning off the TV and then restart it. You can also Operate according to the following chart. If the problem still cannot be solved, please contact the professional technicians. SYMPTOMS POSSIBLE SOLUTIONS Check if the power cord is in the AC outlet and if it has electricity. - Page 24 Other Information Trouble Shooting SYMPTOMS POSSIBLE SOLUTIONS That would indicate that the MTS mode on your unit is set to SAP mode. We suggest setting the MTS mode to either Stereo or Mono . For further instruction, please see Audio Adjust or MTS/SAP in your user manual. On some channels getting SAP is Second Audio Program.
-
Page 25: General
Other Information General NOTE Features, appearance and specifications are subject to change without notice. Model Name 32W22 Width: 29.7 inches(755 mm) With Stand Height: 20.2 inches(512 mm) Depth: 7.0 inches(180mm) Dimension Width: 29.7 inches(755 mm) Without Stand Height: 18.2 inches(463 mm) Depth: 2.8 inches(70 mm)
Need help?
Do you have a question about the 32W22 and is the answer not in the manual?
Questions and answers