Table of Contents
Advertisement
CONTENT
Chapter 1: Introduction..............................1
Chapter 2: Technical Specifications...........5
Chapter 3: Principal Of Operation...............6
Chapter 4: Blood Sample Collection..........7
Chapter 5: Appearance And Function........8
Chapter 6: Setting......................................9
Chapter 7: Operation...............................15
Chapter 8: Trouble-Shooting....................20
Chapter 9: Maintenance..........................23
Chapter 10: Meaning of Marks.................25
Advertisement
Table of Contents

Summary of Contents for URIT 12
- Page 1 CONTENT Chapter 1: Introduction......1 Chapter 2: Technical Specifications...5 Chapter 3: Principal of Operation....6 Chapter 4: Blood Sample Collection..7 Chapter 5: Appearance and Function..8 Chapter 6: Setting........9 Chapter 7: Operation.......15 Chapter 8: Trouble-shooting....20 Chapter 9: Maintenance......23 Chapter 10: Meaning of Marks....25...
-
Page 2: Chapter 1: Introduction
Chapter 1: Introduction URIT-12 Hemoglobin Meter is designe- d for use only with H12 Hemoglobin Test Strip from URIT Medical Electronic Co., Ltd., for the quantitative measurement of hemo- globin in capillary and venous whole blood. According to the conversion between... - Page 3 to 11.1~14.1g/dL at 6 months old. Children Gradually increase from infant to adult levels. Low hemoglobin levels may indicate condition such as anemia or hemorrhage. Elevated hemoglobin levels may indicate conditions such as polycythemia. A hemog- lobin test may be used as part of a general screen for many types of patient populatio- ns, including the elderly, children, and women of child-bearing age, and prior to...
- Page 4 Warning: Please read this manual carefully befo- re using URIT-12 Hemoglobin Meter. 1. URIT-12 Hemoglobin Meter is for in vitro diagnostic use only. 2. Insufficient blood sample volume and inadequate mixing of EDTA-treated samples may affect results.
- Page 5 Test Strips from URIT Medical Electronic Co., Ltd. Prior to the first use of test strips, read the manual carefully and input the Lot Code to the meter. 4. As all diagnostic tests, test results should be evaluated according to the speci- fic patient’s condition.
-
Page 6: Chapter 2: Technical Specifications
Parameter: Hemoglobin in fresh whole blood. Measuring Principle: Optical reflectance. Strip: H12 Hemoglobin Test Strips. Measuring time: Less than 12 seconds. Haematocrit (HCT) hint: Display in perce- ntage. Measuring range: 4.0g/dL~24.0g/dL. Res- ults under 4.0g/dL or over 24.0g/dL will dis- play as “Lo”... -
Page 7: Chapter 3: Principal Of Operation
Storage function: Save the strip code, memorize and update 250 test results automatically. Correction function: self-correction. Weight: < 58g (Battery included). Outer dimension: 102mm×50mm×19mm. Power: DC 6V (Two CR2032 Battery). Operating Ranges: 15~30℃;RH≤80% non -condensing. Ultimate Ranges: -20~55℃;RH<90% non- condensing. Others: Internal trouble check and display. - Page 8 The intensity of reflectance is inversely proportional to the hemoglobin concentrati- on. The meter calculates and displays the total hemoglobin concentration in gram/de- ciliter (g/dL) in 12 seconds based on a mat- hematical conversion.
-
Page 9: Chapter 4: Blood Sample Collection
Chapter 4: Blood Sample Collection Fresh capillary or EDTA-anticoagulate- d venous whole blood may be used. If an EDTA-treated sample is refrigera- ted, allow it to come to room temperature prior to use. EDTA-treated blood samples should be mixed using end to end inversio- ns at least 8 times prior to use, and should be tested within 24 hours. -
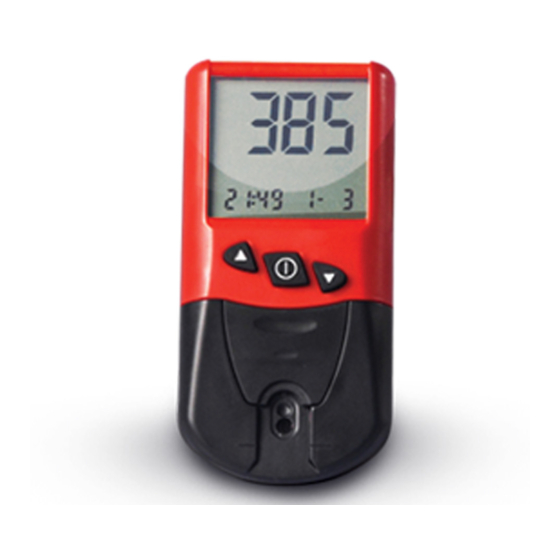
Page 10: Chapter 5: Appearance And Function
Chapter 5: Appearance and function 1. Appearance: The meter is composed of keys, LCD, circuitry board, optical system, strip holder, cover and battery. See the picture of appe- arance as below: 2. Function: Power switch: Turn meter on and confirm key (turning meter off is confirmation) ▲key: up ▼key: down... -
Page 11: Chapter 6: Setting
SET key: set function (under the strip hold- er, refer to Chapter 6) Chapter 6: Setting 1. Meter Options Setting Before the first time using URIT-12 Hemoglobin Meter, the user must enter the following settings: • Time and date format. - Page 12 12-hour AM/PM time clock with mm/dd date format or in a 24-hour time clock with dd/mm date format. Note: The date format only contains day and month, not including year. Step 1: Press the SET key once, the date and time will display.
- Page 13 Step 1: Press and hold the SET key until the time and date flash. Press the SET key again. Step 2: The hour (with AM/PM if 12 hr form- at selected) will flash. Press the ▲ or ▼ key to enter the hour. Press the SET key to...
- Page 14 Once selection of meter settings has been completed, replace the strip holder onto meter. 5. Saving Test Results URIT-12 Hemoglobin Meter automatic- ally stores 250 test results with a date and...
- Page 15 time. If the storage is more than 250 test results, the oldest test result would be auto- matically erased. Test results are stored in ascending chronological order: The first te- st result on the screen (sequence 001) is the newest test result, and the last one (up to sequence 250) is the oldest test result.
- Page 16 to scroll through test results. Step 3: Turn meter off to exit this function. 7. Deleting Test Results Test results could be deleted by follow- ing two methods: deleting the recent results by CLE or deleting all results by CLA. User could turn the meter off to stop deleting test results before MEM displays.
- Page 17 Continue pressing SET key, all the results will be changed into MEM ---. After completing all steps, turn off the meter and cover the strip holder. Note:If you want to exit CLE witho- ut deleting test results, you can shut off the meter directly.
-
Page 18: Chapter 7: Operation
Chapter 7: Operation 1. Turn the meter on Press the Power switch key to turn th- e meter on. The meter automatically monit- ors its internal circuitry and components du- ring a brief self-check. The meter is ready when the test strip prompts, Lot Code and time/date are displayed. - Page 19 the screen. The meter will automatically turn OFF. 3) Remove the code card. Turn the meter ON again. Please verify the displayed code is match the code printed in the label of container which the test strips will be taken from.
- Page 20 with the notched end in first and the hole fa- cing up. The notched end on the top of the strip should no longer be visible when the test strip is inserted correctly and fully. 6. Prepare the Meter for Sample Applica- tion The meter will automatically perform a background blank reading.
- Page 21 finger to the test strip. Note: This product is used for test- ing human blood, user must prevent again- st possible blood infection. A drop of blood (refer to the instru- ction of Strips for detail) Do not use strip to touch blood, test strip must be fixed on the meter.
- Page 22 er or strip, even press any key of meter. The test result will be displayed in less than 30 seconds. After the test is completed, remove the test strip and check whether the test strip s- pot is covered by blood sample completely or not.
- Page 23 or “Hi” respectively to indicate the result out of range.
-
Page 24: Chapter 8: Trouble-Shooting
Chapter 8: Trouble-shooting Troublecode& Possible Cause Correction phenomenon Hardware or Turn off and on again. software error If the error still exists, please contact the local distributor. Meter used in Bright sunlight disturbs E0, E1 bright sunlig- optical system of meter. Used it in room-light or shade. - Page 25 Removing the Do not remove test strip strip with sa- till finishing the test. mple before t- Turn off and on again. esting Repeat test with new test strip. Insufficient Remove the test strip Sample and shut off. Turn on Volume and repeat test with new strip.
- Page 26 Damaged Remove the test strip Strip Inserted and shut off. Turn on and repeat test with new strip. Confirm there are no tears, wrinkles or debris. Optical detec- Remove strip holder tor needs cle- and clean lenses follo- aning wing the direction. Optical detec- Before finishing the ba- tor does not...
- Page 27 Used strip Remove the test strip Inserted and shut off. Turn on and repeat test with new strip. Inserted strip Review the instruction error of Insert Strip. Remove the test strip and shut off. Turn on and repeat test with new strip. Set strip Remove strip holder holder error...
-
Page 28: Chapter 9: Maintenance
Chapter 9: Maintenance 1. Routine maintenance and cleaning The cleaning must be done after appl- ying superfluous blood sample every time. Hold the bottom of meter with left hand and lift holder, then the strip holder could be re- moved and cleaned. Wipe away the rest blood or dirt left on the holder or meter usi- ng gauze with disinfectant (diluenting 10% home bleacher, about 0.6% hypochlorite). - Page 29 al detector. After cleaning, put the strip hol- der and display in a level, and press arc se- gment, the holder could be set back. 2. Battery replacement Open the battery cover, take the batte- ry out of gap, replace two new CR2032 bat- tery, cathode is facing down, insert it into battery container, and press it down, close the cover.
- Page 30 Manufacturer Authorized representative in the European Community Recovery Protect from heat and radioactive sources his product fulfils the requirements of Directive 98/79/EC on in vitro iagnostic medical devices...
- Page 31 Supplied by: URIT Medical Electronic Co., Ltd. Wellkang Ltd t/a Wellkang Tech Consulting Suite B, 29 Harley Street, LONDON W1G 9QR, UK Ver No: 07/2010-5...
Need help?
Do you have a question about the 12 and is the answer not in the manual?
Questions and answers
How to change the unit from g/L to g/dL
To change the unit from g/L to g/dL on the URIT-12 Hemoglobin Meter, follow these steps:
1. Enter the meter settings menu.
2. Navigate to the unit selection option.
3. Choose the desired unit (g/dL).
4. Confirm the selection.
5. The change will apply to all stored test results.
Once confirmed, the new unit will be used for all future measurements.
This answer is automatically generated