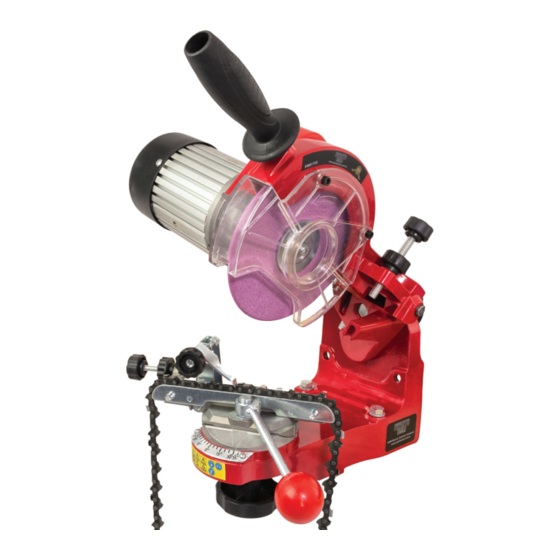
Summary of Contents for Swarts Tools SWB1705
- Page 1 INSTRUCTION BOOKLET Electric Chainsaw Sharpener Part No. SWB1705 PLEASE READ CARE AND SAFETY INSTRUCTIONS BEFORE USE...
- Page 2 WARRANTY The product is warranted to be free from defects in materials and workmanship under normal use and service for a period of 36 months from the date of sale. This warranty covers defective parts and workmanship provided that the product is shipped pre-paid to the seller within 36 months of purchase of goods.
- Page 3 Disc Size: 145 x 22.3 x 4.7MM Cord Length: 1.5m Warranty: 3 Years CONTENTS OF BOX 1 x SWB1705 (Chainsaw Sharpener) 2 x 145 x 22.3 x 3.2MM Grinding Wheel 1 x 145 x 22.3 x 4.7MM Grinding Wheel 2 x Allen Key...
-
Page 4: Safety Instructions
Do not use any aftermarket accessory for this product, unless approved by Swarts Tools. This product may only be serviced by Swarts Tools or by an authorised repair centre. KEEP WORK AREA CLEAN. Cluttered areas invite injuries. - Page 5 Check wheel for fissures and cracks and test for normal operation prior to use. Only use grinding wheels recommended by Swarts Tools. Always ease the abrasive wheel against the work piece when starting to grind. A harsh impact can break the wheel.
- Page 6 SETTING UP THE GRINDER MOUNTING 1. Ensure the tool is securely mounted to a sturdy bench or upright post, using the bolts provided. There is a notch in the bottom of the base to show you how far forward to mount the machine on the bench. CHAIN IDENTIFICATION •Prior to setting up the angles on your chain, it is important to identify the model and specifications of your chain.
- Page 7 SETTING THE GRINDING ANGLE 1. Loosen the knob on the back of the tool (2). 2. Tilt the head to the right until you reach the angle as recommended by the manufacturer of the chain. 3. Re-tighten the knob on the back of the tool. SETTING THE HEAD TILT ANGLE 1.
- Page 8 SETTING THE BACK STOP 1. Release the chain vice locking lever (3) 2. Place the chain into the track, ensuring it can move freely forwards and backwards. 3. Lower the chain backstop and pull the chain firmly up against it 4.
- Page 9 SETTING THE DEPTH Now it is time to set the depth of the cutter head. 1.Use the adjustment knob (1) at the rear of the tool to adjust the grinding head depth. 2.Bring the wheel down, level to the bottom of the tooth, ensuring it does not cut through the bottom of the chain. 3.Tighten the locking knob (1) to ensure it remains set, once you have the desired depth.
-
Page 10: Parts Diagram
PARTS DIAGRAM 1. Depth Stop Adjustment Knob 2. Grinding Angle Adjustment Knob 3. Chain Vice Locking Lever 4. Top Plate Adjustment Knob 5. Rear Stop Adjustment Screw 6. Rear Stop Adjustment Screw Locking Knob INSTRUCTION BOOKLET INSTRUCTION BOOKLET... - Page 11 INSTRUCTION BOOKLET INSTRUCTION BOOKLET...
- Page 12 PLEASE READ CARE AND SAFETY INSTRUCTIONS BEFORE USE PLEASE READ CARE AND SAFETY INSTRUCTIONS BEFORE USE...


Need help?
Do you have a question about the SWB1705 and is the answer not in the manual?
Questions and answers