
Related Manuals for Conrad FS20 AS4-3


Summary of Contents for Conrad FS20 AS4-3
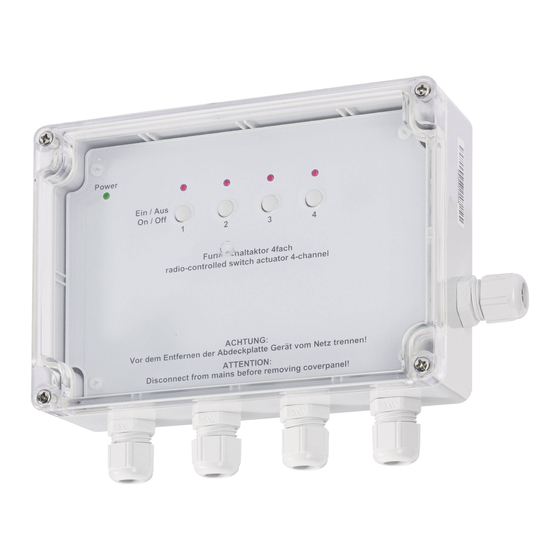
- Page 1 OPERATING INSTRUCTIONS Version 04/13 Surface-mounted remote switch „FS20 AS4-3“ Item no. 62 30 09...
- Page 2 All rights reserved. In case of any technical inquires please contact: Germany: Tel. no.: +49 9604 / 40 88 80 Fax. no.: +49 9604 / 40 88 48 e-mail: tkb@conrad.de Mon. to Thur. 8.00am to 4.30pm Fri. 8.00am to 2.00pm...
- Page 3 Table of contents Page 1. Prescribed use ....................... 4 2. Scope of delivery ......................4 3. Technical specifications and features ................5 4. Explanations of icons ....................5 5. Safety instructions ......................6 6. Installation ........................8 7. Programming and operation ..................11 a) Operating modes ....................
-
Page 4: Prescribed Use
1. Prescribed use The surface-mounted remote switch ‘FS20 AS4-3’ functions exclusively in conjunction with the FS20 wireless control system. 4 switching channels can be switched on or off via the wireless control system’s transmitters. Another feature is the integrated programmable timer function. -
Page 5: Technical Specifications And Features
3. Technical specifications and features Operating voltage ........230 V/AC, 50 Hz Power consumption in standby operation . 0.5 W Maximum switching output ......3680 W Relay ............4 switching contacts Protection type ..........IP65 Ambient temperature ........-20 °C to +55 °C Radio frequency .......... -
Page 6: Safety Instructions
5. Safety instructions The product’s guarantee becomes invalid if the product is damaged as a result of failure to observe these operating instructions. We do not assume any liability for any resulting damages! Nor do we assume liability for damage to property or personal injury caused by improper use or failure to observe the safety instructions. - Page 7 • Always replace the control panel cover in the casing and screw it in tightly before switching on the supply voltage. • Only people who are appropriately trained are permitted to carry out work on voltage- carrying parts. If you are not appropriately trained, please consult a qualified electrician who is authorised to carry out such work.
-
Page 8: Installation
6. Installation Before assembling and using the device, make sure you take note of all the safety and assembly instructions in this user manual. Only people who are appropriately trained are permitted to carry out work on voltage-carrying parts. If you are not appropriately trained, please consult a qualified electrician who is authorised to carry out such work. - Page 9 • Using a suitable screwdriver, remove the three plastic screws from the control panel cover and carefully lift it off. Kanal 1 Kanal 2 Kanal 3 Kanal 4 REL1 REL 2 REL 3 REL 4 Figure 1: Wiring diagram and controls The radio receiver’s circuit board is located at the upper edge.
- Page 10 • The rigid installation cable must be properly secured on the outside, using fixed plastic insulation tubes, for example, or similar. • Strip the cable ends of the installation cable off professionally. • Loosen the cable bushings’ locknuts. Guide the installation cable through the lock nut (note the direction) and then through the cable bushing’s grommet.
-
Page 11: Programming And Operation
7. Programming and operation a) Operating modes The remote switch can be controlled either directly via the four built-in buttons ‘channel 1’ to ‘channel 4’ (only possible when used in dry, clean indoor conditions) or using a remote control. The following operating modes are available: •... -
Page 12: C) Operation
c) Operation • Remote control operation: Switching on: Briefly press the right button of the programmed button combination Switching off: Briefly press the left button of the programmed button combination • Direct operation: Briefly press the channel button (‘channel 1’ to ‘channel 4’) on the remote switch. ... -
Page 13: A) Programming The Timer
a) Programming the timer • Simultaneously press the two buttons of the button combination assigned to the desired switching channel on the remote control for one to three seconds (1 s to 3 s). • The channel’s control indicator/LED on the remote switch blinks. The time measurement for the desired on-time begins. -
Page 14: Deleting The Timer Function
Deleting the timer function • Simultaneously press the button combination assigned to the desired switching channel on your remote control for one to three seconds (1 s to 3 s). • The channel’s control indicator/LED on the remote switch blinks. •... -
Page 15: Integrating The Remote Switch Into The Address System
9. Integrating the remote switch into the address system The remote switch can be integrated into the address system of the FS20 wireless control system via the latter’s addressing scheme using single addresses, function groups, local and global masters. More detailed information on exactly how this address system is structured is provided in the user manual of each transmitter belonging to the FS20 wireless control system. -
Page 16: Resetting To The Delivery State
10. Resetting to the delivery state If necessary, you can delete the programs and settings that were previously saved in the remote switch, thus setting the remote switch back to its delivery state with all default settings. Each channel must be deleted separately. Advantage: You can, for example, only delete the settings for channel 1 whilst all the other channels’... -
Page 17: Handling
11. Handling Take note of all the safety instructions in this user manual. Due to its construction (protection class IP65) the product can be used outdoors, provided that the remote switch’s casing is fully and correctly closed. The product must be assembled and wired properly and professionally. If the casing is removed, the product may only be used when the following requirements are fulfilled: •... -
Page 18: Maintenance And Cleaning
Avoid the following adverse ambient conditions at the installation location or during transport: - Moisture or excessive air humidity (Note: Do not overstep the bounds of protection class IP65 even when the casing cover is properly closed at the installation location!) - Extreme cold or heat - Dust or flammable gases, vapours or solvents - Strong vibrations... -
Page 19: Tips And Notes
14. Tips and notes Ranges and interference • The FS20 wireless control system works in the 868 MHz range, which is also used by other radio services. Therefore devices that operate on the same or neighbouring frequencies may restrict both its operation and its range. •... -
Page 20: Quick Reference Guide
16. Declaration of conformity (DOC) We, Conrad Electronic, Klaus-Conrad-Straße 1, D-92240 Hirschau (Germany), hereby declare that this product complies with the fundamental requirements and other relevant regulations of directive 1999/5/EG. You can find the declaration of conformity for this product at www.conrad.com. -
Page 24: Legal Notice
CONRAD IM INTERNET http://www.conrad.com Legal Notice These operating instructions are a publication by Conrad Electronic SE, Klaus-Conrad-Str. 1, D-92240 Hirschau (www.conrad.com). All rights including translation reserved. Reproduction by any method, e.g. photocopy, microfilming, or the capture in electronic data processing systems require the prior written approval by the editor. Reprinting, also in part, is prohibited.
Need help?
Do you have a question about the FS20 AS4-3 and is the answer not in the manual?
Questions and answers