
Subscribe to Our Youtube Channel
Related Manuals for Rowe Scan 850i


Summary of Contents for Rowe Scan 850i
- Page 1 R O T H + W E B E R G m b H APP CENTER ecoPrint Scan 850i O P E R A T I N G M A N U A L R E V I S I O N 1 . 1...
- Page 2 ROWE Scan 850i Series The present Operating Manual includes a description of all devices of the ROWE Scan 850i series and their fields of use. Safety instructions are given in Annex B. It is imperative to read them before using the device. Moreover, technical safety notes are given in Annex Please also observe the safety notes and warnings in this Operating Manual to which your attention is drawn at the respective passages.
-
Page 3: Typographical Conventions
In the individual chapters of this Operating Manual some typographical conventions are used. These conventions allow for quick familiarization with the manual. They simplify handling of this manual and help you to familiarize quickly with the ROWE Scan 850i scanner. - Page 4 3.3 System Overview ..............13 3.4 Unpacking of Device ..............16 3.5 PC Requirements ..............17 3.6 Connection of ROWE Scan 850i to Power Supply ......18 4 Installation ................19 4.1 Erecting Scanner ..............20 4.2 Starting Software Installation ........... 20 4.3 Selecting Folder ...............
- Page 5 6.1 Performing a Scan ..............32 6.1.1 Scanning with Height Adjustment ..............33 7 ROWE APP CENTER ..............34 7.1 Starting ROWE SCAN APP / ROWE COPY APP ......36 7.2 Main Window of ROWE SCAN APP ..........37 7.3 Selection of Language .............. 37 7.4 Functions .................
- Page 6 8.10 Parameters ................91 8.11 Login ..................92 8.12 Favorites ................93 9 ROWE COST TRACKER / CENTER APP ........95 9.1 Main View ROWE COST TRACKER APP ........96 9.2 Menu Order report ..............97 9.3 ROWE COST CENTER APP ............99 9.3.1 Allocation of Limits and Discounts ..............
- Page 7 11.4 Problems with Automatic Width Detection ......125 11.5 Scan Quality ................. 125 A Technical Requirements ............127 A.1 Java Runtime Environment ............127 B Service and Contact ............128 C About this System ............... 129 C.1 Rating plate - identification ............ 130...
-
Page 8: Introduction
1 Introduction This chapter contains important information regarding the safe use of the ROWE Scan 850i. -
Page 9: Important Information Regarding This Instruction Manual
This Instruction manual applies to the ROWE Scan 850i Wide Format Scanner. For simplification throughout the rest of this Instruction manual, the term "Scanner" will be used instead of the full phrase "ROWE Scan 850i Wide Format Scanner” and "ROWE" will be used instead of the full company name "ROTH + WEBER GmbH". -
Page 10: Safety Information
2 Safety information The Scanner was designed and manufactured according to the state of the art and recognized rules of safety. Nevertheless, hazards to persons or property can occur, as it is impossible to avoid all hazardous locations while providing effective functionality. You can however prevent accidents due to these hazards and problems by following the contents of this Instruction manual and instructing your personnel on the information contained herein. -
Page 11: Disclaimer
Operating Manual. In particular failures impairing safety have to be eliminated immediately. The ROWE systems of the Scan 850i series shall exclusively be used as described in this Operating Manual. Another use or use exceeding the above shall not be deemed intended use. -
Page 12: Fuse Protection
Use only original ROWE wearing and spare parts or wearing parts approved by ROWE. Use of wearing parts which are not approved by ROWE may damage the devices. ROWE does not accept any liability if wearing parts are used which are not approved by ROWE. -
Page 13: Commitment Of Operators
For disposal please contact the Roth + Weber GmbH Company (www.rowe.de or your local sales partner) in order to obtain information about the current mode of take-back. -
Page 14: Instruction And Training
2.4 FCC Class B NOTE: This equipment has been tested and found to comply with the limits for a Class B digital device, pursuant to Part 15 of the FCC Rules. These limits are designed to provide reasonable protection against harmful interference in a residential installation. This equipment generates, uses and can radiate radio frequency energy and, if not installed and used in accordance with the instructions, may cause harmful interference to radio communications. -
Page 15: Sample Training Form
2.5.1 Sample training form Training topics for employees Scanner Example of topics to be covered: Safety Basic statutory provisions Accident prevention regulations Basic safety instructions Specialized safety instructions for operating the Scanner Safety guards on the Scanner Emergency measures Operating the Scanner New Folding system operator experiences since the last round of instruction New experiences with regard to input materials and aids since the last round of instruction... -
Page 16: Rowe Scan 850I Series
of the main functions of the ROWE Scan 850i series. of the scope of supply and the options of the ROWE Scan 850i series. of the software applications of the ROWE Scan 850i series. This chapter shall provide a first overview. You find detailed information in the corresponding chapters which are also included in this Operating Manual. -
Page 17: Basic Models Of Rowe Scan 850I Series
Fax: +49 (0) 2743 2018 E-mail: vertrieb@rowe.de 3.2 Scanner Upgrades As an option, the ROWE Scan 850i -20 basic model can be upgraded to KIT 20, KIT 40, KIT 60 by installing a software upgrade. An overview is given in the following table. - Page 18 ROWE Scan 850i 16.4 16.28 10.68 KIT 60 B/W+COLOR ScanModule Table 3.1: Maximum scan speed of ROWE Scan 850i series The scan speed depends upon the width of the original and the configuration of the computer. ROWE APP Description TWAIN + EDIT...
-
Page 19: Optional Accessories
Inkjet. Table 3.2: ROWE APP CENTER By default, the ROWE Scan 850i is delivered including ROWE TWAIN APP as well as a 30- day trial version of ROWE SCAN/COPY APP. Optionally, models with extended features can be activated on the spot by means of a software upgrade. An overview of the available APPS is given in Table 3.2. - Page 20 Calibration chart for ROWE Scan 850i 44“ ROWE Scan Series Calibration Chart 60“ Calibration chart for ROWE Scan 850i 60“ For information on the available accessories for the individual scanner types, please refer to the current ROWE Scan 850i leaflet.
- Page 21 Important notice in case of use with the ROWE Scan Series MFP Stand: Loosen the screws at the bottom before putting the scanner on the MFP Stand. Remove the four sheets. Use the screwdriver provided with the MFP-Stand. Remove before putting the...
-
Page 22: System Overview
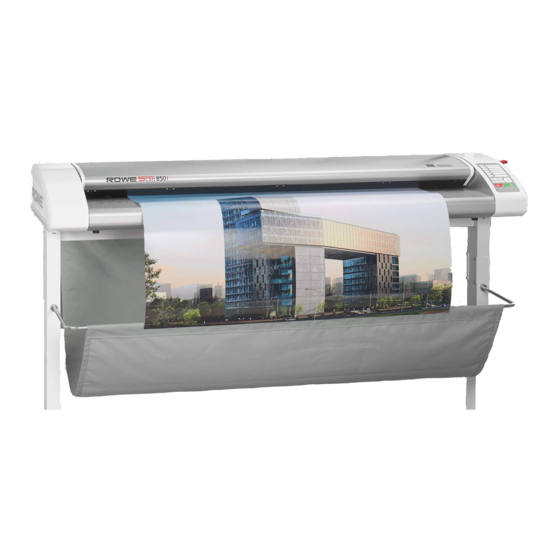
Feeding slot for document feed Zero point Locking scanner top (on both sides) Figure 3.1: ROWE Scan 850i Fehler! Verweisquelle konnte nicht gefunden werden. shows the ROWE Scan 850i control panel. It includes the following components: Start key Stop key... - Page 23 Please use household cleaning agents to remove or clean Fehler! Verweisquelle konnte nicht gefunden werden. shows the back of the ROWE Scan 850i with the left side box. There, you see the following connections: Connection for 24 V power unit USB-A slot (USB 3.0) to connect side box USB-slot to PC...
-
Page 24: Unpacking Of Device
Figure 3.3: Back of ROWE Scan 850i 3.4 Unpacking of Device In order to install the scanner, a space of at least 2.5 m x 2.0 m is required which meets with the ambient conditions described in Annex B.3.1 (Page 130). When unpacking the scanner, do not lift it by grabbing the side boxes (see Fehler! Verweisquelle konnte nicht gefunden werden.). -
Page 25: Pc Requirements
PC. In exceptional cases, a USB 2.0/3.0 host controller chip set may not be compatible with the high performance transfer mode of the ROWE Scan 850i. We recommend to use hardware meeting these requirements. A current list of... -
Page 26: Connection Of Rowe Scan 850I To Power Supply
3.6 Connection of ROWE Scan 850i to Power Supply Before using the ROWE Scan 850i, connect the scanner to the power supply using the power unit. Plug the connector socket of the supplied power unit into the connection on the back of the scanner. Plug the connector of the power unit into a socket. Please... -
Page 27: Installation
4 Installation In this chapter, you learn how to install the software on a PC to operate the ROWE Scan 850i. The PC shall comply with the minimum requirements mentioned in Chapter 3.5. However, the optimum requirements indicated there are recommended. -
Page 28: Erecting Scanner
Place the scanner either on the suitable ROWE floor stand, the suitable ROWE MFP stand (see Optional Accessories ROWE Scan 850i Series, Chapter 3.2 on Page 9), or on a sturdy table. Erect the scanner in a way that document feed and outlet can be accessed from all sides. -
Page 29: Selecting Folder
"Cancel" button. The software is not installed then. However, the ROWE Scan 850i scanner cannot Figure 4.3: Welcome dialog box be operated in this case. 4.3 Selecting Folder When selecting... -
Page 30: Installation Process
4.4 Installation Process After actuating the "Install" button, the files will be installed. In the meantime, the installation progress and the current state are displayed as shown in Fehler! Verweisquelle konnte nicht gefunden werden.. Figure 4.5: Installation process 4.5 Installation of Device Drivers During data transmission several dialog boxes indicating... -
Page 31: Installation Of Additional Plug-Ins
4.6 Installation of Additional Plug-ins After having completed the installation of device drivers and files, additional plug-ins required for use of the ROWE Scan 850i software are installed. By actuating "Next“ (see Figure 2.8) installation will continued. Figure 4.8: Homepage for installation... -
Page 32: Shutting Down Computer – Connecting Scanner – Switching On Computer And Scanner
4.7 Shutting Down Computer – Connecting Scanner – Switching ON Computer and Scanner After actuating „Finish“ prompted to shut the computer down (Fehler! Verweisquelle konnte nicht gefunden werden.). Please confirm by actuating "Yes". Now wait until the computer has been shut down and switched OFF. -
Page 33: Continuing Installation
4.8 Continuing Installation If Windows XP is installed on your computer, operating system browse scanner software after restart. Otherwise, you can skip this step. For driver installation, the dialog boxes in Figures 18 to 21 are displayed. Please select "No, not this time" and click "Next"... -
Page 34: Establishing Connection To Scanner
Figure 4.16: Driver installation finished 4.9 Establishing Connection to Scanner After having restarted the computer, start the Setup Wizard via Start → Programs → ROWE Scan Series follow instructions. Figure 4.17: Start Setup Wizard... -
Page 35: Activation Of License Options
By default, the ROWE Scan 850i is fitted with a 30-day trial license for ROWE SCAN/COPY APP. This is why you can press "Next" immediately – unless you purchased additional... - Page 36 For this purpose, read chapter "Simple Scan“. In general, the Scan 850i software on the supplied CD-ROM is the most recent version. However, it may also occur that a more recent version is already available.
-
Page 37: Switching Scanner On/Off
5 Switching Scanner ON/OFF Operate the ROWE scanner at a supply voltage of 100 to 240 volts and a frequency of 50 / 60 Hz, only. -
Page 38: Connection Of Power Unit
During the installation process switch the scanner ON only after being prompted to do The scanner works properly only after installation of the ROWE Scan 850i software (see Chapter 4) prior to use. Plug the connector of the power unit into the socket to switch the device ON. -
Page 39: Simple Scan
6 Simple Scan Moreover, the ROWE Scan 850i scanners are fitted with automatic width detection (see scan format, Chapter 5 on Page 57). -
Page 40: Performing A Scan
SCAN APP (see Chapter 7.10.1.1 on Page 46) if required. Press the "Start" button (2) on the control panel of the scanner or in ROWE SCAN APP. The "Start“ button on the control panel (2) and in ROWE SCAN APP have the same function. -
Page 41: Scanning With Height Adjustment
6.1.1 Scanning with Height Adjustment If you purchased a ROWE Scan 850i with optional height adjustment, you can scan documents with a thickness of up to 30 mm. If you want to scan an original with a thickness of more than 1.5mm, proceed as follows: ... -
Page 42: Rowe App Center
7 ROWE APP CENTER The ROWE APP CENTER is the central software needed to operate the ROWE Scan 850i series. The present chapter describes how to use the scanner efficiently by means of this software. - Page 43 ROWE TWAIN APP support of TWAIN, basic kit image editing, 2 viewers (General Viewer and Main Viewer), ICC color management, etc. TWAIN+ EDIT + SCAN Includes ROWE ScanManager TWAIN plus ROWE SCAN APP Scan-to-Net, Scan-to-USB, Scan-to-Email, etc. TWAIN + EDIT + SCAN + COPY...
-
Page 44: Starting Rowe Scan App / Rowe Copy App
For detailed information please refer to Chapter 7.15. For being able to use all functions of ROWE SCAN/COPY APP, you have to connect the scanner to the PC and switch it ON. Otherwise, the APP can be used in a limited demo mode only. -
Page 45: Main Window Of Rowe Scan App
7.2 Main Window of ROWE SCAN APP Figure 7.2: ROWE SCAN APP overview The ROWE SCAN APP includes the following components: Functions (depending on the purchased license options not all functions are available (see Chapter 7.4, Page 38) Toolbar of main viewer (see Chapter 7.8, Page 42) Main viewer to display scans (detailed view, preview);... -
Page 46: Functions
CENTER are divided into so-called functions so that only the required functions are available. By selecting one of the buttons in the top line of ROWE APP CENTER you can switch between different functions. You thereby determine what to do next. The functions have the following meaning: ... -
Page 47: Main Viewer
7.5 Main Viewer Figure 7.6: Main viewer The main viewer serves to display the document scanned last and/or a loaded image file. Numerous zoom functions allow zooming of individual areas. For this purpose, you can highlight an area within the displayed image by pressing and holding the left mouse key down. -
Page 48: General Viewer
The General Viewer is deactivated in the touchscreen optimized version (see Chapter 7.15). 7.7 Action Keys Figure 7.8: Toolbar with action keys In the toolbar on the bottom right side of the ROWE SCAN APP, there are keys which are... - Page 49 ROWE Scan 850i. By means of these keys you can start a scan job or print a document on a printer. Start: By means of this key you initiate the action linked to the function –...
-
Page 50: Toolbar Of Main Viewer
7.8 Toolbar of Main Viewer Figure 7.9: Toolbar above Main Viewer The toolbar above the Main Viewer includes the following buttons: General view: Shows complete image in Viewer. This button is particularly useful if you selected a section for being zoomed before and now want to return to the general view. -
Page 51: Toolbar Editing And Measuring Functions
This function can only be with the ROWE EDIT PROFESSIONAL APP. 10. Reset width detection: This function allows to deactivate automatic width detection for the scan effected before. This function is particularly useful if the scanned document is damaged resulting in a failure of the automatic width detection. -
Page 52: Settings
This function is available with ROWE EDIT PROFESSIONAL APP, only. 7.10 Settings The appearance of the settings area in ROWE SCAN/COPY APP (No. (4) in Fehler! Verweisquelle konnte nicht gefunden werden., Page 38) is adapted slightly... -
Page 53: Rowe Scan App Settings
In the following paragraphs, the settings relating to the selected function will be explained briefly. The respective settings options will be described in detail in a separate paragraph. The ROWE PRINT APP and Job list deserve special attention and will be dealt with in separate chapters. 7.10.1 ROWE SCAN APP Settings Figure 7.11: Scan settings... -
Page 54: Storage Location
7.10.1.1 Storage Location Figure 7.12: Settings Storage location Local: Save on local computer (drive, folder) E-mail: Send as attachment to an e-mail. Scanboxes: Save to local area network USB: Save on USB data carrier. Location: Select folder. Open folder in Windows Explorer: The selected folder is opened directly in Windows Explorer for you to be able to call the file(s) quickly. -
Page 55: File Format
USB: By means of this button you can easily select a USB data carrier (e.g. flash drive or external disk) as storage location. This function is only available if the operating system recognized a USB data carrier being connected. By means of button (1) you can also select a subdirectory. -
Page 56: Rowe Copy App Settings
Complete: Press this button after having scanned the last page for the multipage file. 7.10.2 ROWE COPY APP Settings Figure 7.18: Settings – ROWE COPY APP When you are in ROWE COPY APP, the settings are as follows: Color mode: see 7.10.3.1... -
Page 57: Printer Selection
(e.g. Folding for ROWE printers) Printer: Select the requested printer. Folding program: Available only if a ROWE printer was selected in (1). See Fehler! Verweisquelle konnte nicht gefunden werden.. Settings: Further options affecting the print depending on printer type. -
Page 58: Output Settings For Rowe Printer
7.10.2.2 Output Settings for ROWE Printer Figure 7.20: Folder settings If you print on a ROWE printer featuring a folding machine, you can select the following folding options: Select folding program Header position: Here, you can define in which quadrant there is a header if any. -
Page 59: Output Settings For Inkjet Printer
Suspended: For the time being, the drawing is not printed but the job has to be started manually on the printer. Tolerance: Define the tolerance by which the dimensions of the document may be exceeded (in %) for the document being printed on the next smaller roll nonetheless. -
Page 60: Set Function
7.10.2.4 Set Function Figure 7.24: Query whether set shall be printed immediately Figure 7.23: Set function As soon as you enable the set function (1), you are asked whether you want to print the documents in the set immediately. If you press "Yes", the output is started immediately; if you press "No", the output is started only after completion of the set (press (1) again). -
Page 61: Quality
gradients. More: Behind this button there are more special document types in addition to "Line“, "Photo“, and "Mixed" (e.g. optimization for maps, etc.). If you are not sure to which original type a document is to be allocated, you can test which settings meet your requirements best as the display in the Viewer is updated immediately with the selected mode. - Page 62 Figure 7.27: Expert mode – Image settings Image settings/Color settings: If you switch to "Color settings", you access another submenu (see Fehler! Verweisquelle konnte nicht gefunden werden.). Contrast: Increase / reduce contrast (setting range -127...128, 0: neutral). Gamma: Adjust the gamma curve (setting range 1...25, 17: neutral). This setting should not be changed because the default value (17) perfectly matches the scanner's color space.
- Page 63 Figure 7.28: Expert mode – Color settings Image settings/Color settings: If you switch to "Image setting", you see the submenu depicted in Fehler! Verweisquelle konnte nicht gefunden werden.. Red/ Green/Blue: By means of these three slide controls, you can shift the weighting of the three color channels red, green, and blue (R, G, B).
- Page 64 permanent markers cannot be distinguished from the actual background (white of paper). ICC profiles: Select an ICC color space in which the file is to be saved. In general, sRGB is appropriate. If you want to save a color scan in the device color space of the scanner, select None.
-
Page 65: Scan Format
7.10.3.3 Scan Format In the field "Scan format", you can determine the dimensions of the following scan. If you actuate the button as shown in the adjoining figure, a menu pops up where you can select the following settings: Auto: The format is established automatically using the width detection feature. -
Page 66: Scaling/Margins
User-defined: If you select "User-defined“, you can enter any dimension for the scan range in the displayed text fields: Width: Scan width in mm Length: Scan length in mm Start at: Start position in feeding direction from beginning of document in mm ... -
Page 67: Info
Figure 7.35: Area "Info" 7.11 Favorites ROWE SCAN/COPY/PRINT APP provides a vast range of settings to adjust scans and copies according to individual requirements. Often a manageable number of settings and/or combinations of settings are used over and over again. In order that you do not have to set and adjust each option individually again, you can save settings once made as so- called Favorites. -
Page 68: Multiprint Favorites
Figure 7.1: Functions - Favorites When clicking the "Favorites“ function, the depicted menu pops up: List of favorites: Here, all favorites already saved are listed. In order to load and activate the saved settings, simply click on the entry in the list. Save favorite: If you want to save the current settings as favorite, press the "Save“... - Page 69 Printing a second color copy on an inkjet printer, Issuing three more copies on a ROWE printer scaled to ISO A3 including folding, Saving the scan as TIFF file in a folder with activated background compensation, ...
- Page 70 Add new output configuration (2): Another output configuration is added. The new configuration includes the parameters currently set in the ROWE COPY/PRINT APP. Figure 7.40: Create / edit Multiprint favorites Edit output configuration (3): Here, you can subsequently change the settings for the respective configuration.
-
Page 71: Job List
If you start an output with a Multiprint favorite being activated, a dialog box pops up after pressing the start key where you can check/set on which output devices to output: Activate/deactivate output on device: Enable the field if you want to output on the indicated device otherwise remove the check mark by clicking. -
Page 72: Rowe Print App
Restart all jobs: Restart all stopped jobs. 7.13 ROWE PRINT APP By means of the ROWE PRINT APP you can create extensive print jobs as single files or complete sets with individual settings for each file. An overview of ROWE PRINT APP is given in Fehler! Verweisquelle konnte nicht gefunden werden.. -
Page 73: Layout Of Rowe Print App
7.13.1 Layout of ROWE PRINT APP Figure 7.44: Print Master PRO – Overview ROWE PRINT APP is divided into the following sections (see Fehler! Verweisquelle konnte nicht gefunden werden.): File list: List of files added to a print job (see Chapter 7.13.2). - Page 74 Set header position: By clicking one of the four quadrants top left, top right, bottom left, or bottom right you can select where the header shall be positioned. If you output the file on a ROWE printer and set a folding program (if a folding machine is available), the file is rotated automatically in a way that the header is at the top and visible after folding.
-
Page 75: File Settings
7.13.3 File Settings Figure 7.47: ROWE PRINT APP - File settings All settings made in the section File presets always apply to the file selected (highlighted) in the file list. If you selected several files in the list, the settings made are adapted to all... - Page 76 Stamps/labels: Adding stamps or labels (also see 7.10.2, settings "Copy"). Scaling/margins: see 7.10.3.4 . Folding: If output is affected on a ROWE printer with folding machine, a folding program can be selected here. Moreover, you can define in which quadrant any text field shall be located.
-
Page 77: Job Settings
7.13.4 Job Settings Figure 7.48: Job settings All settings made in the section Job settings apply to all files within a set, i.e. to all files available in the file list. Printer: Selection of printer for output of set. With the option Page tolerance you can determine the tolerance by which the dimensions of the documents may be exceeded (in %) for the document being printed on the next smaller roll nonetheless. - Page 78 Jobname / PIN / Account Jobname: Here you can define a user defined jobname which helps the identification of the print job in the job list. PIN: Here you can define a PIN / password for protecting the printjob against other users.
- Page 79 Larger (roll empty: fit): If a fitting medium format is inserted but empty, the printer does not print, but requires the respecting roll format. Otherwise the printer prints to a larger format available next. Larger (medium defined: fit): If a fitting medium is defined but not inserted, ...
-
Page 80: General Print App Settings
7.13.5 General PRINT APP Settings Figure 7.51: General settings The general settings of the ROWE PRINT APP offer the following options: WEB CONNECT APP Printer cockpit always on top: If you start the printer cockpit from the WEB CONNECT APP, you can specify here, if it should be always in foreground or not. -
Page 81: Configuration Of Rowe Scan/Copy App
7.14 Configuration of ROWE SCAN/COPY APP By pressing the button shown on the right which can be found on the left of the action keys in the lower section of the ROWE SCAN/COPY APP you can make several basic settings. -
Page 82: Rowe Scan/Copy App Touch
Content Infobox: Determine which files shall be displayed in the info box. 7.15 ROWE SCAN/COPY APP TOUCH ROWE Scan 850i scanners can be operated with a desktop computer with mouse and keyboard or with a touch screen. For touch screen operation, the specially optimized version of ROWE SCAN/COPY APP is available while the regular version is not intended for touch screen operation (i.e. - Page 83 Chapter 7.6). Fehler! Verweisquelle konnte nicht gefunden werden. shows the layout. Figure 7.53: ROWE SCAN/COPY APP TOUCH As a conventional keyboard is usually not available when using a touch screen, a virtual keyboard is shown when an entry is required. By means of the buttons you can enter the desired text and/or figures by finger.
- Page 84 If you touch a text field with the finger where a text needs to be entered (e.g. a file name), virtual keyboard shown automatically. Figure 7.55: Virtual keyboard...
-
Page 85: Rowe Configmanager
The ROWE ConfigManager provides all administrative functions for the scanners of the ROWE Scan 850i series. Apart from configuring all basic settings, printers can be set, license upgrades can be loaded, or the scanner can be recalibrated here among others. -
Page 86: Starting Rowe Configmanager
ConfigManager 8.2 Main View of ROWE ConfigManager Figure 8.2: ConfigManager - Overview The ConfigManager layout is similar to that of ROWE SCAN/COPY APP. Similar to them the provided configuration options in the ConfigManager are divided into different functions by topics: ... - Page 87 Favorites: Here you can set additional options for the behavior of the favorites in ROWE SCAN/COPY/PRINT APP (see 8.12). Email: Settings for email notification (only available with copy system ROWE ecoPrint, see ROWE ecoPrint manual for details). Stamp programs: Configuration and editing of stamps (only available with ROWE EDIT PROFESSIONAL APP, see 8.6)
-
Page 88: Status Of Scanner
Whether calibration is required Whether maintenance by the ROWE Service is required Under Protocol you can see the scanner's intensity of utilization. There you can see the number of scans already effected, the overall scan length, as well as the operating hours of the scanner. -
Page 89: Printer
Calibration 8.5 Printer Figure 8.5: Selection of printer actions In order to set up your printer, ConfigManager provides numerous options: Add printer (see 8.5.1) Delete printer (see 8.5.2) Profile printer: Create a color profile for an inkjet printer to optimize the color reproduction quality (see 8.5.3) ... - Page 90 NOT available (name changed, not available, license invalid, etc.), a corresponding message displayed when starting ROWE Figure 8.10: Warning - printer name COPY/PRINT APP. In this case, the loaded favorite should be modified! Check for:...
-
Page 91: Deleting Printer
In order to achieve a reproducible reproduction of color, ROWE ConfigManager offers the "Closed loop calibration" option. This means that the printer prints a specific color pattern (a so-called target) about which the precise color values are known. -
Page 92: Configuring Printer
already on the next medium. When creating a profile later, you can then skip this step. In the next step, the printed target needs to be scanned. Allow the target to dry for about one hour, as the colors may still change during this period. After the drying time, place the target in the scanner Figure 8.14: Inkjet profiling - and click "Next". - Page 93 Figure 8.16: Roll configuration Now you access the configuration area of the printer. There you can Change IP address and/or host name of the printer, See whether a color profile is already available for a medium (only for color printers), ...
-
Page 94: Stamp Programs
If you are not already logged in as administrator user, you are requested to do so, as soon as you press one of the buttons (see 8.11). In order to add, delete and configure stamps you need the ROWE PRINT SPECIALS APP. - Page 95 In the next step specify the parameters of the stamp: Stamp name: Identifier of the stamp, can be an arbitrary name without special characters. Alignment hor./vert.: Specifies the position of the stamp on the sheet. Can be in relation to header or centered, top/bottom (resp.
-
Page 96: Delete Stamp
8.6.2 Delete Stamp If you desire to delete a stamp, press “Delete Stamp”. Afterwards you will be requested to select the stamp to remove. Click “Next” to continue and apply the apply the confirm dialog. Figure 8.23: Stamp selection 8.6.3 Configure Stamp If you desire to change the parameters of an already existing stamp, press “Configure Stamp”. - Page 97 Windows access permission. Public access: Defines whether any user is allowed to use the scan box as scan target directory in the ROWE SCAN APP or whether access is protected by a user name/password. Figure 8.27: Creating a remote scanbox When creating a remote scanbox you are requested to select a protocol as a first step.
-
Page 98: Licenses
Accordingly, it may be worthwhile to check under "Update" once in a while whether a more recent version of ROWE Scan 850i software is available. As in case of the license upgrade order, ConfigManager opens the ROWE website automatically using your Internet browser where you can see whether an update is available. -
Page 99: Parameters
8.11). Figure 8.29: ConfigManager - Parameters The following parameters are available: Password protect ScanManager settings: You can protect the ROWE SCAN/COPY APP settings with a password (see 7.13.5) to prevent unauthorized persons from changing them. Force USB-2.0: Activate the USB 2.0 mode of the scanner. -
Page 100: Login
Correction scale factor (length): If this parameter is activated, you can set a correction in y direction between 0,980 and 1.020 per mill in ROWE SCAN/COPY APP under "Expert mode". In case of existing favorites, this parameter is to be checked for correctness and to be saved, once. -
Page 101: Favorites
(two times). Figure 8.32: ConfigManager - Change password 8.12 Favorites Figure 8.33: ConfigManager - Favorites In addition to the numerous ROWE SCAN/COPY/PRINT APP options regarding handling of favorites (see 7.11), in the function Favorites you can define for each individual... - Page 102 As a consequence, the temporary setting of the parameter in the ROWE SCAN/COPY/PRINT APP gets lost and after loading of the favorite it needs to be set again if a value deviating from the favorite shall be used.
-
Page 103: Rowe Cost Tracker / Center App
9 ROWE COST TRACKER / CENTER By means of the ROWE COST TRACKER APP all scan/print and – if applicable – folding operations can be collected and evaluated so that a precise breakdown of the accruing costs is possible. The ROWE COST CENTER APP extends those features by and account management which allows the preparation of precise accounting and a limitation of device use if required. -
Page 104: Main View Rowe Cost Tracker App
9.1 Main View ROWE COST TRACKER APP Figure 9.1: Overview of ROWE Cost Control Professional with job report ROWE Cost Control Professional comprises of the following components: Via this tab in the ConfigManager, “Cost Control” can be opened. Menu Order report (see 9.2) Menu User administration (see 9.4) -
Page 105: Menu Order Report
9.2 Menu Order report The order report includes information on each performed job (scanning, printing, or folding). This information can be filtered by various criteria and be exported into a file with comma-separated values (.csv) for further analysis in tables. In the standard version, only the order report is provided. - Page 106 Example: Prescan and scan or scan and subsequent print. The view of the ROWE COST TRACKER APP version deviates from the ROWE COST CENTER APP view in that information on cost centers and costs is given in the...
-
Page 107: Rowe Cost Center App
Limits allocated to a cost center or cost center group have the same priority but are checked in the third place. The course of a job entirely monitored with ROWE Cost Control Professional is as follows: A person logs into ROWE SCAN/COPY/PRINT APP with user name and password. -
Page 108: Menu User Administration
9.4 Menu User Administration This menu includes four areas where the administrator can create accounts for users and user groups and set limits for users and user groups. Among others, the present chapter describes the configuration of limits and discounts in detail. -
Page 109: User Administration
By means of the field Status, a user can be disabled temporarily to prevent login Figure 9.8: Create user account to ROWE SCAN/COPY/PRINT APP. If user groups are available, the user can be allocated to a group. The field Add is located under the main window. -
Page 110: User Group Administration
After successful creation user account, cost centers can be allocated to that user. If cost centers are available, a list of all cost centers appears which can be allocated by means of the button Add cost center Cost centers already allocated are listed in alphabetic order and can be removed by means of the button Remove account if required. -
Page 111: User Limits
Modifications in the main window are confirmed, rejected, or deleted – if allowed – by means of the buttons. Figure 9.13: Buttons – User group administration In the following, the configuration of user-related limits is described as an example. This process is equal for all other limits (user groups, cost centers, and cost center groups) except for the labels which may be different. -
Page 112: User Group Limits
After having made all settings, the changes have to be accepted by the Save button. This operation can be repeated for all existing job categories. A job category which is not allocated may result in a refusal of the ROWE SCAN/COPY/PRINT APP to execute the job (see Fehler! Verweisquelle konnte nicht gefunden werden.). -
Page 113: Cost Center Administration
The name of the cost center shall be unique. The fields Status and Available date serve to allow bookings on this cost center in the ROWE SCAN/COPY/PRINT APP or not. It is not possible to charge to inactive cost centers... -
Page 114: Cost Center Group Administration
Status defines whether category limits can be used for this cost center group in ROWE SCAN/COPY/PRINT APP. Figure 9.22: Define / modify cost center group After successful definition of the cost center group, cost centers can be added to this group. -
Page 115: Menu Config Setup
9.6 Menu Config Setup In this menu, the behavior of the ROWE SCAN/COPY/PRINT APP with Cost Control Professional being activated is defined. Moreover, it is possible to save and restore the... -
Page 116: Cost Control
9.6.1 Cost Control In the submenu Cost Control, the behavior of the ROWE SCAN/COPY/PRINT APP relating to the ROWE COST CENTER APP is defined. Changes in this menu have to be confirmed by the Save button for being effective in ROWE SCAN/COPY/PRINT APP. - Page 117 Figure 9.25: Cost Control Settings Cost Control Professional: The ROWE COST CENTER APP can be deactivated by disabling this field. In this case, the ROWE COST TRACKER is active and jobs are recorded, only. Cost center editable: Define whether the user shall be allowed to enter a cost center (in a text box) independently when logging onto ROWE SCAN/COPY/PRINT APP.
-
Page 118: Job Category Administration
Job categories can neither be deleted nor can new entries be added. At the beginning of each month, ROWE Cost Control creates a new database which includes information on the recorded jobs of the previous month. Older data is maintained and you can still access it. - Page 119 A change of the units of measure and/or price may result in irreproducible entries in the order report and should be effected only when performing an overall reset of the consumption data if possible.
-
Page 120: Order Report Administration
A file with the name jobdb_201206__empty.db means that the monthly backup file does NOT include any information. Such a file may occur if all information from the order report were deleted and ROWE Cost Control created a monthly backup file automatically afterwards. -
Page 121: Deleting Order Report
9.6.3.2 Deleting Order Report In the area Order report delete the monthly backup files can be removed from the order report or all information including the current month can be deleted. In a list, the available files can be displayed and deleted by pressing the Delete button toolbar. -
Page 122: Warnings, Limits, Errors
APP has been started. After having entered login name and password, the authentication is started when pressing Start. By pressing Cancel the current ROWE SCAN/COPY/PRINT APP session is closed. Figure 9.34: Cost Control login If in the user administration a user was... -
Page 123: Editing Range
Figure 9.37: Missing login / password After successful login, the button LOGOUT is displayed next to the STOP button in ROWE SCAN/COPY/PRINT APP. By means of this function, you can change the user. 9.7.1.2 Editing Range... -
Page 124: Cost Center Query
unique If the name is already used in the system, you have to change this entry. Figure 9.42: Name is not unique Some entries have to be confirmed before deleting them if they are used across the system. The query may occur in ... -
Page 125: Examples For Limits
Define users to be included in the respective user group. A user may be a member of one group at most. All jobs affected in ROWE SCAN/COPY/PRINT APP are then entered in the respective user group. The advantage of a limitation by user group is that only a few settings are to be made for job category limits if many users are divided into a few groups. - Page 126 set.
-
Page 127: Limit By Cost Center Group
Allocate users and/or user groups to the respective cost center group(s). All jobs affected in ROWE SCAN/COPY/PRINT APP are then entered in the respective cost center group. The advantage of this limitation is that only a few settings are required for the job category limit if some cost centers can be included in groups. -
Page 128: Maintenance Of Scanner
10 Maintenance of Scanner The present chapter describes how to clean the scanner of the ROWE Scan 850i series and how to replace wear parts. -
Page 129: Cleaning Of Scanner
10.1 Cleaning of Scanner Dirt and dust particles on the glass plate of the scanner may result in a deterioration of the scan result. This can be avoided by regular cleaning of glass plate, reflector rollers, and feed table. Figure 10.1: Cleaning of glass plate In order to clean glass plate, reflector rollers, and feed table, first open the scanner top. - Page 130 In order to replace the glass plate, first open scanner (see Fehler! Verweisquelle konnte nicht gefunden werden., Page 147). Recess for thumbs Upper support for glass plate Glass plate Lower support, retaining clip Figure 10.2: Glass plate Now, put both thumbs into the recesses above the glass plate and push it down.
-
Page 131: Trouble Shooting
11 Trouble Shooting This chapter describes the actions to be taken if a problem occurs when using the scanner. -
Page 132: Malfunction Indicator Lamp On Control Panel
Check whether the connection to the scanner is established (see fails above). Reinstall the software. Calibration fails Repeat calibration. Check the chart for damages. 11.3 Scanning Problems The following table lists some possible problems when working with the ROWE SCAN/COPY APP and describes remedial actions. Problem Remedy ROWE SCAN/COPY... -
Page 133: Problems With Automatic Width Detection
The document is not Switch scanner OFF and ON again. Execute the Setup Wizard taken in again if applicable (see Chapter 0). Only a part of the Check the setting of the Scan format (Auto or sufficiently large original is scanned. format). - Page 134 original Stitching offset only at For extremely thin and light originals, a minor offset may occur front edge of very thin at the front edge when composing the image which is caused by originals. the feed. In this case, it may be useful to stabilize the front edge with transparent adhesive tape.
-
Page 135: A Technical Requirements
A Technical Requirements A.1 Java Runtime Environment In order to be able to use all functions of the ROWE APPS, a "Java Runtime Environment", version 1.6.0 update 39 or higher has to be installed. If it is not yet installed on your... -
Page 136: B Service And Contact
B Service and Contact Should you have any questions about the ROWE products or need any technical support in case of problems with your ROWE device, do not hesitate to contact our Service Department: Phone: +49 (0) 2743 9217 -21 Fax: +49 (0) 2743 2018 E-mail: service@rowe.de... -
Page 137: C About This System
C About this System Copyright©2003-2017 ROTH + WEBER GmbH. All rights reserved. -
Page 138: C.1 Rating Plate - Identification
This software is partly based on the work of Python Software Foundation (http://www.python.org, License/Copyright) The authors of Python for Windows Extensions – pywin32 (http://sourceforge.net/projects/pywin32, License/Copyright) Independent JPEG Group (http://www.ijg.org, License/Copyright) The authors of libtiff (http://www.libtiff.org, License/Copyright) ... - Page 139 C.2 Production date The production date can be found on the type label.
- Page 140 D Declaration of conformity...
- Page 142 Table of Figures Figure 3.1: ROWE Scan 850i ....................14 Figure 3.2: Control panel ROWE Scan 850i ................ 15 Figure 3.3: Back of ROWE Scan 850i .................. 16 Figure 3.4: Unpacking of ROWE Scan 850i ................. 16 Figure 4.1: Installation screen .................... 20 Figure 4.2: Selection of language ..................
- Page 143 Figure 8.32: ConfigManager - Change password ............... 93 Figure 8.33: ConfigManager - Favorites ................93 Figure 9.1: Overview of ROWE Cost Control Professional with job report......96 Figure 9.2: Fields in order report ..................97 Figure 9.3: Order report table .................... 98...
- Page 144 Figure 9.4: Fields for limits ....................99 Figure 9.5: User info box in order report ................100 Figure 9.6: User administration ..................101 Figure 9.7: Empty user list ....................101 Figure 9.8: Create user account ..................101 Figure 9.9: Add cost centers to user ................102 Figure 9.10: User group administration ................
Need help?
Do you have a question about the Scan 850i and is the answer not in the manual?
Questions and answers