Table of Contents
Advertisement
Quick Links
Advertisement
Table of Contents

Related Manuals for Elektron Analog Rytm


Summary of Contents for Elektron Analog Rytm
- Page 2 Elektron may also make improvements and/or changes in the products and programs described in this document at any time without notice. In no event shall Elektron be liable for any special, indirect, or consequential damages or any damages whatsoever resulting from loss of use, data, or profits, whether in an action of contract, negligence, or other action, arising out of or in connection with the use or performance of this information.
- Page 3 SOUND PEAKS • A brief 3 kHz signal will be sent to all outs of the Analog Rytm when the Test mode on the Early Startup menu is activated. Remember to turn down the volume on all speakers and headphones before activating Test mode.
- Page 4 4. ANALOG RYTM SOUND ARCHITECTURE........
- Page 5 TABLE OF CONTENTS 8.3 ROTARY ENCODERS ............... 22 8.4 PRAGMATIC OPERATION .
- Page 6 15.3 ANALOG RYTM WITH A STEREOPHONIC DRUM MACHINE ....... . .
- Page 7 TABLE OF CONTENTS APPENDIX A: DRUM TRACK PARAMETERS........70 A.1 SYNTH .
-
Page 8: Introduction
A tip that will make it easier for you to interact with the Analog Rytm This symbol shows a nice ear. For the first time in Elektron history, it is used in the manual. It is up to you to find out where. -
Page 9: The Analog Rytm
We would boldly like to claim that the Drum Computer we call Analog Rytm embodies and honors the spirit of Pythagoras: combining the fearless hands-on strumming of nature’s vibrating strings with the cool analyt- ic framework of digital computation. -
Page 10: Panel Layout And Connectors
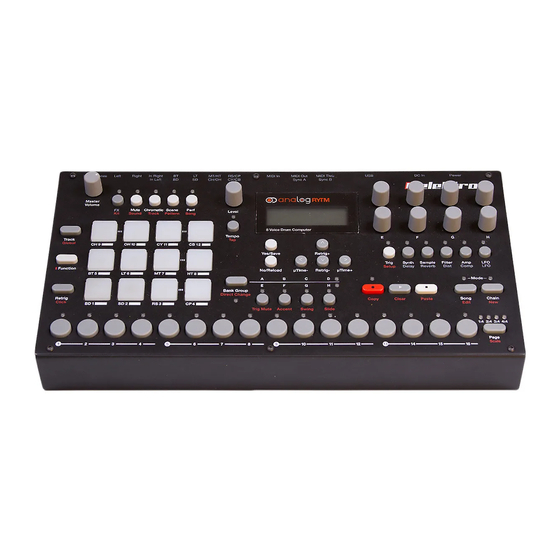
3. PANEL LAYOUT AND CONNECTORS 3.1 FRONT PANEL 10 11 The Analog Rytm Front Panel. 1. MASTER VOLUME sets the volume for the main outputs and the headphones output. 2. [FX] selects the FX track. Secondary function accesses the KIT menu. - Page 11 32. [FUNCTION] key. Press, hold and press another key to access the secondary function of that key. Sec- ondary functions are seen in red writing on the Analog Rytm front panel. 33. [TRACK] key. Press [TRACK] + one of the [PADS] to select a drum track for editing or CHROMATIC play.
-
Page 12: Rear Connectors
If MIDI control is desired, connect the MIDI OUT port of the device you wish to send data from to the MIDI IN port of the Analog Rytm. The MIDI THRU port duplicates the data arriving at the MIDI IN port. It is used for chaining several MIDI units together. -
Page 13: Analog Rytm Sound Architecture
4. ANALOG RYTM SOUND ARCHITECTURE 4. ANALOG RYTM SOUND ARCHITECTURE The Analog Rytm sound architecture, with its eight drum voices, two send effects (delay and reverb), and two master effects (distortion and compressor), is shown below. Analog elements are gray; digital are white. -
Page 14: Overview Of The Analog Rytm Data Structure
128 Sounds. General settings and states are stored in the project. When a proj- ect is loaded it becomes the active working state of the Analog Rytm. From here it is possible to edit the patterns, kits, songs and globals of the project. -
Page 15: Songs
LFO each. 5.3.2 THE FX TRACK The FX track controls the Analog Rytm send effects DELAY and REVERB, as well as the DISTORTION and COMPRESSOR master effects. One LFO is also available for this track. To select the FX track for editing, press the [FX] key. -
Page 16: The User Interface
6. THE USER INTERFACE 6. THE USER INTERFACE The LCD screen shows all the information needed for real-time interaction and editing on the Analog Rytm. The eight DATA ENTRY knob parameters shown will vary depending on the given situation. The main inter- face screen is shown below: 1. -
Page 17: Quick Scrolling
6. THE USER INTERFACE 6.3 QUICK SCROLLING Scroll through menus using the LEVEL knob. Quick scrolling is possible on many menus. Press [FUNC- TION] + the [UP] or [DOWN] arrow keys to move the cursor one menu page at a time. 6.4 COPY, CLEAR AND PASTE Copy, clear and paste commands are available in a lot of contexts. -
Page 18: Overbridge
Once installed, for Overbridge to work together with your Analog Heat, do the two following two things: First - Make sure the OS of your Analog Rytm, and the OS of Overbridge, match. You must have the most recent OS installed for both Overbridge and the device. The most recent OS versions are available for download on the Elektron website. -
Page 19: Quick Start
7. QUICK START 7. QUICK START This quick start will guide you through some of the basic operations to start using the Analog Rytm right away. First, connect it as described in section “3.3 SETTING UP AND STARTING THE ANALOG RYTM” on page 12. -
Page 20: Mute Mode
7. QUICK START 7.1.4 MUTE MODE Mute the sequencer of any of the twelve drum tracks in this mode. Unlike the CHROMATIC mode, it makes no difference which track is active when this mode is activated. All tracks are accessed simultane- ously. -
Page 21: Analog Rytm Controls
Tracks RS-CP, MT-HT, CH-OH and CY-CB, each pair is shown with a coupling on the front panel of the Analog Rytm, share a voice. If both tracks of a coupled pair are played or trigged simultaneously, the right-hand track has a higher priority. Track CP will mute track RS, HT will mute MT, OH will mute CH and CB will mute CY. -
Page 22: Machines
Some functions can be triggered by sending MIDI note values from an external MIDI device (a MIDI key- board or a computer, for example) connected to the Analog Rytm via standard MIDI cable or a USB 2.0 A to B connector cable. -
Page 23: Mode Keys
8. ANALOG RYTM CONTROLS 8.7 MODE KEYS There are four main keys with which you change the mode of operation on the Analog Rytm: [MUTE], [CHROMATIC], [SCENE] and [PERF]. The red LEDs above these keys show if the modes are active (full- bright) or inactive (off). - Page 24 8. ANALOG RYTM CONTROLS To exit PERFORMANCE mode, press [PERF] key again. PERFORMANCE mode settings are stored as part of a kit. See “7.1.1 PERFORMANCE MODE” on page 19 to find out more about this mode.
-
Page 25: Projects
9. PROJECTS A project is the top level of the Analog Rytm workflow. A project contains 128 patterns, 128 kits, 16 songs, 4 global slots, and a project Sound pool consisting of up to 128 Sounds. Projects are handy when, for example, you want to save a specific setup for a live performance or when managing a select number of compositions. - Page 26 9. PROJECTS SAVE PROJECT opens a project selection screen where you choose a slot to save the active project to. PROJECT MANAGER launches the PROJECT MANAGER menu. Selecting a project in this menu and pressing the [RIGHT] arrow key will bring up a list of commands. CLEAR resets the project slot to a clean state.
-
Page 27: Kits And Sounds
Sound. It will affect and become part of the active kit. A pattern, controlling the playback of the kit, always links to a specific kit (non-exclusively). Any changes to the kit will affect other patterns using the same kit. When the Analog Rytm is switched off, only the active kit preserves its changes. Other kits must be saved. -
Page 28: Scene Mode
10. KITS AND SOUNDS SAVE KIT saves all the current kit related settings as a kit. When a kit is saved, it will be linked to the active pattern. [YES/SAVE] + [FX] offers a shortcut to this command, saving the kit instantly to the same slot and with the name of the kit unchanged. -
Page 29: Performance Mode
10. KITS AND SOUNDS which scene to edit by pressing one of the [PADS]. Then press and hold the [SCENE] key for a short while to edit the scene. When SCENE mode is active, [FUNCTION] + one of the [PADS] offers a convenient short- cut to scene edit mode. -
Page 30: Performance Edit
10. KITS AND SOUNDS 10.4.1 PERFORMANCE EDIT Make sure PERFORMANCE mode is active. Press and hold the [PERF] key for a short while to enter edit mode. When PERFORMANCE mode is active, [FUNCTION] + one of the [PADS] offers a conve- nient shortcut to scene edit mode. -
Page 31: Sound Menu
10. KITS AND SOUNDS Remember to save the kit regularly with [YES/SAVE] + [FX]. Once the editing is done, simply press the [PERF] key again to exit edit mode. The parameter locks you entered will be activated whenever the pad containing the performance macro is pressed, provided PERFORMANCE mode (but not performance edit) is active. -
Page 32: Sound Manager
10. KITS AND SOUNDS SEARCH will perform a text search and list all Sounds with names matching or including the text input. See “6.5 THE NAMING SCREEN” on page 17 on how to enter text. 10.5.2 SOUND MANAGER The SOUND MANAGER is a more comprehensive version of the SOUND BROWSER. Sounds can be saved, loaded, renamed, tagged et cetera. - Page 33 10. KITS AND SOUNDS • Sounds in the +Drive Sound library are organized into 16 banks, ranging from A to P. Each bank can contain 256 Sounds. Use the [TRIG] keys to view only Sounds located in a specific bank. •...
-
Page 34: Playing A Sound
10. KITS AND SOUNDS • Copy, clear and paste operations are available in the SOUND BROWSER and SOUND MANAGER. • Use the LEVEL knob to increase scrolling speed in the SOUND BROWSER and SOUND MANAGER. 10.6 PLAYING A SOUND Play the drum track Sounds of the active kit by tapping any of the twelve [PADS]. <PADS> will briefly flash when tapped. -
Page 35: Selecting A Sample
SAMPLE, twice. 10.9 EDITING THE FX Select the FX track for editing by pressing the [FX] key. The FX track controls Analog Rytm internal send effects (Delay and Reverb) and master effects (Distortion and Compression). Editing the FX track is similar to editing the Sounds of the drum tracks. - Page 36 10. KITS AND SOUNDS LFO controls parameters for the FX track LFO. • FX and track parameter settings are stored as part of a kit. Don’t forget to save the kit and give it a unique name once you have achieved the results you want, or simply press [YES/ SAVE] + [FX] to quickly save the active kit with its name unchanged.
-
Page 37: The Sequencer
11. THE SEQUENCER 11. THE SEQUENCER The sequencer of the Analog Rytm stores beat information in patterns. A pattern controls the playback of the drum tracks, the FX track and various pattern-specific aspects of these. Each of the 8 banks, ranging from A to H, contains 16 patterns, which means 128 patterns are instantly available for each project. -
Page 38: Tempo
It is shown with an unlit <PATTERN MODE> LED. 11.3 EDITING A PATTERN Analog Rytm offers two main modes of input when editing or creating a pattern, GRID RECORDING mode and LIVE RECORDING mode. In these modes, two types of trigs can be entered: note trigs and trigless locks. -
Page 39: Live Recording Mode
11. THE SEQUENCER Set the retrig speed by pressing and holding the [TRIG] key while pressing [ARROW] keys [UP] or [DOWN]. Similarly, a pop-up menu will appear on the screen, where various retrig settings can be made. Read more about the retrig menu on page 36. If the pattern contains more than 16 steps, select the pattern page you want to edit by pressing the [PAGE] key. -
Page 40: Track Menu
11. THE SEQUENCER LENGTH Sets the duration of the retrig velocity curve in fractions of, or rational or integer multiples of, a step (0,125 - INF). 1/16 is the nominal length of one step. This setting affects the behavior of the velocity curve (see directly below), by defining the boundaries of its envelope. -
Page 41: Pattern Menu
11. THE SEQUENCER 11.6 PATTERN MENU In the PATTERN menu patterns can be saved and reloaded. Open the menu by pressing [FUNCTION] + [SCENE]. Select between the available commands by using the [UP]/[DOWN] arrow keys. Confirm selec- tions with [YES/SAVE]. RELOAD PATTERN will reload the active pattern. -
Page 42: Click Track
Range 0-127. 11.8 CLICK TRACK The CLICK TRACK menu controls the internal metronome of Analog Rytm. Open the menu by pressing [FUNCTION] + [RETRIG]. Use the [UP]/[DOWN] arrow keys or the LEVEL knob to scroll through the list of settings. -
Page 43: Advanced Mode
A 2X time signature setting is useful for increasing the base resolution of the step sequencer to 32nd notes. A 3/4X setting is useful when Analog Rytm is playing alongside other instruments set to the same BPM, and you want Analog Rytm to play triplets. -
Page 44: Sound Locks
11. THE SEQUENCER ic track (or on several tracks) in time with the sequencer, i.e. all steps reached on the pattern playing will be erased, until the keys are released. Sound locks will not be erased. Remove specific parameter locks in real time by pressing [NO/RELOAD] while pressing the DATA EN- TRY knob corresponding to the parameter that will be removed. -
Page 45: Trig Mute
11. THE SEQUENCER • Conditional parameter locks are a great way to add variety to a pattern. To set up a grid of mutually exclusive or conclusive note trigs across any of the synth tracks, and throwing some probability locks in there as well (perhaps, in turn, also sporting an array of logically conditioned trigs) is a neat way to make the most minimal of compositions come alive with randomness. -
Page 46: Slide
11. THE SEQUENCER Set the SWING ratio to 51-80%, by turning the LEVEL knob or by pressing [ARROW] keys [UP] or [DOWN]. The default setting is equal spacing, 50%. Customize the swing pattern, shown by lit <TRIG> LEDs, using the [TRIG] keys. 11.10.7 SLIDE The PARAMETER SLIDE menu makes it possible for the parameter values of two separate note trigs or trigless locks of a track to slide between each other. -
Page 47: Quick Save And Reload Commands
11. THE SEQUENCER 11.10.9 QUICK SAVE AND RELOAD COMMANDS Kits, Sounds, tracks, patterns and songs can instantly be saved and reloaded. When reloading, settings will revert to their saved state. • To quick save a kit, press [YES/SAVE] + [FX]. This command is the same as the SAVE KIT command found in the KIT menu, covered on page 20. -
Page 48: Chains And Songs
12. CHAINS AND SONGS 12. CHAINS AND SONGS Chains are sequences that consist of one or more patterns. Chains are used to form songs. 256 pattern entries are available to the 64 chains. For example, one chain can consist of 256 patterns or two chains can consist of 128 patterns each. -
Page 49: Adding Song Rows And Assigning Patterns And Chains
12. CHAINS AND SONGS Songs are played row by row, starting from the top and moving towards the bottom. If a song row con- tains a chain, all patterns in the chain will play before the song play position moves to the next row. The song play position is shown with inverted pattern number graphics. -
Page 50: Song Menu
12. CHAINS AND SONGS The mute graphics on the bottom right of the LCD screen will show the muted tracks with a (-) symbol. Unmuted tracks are shown as squares. To mute tracks of another pattern in the song, simply move the cursor to that pattern using the [ARROW] keys and press [YES/SAVE]. -
Page 51: Global Menu
13. GLOBAL MENU 13. GLOBAL MENU The GLOBAL menu offers settings that affect Analog Rytm on a global level. Global sequencer, MIDI and track routing settings are made here. Up to four Global slots are available, each with its individual settings. -
Page 52: Receiving A Sample From A Computer
SDS header if you want the sample name to be sent to the machine (if not, the samples will simply be named 1, 2, 3... and so on in the destination directory of the Analog Rytm). In C6 version 1.5 these settings are found in the config window. -
Page 53: Global Slot
The C6 software can be freely and conveniently downloaded from the Elektron website. • Please note that the Analog Rytm will not appear as an icon on your computer desktop. Use the c6 software for all transfers. • If MIDI+USB is selected in the INPUT FROM and/or OUTPUT TO settings on the MIDI PORT CONFIG menu (see below), MIDI data transfers will limit the USB speed. -
Page 54: Midi Sync
• USB will make Analog Rytm listen only to MIDI data sent to the USB port. • MIDI+USB will make Analog Rytm listen to MIDI data sent to both the MIDI IN and USB ports. OUTPUT TO selects the destination to which Analog Rytm will send MIDI data. -
Page 55: Midi Channels
INT, no MIDI data will be sent. When set to INT + EXT, MIDI will be sent internally as well as externally. When set to EXT, MIDI will only be sent externally. RECEIVE NOTES will when active, make it possible to play Analog Rytm using an external MIDI key- board. -
Page 56: Track Routing
Sample transfer is handled exclusively via the SAMPLES menu (see above). Select a menu option using [UP]/[DOWN] or the LEVEL knob. Press [YES/SAVE] to open the highlighted menu selection. When receiving or sending SysEx data, the MIDI ports or the USB port of Analog Rytm must be connected to the external sending/receiving device. -
Page 57: Sysex Receive
Press the [RIGHT] arrow key to access this column. Use the [UP]/[DOWN] keys or the LEVEL knob to select what will be received. Press [YES/SAVE] to initiate the SysEx receive procedure. Analog Rytm will start listening to incoming data. Press [NO/RELOAD] to stop listening. -
Page 58: System
On your computer, download the OS syx file, open the C6 software. Click “Configure” and select Elek- tron Analog Rytm for MIDI In as well as MIDI Out. Drag the syx file to the C6 main window, then highlight it by pointing and clicking on it with the mouse pointer. Point and click on the “send” button in the top left corner of the C6 window. -
Page 59: Calibration
Analog Rytm is factory calibrated. It should not be re-calibrated unless specifically stated by Elektron Support or if prompted by the machine. Before calibrating, it is important that the unit has been turned on for at least two hours to attain working temperature. -
Page 60: Early Startup Menu
On your computer, download the OS syx file, open the C6 software. Click “Configure” and select Elektron Analog Rytm for MIDI In as well as MIDI Out. Drag the syx file to the C6 main window, then highlight it by pointing and clicking on it with the mouse pointer. - Page 61 • When you send the OS syx file, use our free SysEx utility C6. It can be downloaded from the Elektron website. • If the Analog Rytm receives the OS upgrade through the MIDI ports, use the Elektron TM-1 USB MIDI interface for up to 10x transfer speeds.
-
Page 62: Setup Examples
3. Connect the Analog Rytm outputs to the mixer using standard phone cables. 4. Connect the MIDI Out of the Analog Rytm to the SYNC IN of the bass machine using a DIN connector. 5. On the MIDI PORT CONFIGURATION menu, in the GLOBAL menu of the Analog Rytm, use the setting DIN24 on the OUT PORT FUNCTIONALITY selector. -
Page 63: Analog Rytm With A Stereophonic Drum Machine
Analog Rytm. 1. Prepare a rhythm pattern on your heritage drum machine. 2. Connect the stereo outputs of the drum machine to the inputs of the Analog Rytm using a mono to ste- reo split phone cord. - Page 64 15. SETUP EXAMPLES 5. Start the rhythm on the drum machine and access the COMPRESSOR of the Analog Rytm by pressing the [FX] key, then the fourth [PARAMETER] key. Set the parameters according to taste. 6. Prepare a rhythm on the Analog Rytm.
-
Page 65: Useful Key Combinations (Quick Keys)
16. USEFUL KEY COMBINATIONS (QUICK KEYS) 16. USEFUL KEY COMBINATIONS (QUICK KEYS) Use the key combinations below to quickly perform certain tasks. GENERAL [FUNCTION] + [REC] will perform a copy command. Action depends on the currently active page or mode. [FUNCTION] + [PLAY] will perform a clear command. - Page 66 16. USEFUL KEY COMBINATIONS (QUICK KEYS) CLEAR TRACK / CLEAR PATTERN [FUNCTION] + [PLAY] (while in GRID RECORDING mode) to clear active Track. [FUNCTION] + [PLAY] (while in no mode or LIVE RECORDING mode) to clear Pattern. SHIFTING TRIGS AROUND [FUNCTION] + [LEFT/RIGHT] to move all trigs a whole step, left or right.
-
Page 67: Technical Information
17. TECHNICAL INFORMATION 17. TECHNICAL INFORMATION SPECIFICATIONS THE SEQUENCER 12 drum tracks 1 FX track Up to 64 steps per pattern Individual track lengths 12 Scenes (per kit) Trig mute, Accent, swing and slide functions Micro timing Parameter locks Chromatic mode Scene mode Performance mode Versatile and assignable Retrig... - Page 68 17. TECHNICAL INFORMATION Unbalanced audio inputs: Input level: +15 dBu maximum Audio input impedance: 9 k Individual Outputs: Output level: +15 dBu Output Impedance: 440 Unit power consumption: 14 W typical, 20 W maximum. Recommended power supply: PSU-3 or similar 12V DC, 2A HARDWARE 12 synthetic rubber, pressure sensitive, backlit pads 122x32 pixel backlit LCD screen...
-
Page 69: Credits And Contact Information
Charlie Storm Daniel Troberg DOCUMENTATION Ufuk Demir Thomas Ekelund Jon Mårtensson Daniel Sterner Erik Ångman 18.2 CONTACT INFORMATION ELEKTRON WEBSITE http://www.elektron.se OFFICE ADDRESS Elektron Music Machines MAV AB Sockerbruket 9 SE-414 51 Gothenburg Sweden TELEPHONE +46 (0)31 743 744 0... -
Page 70: Appendix A: Drum Track Parameters
APPENDIX A: DRUM TRACK PARAMETERS APPENDIX A: DRUM TRACK PARAMETERS This appendix lists the parameters on the five PARAMETER pages for the drum tracks and explains them. With one significant exception, each unique page contains the same parameters on all drum tracks. The exception is the SYNTH page, where parameters will vary depending on the active MACHINE. -
Page 71: A.3 Filter
APPENDIX A: DRUM TRACK PARAMETERS knob clockwise to scroll down the list, counter-clockwise to scroll up. The first position, OFF, plays no sample at all (OFF, 1–127). STA (Start) sets the starting point for the playback of the sample. The extreme values of the range (0- 120) are the very beginning and the very end of the sample, respectively. - Page 72 APPENDIX A: DRUM TRACK PARAMETERS DEC (Decay) sets the length of the decay phase of the amp envelope. (0–INF) OVR (Overdrive) sets the overdrive (gain increase boost of the amp), located before the multimode filter in the signal path. Take care not to harm your hearing when using the overdrive, and also not to over-use it when crafting a Sound (as it is a bit of a rock’n’roll cliché...
-
Page 73: Appendix B: Fx Track Parameters
APPENDIX B: FX TRACK PARAMETERS APPENDIX B: FX TRACK PARAMETERS In this appendix, the parameters of the FX track are shown and explained, one page at a time. B.1 DELAY The Delay send effect takes a duplicate of the input signal, delays it in time and then rejoins it with the origi- nal signal. -
Page 74: B.3 Distortion
APPENDIX B: FX TRACK PARAMETERS more poignant or more muffled. (0–127) GAI (Shelving Gain) affects the damping of the reverberated signal above the shelving frequency set by the FRQ parameter. At max value the treble is included in the reverberations; lowering the value gradually dampens it. - Page 75 APPENDIX B: FX TRACK PARAMETERS MUP (Makeup Gain) sets the makeup gain of the compressor output, to compensate for the reduced signal levels caused by compression. (0–127) RAT (Compression Ratio) There are four different compression ratios, 1:2, 1:4, 1:8 and MAX. Higher ratios result in greater compression of the signal.
- Page 76 APPENDIX B: FX TRACK PARAMETERS DEP (Depth) sets the depth and polar orientation of the LFO modulation. Both negative (inverted) and positive modulation depth is possible. Positive values start the oscillation toward the crest phase of the wave. Negative values start toward the trough phase of the wave. A dead center setting, 0, equals no modulation depth at all.
-
Page 77: Appendix C: Midi
APPENDIX C: MIDI APPENDIX C: MIDI This appendix lists the CC and NRPN specification for the Analog Rytm. C.1 GENERAL TRIG PARAMETERS TRIG PARAMETERS Parameter CC MSB CC LSB NRPN MSB NRPN LSB Note Velocity Lenght Synth Trig Sample Trig... - Page 78 APPENDIX C: MIDI SYNTH Parameter CC MSB CC LSB NRPN MSB NRPN LSB Synth Parameter 3 Synth Parameter 4 Synth Parameter 5 Synth Parameter 6 Synth Parameter 7 Synth Parameter 8 SAMPLE Parameter CC MSB CC LSB NRPN MSB NRPN LSB Sample Tune Sample Finetune Sample Bit Reduction...
-
Page 79: C.5 Lfo Parameters
APPENDIX C: MIDI C.5 LFO PARAMETERS Note that the LFO depth is a high-resolution parameter, with CC LSB value. Parameter CC MSB CC LSB NRPN MSB NRPN LSB LFO Speed LFO Multiplier LFO Fade In/Out LFO Destination LFO Waveform LFO Start Phase LFO Trig Mode LFO Depth C.6 FX PARAMETERS... -
Page 80: C.7 Machine Parameters
APPENDIX C: MIDI COMPRESSOR Parameter CC MSB CC LSB NRPN MSB NRPN LSB Compressor Threshold Compressor Attack Time Compressor Release Time Compressor Makeup Gain Compressor Ratio Compressor Sidechain EQ Compressor Dry/Wet Mix Compressor Output Volume C.7 MACHINE PARAMETERS The following shows the SYNTH parameters per MACHINE type. BD PLASTIC Parameter CC MSB... - Page 81 APPENDIX C: MIDI BD CLASSIC Parameter CC MSB CC LSB NRPN MSB NRPN LSB Level Tune Decay Hold Sweep Time Sweep Depth Waveform Transient Tick BD FM Parameter CC MSB CC LSB NRPN MSB NRPN LSB Level Tune Decay FM Amount Sweep Time FM Sweep Time FM Decay Time...
- Page 82 APPENDIX C: MIDI SD HARD Parameter CC MSB CC LSB NRPN MSB NRPN LSB Level Tune Decay Sweep Depth Tick Level Noise Decay Noise Level Sweep Time SD CLASSIC Parameter CC MSB CC LSB NRPN MSB NRPN LSB Level Tune Decay Detune Snap Amount...
- Page 83 APPENDIX C: MIDI RS CLASSIC Parameter CC MSB CC LSB NRPN MSB NRPN LSB Level Tune Osc 1 Decay Osc Balance Tune Osc 2 Symmetry Noise Level Tick Level CP CLASSIC Parameter CC MSB CC LSB NRPN MSB NRPN LSB Level Noise Tone Noise Decay...
- Page 84 APPENDIX C: MIDI CH CLASSIC Parameter CC MSB CC LSB NRPN MSB NRPN LSB Level Tune Decay Color CH METALLIC Parameter CC MSB CC LSB NRPN MSB NRPN LSB Level Tune Decay Time OH CLASSIC Parameter CC MSB CC LSB NRPN MSB NRPN LSB Level...
- Page 85 APPENDIX C: MIDI CY CLASSIC Parameter CC MSB CC LSB NRPN MSB NRPN LSB Level Tune Decay Color Tone CY RIDE Parameter CC MSB CC LSB NRPN MSB NRPN LSB Level Tune Tail Decay Hit Decay Cymbal Type Component 1 Component 2 Component 3 CB CLASSIC &...
-
Page 86: Appendix D: Machines
MACHINE that has been selected. There are several MACHINES to choose from. See “ANALOG RYTM CONTROLS” on page 14 (illustration) for drum track voice allocation. The MACHINES below can be used on all tracks: BD, SD, RS, CP, BT, LT, MT, HT, CH, OH, CY and CB. -
Page 87: D.2 Bass Drum
APPENDIX D: MACHINES D.2 BASS DRUM BDHD (BASS DRUM HARD) TUN (Tune) sets the pitch of the oscillator. (-64–63) SWT (Sweep Time) sets the pitch sweep time. The depth of the sweep is fixed. (0–127) SNP (Snap Amount) sets the snap transient level. (0–127) DEC (Decay) sets the length of the decay phase. - Page 88 APPENDIX D: MACHINES LEV (Level) sets the synth volume. (0–127) BDPL (BASS DRUM PLASTIC) TUN (Tune) sets the pitch of the two interacting oscillators. (-64–+63) SWT (Sweep Time) sets the pitch sweep time of the two interacting oscillators. (0–127) SWD (Sweep Depth) sets the depth of the pitch sweep. (0–127) DEC (Decay) sets the length of the decay phase.
-
Page 89: D.3 Snare Drum
APPENDIX D: MACHINES LEV (Level) sets the synth volume. (0–127) D.3 SNARE DRUM SDHD (SNARE DRUM HARD) TUN (Tune) sets the pitch of the oscillators. The interval between them is fixed. (-64–+63) SWT (Sweep Time) sets the pitch sweep time. (0–127) SWD (Sweep Depth) sets the depth of the pitch sweep. -
Page 90: D.4 Rimshot
APPENDIX D: MACHINES NOD (Noise Decay) sets the length of the noise decay phase. (0–127) NOL (Noise Level) sets the noise level. (0–127) LEV (Level) sets the synth volume. (0–127) SDNA (SNARE DRUM NATURAL) TUN (Tune) sets the pitch of the first oscillator. (-64–+63) DEC (Noise Decay) sets the length of the noise decay. -
Page 91: D.5 Hand Clap
APPENDIX D: MACHINES DEC (Decay) sets the length of the decay phase. (0–127) SYM (Symmetry) adjusts the nonlinearity in the special rimshot circuit. (-64–+63) TIC (Tick Level) sets the level of the transient tick. (0–127) NOL (Noise Level) sets the noise level. (0–127) LEV (Level) sets the synth volume. -
Page 92: D.8 Closed Hihat
APPENDIX D: MACHINES TUN (Tune) sets the pitch of the oscillator. (-64–+63) SWT (Sweep Time) sets the pitch sweep time. (0–127) SWD (Sweep Depth) sets the depth of the pitch sweep. (0–127) DEC (Decay) sets the length of the decay phase. (0–127) TON (Noise Tone) sets the pitch of the noise. -
Page 93: D.9 Open Hihat
APPENDIX D: MACHINES D.9 OPEN HIHAT OHCL (OPEN HIHAT CLASSIC) TUN (Tune) sets the pitch of the oscillators of the open hihat. (-64–+63) DEC (Decay) sets the length of the decay phase. (0–127) COL (Noise Color) sets the timbral color. (-64–+63) LEV (Level) sets the synth volume. -
Page 94: D.11 Cowbell
APPENDIX D: MACHINES DEC (Decay) sets the length of the decay phase of the oscillators. (0–127) LEV (Level) sets the synth volume. (0–127) CYRD (CYMBAL RIDE) TUN (Tune) sets the pitch of the interacting oscillators that make up the ride cymbal model. (-64–+63) TYP (Cymbal Type) selects different sets of fundamental oscillator frequencies, as well as different inter-oscillator logical interaction. - Page 95 1. INTRODUCTION...
-
Page 96: Index
INDEX INDEX Symbols Playing a sound 34 Save kit 28 +DRIVE 14 Selecting a sample 35 Sound menu 31 ACCENT 45 AMP 71 LFO 72 CHAINS 48 MACHINES 22 CHROMATIC MODE 23 Parameters 86 COMPRESSOR 74 MIDI 53 CONDITIONAL LOCKS 44 Channels 55 CONNECTORS 12 MIDI config 53... - Page 97 Swing 45 Track menu 40 Trig menu 41 Trig mute 45 SETUP EXAMPLES 62 Analog Rytm with a monophonic bass machine 62 Analog Rytm with other Elektron gear 62 Analog Rytm with stereophonic drum machine 63 SONGS 48 SOUND ARCHITECTURE 13...
Need help?
Do you have a question about the Analog Rytm and is the answer not in the manual?
Questions and answers