Advertisement
weslo.com
Model No. WLTL99616C.0
Serial No.
Write the serial number in the space
above for reference.
Serial
Number
Decal
ACTIVATE YOUR
WARRANTY
To register your product and
activate your warranty today, go
to iconservice.ca.
CUSTOMER CARE
Call toll-free 1-888-936-4266
Mon.–Fri. 7:30 a.m.–4:30 p.m. ET
(excluding holidays)
or email us at
customerservice@iconcanada.ca
Please do not contact the store.
CAUTION
Read all precautions and
instructions in this manual before
using this equipment. Save this
manual for future reference.
USER'S MANUAL
4.0
Advertisement
Table of Contents

Subscribe to Our Youtube Channel
Related Manuals for Weslo WLTL99616C.0


Summary of Contents for Weslo WLTL99616C.0
- Page 1 USER’S MANUAL Model No. WLTL99616C.0 Serial No. Write the serial number in the space above for reference. Serial Number Decal ACTIVATE YOUR WARRANTY To register your product and activate your warranty today, go to iconservice.ca. CUSTOMER CARE Call toll-free 1-888-936-4266 Mon.–Fri.
- Page 2 Apply the decal in the location shown. Note: The decal(s) may not be shown at actual size. 256836 WESLO is a registered trademark of ICON Health & Fitness, Inc.
-
Page 3: Important Precautions
IMPORTANT PRECAUTIONS WARNING: To reduce the risk of serious injury, read all important precautions and instructions in this manual and all warnings on your treadmill before using your treadmill. ICON assumes no responsibility for personal injury or property damage sustained by or through the use of this product. - Page 4 21. Do not change the incline of the treadmill by 24. Servicing other than the procedures in this placing objects under the treadmill. manual should be performed by an autho- rized service representative only. 22. Inspect and properly tighten all parts each time the treadmill is used.
-
Page 5: Before You Begin
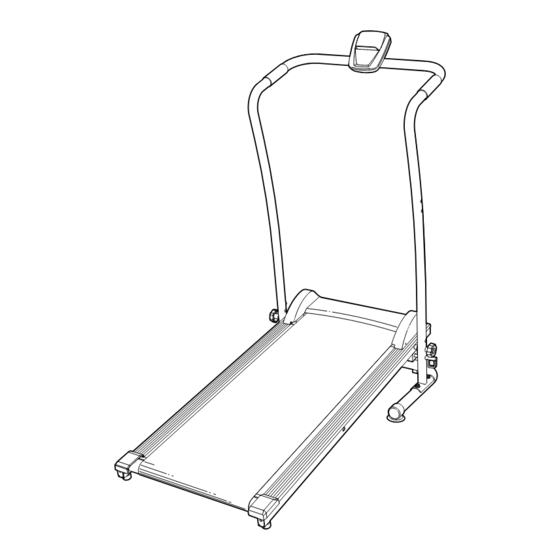
BEFORE YOU BEGIN Thank you for selecting the new WESLO CARDIO manual. To help us assist you, note the product model ® STRIDE 4.0 treadmill. The CARDIO STRIDE 4.0 tread- number and serial number before contacting us. The mill offers a selection of features designed to make model number and the location of the serial number your workouts at home more effective and enjoyable. -
Page 6: Part Identification Chart
PART IDENTIFICATION CHART Use the drawings below to identify small parts used for assembly. The number in parentheses below each draw- ing is the key number of the part, from the PART LIST near the end of this manual. The number following the key number is the quantity used for assembly. -
Page 7: Assembly
ASSEMBLY • Assembly requires two persons. • Left parts are marked “L” or “Left” and right parts are marked “R” or “Right.” • Place all parts in a cleared area and remove the packing materials. Do not dispose of the packing •... - Page 8 3. Raise the Right Handrail (7) and the Left Handrail (5) to the position shown. 4. Attach the Hood (9) to the front of the Frame (10) with four M4 x 12mm Screws (4); start all four Screws, and then tighten them. 5.
- Page 9 6. Insert the Pin (12) into the holes in the Right Handrail (7) and the Frame (10). Make sure that the Pin is fully inserted. Then, attach a Spring Clip (13) to the end of the Pin. IMPORTANT: Make sure that the Pin (12) is fully inserted and that the Spring Clip (13) is attached when the treadmill is being used.
- Page 10 8. Have a second person hold the Center Handrail (16) near the Left and Right Handrails (5, 7). Connect the Lower Handrail Wire (8) to the Upper Handrail Wire (17). Tip: Pull out only enough wire to make a connection. Then, insert the wires downward into the Left Handrail.
- Page 11 10. Hold the Console (18) near the Center Handrail (16). Connect the wire on the Console (B) to the Upper Handrail Wire (17). Attach the Console (18) to the bracket on the Center Handrail (16) with four M4 x 12mm Screws (4);...
- Page 12 CONSOLE DIAGRAM FEATURES OF THE CONSOLE The easy-to-use console features five modes that provide instant exercise feedback during your workouts. Scan (SCAN): This mode displays the time, speed, distance, and calories modes, for a few seconds each, in a repeating cycle. Time (TMR): This mode displays the elapsed time.
- Page 13 HOW TO USE THE CONSOLE To pause the console, stop walking or running. The word STOP will appear in the display. To continue Make sure that batteries (not included) are installed in your workout, simply resume walking or running. the console (see assembly step 9 on page 10). If there is a sheet of plastic on the console, remove the plastic.
-
Page 14: How To Fold The Treadmill
HOW TO FOLD THE TREADMILL FOLDING THE TREADMILL FOR STORAGE 2. Hold the treadmill securely with When the treadmill is not in use, it can be folded to the your left hand compact storage position. CAUTION: You must be as shown. Next, able to safely lift 25 pounds (11 kilograms) to raise insert the Pin (12) or lower the treadmill. -
Page 15: Maintenance And Troubleshooting
MAINTENANCE AND TROUBLESHOOTING MAINTENANCE TROUBLESHOOTING Regular maintenance is important for optimal per- Most treadmill problems can be solved by follow- ing the simple steps below. Find the symptom that formance and to reduce wear. Inspect and properly applies, and follow the steps listed. If further assis- tighten all parts each time the treadmill is used. - Page 16 SYMPTOM: THE WALKING BELT DOES NOT MOVE b. If the walking SMOOTHLY belt has shifted to the left side, a. If the walking use the hex belt is over- key to turn the Walking Belt tightened, left adjustment performance screw clock- may be reduced wise, and the and the walk-...
-
Page 17: Exercise Guidelines
EXERCISE GUIDELINES Aerobic Exercise—If your goal is to strengthen your WARNING: cardiovascular system, you must perform aerobic Before beginning this exercise, which is activity that requires large amounts or any exercise program, consult your physi- of oxygen for prolonged periods of time. For aerobic cian. - Page 18 SUGGESTED STRETCHES The correct form for several basic stretches is shown at the right. Move slowly as you stretch —never bounce. 1. Toe Touch Stretch Stand with your knees bent slightly and slowly bend forward from your hips. Allow your back and shoulders to relax as you reach down toward your toes as far as possible.
- Page 19 NOTES...
-
Page 20: Limited Warranty
LIMITED WARRANTY ICON of Canada, Inc. (ICON) warrants this product to be free from defects in workmanship and material, under normal use and service conditions. Parts and Labor are warranted for ninety (90) days from the date of purchase. This warranty extends only to the original purchaser (customer) and is not transferrable. ICON’s obliga- tion under this warranty is limited to repairing or replacing, at ICON’s option, the product through one of its authorized service providers.
Need help?
Do you have a question about the WLTL99616C.0 and is the answer not in the manual?
Questions and answers