Table of Contents
Advertisement
Advertisement
Table of Contents

Related Manuals for Silhouette Portrait


Summary of Contents for Silhouette Portrait
- Page 1 Getting started with your...
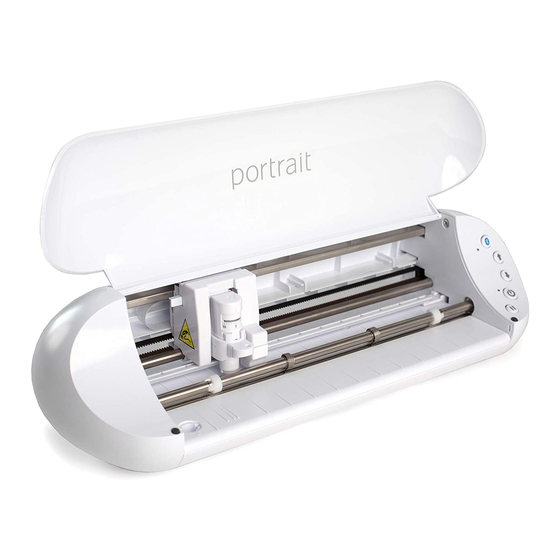
- Page 2 8”x 12” cutting mat Take the Silhouette Portrait® from the box and remove the strips of packing tape and foam as indicated by the following diagram. These strips of tape and foam are used to hold the moving parts of the Silhouette in place during shipment.
- Page 3 Connect the Silhouette Portrait® Once the Silhouette Studio® software is installed, connect the Silhouette Portrait® to the power supply. Then connect the Silhouette to your computer with the included USB cable as shown in the diagram. Turn the machine on by pressing the power button. If your PC displays a “New Hardware Found”...
- Page 4 This design area is your workspace to create projects. This area houses the toolbars, the white design page, and the gray holding area. When you are in the Library, the Silhouette Design Store, or the Send menu, click the Design tab to return to your design page. Store...
- Page 5 Images and designs can be placed on both the gray holding area and the cutting space, but only designs or images within the active cut area (bound inside the red box on the white page) will be sent to your Silhouette. The gray area can be used to place your extra work. Document Tabs Your document tabs are located at the top of your workspace.
- Page 6 Panels Silhouette Studio® design icons open their own panels. Panels open on the right-hand side of the screen when you click a design icon. The first panel you open will be at the top. Any panels you open after the first will replace the panel currently open as long as it is in the default position.
- Page 7 To resize your text, select the text and then click and drag one of the corner control handles. To rotate your text, select the text, then click and drag the green circle displayed above the object. Getting Started with Silhouette Portrait...
- Page 8 Drawing Simple Shapes Silhouette Studio® has built-in functions to draw simple shapes such as circles, squares, rectangles, lines, polygons, and freehand line art. Each of these tools can be found in the toolbar on the left-hand side of the Silhouette Studio® window.
- Page 9 Store Tab The Silhouette Design Store contains thousands of designs, ranging from simple cutouts to intricate patterns and designs, to cut with your Silhouette. Most shapes are only 99¢. Generally, a free shape is posted every week as well. To access the Silhouette Design Store, click the Store tab in the upper-right corner of the software.
- Page 10 Browsing for New Designs The Silhouette Design Store works like any other web page and can be navigated by clicking on various links to browse new releases, popular designs, etc. The home page contains popular and new designs that you may be interested in.
- Page 11 Creating an Account Several different account types exist. Once you’re more familiar with the Silhouette Design Store, you may wish to purchase a subscription and download dozens of designs each month. In order to create a free account and buy designs one at a time, choose the “Sign up FREE” option.
- Page 12 Type your password to authorize the download. Using Your Trial Subscription Card If your Silhouette came with a trial subscription card, you may use it to purchase designs from the Silhouette Design Store. After registering your machine at silhouetteamerica.com/setup, you will receive an email with a unique code that entitles you to a one-month Basic subscription to the Silhouette Design Store.
- Page 13 Click the My Library button to view the Silhouette designs you have on your computer. Silhouette Studio® includes 50 free designs to help you get started. Connect your Portrait to your computer and power it on to get your 50 free designs.
- Page 14 To sync your files, drag them into the cloud icon in your Library folder. The software will prompt you to sign into the cloud with your Silhouette account. Once you sign in, your cloud will start syncing your designs.
- Page 15 If you would like to view the keywords and description for a shape used for searching, right-click (or Control + Click on Mac®) and choose Show Properties. A window with details about the highlighted shape will appear. Shapes downloaded from the Silhouette Design Store will contain several keywords and a description or instructions.
- Page 16 Preparing the Silhouette to Cut Turn the Silhouette Portrait® on by pressing the Power button under the lid and waiting for the machine to start up. To feed a cutting mat into the Silhouette, center the mat between the white rollers and press the Load button.
- Page 17 Different styles of blades are adjusted by different methods. Instructions for adjusting alternate blade types will be included on the blade packaging. In all cases, higher blade settings expose more of the blade and are for cutting thicker materials. Refer to Silhouette Studio® for recommended blade settings for different materials.
- Page 18 The first option on the Action panel is the Simple tab. This is where you can select the material type, the action you want your Silhouette to perform, what kind of blade you are using, what lines you want to be cut, etched, scored, embossed, or stippled.
- Page 19 For more advanced settings, you can use the Line panel, the Fill panel, or the Layer panel. With the Line Panel or the Fill panel, you can assign which task the Silhouette will do according to the image’s line color or fill color.
- Page 20 Bluetooth® button on your Portrait. The LED light next to the Bluetooth® button should illuminate blue. In Silhouette Studio®, go to the Send tab. Click on the Bluetooth® icon at the bottom of the panel and select “Add Bluetooth® machine.” After a few seconds, the status of the Portrait will display as Ready in the Send panel, and the setup is complete.
-
Page 21: Customer Service
Where to Find More Information Complete Software Manual View the complete, illustrated User’s Manual within Silhouette Studio® by clicking Help -> User’s Manual. Website Visit the tutorials section of www.silhouetteamerica.com for help with specific features and step-by- step instructions on how to cut different media types with the Silhouette Portrait®.
Need help?
Do you have a question about the Portrait and is the answer not in the manual?
Questions and answers