Table of Contents
Advertisement
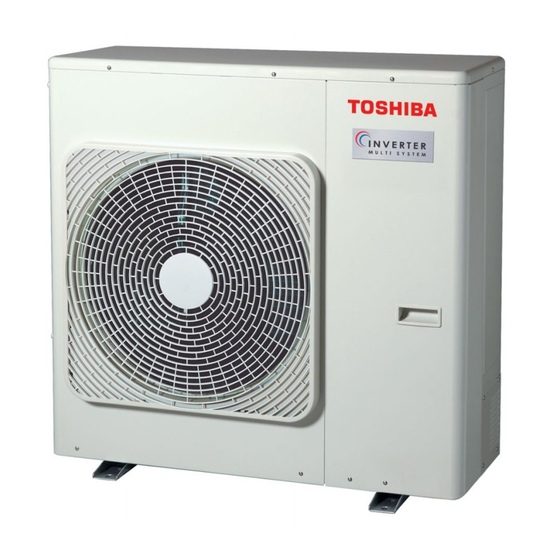
AIR CONDITIONER (MULTI-SPLIT TYPE)
Installation Manual
Outdoor Unit
Model name:
RAS-5M34S3AV-A
RAS-4M27S3AV-A
RAS-3M26S3AV-A
* NOTE:
Descriptions about operations for the E unit in this manual are
not applicable to RAS-4M27S3AV-A.
Descriptions about operations for the D unit and the E unit in
this manual are not applicable to RAS-3M26S3AV-A.
1116791101_EN.indd c1
1116791101_EN.indd c1
1116791101
For OUTDOOR USE only
Installation Manual
Outdoor Unit
Manuel du proprietaire
Unité hydroélectrique
Betriebsanleitung
Wassergerät
English
2
Français
16
Deutsch
30
English
2/3/58 BE 2:20 PM
2/3/58 BE 2:20 PM
Advertisement
Table of Contents

Subscribe to Our Youtube Channel
Related Manuals for Toshiba RAS-3M26S3AV-A


Summary of Contents for Toshiba RAS-3M26S3AV-A
- Page 1 * NOTE: Descriptions about operations for the E unit in this manual are not applicable to RAS-4M27S3AV-A. Descriptions about operations for the D unit and the E unit in this manual are not applicable to RAS-3M26S3AV-A. Installation Manual English Outdoor Unit Manuel du proprietaire Français...
-
Page 2: Table Of Contents
Outdoor Unit Installation Manual Contents Precautions for safety ..................2 Installation / service tools . -
Page 3: Precautions For Safety
Outdoor Unit Installation Manual Precautions for safety The manufacturer shall not assume any liability for the damage caused by not observing the description of this manual. Be sure to read this installation manual carefully before installing. The supplied CD-ROM contains the installation manual translated into many languages. Recommend to the owner to perform maintenance periodically when using over long periods of time. - Page 4 Outdoor Unit Installation Manual CAUTION New refrigerant air conditioner installation THIS AIR CONDITIONER USES THE NEW HFC REFRIGERANT (R410A), WHICH DOES NOT DESTROY THE OZONE LAYER. R410A refrigerant is apt to be affected by impurities such as water, oxidizing membranes, and oils because the pressure of R410A refrigerant is approx.
- Page 5 Outdoor Unit Installation Manual WARNING • Do not use any refrigerant different from the one specified for complement or replacement. Otherwise, abnormally high pressure may be generated in the refrigeration cycle, which may result in a failure or explosion of the product or an injury to your body. •...
- Page 6 Outdoor Unit Installation Manual WARNING • If you detect any damage, do not install the unit. Contact your supplying dealer immediately. • Never modify this unit by removing any of the safety guards or bypassing any of the safety interlock switches. •...
-
Page 7: Installation / Service Tools
68 (RAS-5M34S3AV-A) *2 Need the reducer (12.7 to 9.52 mm). *3 Need the expander (9.52 to 12.7 mm). Total 54 (RAS-4M27S3AV-A) — • Locally procured. 54 (RAS-3M26S3AV-A) Optional parts, accessories Optional parts Parts name Specifications Q’ty Indoor unit Liquid side *4 Refrigerant piping covered with insulating material (Polyethylene Gas side (O.D.) -
Page 8: Installation Of Outdoor Unit
Outdoor Unit Installation Manual Draining Off the Water from the Outdoor Unit Installation of outdoor unit Install 5 waterproof rubber caps and the drain nipple to drain off the Installation Location ■ water from the outdoor unit. • Seal the knock-out holes and screw/thread areas tightly using a silicon •... -
Page 9: Refrigerant Piping
Outdoor Unit Installation Manual Air Purge Refrigerant piping ■ From the sake of environmental protection, use a vacuum pump to extract CAUTION the air during installation. * Prepare a 4 mm hexagon wrench. 1. Connect a charge hose. Install in rooms that are 13 m or larger. - Page 10 Outdoor Unit Installation Manual Pump-down Operation (Recovering refrigerant) Charging Refrigerant ■ ■ • You need not add refrigerant if the piping length is 40 m or less. • If the length exceeds 41 m, add 20 g of refrigerant per 1 meter over. CAUTION Procedure to Charge Refrigerant Since the forcible running for collecting...
-
Page 11: Electrical Work
Outdoor Unit Installation Manual 1. Detach the front panel from the outdoor unit. Electrical work 2. Remove the cord clamp. 3. Connect the wires for the power source and each indoor unit. WARNING • Connect the connecting cable to the terminal as identifi ed by the matching numbers on the terminal block of the indoor and the outdoor unit. -
Page 12: Wiring Between Dred (Demand Response Enabling Device) And Outdoor Unit
Outdoor Unit Installation Manual Wiring between DRED (Demand response enabling device) and Outdoor Unit This model supports DRM1 DRM2 DRM3. AS/NZS 4755 DRM1 DRM2 DRM3 Important notice ■ • Install in accordance with the wiring rules (AS/NZS 3000). • The precautions described below include important items regarding safety. Observe them without fail. - Page 13 Outdoor Unit Installation Manual Connection procedure ■ • This air conditioner complies with AS/NZS 4755.3.1. • DRM available: DRM1, DRM2, DRM3 • The terminal block meets ELV requirements. Demand response interface CN101 CN100 Trans- MCC-1653 former Outdoor control P.C. board CN102 CN105 COM DRM1 DRM2 DRM3...
- Page 14 Outdoor Unit Installation Manual Air conditioner demand response Demand response mode Description DRM1 Compressor off DRM2 E30m ≤ R × 0.50 × 0.5 DRM3 E30m ≤ R × 0.75 × 0.5 *1: E30m = total electrical energy (kWh) used by the air conditioner for all purposes (including compressors, controls and fans) over a 30 min period. *2: R = rated input electrical power of the air conditioner (kW) at rated capacity in the mode in which it is operating during the demand response event (i.e.cooling or heating).
-
Page 15: Test Run
Outdoor Unit Installation Manual : LED ON, : LED OFF, : LED Flash 0 Test run Wiring/Piping Check Description ■ D800 D801 D802 D803 D804 D805 Normal operation (no error) CAUTION Trouble in unit A Trouble in unit B Electric current is applied on the Trouble in unit C Trouble in unit D control board. - Page 16 144 / 9 Moo 5, Bangkadi Industrial Park, Tivanon Road, Tambol Bangkadi, Amphur Muang, Pathumthani 12000, Thailand 1116791101 1116791001_EN.indd 15 1116791101_EN.indd 15 1116791101_EN.indd 15 01/22/15 10:52 AM 2/3/58 BE 2:20 PM 2/3/58 BE 2:20 PM...
Need help?
Do you have a question about the RAS-3M26S3AV-A and is the answer not in the manual?
Questions and answers