LG OPTIMUS L9 User Manual
T-mobile
Hide thumbs
Also See for OPTIMUS L9:
- Quick reference manual (218 pages) ,
- User manual (113 pages) ,
- Instruction manual (45 pages)
Table of Contents
Advertisement
Quick Links
Advertisement
Table of Contents

Related Manuals for LG OPTIMUS L9


Summary of Contents for LG OPTIMUS L9
-
Page 1: User Guide
TM1827 LG OPTIMUS L9 MBM63817905 (1.0) W Printed in Korea... -
Page 4: Table Of Contents
TABLE OF CONTENTS INTRODUCTION ..........4 Support ................4 Service ................5 Your Phone............6 Front view ................ 6 Side/Rear view..............7 Getting Started ..........8 Installing the Micro SIM card and battery ....... 8 Charging your phone ............ 10 Inserting a microSD card ..........12 Removing the microSD card ......... - Page 5 Ending a Call ..............28 Ending a Call from the Status Bar ......... 28 Viewing your call logs ............ 28 Call settings ..............29 Contacts ............29 Searching for a contact ..........29 Adding a new contact ........... 30 Favorite Contacts ............30 Messaging/Email ...........31 Messaging ..............
-
Page 6: Introduction
INTRODUCTION Support This guide provides you with the information you need to get started. For more information and additional support, please visit www.T-Mobile.com/support where you can: • Register at My.T-Mobile.com to check your minutes, pay your bill, upgrade your phone, and change your rate plan. -
Page 7: Service
Service If you are a new T-Mobile customer and your ® service has not yet been activated, call Customer Care at 1-800-937-8997 and a T-Mobile Activations representative will assist you. You will need the following information when activating service: • Service Agreement and agent code on your Agreement. -
Page 8: Your Phone
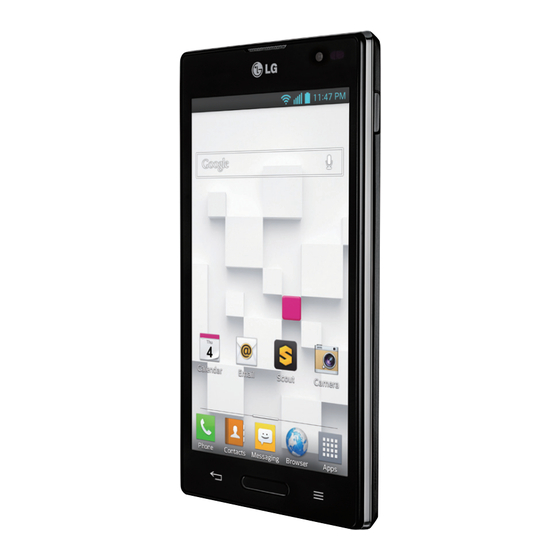
Your Phone Front view 1 Earpiece 2 Front Camera Lens 3 Proximity Sensor 4 Back Key 5 Home Key 6 Menu Key 7 3.5mm Headset Jack 8 Microphone(Sub) 9 Charger/Accessory Port 10 Microphone(Main) -
Page 9: Side/Rear View
Side/Rear view 1 Volume Keys TIP: QuickMemo Press and hold the Volume Up and Volume Down Keys for one second to access QuickMemo (See on page 17). 2 Power/Lock Key 1 Back Cover 5 Back Camera Lens 2 Fingertip Cutout 6 Flash 3 Battery 7 MicroSD Card Slot... -
Page 10: Getting Started
Getting Started Installing the Micro SIM card and battery Before you can start exploring your new phone, you’ll need to set it up. To insert the Micro SIM card and battery: 1 Hold the phone in your hand firmly. With the other hand, lift the back cover using the fingertip cutout located at the bottom of the cover and pull it up to remove it. - Page 11 3 Insert the battery into place by aligning the gold contacts on the phone and the battery and press the battery down until it clicks into place . 4 Align the back cover over the battery compartment and press it down until it clicks into place .
-
Page 12: Charging Your Phone
Charging your phone A rechargeable Li-ion battery is used to power your phone. A USB Adapter, which is included with your phone, is used to charge the battery. Ask your T-Mobile sales representative for further details regarding approved batteries and chargers. Before using your phone for the first time, make sure the battery is fully charged. - Page 13 1 Connect the USB Adapter and USB cable (as shown on the previous page). 2 Plug the USB cable (as shown on the next image) into the phone’s Charger/Accessory Port. Make sure the ‘B’ side on the USB cable is facing upwards.
-
Page 14: Inserting A Microsd Card
Internal Antenna Inserting a microSD card Insert a microSD™ card to use the camera and other multimedia features. Multimedia contents can be saved in the microSD card. NOTE This device supports up to a 32GB microSD card. 1 Remove the back cover as previously described. Fingertip Cutout... -
Page 15: Removing The Microsd Card
2 Then insert the microSD card into the slot. Make sure the gold contact area is facing downwards. Removing the microSD card To safely remove the microSD card from your phone, first you need to unmount it. 1 From the Home screen, tap the Menu Key tap System settings >... -
Page 16: Formatting The Microsd Card
Formatting the microSD card Warning All files stored on your microSD card are deleted when you format the card. NOTE To format the microSD card, you must first unmount 1 From the Home screen, tap the Menu Key tap System settings > Storage. 2 Tap Erase SD card (twice). -
Page 17: Switching Between Applications
Switching between applications Touch and hold the Home Key . A list of recently used applications will be displayed. Then tap the application you want to access. NOTE Swipe an application preview on the recently used apps screen to the left or right to remove it from the list. -
Page 18: Notifications Panel
Notifications Panel Notification icons on the Status Bar report the arrival of new messages, calendar events, alarms, as well as ongoing events, such as when you are on a call. You can view and edit a list of all recent notifications. The Notifications Panel runs across the top of your screen. -
Page 19: Quickmemo
QuickMemo The QuickMemo allows you to create memos and capture screen shots. Capture screens, draw on them, and share them with family and friends with QuickMemo. 1 Enter the QuickMemo screen by pressing both the Volume Keys for one second on the screen you want to capture. -
Page 20: Viewing The Saved Quickmemo
to keep the current memo on the screen and use the phone while keeping the memo in the background. to select whether to use the current screen or a note image as the background screen. Tap share the memo with others via any of the available applications. -
Page 21: Live Zooming
1 Open the Notifications Panel and tap the desired app from the QSlide apps section. - or - While using an application that supports QSlide, . The function will be displayed continuously as a small window on your screen. 2 Slide to adjust the transparency level. -
Page 22: Google Account Setup
NOTE Do not to press too hard; the touch screen is sensitive enough to pick up a light, firm touch. Google Account Setup When you first turn on your phone, you have the opportunity to activate the network, to sign into your Google Account and select how you want to use certain Google services. -
Page 23: Connecting To Networks And Devices
Connecting to Networks and Devices Wi-Fi With Wi-Fi, you can use high-speed Internet access within the coverage of the wireless access point (AP). Enjoy wireless Internet using Wi-Fi, without extra charges. Connecting to Wi-Fi networks To use Wi-Fi on your phone, you need to access a wireless access point or ‘hotspot’. -
Page 24: Bluetooth
You can use Bluetooth to send data by running a corresponding application, but not from the Bluetooth menu as on most other mobile phones. • LG is not responsible for the loss, interception or misuse of data sent or received via the Bluetooth wireless feature. - Page 25 3 Choose the device you want to pair with from the list. Once the paring is successful, your device will connect to the device. NOTE Some devices, especially headsets or hands-free car kits, may have a fixed Bluetooth PIN, such as 0000. If the other device has a PIN, you will be asked to enter it.
-
Page 26: Tethering
3 Pair the devices and tap Accept when you receive a Bluetooth Authorization Request to accept the file(s). Tethering You can use your phone to provide a data connection to a computer by activating data tethering and connecting the phone and computer with a USB cable. -
Page 27: Wi-Fi Direct
HotSpot. A checkmark indicates that the function is active. Then set the desired configuration for your hotspot. You can tap Configure Mobile HotSpot and change any options after initially configuring the hotspot. NOTE To use your phone’s HotSpot capability, you must have the Smartphone Mobile HotSpot service added to your rate plan. -
Page 28: Calls
CREATE GROUP – Touch to activate group owner mode, which enables the legacy Wi-Fi devices to connect by scanning your phone. Calls Making a call 1 From the Home screen, tap Phone to open the keypad. 2 Enter the number on the keypad. To delete a digit, tap Clear 3 Tap Call to make a call. -
Page 29: Answering And Rejecting A Call
Answering and rejecting a call Locked screen To answer an incoming call when the screen is locked, swipe Answer in any direction. Swipe Decline in any direction to decline an incoming call. Unlocked screen To answer an incoming call when the screen is unlocked, tap Answer . -
Page 30: Ending A Call
Ending a Call Tap End to end a call. NOTE To redial recent numbers, touch Redial at the end of the call or find the number within the Call logs and tap Call to the right of the entry. If you end the current call screen and return to the Home screen, you will be notified that you are still on an active call by the green phone icon within the Status Bar. -
Page 31: Call Settings
Tap the Menu Key , then tap Clear to delete entries individually or Clear all to delete all. Call settings You can configure phone call settings, such as call forwarding, and other special features offered by T-Mobile. 1 From the Home screen, tap the Menu Key tap System settings. -
Page 32: Adding A New Contact
name using the keypad. You can also tap a letter along the right side of the screen to access names starting with the chosen letter. Adding a new contact 1 From the Home screen, tap Phone and enter the new contact’s number. 2 Tap the Menu Key >... -
Page 33: Messaging/Email
2 Tap the Favorites tab to view your favorite contacts. 3 Tap a contact to view its details. 4 Tap the gold star to the right of the contact’s name. The star turns grey and the contact is removed from your favorites. Messaging/Email Messaging Your phone combines text and multimedia messages... -
Page 34: Using Smilies
Warning The 160-character limit may vary from country to country depending on how the text message is coded and the language used in the message. Warning If an image, video, or audio file is added to a text message, it will be automatically converted into a multimedia message and your service plan will be decremented accordingly. -
Page 35: Managing An Email Account
Managing an email account The first time you open the Email application, a set-up wizard opens to help you to set up an email account. After the initial setup, Email displays the contents of your inbox. If you have added more than one account, you can switch among accounts. -
Page 36: Visual Voicemail
multiple addresses using semicolons. 3 Tap the Cc and Bcc fields to copy contacts and tap Attach to attach files, if required. 4 Enter the subject and your message. 5 Tap Send to send the message. If you aren’t connected to a network, for example, if you’re working in airplane mode, the messages that you send will be stored in your Outbox folder until you connect to a network again. -
Page 37: Slacker Radio
3 Tap an on-screen voicemail message to play it back. Slacker Radio Slacker offers Internet radio for mobile devices. ® 1 From the Home screen, tap Apps Key > Slacker Radio 2 If prompted, enter your email address and password. –... -
Page 38: Scout
4 Tap any of the available categories to begin viewing. Note T-Mobile TV must be configured over network before first use. 30-days free offer is available for a limited time and subject to change. Unsubscribe during the first 30 days to avoid any charges; access to free content will remain available. -
Page 39: Accessories
Accessories Whether you want a charger, a fashionable carrying case, a Bluetooth headset, or you just want to browse for fun extras, T-Mobile is the place to shop for all your phone accessories. Here are a few examples… Battery Boost Headset MicroUSB Car Charger To purchase accessories for your phone, visit... -
Page 40: Safety Tips
Safety Tips Consider device compatibility If you have a pacemaker or hearing aid, check with your doctor to make sure it is safe for you to use a cell phone. In some cases, cellular radio frequencies can disrupt the performance of other electronic equipment. -
Page 41: Information About Safeguarding Handsets
Information About Safeguarding Handsets T-Mobile encourages customers to take appropriate measures to secure their handsets and invites them to take advantage of the features available on this handset to help secure it from theft and/or other unauthorized access and use. This handset has a locking function (e.g., user-defined codes or patterns) that can serve as a first line of defense against unauthorized use or access to stored information. -
Page 42: Emergency Dialing
Emergency Dialing Although all phones are equipped with 9-1-1 emergency calling, this phone may or may not permit its location to be approximated during a 9-1-1 call.* * Availability of this feature depends on upgrades to the (a) wireless network and (b) 9-1-1 calling system that are required to be installed by the local 9-1-1 response agency or public safety answering point (PSAP);... -
Page 43: Caring For Your Phone
Caring For Your Phone Your phone is a complex electronic device; think of it as a mini-computer. Here are some tips to help you extend the life of your new device: Do not get your device wet. Water will damage your phone and accessories. - Page 44 Smartphone Mobile HotSpot/Tethering: Qualifying plan required. Plan data allotment applies. Use of connected devices subject to T-Mobile’s terms and conditions. Mobile Security: Capable phone required; technical limitations may prevent certain features (e.g., LOCK) from working on certain phones. For a list of eligible devices, visit www.T-Mobile.com/mobilesecurity.
- Page 45 provide quality service to other users, if you roam for a significant portion of your usage, or if you use a disproportionate amount of bandwidth during a billing cycle. You may not use your plan or device for prohibited uses. Downloads/Applications: T-Mobile is not responsible for any third party content or Web site you may be able to access using your phone.
- Page 46 registered trademarks of Deutsche Telekom AG. The Visual Voicemail and T-Mobile TV icons are trademarks, of T-Mobile USA, Inc. Android, Google, Google Play Store, Google Maps, Picasa, and Gmail are trademarks of Google Inc. TeleNav is a registered trademark of TeleNav, Inc. ©2013 T-Mobile USA, Inc.
Need help?
Do you have a question about the OPTIMUS L9 and is the answer not in the manual?
Questions and answers