Table of Contents
Advertisement
Quick Links
Sheet #i-5282 Updated 10/17
StewMac
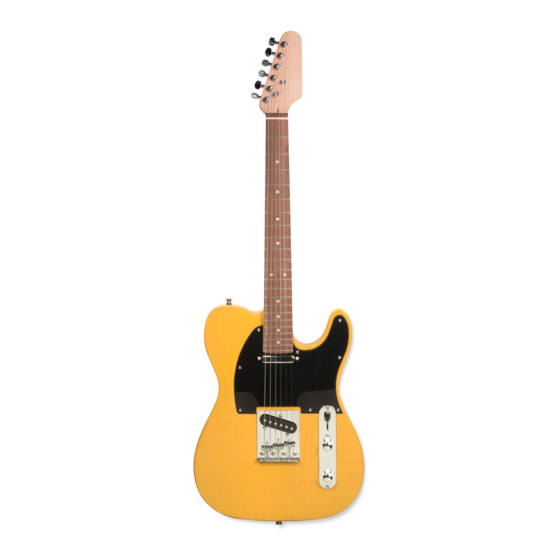
T- ST Y L E
G U I TA R K I T
Assembly Instructions
Welcome to guitar building! If you're a first-time builder,
this kit is a great way to start. You'll have fun and learn a lot.
This simple kit is an excellent entry into electric guitar
assembly. It can be built with basic tools. You'll learn to
cut the peghead shape, attach the neck, and apply a
finish. After you build it, we'll show you how to set it up
to play tip-top.
Advertisement
Table of Contents

Summary of Contents for StewMac T-STYLE
-
Page 1: Assembly Instructions
Sheet #i-5282 Updated 10/17 StewMac T- ST Y L E G U I TA R K I T Assembly Instructions Welcome to guitar building! If you’re a first-time builder, this kit is a great way to start. You’ll have fun and learn a lot. -
Page 2: Table Of Contents
Final setup ..........13 Tools and supplies These are the tools and supplies we recommend for assem- bling this kit. StewMac item numbers are included where applicable. Tools... -
Page 3: Parts List
4mm hex wrench for adjusting truss rod Bridge with mounting screws Output cord Pickguard with mounting screws Output jack with mounting screws Prewired control plate with mounting screws Strings (2 sets) Neck pickup with mounting screws and springs Solder stewmac.com... -
Page 4: Create Your Peghead Shape
For more information on grain filling, see our article #i-5035 ant if not more important than the final spray. The key to a “Using ColorTone Grain Filler” at stewmac.com. great looking finish is patience and lots of it. Be thorough stewmac.com search:... - Page 5 When you’ve finished sanding, wipe the body and neck with a naphtha-dampened rag to remove any oils or grease. From this point on, wear clean gloves when handling so you won’t contaminate the wood. Tape off the string nut before spraying, so it remains free of finish. stewmac.com...
-
Page 6: Spray The Finish
Allow the finish to cure for a week in a cool, dry room. Around 70° at 50% humidity is recommended. After the finish has dried for 1 week, go over the entire Stiff wrist instrument lightly with Light Duty 3M Scotch-Brite Pads or 0000 steel wool for a nice satin appearance. stewmac.com... -
Page 7: Level And Dress The Frets
Turning it right tightens the rod, pulling the neck back. For more information, see our Trade Secrets article #33 “Don’t be nervous about adjusting that truss rod!” at stewmac.com. stewmac.com search: ts33 Color the fret tops with a blue permanent marker to prepare them for leveling. - Page 8 Follow up with Light Duty Scotch-Brite Pads or 0000 steel wool for a final finish. This will remove any of the remaining lacquer from the frets, and polish them to a smooth finish. stewmac.com...
-
Page 9: Assemble Your Guitar
Adjust each side evenly until the pickup fits through the guard. Feed the lead wire from the pickup through the hole in the body running from the bottom of the pickup rout, and feed it through to the control cavity. stewmac.com... - Page 10 The mounting plate sits on a plastic backer. For more information, see our Trade Secrets video #245 “How to install a bolt-on neck” at stewmac.com. stewmac.com search: ts245 Install the pickguard and control plate Lay out the pickguard and control plate using the neck and bridge for reference.
-
Page 11: Wire The Electronics
Solder the white insulated wire to the jack’s tip lug (the rounded lug). Solder the bare ground wire to the jack’s sleeve lug (the square lug). For more information, see our Trade Secrets video #186 “How to get a good clean solder joint!” at stewmac.com. stewmac.com search: ts186 stewmac.com... - Page 12 1 2 3 Solder the bare ground leads of each pickup to the lugs on Note that there is one lead that is not necessary for this the switch housing. circuit. Cut this wire off at the volume pot. stewmac.com...
-
Page 13: Final Setup
You can always go lower or higher depending on your play- ing style. After setting the two E strings, dial in the remaining strings to match the curve of the fretboard’s 16" radius using the cut out gauge included on page 15. stewmac.com... - Page 14 Congratulations! Your guitar is ready to play. We hope this guitar will be the first of many that you have fun assembling and customizing. Be sure to get a gig bag or case, so it doesn’t get banged around! stewmac.com...
- Page 15 Cut-out radius gauge Carefully cut out this radius gauge to check your saddle heights as shown on page 13. We’ve printed two, so you have a backup. stewmac.com...
- Page 16 StewMac tools + ideas for guitarmaking 21 N. Shafer St • Athens, Ohio 45701 • USA USA & Canada call toll-free: 800-848-2273 9am-6pm weekdays Eastern time stewmac.com...


Need help?
Do you have a question about the T-STYLE and is the answer not in the manual?
Questions and answers