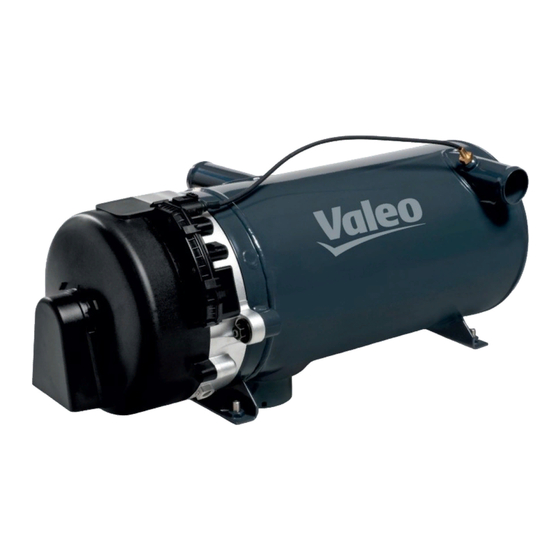
Valeo thermo plus 230 Workshop Manual
Heating systems
Hide thumbs
Also See for thermo plus 230:
- Installation instructions manual (72 pages) ,
- Workshop manual (66 pages) ,
- Operating and service instructions (8 pages)

Subscribe to Our Youtube Channel
Related Manuals for Valeo thermo plus 230


Summary of Contents for Valeo thermo plus 230
- Page 1 HEATING SYSTEMS Thermo plus 230 Thermo plus 300 Thermo plus 350 Workshop Manual Rev. 07/2017 Id.No. 11121156A...
-
Page 2: Table Of Contents
Thermo plus 230/300/350 Content Introduction Content and purpose Effectivity of the workshop manual Meaning of highlighted content Symbols Further documentation to be used Safety information and regulations 1.6.1 General safety regulations 1.6.2 Other safety information Suggestions for improvement and change... - Page 3 Thermo plus 230/300/350 Content 5.5.3 Error symptom "Low voltage" 5.5.4 Error symptom "Extraneous light detected prior to ignition or during purge cycle" 5.5.5 Error symptom "Flameguard defective" 5.5.6 Error symptoms "Temperature sensor / overheating protection defective" and "Overheating" 5.5.7 Error symptom "Circulating pump defective"...
- Page 4 Thermo plus 230/300/350 Content 10 Packing/storage/shipping 10.1 General 1001 Appendix Periodic heater maintenance...
-
Page 5: Introduction
The torque values are shown repair of water heaters (further referred to as heaters) at the symbol and are binding. Thermo plus 230, plus 300 and plus 350. Further documentation to be used ATTENTION: Work on the heater may only be performed by briefed and/or trained by Spheros personnel. -
Page 6: Other Safety Information 102
Thermo plus 230/300/350 1 Introduction 1.6.2 Other safety information 1.6.2.1 Temperature sensors ATTENTION: The temperature sensors cable may not be mechani- cally stressed (pull on the cable, carry the heater at the cable etc.). STOP! Suggestions for improvement and change... -
Page 7: Technical Data
Thermo plus 230/300/350 2 Technical Data Technical Data Unless limiting values are defined, the technical data should be understood with tolerances of ±10% common for heaters at an ambient temperature of +20°C, and at nominal voltage. Table 201 Technical Data... - Page 8 Thermo plus 230/300/350 2 Technical Data Fuel Requirements acc. Summer diesel DIN EN 590 Winter diesel DIN EN 590 Arctic diesel and Diesel for a strong DIN EN 590 winter climate Bio diesel (FAME) DIN EN 12214 Paraffinic diesel fuel from synthesis...
-
Page 9: Description Of Assemblies And Components
The heaters Spheros Thermo plus 230, plus 300 and Heat is generated by combustion of liquid fuels. Via the plus 350 are used in conjunction with the vehicle heating... -
Page 10: Burner Head 302
Thermo plus 230/300/350 3 Assemblies and components 3.1.2 Control device The heaters of the Thermo plus series basically consist of the main components: The control device (Fig. 303) ensures the operating • burner head sequence and burner operation monitoring. It constitutes •... - Page 11 Thermo plus 230/300/350 3 Assemblies and components 3.1.2.2 Flameguard The flameguard (see Fig. 304) is integrated in the control during heater operation. device. The flame guard is a photo transistor that changes its The flameguard monitors the combustion flame condition resistance depending on the incident light.
-
Page 12: Fuel Pump 304
Thermo plus 230/300/350 3 Assemblies and components Disc Flameguard Sight window Fig. 304 Flameguard 3.1.3 Fuel pump atomized by the atomiser nozzle. The solenoid valve installed at the fuel pump opens and closes the fuel supply to the atomizer nozzle. -
Page 13: Electronic Ignition Unit With Ignition Electrodes 305
Thermo plus 230/300/350 3 Assemblies and components The fuel pump can be used in dual-line operation only viscosity is reduced and atomization improved. (fuel supply and return line). The heating time depends on the temperature of intake air If the heater is operated with and the heat reflection from the combustion space. - Page 14 Thermo plus 230/300/350 3 Assemblies and components Retaining clamp Thermostat Heating element NOTE: The disc is displayed transparently. Burner head Fig. 307 Nozzle block preheater Water temperature sensor with integrated overheat protection Fig. 308 Temperature sensors...
-
Page 15: Heat Exchanger 307
Thermo plus 230/300/350 3 Assemblies and components Heat exchanger NOTE: In the heaters are used different combustion chambers depending on the heating capacity class. The heat exchanger (Fig. 309) transfers the heat genera- ted by combustion to the coolant circulation system. -
Page 16: Heater Functions
Thermo plus 230/300/350 4 Heater functions Heater functions nozzle holder with the atomizer nozzle at low tempera- tures, and thus the fuel. The fuel air mixture is ignited in the combustion chamber via a high-voltage ignition spark. General heater functionality... -
Page 17: Operational Heater Sequence 402
Thermo plus 230/300/350 4 Heater functions Operational heater sequence Signals Main switch UPFA Econ. mode Terminal 61 off (parking heating) on (aux. heating) Coolant temperature T > T_min T < T_min T >= T_max T >= T_max Actuators Operation indicator Flame indicator Comb. -
Page 18: Switching Off 403
Thermo plus 230/300/350 4 Heater functions The purge cycle ends approx. after 120 seconds. The always achieved. combustion air fan is switched off. In order to achieve the minimum combustion period, the The heater is in a controlled break. lower switching threshold is variably adjusted by the The operation indicator is on. -
Page 19: Fault Lock-Out And Heater Lock-Out 404
Thermo plus 230/300/350 4 Heater functions Fault lock-out and heater lock-out 30 V within a duration of 6 seconds (purge cycle only, no fault lock-out). A distinction is made between fault lock-out and heater 4.5.2 Malfunctions during heater operation lock-out. -
Page 20: Fault Lock-Out Release And Error Clearance 405
Thermo plus 230/300/350 4 Heater functions 4.5.4 Fault lock-out release and error clearance 4.6.1 Heater lock-out release The fault lock-out is released when the heater is switched To release, the switched on heater must be disconnected off. from the vehicle electrical system as follows. -
Page 21: Troubleshooting
This section describes troubleshooting and error correc- Some troubleshooting procedures require to disconnect tion for Thermo plus 230, plus 300 and plus 350 heaters. the heater from the vehicle electrical system. In case of doubt functional connections can be obtained in ATTENTION: chapters 3 and 4. - Page 22 Thermo plus 230/300/350 5 Troubleshooting Table 501 General error symptoms Error symptom Possible cause Error in the water system Circulating pump does not operate (Aquavent 6000S and • Error mode activated. Aquavent 6000SC only). In case of malfunctions the motor is switched off via the error mode.
- Page 23 Thermo plus 230/300/350 5 Troubleshooting Table 501 General error symptoms Error symptom Possible cause Error in the fuel supply No fuel delivery to the heater. • Fuel tank empty. • Bent, closed, clogged or leaking lines. • Paraffin deposits or frozen water entrapments in fuel lines or lines.
-
Page 24: Malfunction Output Via Flash Code 504
Thermo plus 230/300/350 5 Troubleshooting Malfunction output via flash code After five short signals the long flash signals are counted. The number of long flash impulses corresponds to the If the heater is equipped with a standard timer, the error respective flash code. -
Page 25: Error Symptom "No Start Within Safety Period" 505
Thermo plus 230/300/350 5 Troubleshooting Error symptoms during functional tests with malfunction code output or diagnosis 5.5.1 Error symptom "No start within safety period" If due to a malfunction the heater unsuccessfully attemp- ted to start eight times in sequence, it will be locked-out. - Page 26 Thermo plus 230/300/350 5 Troubleshooting Clean and securely mount the combustion air intake Are the combustion air intake opening and line and the opening and line and the exhaust line. exhaust line clean and securely mounted? Secure fresh air supply. Prevent Is sufficient fresh air intake ensured and are no exhaust fumes exhaust intake.
-
Page 27: 5.5.3 Error Symptom "Low Voltage
Thermo plus 230/300/350 5 Troubleshooting 5.5.3 Error symptom "Low voltage" A value is stored in the control unit as smallest "permis- sible low voltage". It must be noted that the voltage may be lowered during heater start, and that the "low voltage" threshold may be violated. -
Page 28: Error Symptom "Extraneous Light Detected Prior To Ignition Or During Purge Cycle
Thermo plus 230/300/350 5 Troubleshooting 5.5.4 Error symptom "Extraneous light detected prior to ignition or during purge cycle" Correct overheating cause. Did overheating occur? Is the burner properly screwed onto the Properly screw burner onto the heat heat exchanger? exchanger. -
Page 29: Error Symptoms "Temperature Sensor / Overheating Protection Defective" And "Overheating" 509
Thermo plus 230/300/350 5 Troubleshooting 5.5.5 Error symptom "Flameguard defective" The flameguard cannot be replaced. It can only be tested using STT diagnosis. In case of damage or if the target value cannot be reached, the control device must be replaced as needed. -
Page 30: Individual Component Tests 510
Thermo plus 230/300/350 5 Troubleshooting Individual component tests is absolutely necessary. 5.6.3 Combustion chamber visual inspection Individual components can basically be tested using visual inspection or manual electrical testing. • Remove combustion chamber (see 8.12). In addition, the electrical components burner motor, circu- •... - Page 31 Thermo plus 230/300/350 5 Troubleshooting due to increased coolant temperature. Possibly let the heater additionally cool down and have a collec- ting container ready for discharged coolant. Check Resistance vs. temperature charts • Inspect temperature sensor, plug and cable for damage and proper fit.
-
Page 32: Fan And Combustion Air Intake Line Visual Inspection 512
Thermo plus 230/300/350 5 Troubleshooting 5.6.5 Fan and combustion air intake line visual Reconnect the heater with the vehicle electrical system. inspection • Inspect a possibly available combustion air intake line for contamination, condition and deposits. • Remove hood (see 8.4). -
Page 33: Electronic Ignition Unit Inspection 513
Thermo plus 230/300/350 5 Troubleshooting 5.6.7 Electronic ignition unit inspection • Install burner head (see 8.2). NOTE: Manual functional test when disassembled: It is possible to manually test the functionality of the elec- tronic ignition unit, and using the Component Test menu •... -
Page 34: Ignition Electrode Inspection 514
Thermo plus 230/300/350 5 Troubleshooting 5.6.8 Ignition electrode inspection 5.6.9 Flameguard inspection NOTE: NOTE: The ignition electrode insulation may not be damaged. In case of contamination the the flameguard lens and the Ignition electrodes not functioning properly must be inspection glass in the disc (see Fig. -
Page 35: Fuel Pump Inspection 515
Thermo plus 230/300/350 5 Troubleshooting 5.6.10 Fuel pump inspection • Remove ignition electrode (see 8.6). • Remove fuel nozzle (see 8.11). ATTENTION: The pump pressure of the fuel pump is adjusted to a • Screw the pressure test gauge into the nozzle block defined value in the factory. -
Page 36: Solenoid Valve Inspection 516
Thermo plus 230/300/350 5 Troubleshooting 5.6.11 Solenoid valve inspection • Install ignition electrode (see 8.6). • Install burner head (see 8.2). Caution! Risk of burns! The coil of the solenoid valve can heat up in switched- on condition. The solenoid valve must only be completely replaced. -
Page 37: Nozzle Block Preheater Inspection 517
Thermo plus 230/300/350 5 Troubleshooting Manual inspection space. Above 8 °C the thermostat switches off. • Remove burner head (see 8.2). The power consumption of the heating element at 24V is approx. 80W. • Disconnect the solenoid valve plug from the control device. -
Page 38: Circulating Pump Inspection 518
Thermo plus 230/300/350 5 Troubleshooting Thermostat Holding clamp Heating element Fig. 513 Nozzle block preheater 5.6.13 Circulating pump inspection ATTENTION: The circulating pump fuse may never be pulled, while the pump is running. Inspection using the STT diagnosis • Check electrical connections as well as the leak-tight- ness of the cooling system. -
Page 39: Wiring Diagrams
Thermo plus 230/300/350 6 Wiring diagrams Wiring diagrams General The following figures represent heater connection options to the vehicle electrical system. The minimum cable cross-sections indicated in the table must be applied. Cable length <7.5m Cable length 7.5 - 15m 0.75 mm²... - Page 40 Thermo plus 230/300/350 6 Wiring diagrams Up to 85°C ambient temperature Terminal 58 Terminal 15 Terminal 30 (permanent plus) Terminal 31 (ground) Terminal 61 (D+) T. 30 UP, DVW 2.5mm T. 31 UP, DVW 2.5mm 1 - 4 must be all connected T.
- Page 41 Thermo plus 230/300/350 6 Wiring diagrams Up to 100°C ambient temperature Terminal 58 Terminal 15 Terminal 30 (permanent plus) Terminal 31 (ground) Terminal 61 (D+) T. 30, UP, DVW 2.5mm T. 31, UP, DVW 2.5mm 1 - 4 must be all connected T.
- Page 42 Thermo plus 230/300/350 6 Wiring diagrams Position Designation Operation indicator max. 1x5W or 2x2W Flame indicator Circulation pump Spheros Thermo Test (diagnostic tool) F1, F2* Car flat-type fuse 25A acc. to DIN 72581 part 3 or ISO 8820-3 F3 - F7 Car flat-type fuse 5A acc.
- Page 43 Thermo plus 230/300/350 6 Wiring diagrams Wiring harness Fig. 605 Wiring harness 11123331A02 for up to 100°C ambient temperature - connector and pin assignment Wiring harness Fig. 606 Wiring harness 11123507A00 for up to 100°C ambient temperature - connector and pin assignment...
- Page 44 Thermo plus 230/300/350 6 Wiring diagrams Wiring harness Fig. 607 Wiring harness 11123530A00 for up to 100°C ambient temperature - connector and pin assignment...
-
Page 45: General 601
Thermo plus 230/300/350 7 Servicing Servicing Within the scope of the adjustment, the motor speed must be changed in such a way, that the required CO content in the exhaust gas is established (ref. to Table General in 2 Technical Data). -
Page 46: Burner Head, Components And Heater Removal And Installation
Thermo plus 230/300/350 8 Repairs Burner head, components and heater removal and installation General Warning! Danger to life and health! The safety hints and regulations in Chapter 1 (see 1.6) must be adhered. ATTENTION: Prior to disassembling components the heater must... -
Page 47: Burner Head Removal And Installation
Thermo plus 230/300/350 8 Repairs Burner head removal and installation Burner head removal Burner head installation 1. Disconnect the heater from the vehicle electrical sys- 1. Bring burner head (1, Fig. 801) in assembly position tem (Observe and ensure center alignment and correct fit. -
Page 48: Removal And Installation Of The Temperature Sensor With Integrated Overheating Protection
Thermo plus 230/300/350 8 Repairs Removal and installation of the Hood removal and installation temperature sensor with integrated overheating protection Removal 1. Disconnect the heater from the vehicle electrical sys- tem (Observe 2. Loosen screws (2, Fig. 803). 3. Remove hood (1). -
Page 49: Electronic Ignition Unit And Ignition Electrode Removal And Installation
Thermo plus 230/300/350 8 Repairs Hood Screws (2)(not removable) Circlip Fan wheel Burner motor 2 Nm +0.5 Nm Fig. 803 Fan wheel removal and installation Electronic ignition unit and ignition electrode removal and installation Removal Installation 1. Remove burner head (see 8.2). -
Page 50: Control Device Removal And Installation
Thermo plus 230/300/350 8 Repairs Electronic ignition unit Ignition electrode Disc Screws (2) Light window Flame guard 5 Nm +1 Nm Fig. 804 Electronic ignition unit / ignition electrode removal and installation Control device removal and 4. Install the fan wheel (see 8.5). - Page 51 Thermo plus 230/300/350 8 Repairs Electronic ignition unit 5 +1 Nm Combination screw (2) Ignition electrode Fuel nozzle Disc 20 ±2 Nm Solenoid valve Nozzle block preheater (optional) Retaining clamp Fuel pump 10 O-rings (2) 11 Screen insert 12 Screws (3)
-
Page 52: Solenoid Valve Removal And Installation
Thermo plus 230/300/350 8 Repairs Solenoid valve removal and Installation 1. If necessary, install solenoid valve (6, Fig. 805) onto installation the fuel pump (9) (siehe 8.9). NOTE: 2. Install new O-rings (10) and a new screen insert (11) The solenoid valve must be completely replaced and may into the fuel pump (9). -
Page 53: Nozzle Block Preheater Removal And Installation
Thermo plus 230/300/350 8 Repairs 2. Using a suitable tool, tighten hexagon, wrench size 16 nic ignition unit by twisting a screwdriver sideways Fig. 806) of the solenoid valve. (see Fig. 804) and remove it. 3. Connect the solenoid valve plug (6, Fig. -
Page 54: Fuel Nozzle Removal And Installation
Thermo plus 230/300/350 8 Repairs 8.11 Fuel nozzle removal and installation nozzle wrench is used, a tool must be used to exert counter pressure onto the hexagon of the fuel pump nozzle holder (9). Removal 2. Fit the disc (5) onto the nozzle holder of the fuel pump 1. -
Page 55: Heat Exchanger Removal And Installation
Thermo plus 230/300/350 8 Repairs Installation 9. If necessary remove temperature sensor (see 8.3). 10. Remove heat exchanger from vehicle. ATTENTION: Installation When replacing the combustion chamber, ensure that 1. Position the combustion chamber (1) correctly into the the new combustion chamber corresponds to the heat exchanger (2) (see Fig. -
Page 56: Start-Up After Burner Head Or Heater Installation
Thermo plus 230/300/350 8 Repairs 8.15 Start-up after burner head or heater While the vehicle engine is switched off, switch on the heater with the circulating pump and the vehicle heating installation fan. After the engine motor cooled down, the heater must The fuel system must be bleeded after burner installation. - Page 57 Thermo plus 230/300/350 9 Modifications and retrofits Modifications and retrofits General For further optimization the heaters are continuously improved. Units in the field can usually be upgraded or retrofitted. For this purpose respective modification kits will be available.
- Page 58 Thermo plus 230/300/350 10 Packing/storage/shipping Packing/storage/shipping 10.1 General The heater or its components, which are sent to Spheros for inspection or repair, must be cleaned and packaged to ensure that handling, transport and storage will not damage them. ATTENTION: If a complete heater is sent back, it must be comple- tely drained.
- Page 59 Maintenance plan for Spheros heaters of type Thermo, Thermo E, Thermo S and Thermo plus in buses und railway vehicles Periodic heater maintenance adhered. If there no such regulations, Spheros prescribes the here shown maintenance intervals for common The heater should be inspected in periodic time intervals, applications.
- Page 60 9.5 ±0.5 Thermo E 200 10.0 ±0.5 Thermo E 300 9.5 +1.5 Thermo S 9.0 +1.5 Thermo plus 230 9.5 +1.5 Thermo plus 300/350 (ppm) at 19V _ < 1000 Rail versions _ < 4 Smoke spot number acc. to Bacharach (all devices)
- Page 61 Maintenance plan for Spheros heaters of type Thermo, Thermo E, Thermo S and Thermo plus in buses und railway vehicles 7. Functional check a) If available, open shut-off valve of the fuel return line and water line. b) Check fault memory, clear it as needed using the diagnostic tool (STT).
- Page 62 memos...
- Page 63 Valeo Thermal Commercial Vehicles Germany GmbH Postfach 1371 - 82198 Gilching - Germany - Tel. +49 (0)8105 7721-0 - Fax +49 (0)8105 7721-889 www.valeo-thermalbus.com - service-valeobus@valeo.com...
Need help?
Do you have a question about the thermo plus 230 and is the answer not in the manual?
Questions and answers