Table of Contents
Advertisement
Quick Links
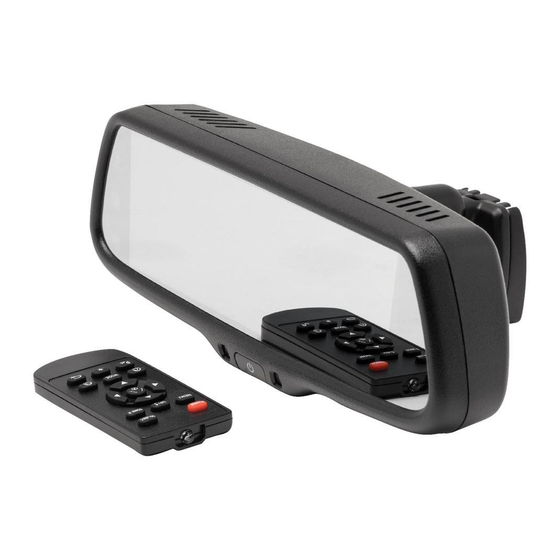
MIR-DVR
Rear View Mirror
CONGRATULATIONS on your choice of a CrimeStopper Universal Rear View Mirror. This booklet contains all of
the necessary information for connecting and using your mirror. If any questions should arise, contact your
installation facility or check out the Knowledge Base at www.crimestopper.com
Installation manual
1230-62521-01
Advertisement
Table of Contents

Related Manuals for CrimeStopper MIR-DVR


Summary of Contents for CrimeStopper MIR-DVR
- Page 1 MIR-DVR Rear View Mirror CONGRATULATIONS on your choice of a CrimeStopper Universal Rear View Mirror. This booklet contains all of the necessary information for connecting and using your mirror. If any questions should arise, contact your installation facility or check out the Knowledge Base at www.crimestopper.com...
-
Page 2: Warranty
WHAT IS COVERED This warranty applies only to CrimeStopper products sold to consumers by authorized CrimeStopper dealers in the United States of America Products purchased by consumers from an Authorized CrimeStopper Dealer in any other country are covered only by that country’s Distributor and not by Rockford Corporation. -
Page 3: Table Of Contents
The MIR-DVR comes with a variety of mounting adaptors for your vehicle or the optional MIR-BRKT437 may be needed in select installations. -
Page 4: Wiring
Wiring Harness MIR-DVR YELLOW - 12V CONSTANT Connect to 12V constant source BLACK - GROUND This wire needs to be grounded to a clean, paint free metal surface of the vehicle. The best installation practices recommend grounding in the kick panel area of the vehicle. -
Page 5: Wiring
Wiring Diagram Connects to Camera Harness Mirror Connector Power to Camera Camera Harness Camera Input Connect to Main Harness Camera Connector... -
Page 6: Specifications
Specifications SCREEN SIZE 4.3” DISPLAY RESOLUTION 480(H) X 272(V) CAMERA ANGLE 140° RECORDING RESOLUTION 1080P 25FPS, 720P 30FPS PHOTO RESOLUTION 1M 1280X960 2M 1600X1200 3M 2048X1536 5M 2560X1920 MICROPHONE Built-in VIDEO SIGNAL PAL/NTSC MICRO SD CARD Up to 32GB OPERATING VOLTAGE 9-16 Volts CURRENT DRAW 71mA... -
Page 7: Remote Functions
Remote Functions Turn the LCD screen ON or OFF When not recording: Enter the settings menu When recording: Will hard code le (only can be deleted by formating SD card) When recording: Single press will start or stop the recording Playback: Single press will start or pause playback When in Settings: Enter a menu and make selection in menu Switch between Recording, Snap shot and playback modes... -
Page 8: Setup / Menu Settings
Start Up Screen 1080P 07:34:35 2017-09-13 07:36:27 To enter into the settings menu, stop any recordings. Press the “MENU” button once to enter the Video Recording Quality menu. - Page 9 Video Quality 1080P 720P 1080P Choose the quality of the video recording you would like using the Up/Down and Select buttons. VGA - Uses the least amount of space on SD card. 1080P - Uses the most amount of space on SD card.
- Page 10 Settings Menu 1080P Setting Auto Detect Time Stamp Audio Language Frequency Pressing the “MENU” button twice will open up the Settings Menu. Press the “UP” and “DOWN” button to scroll through the menu. Press the “SEL/REC” button to enter a menu.
- Page 11 Auto Detect 1080P Auto Detect To save space on the memory card you may choose to activate the Auto Detect feature. When activated the mirror will start recording if the camera sees motion when powered on instead of continuous recording. Press the “UP”...
- Page 12 Time Stamp 1080P Time Stamp The TIME STAMP function will add an embedded time code into the video when activated and will be displayed upon playback. Press the “UP” and “DOWN” button to scroll through the menu. Press the “SEL/REC” button to enter.
- Page 13 Audio Menu 1080P Audio To activate AUDIO recording set to ON. This will record external audio through the built-in microphone. Press the “UP” and “DOWN” button to scroll through the menu. Press the “SEL/REC” button to enter.
- Page 14 Language Menu 1080P Language 中文 体 中文繁体 English Deutsch 日本言 Allows you to select the operating language of the display and menus. The default language is set to ENGLISH. Press the “UP” and “DOWN” button to scroll through the menu. Press the “SEL/REC” button to enter.
- Page 15 Frequency Menu 1080P Frequency 50Hz 60Hz The default video frequency is 50Hz. If your image appears “fuzzy” switch the frequency to attempt to improve quality. Press the “UP” and “DOWN” button to scroll through the menu. Press the “SEL/REC” button to enter.
- Page 16 Parking Guard 1080P Parking Guard If on, the DVR will automatically begin recording if the G-Sensor is triggered while the vehicle is turned off. Note: G-Sensor MUST be turned ON to work. Press the “UP” and “DOWN” button to scroll through the menu.
- Page 17 Keytone 1080P Keytone When pressing buttons on the remote, the system will provide a confirmation tone. Turn Keytone OFF to silence these tones. Press the “UP” and “DOWN” button to scroll through the menu. Press the “SEL/REC” button to enter.
- Page 18 G-Sensor 1080P G_sensor Adjusts how sensitive the High G-Sensor is. HIGH = Very Sensitive. Middle LOW = Not Very Sensitive. The G-Sensor activates with a sudden change in acceleration or impact often being triggered in a crash or by the vehicle being hit. G-Sensor triggered recordings are locked and can only be deleted by reformatting the SD card.
- Page 19 Backlight 1080P Backlight Time 10Sec 1 Min 3 Min Determines how long the LCD panel will stay ON. Driving with the LCD panel ON can be very distracting, especially at night. Press the “UP” and “DOWN” button to scroll through the menu.
- Page 20 TV System 1080P TV system NTSC The TV system setting determines the file format that video is recorded in allowing it to viewed on other video devices of the same format. NTSC (Default) - United States and Canada PAL - Most Other Countries Press the “UP”...
- Page 21 Dimming Feature 1080P Dimming NOTE: This model does not have a dimming feature included.
- Page 22 Version Info 1080P GMD-F23-XXXXX-20160611 07:34:35 2017-09-13 07:36:27 Shows the firmware version of the system. Press the “UP” and “DOWN” button to scroll through the menu. Press the “SEL/REC” button to enter.
- Page 23 Date Set 1080P 2017-09-13 00:49:41 07:34:35 2017-09-13 07:36:27 Change date and time by using the button on the remote. Set in the YYYY-MM-DD format. Press the “UP” and “DOWN” button to scroll through the menu. Press the “SEL/REC” button to enter.
- Page 24 Formating 1080P Disk Format 07:34:35 2017-09-13 07:36:27 Performs formating of the SD card. This wipes all files on the card and is the only way to delete G-Sensor coded videos. Press the “UP” and “DOWN” button to scroll through the menu.
- Page 25 Default Settings 1080P Default Set 07:34:35 07:34:35 2017-09-13 07:36:27 2017-09-13 07:36:27 Reset all settings to factory default. Press the “UP” and “DOWN” button to scroll through the menu. Press the “SEL/REC” button to enter.
- Page 26 Picture-in-Picture Display 07:34:35 2017-09-13 07:36:27 This DVR rear view mirror can display two channel video on the high brightness screen simultaneously. You can switch the video channel by pressing the “UP” button when not recording. This requires a secondary camera such as a backup camera to be connected and active while powered up.
-
Page 27: Picture-In-Picture
P-I-P Option 1 07:34:35 2017-09-13 07:36:27 PICTURE IN PICTURE OPTION 1 FORWARD LOOKING = Main image SECOND CAMERA VIEW = In-picture image... - Page 28 P-I-P Option 2 07:34:35 2017-09-13 07:36:27 PICTURE IN PICTURE OPTION 2 SECOND CAMERA VIEW = Main image FORWARD LOOKING = In-picture image...
- Page 29 P-I-P Option 3 07:34:35 2017-09-13 07:36:27 PICTURE IN PICTURE OPTION 3 Both images equally shown...
-
Page 30: Photograph Mode
Photograph Mode 2017-09-13 07:36:27 26963 Photograph mode allows you to take snap shots by pressing the “SEL/REC“ button on the remote. Press the “MODE“ button to enter Snap Shot mode. - Page 31 Photo Quality In Photograph mode you can change the image quality by accessing the settings menu by pressing the “MENU“ button on the remote. Press the “UP” and “DOWN” button to scroll through the menu. Press the “SEL/REC” button to enter.
-
Page 32: Playback Mode
Video Playback AWW_A0000012.avi 2017-09-13 07:05:27 1080P 2017-09-13 07:36:27 7/20 Press “MODE“ until you get to Video Playback menu. Pressing the “UP“ and “DOWN“ buttons to scroll through the videos. Press the “SEL/REC“ button to play video. - Page 33 G-Sensor Video 1080P SOS_A0000012.avi 2016-06-12 20:10:30 1080P 2016-06-13 01:40:24 6/20 Videos displaying the LOCK symbol in the lower left corner means the video is hard coded to the SD card. It can be played but can only be deleted by formating the SD card.
- Page 34 Video Deleting AWW_A0000012.jpg 2016-06-12 20:10:50 Setting Delete le Delete all les Pressing the “MENU“ button in video playback will bring up your delete options. Selecting DELETE or DELETE ALL will only erase NON-HARD CODED video.
- Page 35 Confirm Deleting AWW_A0000012.jpg 2017-09-13 07:36:27 Delete file After selecting to delete a file, you will be asked to confirm the deletion to prevent accidental deleting of files.
-
Page 36: Video Recording
Video Recording Mode 07:34:35 2017-09-13 07:36:27 Press the “REC” button to turn ON/OFF video recording When recording, press the “MENU” button to save the current video as a read-only video file. Press the “DOWN” button to turn ON/OFF volume recording. A BLACK camera icon in the upper right corner indicates that video is not currently being recorded. - Page 37 Recording With Audio 00:03:52 2017-09-13 07:36:27 When recording, the camera in the upper right corner will turn from BLACK to YELLOW. The time in the bottom center of the screen will change from WHITE to RED and begin counting up from zero indicating current recording time.
-
Page 38: Notes
Notes... - Page 39 Notes...
Need help?
Do you have a question about the MIR-DVR and is the answer not in the manual?
Questions and answers