Advertisement
Quick Links
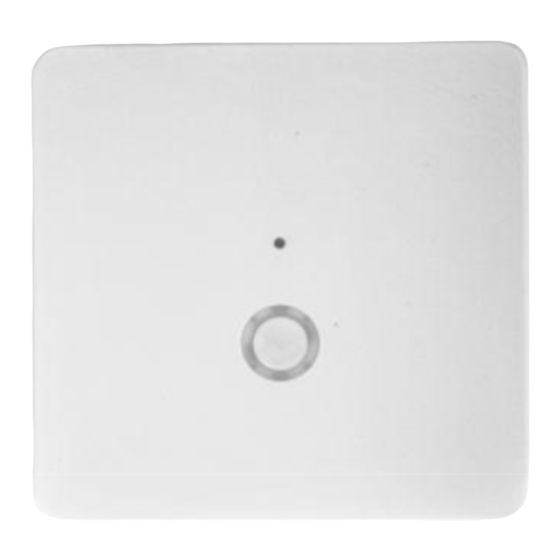
The Z-Box Smart Home Controller
Version 2/ Z-Wave Cert No: ZC10-XXXXXXXX
Quick Start
This device is a control center (gateway) for Z-Wave home automation networks. It is used to control different
single devices as well as complete defined scenes and actions combining device functions within the network.
It needs only a few steps to get your Z-box up and running.
1.
Power it up by plugging in the external power supply
2.
Connect the z-box to your local router using a standard Ethernet cable
3.
Use a web browser on your desktop PC or mobile internet device and go to login page .Input the IP
address into the address bar, press ENTER to enter the login page.(IP address:192.168.10.1)
4.
Login using the initial local default login (login: admin; password: 123456)
5.
Got to setup (upper right corner)
password. This password is used for accessing the controller from outside the home. It is shared among all
local users in the home. If you want to protect your login from other users inside the home, change the local
default password.
6.
Define your rooms using
7.
Setup the other users and give them access to the rooms.
8.
Installing your smart home devices one by one. Use the dialog
Hardware
The Z-Box is a small but powerful hardware offering various interfaces:
• Power Input: The device is powered by AC adapter DC9V 1.3A.
• Ethernet: The device can be connected to any standard 10/100 MBit/s Ethernet router
• 3 * USB (2 inside the chamber and 1 external): The 3 USB ports allow to connect additional communication
or storage options such as an EnOcean dongle, Bluetooth dongle, hard disk or any other USB device suitable
for Z-box.
Installation
• Connect to Router
Using the LAN cable connect the Z-box to your router.
My Settings
Rooms
, remember your remote access ID and define your remote
Devices
for this
1
Advertisement

Subscribe to Our Youtube Channel
Related Manuals for Z-Wave Z-Box

Summary of Contents for Z-Wave Z-Box
-
Page 1: Quick Start
Version 2/ Z-Wave Cert No: ZC10-XXXXXXXX Quick Start This device is a control center (gateway) for Z-Wave home automation networks. It is used to control different single devices as well as complete defined scenes and actions combining device functions within the network. -
Page 2: Led Behavior
4 x 2400mA Ni-MH rechargeable batteries – please DON’T MIX different capacity/brand/age of batteries. To install the batteries, pry open the lid of the Z-box at the notch in the back just above the cable ports. LED Behavior... - Page 3 Defaulting Network Settings To reset the Network to the default settings, press and hold the Main button (on top of the Z-box) for 10 seconds. Release the button when the LED quickly flashes red indicating reset. Refer to the Dome App to...
- Page 4 Resetting the Z-box will delete all the settings, disconnect all Z-Wave devices and delete all of the presets. To revert to the Factory default settings, press and hold the Reset button (inside the Z-box) for 10 seconds. Release the button when the Status LED quickly flashes red indicating reset.
-
Page 5: Functions Of The User Interface
Devices You can include all certified Z-Wave devices. If you can’t find your device in the list of known devices please use the Autodetect function. It will create the same result but you need to find out from the device manual how to add (include) the device to the network. - Page 6 Z-Wave devices and the Z-Wave network. A link refers to the Z- Way Expert User Interface. Please note that this Expert User Interface is for Z-Wave experts. The Razberry documentation and user forums will provide help for its use if needed. Direct access to the Z-...
- Page 7 Power it up. After about 1 minute open a web browser and point to find.zwave.me Below the login screen you will see the IP address of your Z-Box system. Click on the IP address link to open the configuration dialog.
- Page 8 Also in case the IP address of your Z-Box changes you may have difficulty to find the new address. Hence we recommend using find.zwave.me. The same time w e w ant you to have 100% control of any cloud service usage of your system.
- Page 9 Just visit the Google App store or the iOS app store for native apps with the name “Z-Way”. The Z-Wave Expert UI The Z-Wave Expert User Interface is d esig ned for installers, technically savvy people and other users that know how to built and maintain a Z-W ave based wireless network. Hence it uses some Z-Wave specific language and offers detailed insight into the work and data structure if the Z-Wave network.
- Page 10 The Z-Wave Expert UI do e s n o t p r ov i d e a n y a c c e s s t o h i g h e r or d e r bu s i...
- Page 11 Control The Control Tab allows operating the various types of devices and shows the reported values in case of sensors or meters. In case the control options offered here are not sufficient please refer to the Expert Command Tab as part of the Configuration menu for a full set of functions supported by the device.
- Page 12 Meters The meter dialog lists all devices of the network providing (accumulating) meter information. Device name and id, the type of the meter, the actual meter value and the meter scale is listed. The Date/time column indicates when the given sensor value was received. Its possible to call for a meter update but bear in mind that battery operated device will only respond after the next wakeup.
- Page 13 Attention: The temperature value does not differentiate between heating and cooling devices. If a cooling and a heating function shall have different set points please refer to the expert command section for more precise command settings. DoorLocks The door lock dialog lists all door lock devices of the network. Device name and id, the current status of the lock and last time of the change of the status is listed.
- Page 14 The type info dialog lists all devices of the network and indicates if they support enhanced Z-Wave functions such as Security and Z-Wave Plus. Their Z-Wave protocol version, their application version and their device type indicator is shown for information purposes too.
- Page 15 Configuration The Configuration Tab allows configuring the functions of the device. Pick the device to be configured from the drop down list to access four tabs. Interview The device interview section shows the result of the device interview. In this process the controller tries to get information about the device.
- Page 16 Refer to the ‘Expert Commands’ tab for a complete set of controls. • S witch Al l con figuration: Z-Wave supports the so called switch all function as a broadcast to all switches and dimmers. This setup defines the reaction of the device to such a “Switch All”...
- Page 17 A ssociation Associations allow switching a Z-Wave device B (target) as a result of an event in Z-Wave device A (source). Z- Wave device A offers lists of devices to switches for each event supported. The list of these events - also called association groups - and the devices that are associated with it are shown in the Association tab.
- Page 18 Exp e rt Command s The expert command section displays the status values and possible commands in a very generic way. On the left hand side the different channels of the device are listed in a column. In case there is only one channel (that’s the case for most devices) only channel 0 is shown. Clicking on the number opens a dialog showing all internal variables for the channel.
- Page 19 ‘BIN’ format or ‘HEX’ format. The target field allows specifying the target memory/processor for the update process. For updating the Z-Wave firmware part a ‘0’ must be set. The firmware updating process will take up to 10 minutes. Please don’t do any other operation during this time.
- Page 20 A checkbox defines if the node information in the z-wave chip itself shall be overwritten as well. This operation result in a possible loss of all network relationships and may require a re- inclusion of devices.
- Page 21 The function Remove Failed No d e allows removing a node that is not longer communicating with the controller. After multiple failed communications with a device the controller will mark this device as failed and avoid further communication. This function finally removes such a device from the network configuration.
- Page 22 Changing the frequency may result in malfunction of your network. If you are uncertain about the consequences of this change, don’t touch the buttons! The Z-Box hardware can be changed into every valid frequency however the antenna filter used with Z-Wave transceivers will attenuate the wireless signal for wrong frequencies. At the moment there are three different types of antenna filters allowing operation in the three frequency groups.
- Page 24 This table shows the neighborhood relationship of devices. The id, the name and the type of the node are listed. Dark green indicates that the two devices are in direct wireless neighborhoods and don’t need any other device to forward their signals. A Light green connection needs one router between.
- Page 25 It is however also possible that a battery operated device just went back to sleep too fast. Z-Wave pros can read a lot out of this timing information particularly when combined with the routing table.
- Page 26 The second block gives detailed information about the Role of the controller in the network, the Z-Wave transceiver hardware used, firmware running on the Z-Wave transceiver and the release information of the Z-Way software. This information may be needed during support and debugging.
- Page 27 The last block shows the availability of the function calls on the serial API between the Z-Wave transceiver and Z- Way. ‘Not implemented’ means that Z-Way is either not knowing about the function indicated by the function ID or does not make any use of it. A red function call id or name indicated that Z-Way is able to use this function but the transceivers firmware did not report to offer this service.
-
Page 28: Fcc Radiation Exposure Statement
Supported + Controlled, Wakeup V2 Controlled, Z-WavePlus V1 Supported + Controlled Support Should you encounter any problem, please give us an opportunity to address it before returning this product. Most questions regarding Z-Wave wireless communication standard can be answered through the international community at www.z-wave.info FCC STATEMENT : This device complies with Part 15 of the FCC Rules.
Need help?
Do you have a question about the Z-Box and is the answer not in the manual?
Questions and answers