
Related Manuals for Avayon DXP-10P

Summary of Contents for Avayon DXP-10P
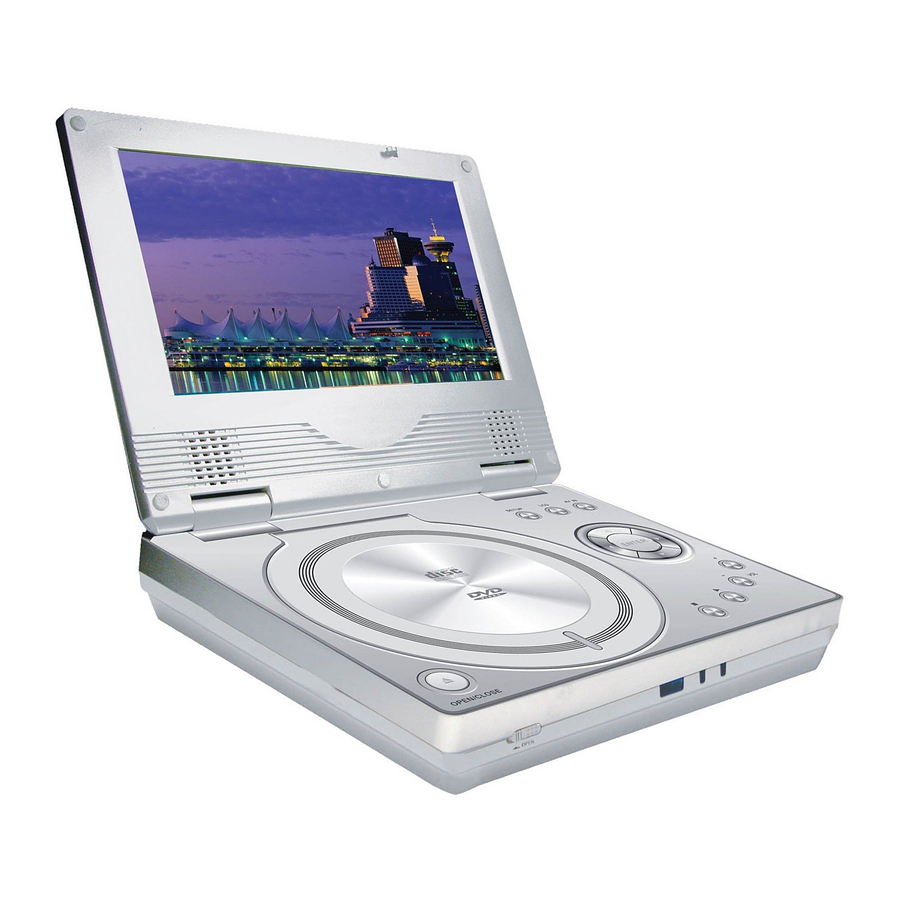
- Page 1 ENGLISH PORTABLE DivX MPEG-4 DVD PLAYER Model DXP-10P OWNER`S MANUAL Please read this manual before operating. COMPACT DIGITAL AUDIO...
-
Page 2: Table Of Contents
Table of Contents...……………………...2 Safety Information...……………………...3 DivX Certification………………………………………………………………………………………………………………………………………………..4 Remote Control...……………………...5 Description...……………………...6 Using the Remote Control...……………………...7 Connecting Earphones to the DVD Player...…………………...8 Connecting to an External Component ...…………………...9 Connecting to a TV...……………………...10 Connecting to a Stereo Component...…………………...11 Using Card Reader...……………...12 Using USB Port ...……………...13 Using the AC Adaptor...……………………...14... -
Page 3: Safety Information
Place the DVD Player on a firm, flat surface. Keep the DVD Player away from domestic heating equipment and direct sunlight. When placing the DVD Player in a cabinet, allow about one inch of space all around the DVD Player for ventilation. SAFETY WARNING CLASS 1 LASER PRODUCT / KLASSE 1 LASER PRODUKT / LUOKAN 1 LASER LAITE / KLASS 1 LASER APPARAT / PRODUCTO LASER CLASE. -
Page 4: Divx Certification
DivX Certification By displaying the DivX® logo, we are demonstrating that AVAYON products have been tested and certified by DivXNetworks, the creators of DivX® video technology, and are capable of playing all versions of DivX® video content. DivX Certified ensures that the DivX® content you attain and create can be played on your AVAYON DivX®... -
Page 5: Remote Control
Remote Control Remote Control 1. MENU/PBC Button Brings up the disc menu. 2. L/R Button Selects left, right and stereo sound tracks. 3. P/N Button Selects PAL/NTSC/AUTO TV systems. 4. TITLE Button 5. SUBTITLE Button Selects the subtitle's language. 6. Number Buttons (0,1,...,9) 7. -
Page 6: Description
Description Front View 1. LCD 2.(16:9/4:3)(REVERSE)/(MODE)/ (DOWN) /(UP) 3. OPEN 4. DISC COVER 5. PLAYBACK BUTTONS PLAY/POWER ON( ► ) FAST REVERSE( ▐◄◄ ) Left View 1. LED LIGHT/REMOTE CONTROL SENSOR 2. 3-in-1 card slot(For DivX, USB, Card Reader Model) 3. -
Page 7: Using The Remote Control
( + ) facing up as marked. 4. Replace the battery tray by pushing it until it clicks into place. Using the remote control Point the remote control directly at the remote sensor on the front of the DVD Player. Remote Control Sensor... -
Page 8: Connecting Earphones To The Dvd Player
Connecting Earphones to the DVD Player You can attach an earphone with a stereo mini-jack plug to the phone jack ( using the VOLUME control dial. You can also connect a second earphone to the AUDIO OUT jack, but its volume cannot be adjusted. -
Page 9: Connecting To An External Component
Connecting to an External Component You can enjoy video from VCR or camcorder on your DVD player. 1. Turn off DVD player, VCR and other components. 2. Connect the audio and video cables as illustrated below. 3. Slide INPUT/OUTPUT to INPUT. -
Page 10: Connecting To A Tv
2. Connect the audio and video cables as illustrated below. 3. Slide INPUT/OUTPUT to OUTPUT. 4. Turn on power. 5. Repeatedly press TV/Video button on your TV to select the input from the DVD player. Audio (black) TIPS If you wish to view video on your TV only, close the display panel of your Player. -
Page 11: Connecting To A Stereo Component
Connecting to a Stereo Component By connecting the digital output (SPDIF) on the DVD player through a coaxial cable (optional accessory) to a Dolby Digital/DTS amplifier or processor, you can enjoy full 5.1 channel surround sound. Follow these steps for making the connection. -
Page 12: Using Card Reader
Using the Card Reader The player has a 3-in-1 card reader, accepting MMC(Multimedia card), SD (Secure digital card) and MS (Memory stick). Inserting a memory card 1. Make sure that no disc is placed on the Player. 2. Insert the card into the slot with the gold contacts facing down. Gently push the card in all the way until the card is fixed in place. -
Page 13: Using The Usb Port
Using the USB Port The player accepts most USB devices such as MP3, DSC, USB- drive, Digital Camcorder etc. The USB in this player is version 2.0. Plugging in a USB device Remove the disc from the player. Plug in the USB device to the USB port on the player. Slide INPUT/OUTPUT to OUTPUT. -
Page 14: Using The Ac Adapter
Using the AC Adapter This portable DVD player can be powered by AC through the supplied switching power AC adapter. It can also use the Supplied battery pack to power. When the AC adapter is connected to the unit and powered, the unit will be automatically powered by the AC power. -
Page 15: Using The Battery Pack
When the Player uses battery for power, the red LED lights. If the battery power is low, the red LED blinks. left until it clicks into place. To DC12V IN on the DVD player Removing the battery pack 1. Slide down the latch. -
Page 16: Cautions In Using Battery Pack
Do not expose the battery pack to water, fire, or heat. Always use the included AC adaptor when charging the battery pack. This battery pack is designed exclusively for your portable DVD player. Do not use it with other devices. Warning! 1. -
Page 17: Installing Carrying Bag/Car Harness Kit (Optional Accessory)
Installing Carrying Bag/Car Harness Kit (Optional Accessory) You can install the Carry case/Car Harness kit to a car seat to enjoy the movie in the car. Following these steps. 2. Fold the top and bottom 1. Unzip and open the bag. covers backwards. -
Page 18: Playing A Disc
Playing a Disc Turning ON /OFF the player To turn on the Player 1. Slide POWER on the Player to ON, this will put the Player on standby mode. 2. Press ► on the Player to turn on the power. 3. - Page 19 Playing a Disc (cont’d) Resume This Player provides a unique resume function for making viewing movie more convenient. Follow these steps 1. When you want to interrupt the playback and come back later to play where you interrupted it, you can press OPEN on the Player to open the disc compartment cover.
- Page 20 Playing a Disc (cont’d) Repeat Playback You can play a chapter, a track, a title, a file or the entire disc repeatedly. 1. During playback, repeatedly press REPEAT to choose a Repeat option. Depending on the type of disc,the Repeat options may be different.
- Page 21 Playing a Disc (cont’d) ZOOM 1. Press ZOOM repeatedly during playback or pause to enlarge (2X, 3x, 4x, ) or reduce (1/2, 1/3, 1/4) the image. 2. Use direction keys ( ▲▼ and ◄► ) to move around (pan and scan) the enlarged image. MUTE Repeatedly press MUTE until "MUTE"...
-
Page 22: Playing A Disc
Playing a Disc (cont’d) TITLE Press TITLE, it takes you to the very beginning of the title and play, or to the MENU if it has title menu. DISPLAY Repeatedly press DISPLAY during playback to display various playback information such as current title, chapter, track elapsed time, languages etc. -
Page 23: Playing An Mp3 Or Regular Audio Cd
Playing an MP3 or Regular Audio CD Valid MP3 CD and CD-R/RW The MP3 files should be ISO9660 or Joliet format. Use "mp3" as the file extension. Play In most cases, when a MP3 or CD is placed into the player, the first song file of the first folder plays. In other cases, the file manger appears. -
Page 24: Playing Picture Cd
Playing Picture CD Valid Picture The player can play both Kodak Picture CD that you order from photo processing store, and home-made CD by burning JPEG files onto a CD-R or CD-RW disc. Play In most cases, after the disc is placed into the player, the first file will be shown. In other cases, the file manger appears. -
Page 25: Setting Tv System, Screen Saver, Tv Type (4:3/16:9), Password, Rating, Default,Divx(R) Vod
Setting TV System, Screen Saver, TV Type (4:3/16:9), Password, Rating, Default, DivX(R) VOD 1. Press SETUP on the remote control. 2. Use the direction keys( ▲▼◄► ) to select SYSTEM SETUP and its sub-menu. 3. Press ENTER to confirm your selection. 4. - Page 26 Setting TV System, Screen Saver, TV Type (4:3/16:9), Password, Rating, Default, DivX(R) VOD 1. Press SETUP on the remote control. 2. Use the direction keys( ▲▼◄► ) to select SYSTEM SETUP and its sub-menu. 3. Press ENTER to confirm your selection. 4.
-
Page 27: Setting Language For Osd, Voice, Subtitle, Menu
Setting Language for OSD, Voice, Subtitle, Menu Although this Player supports a list of different languages for OSD, subtitle and voice, the disc must have the specific language(s) built-in in order to effect the multi-language function of this Player. 1. Press SETUP on the remote control. 2. -
Page 28: Setting Audio Output
Setting Audio Output 1. Press SETUP on the remote control. 2. Use the direction keys(▲▼◄►) to select AUDIO SETUP and its sub-menu. 3. Press ENTER to confirm your selection. 4. Press SETUP to exit, or select EXIT SETUP to exit. Changing AUDIO output Note: SPDIF/OFF:select this when you do not want to have digital... -
Page 29: Setting Video For Brightness, Contrast, Hue, Saturation
Setting Video for Brightness, Contrast, Hue, Saturation 1. Press SETUP on the remote control. 2. Use the direction keys( ▲▼◄► ) to select VIDEO SETUP and its sub-menu. 3. Press ENTER to confirm your selection. 4. Press SETUP to exit, or select EXIT SETUP to exit. Adjusting brightness Adjusting contrast Adjusting hue... -
Page 30: Adjusting The Lcd Screen
Adjusting LCD Screen Following these steps to adjust the LCD quality during playback or while paused. 1. Repeatedly press MODE on the screen panel to select the parameters listed in the menu. You can change BRIGHTNESS, CONTRAST, SATURATION and HUE. 2. -
Page 31: Troubleshooting
Troubleshooting If your DVD player does not seem to be functioning properly, check the items below before you contact a service center. Symptom Power does not turn on or suddenly turns off Battery pack is in place but the power does not turn on... - Page 32 Check Check that the video or audio cable is securely connected. Check that the DVD player is in the INPUT mode and in the DVD mode. Check that the DVD player is turned on. You cannot charge the battery pack with the player turned off.
-
Page 33: Specifications
Specifications Power Requirements Power Consumption Weight General Dimensions Operating Temperature Range DVD, DVD-R, DVD+R, DVD-RW,DVD+RW, VCD,SVCD,DVCD, MP3,PICTURE CD, Readable Disc CD, CD-G, HDCD, CD-R, CD-RW, MPEG4, DivX®Video (MPEG4, DivX®Video) DSC, Camcorder, U-drive, MP3 player, and other USB storage devices Readable USB SD/MMC/MS card Readable Card Composite Video... -
Page 34: Customer Support And Warranty
AVAYON retains the right to assess all warranty claims and to determine if damages are covered by this warranty. In case of a claim that is not covered by the warranty, you will be contacted to determine if AVAYON should repair the damage for a fee or if the player should be returned to you as received by the service center. - Page 35 During the Warranty Period, AVAYON will, at its option and sole discretion, repair or replace defective parts, including replacement of the entire Player. You will be required to ship the player to the service center indicated at the time you contact AVAYON customer service for warranty support.
Need help?
Do you have a question about the DXP-10P and is the answer not in the manual?
Questions and answers