Table of Contents
Advertisement
Advertisement
Table of Contents

Related Manuals for Club Car TURF 2 XRT


Summary of Contents for Club Car TURF 2 XRT
- Page 1 Turf 2 XRT Europe 200 1 asoline ehicles Owner’ s Manual...
- Page 3 The Transportation and Utility Vehicle Limited Warranty appears on the last pages of this manual. No other warranties, express or implied, are contained herein. Club Car is not liable for errors in this manual or for incidental or consequential damages that result from the use of the material in this manual.
- Page 4 2001 Turf 2 XRT Gasoline Vehicle Owner’s Manual...
- Page 5 We hope you will consider this owner’s manual a permanent part of your Club Car vehicle. If you sell the vehicle, please include the manual so that the next owner will have the important operating, safety, and main- tenance information it contains.
-
Page 6: Practice Safety
Safety signs like you see above may at first seem shocking, but their impact is mild compared with the reality of severe personal injury. Your safety and satisfaction are of the utmost importance to Club Car. That is why before operating the vehicle, we urge you to review the information in this manual. -
Page 7: Table Of Contents
Warranties ............... . . 2001 Turf 2 XRT Gasoline Vehicle Owner’s Manual... -
Page 8: General Information
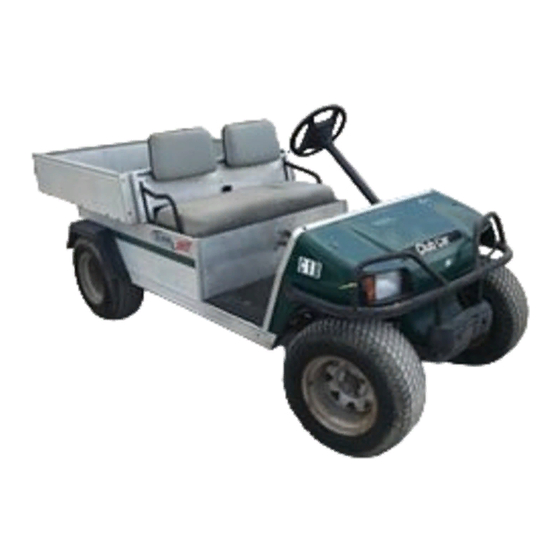
General Information GENERAL INFORMATION The Turf 2 XRT is a utility vehicle especially designed for off-road transportation of cargo and passengers. Its construction allows for operation on extremely rough terrain on inclines not exceeding 20%. The vehicle is not intended for use on public streets, roads, or highways or for operation in flammable or explosive atmo- spheres. -
Page 9: Accessories
1.24-1.38 Bars (18-20 psi) ACCESSORIES There is a complete line of accessory equipment available from Club Car and our dealers. Care should be taken that these accessories are properly installed by trained technicians, and that they are used in the man- ner for which they were designed. -
Page 10: Model Identification
MODEL IDENTIFICATION The serial number of each Club Car vehicle is printed on a bar code decal (1) mounted on the frame directly above the accelerator pedal (Example: XG0101-123456) (Figure 1, Page 8) . There is also a second serial number decal mounted on the front body frame behind the center dash panel. -
Page 11: Safety Details
• A utility vehicle will not provide protection from lightning, flying objects, or other storm- related hazards. If caught in a storm while driving a utility vehicle, exit the vehicle and seek shelter in accordance with applicable safety guidelines for your location. 2001 Turf 2 XRT Gasoline Vehicle Owner’s Manual... - Page 12 • Do not allow riders in the cargo bed. • The vehicle is not specially equipped for handicapped persons: - Be sure all passengers are capable of securing themselves in a moving Club Car vehicle before allowing them to ride in one.
- Page 13 • Avoid top-heavy loads. The center of gravity of a load should never exceed 38 cm (15 inches) above the bottom of the cargo bed. • Always unload cargo bed before raising vehicle with a lift, hoist, or jack. 2001 Turf 2 XRT Gasoline Vehicle Owner’s Manual...
- Page 14 • Reduce normal driving speed when transporting a vehicle on a trailer. • Never tow a Club Car vehicle behind a passenger vehicle or truck on a public road unless it is on an approved trailer.
- Page 15 • Tools, wires, and metal objects can cause sparks when shorted across a battery. • Follow all instructions carefully when working with batteries. • Charge battery in a well-ventilated area only. DANGER CONTINUED ON NEXT PAGE... 2001 Turf 2 XRT Gasoline Vehicle Owner’s Manual...
- Page 16 • Do not tamper with the governor. Doing so will void the warranty, as well as damage the engine and other components, and could result in property damage, personal injury, or death due to unsafe speeds. 2001 Turf 2 XRT Gasoline Vehicle Owner’s Manual...
- Page 17 Do not drop the bed. Failure to follow these instructions could result in severe personal injury. • A hydraulic bed lift system is under pressure. Wear a face shield and use extreme caution when servicing it. Figure 2 Battery Cable Removal 2001 Turf 2 XRT Gasoline Vehicle Owner’s Manual...
-
Page 18: Vehicle Feature Identification
When driving on uneven terrain or down steep hills, • and warnings on dash. Maximum trailer hitch tongue weight - 150 lbs. reduce speed and load. • CCI 102006701 2001 Turf 2 XRT Gasoline Vehicle Owner’s Manual... - Page 19 (7) Park brake handle (16) Vehicle loading decal (24) Frame ground and governor warning decal (on frame) (8) Crush area decal (17) Directional arrow on tire (25) Choke (9) Bed load warning decal 2001 Turf 2 XRT Gasoline Vehicle Owner’s Manual...
-
Page 20: Controls And Indicators
The Forward/Reverse handle is located on the seat support panel (Figure 4, Page 18). The handle has three distinct positions: (FORWARD), (NEUTRAL), and (REVERSE). Rotate the handle to the FOR- WARD position, towards the driver, to operate the vehicle in the forward direction. Rotate the handle to the 2001 Turf 2 XRT Gasoline Vehicle Owner’s Manual... -
Page 21: Accelerator Pedal
PARK BRAKE There are two park brakes on the Turf 2 XRT vehicle. The park brake handle is located on the floorboard to the right of the accelerator pedal (Figure 6, Page 19). To set the hand brake, pull the park brake handle down until park brake is fully engaged (1). - Page 22 floor, then pull the choke handle out to activate. Release the handle when the engine begins to run smoothly (Figure 9, Page 20). Figure 9 Choke 2001 Turf 2 XRT Gasoline Vehicle Owner’s Manual...
- Page 23 OIL LIGHT The Turf 2 XRT is equipped with a low oil warning light (1), located on the dash panel just above the steering column (Figure 10, Page 21). If the oil warning light comes on, oil should be checked and added to the engine as necessary before continuing to use the vehicle.
-
Page 24: Pre-Operation And Daily Safety Checklist
Use the following checklist as a guide to inspect your new vehi- cle and check daily for proper operation. Any problems should be corrected only by a Club Car dealer or a trained technician. -
Page 25: Driving Instructions
FORWARD, the vehicle should accelerate smoothly to full speed as the accelerator pedal is depressed. When the pedal is released it should return to the original position and the engine should idle. Club Car vehicles operate at reduced speed in reverse. -
Page 26: Bed Latch
To close the bed, disengage the prop rod and gently lower the bed until the bed latch engages. DO NOT drop the bed. See following WARNING. 2001 Turf 2 XRT Gasoline Vehicle Owner’s Manual... -
Page 27: Prop Rod
To lower the bed, lift the bed so that the prop rod is no longer supported in one of the track notches. Push the prop rod toward the front of the vehicle to free it from the track notch and gently lower the bed. DO NOT drop the bed. 2001 Turf 2 XRT Gasoline Vehicle Owner’s Manual... -
Page 28: Loading And Unloading
Because towing another Club Car vehicle or a trailer can have adverse effects on vehicle handling, be espe- cially cautious when towing with a Club Car vehicle. The sum of the gross trailer weight and cargo bed load must never exceed rated capacity. See the preceding chart for vehicle capacities. - Page 29 3.3. Fill fuel tank to about 2.5 cm (1 inch) from top of fuel tank and, following manufacturer’s directions, ® add a commercially available fuel stabilizer (such as Sta-Bil 3.4. Disconnect fuel vent line from fuel tank vent nipple. 2001 Turf 2 XRT Gasoline Vehicle Owner’s Manual...
-
Page 30: Battery
BATTERY Read DANGER and WARNING on page 14. The battery in a Club Car gasoline vehicle is a 12-volt, low-maintenance battery that requires infrequent watering (Figure 16, Page 29). Any corrosion around the positive (+) or negative (–) terminals should be washed off with a solution of baking soda and water (237 mL (1 cup) per 3.8 L (one gallon) of water) and then the baking soda solution rinsed off... -
Page 31: Maintenance
This will prevent further damage to the vehicle and avoid the possibility of injury due to unsafe conditions. Contact your local Club Car dealer to perform all repairs and semiannual and annual periodic service. PERIODIC SERVICE SCHEDULE Read DANGER and WARNING on page 14. - Page 32 • If any problems are found during scheduled inspection or service, do not operate the vehicle until repairs are made. Failure to make necessary repairs could result in fire, property damage, severe personal injury, or death. 2001 Turf 2 XRT Gasoline Vehicle Owner’s Manual...
-
Page 33: Periodic Lubrication Schedule
200 hours of opera- Change engine oil and oil filter filter. See Oil Viscosity on page 32. tion or annually, whichever comes first *See Figure 18, Page 31. FLOORBOARD Figure 18 Vehicle Lubrication Points 2001 Turf 2 XRT Gasoline Vehicle Owner’s Manual... -
Page 34: Engine Oil
Choose the viscosity according to the temperature as follows: -20°C -10°C 0°C 20°C 30°C 40°C 10°C SAE 40 SAE 30 SAE 10W-30/SAE 10W-40 SAE 5W-20 32°F 50°F 86°F 104°F -4°F 14°F 68°F Figure 20 Oil Viscosity Chart 2001 Turf 2 XRT Gasoline Vehicle Owner’s Manual... -
Page 35: Fueling Instructions
See preceding DANGER, CAUTION, and NOTE. 3. Replace fuel cap on tank. Make sure cap is tightened securely. 4. Replace seat bottom. VENT FUEL SHUT-OFF VALVE GAS TANK TO CARBURETOR VENT TUBES Figure 21 Fuel Tank 2001 Turf 2 XRT Gasoline Vehicle Owner’s Manual... -
Page 36: Cleaning The Vehicle
In the event a vehicle is bought as a used vehicle from another individual or from a dealer, we strongly urge the new owner to register the vehicle with Club Car. This will enable us to contact you if the need arises. -
Page 37: Rear Fender Installation
3. Position a fender in the vehicle, align the hole in the fender with the slot in the frame as shown and install bolt (1), flat washers (2), and locknut (3) (Figure 22, Page 35). Finger-tighten only at this time. Figure 22 Install Hardware in Fender Hole 2001 Turf 2 XRT Gasoline Vehicle Owner’s Manual... - Page 38 9. Lower cargo bed. UPPER SIDE PANEL FENDER RIB Before drilling holes, move fender as far forward as possible. Do not allow any gap between fender and side panel. Figure 23 Drill Additional Mounting Holes 2001 Turf 2 XRT Gasoline Vehicle Owner’s Manual...
-
Page 39: Wheel And Tire Installation
Turf 2 XRT wheel and tire assemblies. Unlike some other vehicles, the Turf 2 XRT’s front and rear wheels are NOT interchangeable. The rear wheels have a different offset than do the front wheels; The rear wheels must be installed with the deeper off- set facing out. -
Page 40: Warranties
CLUB CAR’s liability under this limited warranty, or in any action whether based upon warranty, contract, negligence, strict product liability or otherwise, shall be the repair or replacement, at CLUB CAR’s option, of the vehicle or component thereof that CLUB CAR deems to be defective. Replacement shall mean furnishing, during the applicable limited warranty period, a new vehicle or factory-reconditioned vehicle or component thereof which is identical or reasonably equivalent to the warranted product or component at no cost to the purchaser. - Page 41 WHICH IN ANY WAY VARIES THE TERMS OF THIS WARRANTY. 7. NO CONSEQUENTIAL DAMAGES: IN NO EVENT SHALL CLUB CAR BE LIABLE FOR ANY INCIDENTAL OR CONSEQUENTIAL DAMAGES INCLUDING, BUT NOT LIMITED TO, LOSS RELATED TO PROPERTY OTHER THAN THE VEHICLE, LOSS OF USE, LOSS OF TIME, INCONVENIENCE, OR ANY OTHER ECONOMIC LOSS.
- Page 44 Manual No. 102189822 Edition Code 0800A00000 Turf Utility/Gasoline Club Car, Inc., P.O. Box 204658 Augusta, GA 30917-4658...
Need help?
Do you have a question about the TURF 2 XRT and is the answer not in the manual?
Questions and answers