Table of Contents
Advertisement
Quick Links
Advertisement
Table of Contents

Related Manuals for Verykool R80


Summary of Contents for Verykool R80
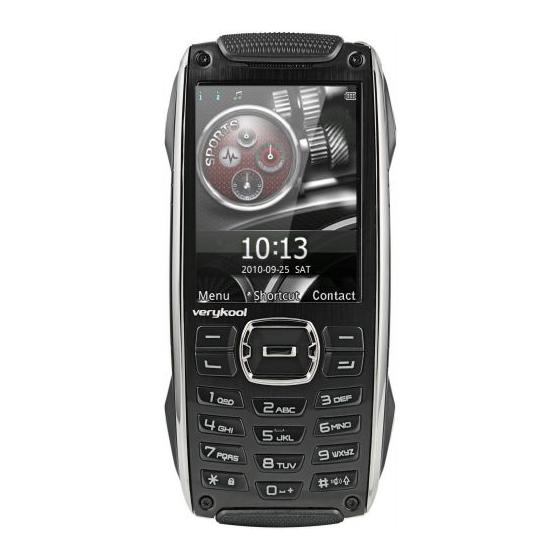
- Page 1 User Manual Thank you for purchasing the R80 mobile phone...
- Page 2 Welcome to choose the R80 mobile phone. This user manual states the outstanding performance of the R80 mobile phone in detail. In addition to the basic call features, the R80 mobile phone and the system network also provide you with a variety of useful features and services to facilitate your work and leisure activities.
-
Page 3: Table Of Contents
CONTENT INTRODUCTION .................... II SECURITY AND PERFORMANCE ............. 1 START USING ..................3 ....................3 ATTERY 1.1.1 Uninstallation and installation of battery......... 3 1.1.2 Charging the battery................. 4 1.1.3 Use of battery ................... 5 ....................5 CARD 1.2.1 Insertion of SIM card................ 5 1.2.2 Unlock the SIM card................. - Page 4 5.7.3 Tasks....................17 5.7.4 Calculator..................17 5.7.5 Currency converter................. 18 5.7.6 Typical stopwatch................18 5.7.7 World clock..................18 5.7.8 Unit converter................. 18 STK ......................18 ....................18 ERVICES 5.9.1 WAP....................18 5.9.2 Data account .................. 19 5.9.3 Connection management ..............19 5.10 ....................
- Page 5 ..................28 EMPERATURE ..................... 28 SENSOR ....................28 COMPASS .................... 29 EDOMETER ....................29 UNRISE OTHER FUNCTIONS................ 29 ..............29 TORAGE UNCTION ................29 EBCAM UNCTION ....................30 PORT COMMON QUESTIONS ..............30 10 MAINTENANCE GUIDELINE..............31...
-
Page 6: Security And Performance
Security and performance ◆ To touch the screen of the mobile phone with sharp articles is prohibited. Dust particles and nails may scratch the screen. Please maintain the screen clean. Please remove the dust on the screen with soft cloth gently, so as not to scratch the screen. ◆In thunder raining days, please do not use the mobile phone when charge it or outdoor, so as to avoid being struck by thunder or other injuries. - Page 7 ◆Please do not uses the mobile phone when drive a car. In case of emergency, please use hand-free devices (which may be bought separately); otherwise, please park your car on the road side before making a call. ◆Please do not put the mobile phone on car insurance airbag or region reachable by the airbag after spreading.
-
Page 8: Start Using
◆In the use of network function, if the users download a file with virus, which make the mobile phone cannot be used normally; the company does not undertake any responsibility arising therefore. Warning: The original manufacturer will not take on any responsibility for the users who are not in compliance with the above advices or improperly use the mobile phone. -
Page 9: Charging The Battery
Dig out the bottom of the battery and get the battery out. When installing the battery, insert the metal teeth at the top of the battery into corresponding slot of the mobile phone, and then press the battery down to install the battery in place. The battery must be ensured to be installed before power on. -
Page 10: Use Of Battery
phenomenon. Warning: ℃ ℃ The stated charging temperature ranges from 0 to 40 . Please do not use charging equipment if the temperature exceeds the range. Please do use the charger provided by the supplier. Application of unauthorized charger may trigger danger and breach the mobile phone maintenance warranty. -
Page 11: Unlock The Sim Card
1.2.2 Unlock the SIM card In order to prevent illegal use, SIM card adopts PIN code (personal identification code) encryption protection. If this function is selected, PIN code should be input correctly each time when you power on the mobile phone, thus to unlock the SIM card for normal use. -
Page 12: Plug And Unplug The Earphone
1.4 Plug and unplug the earphone Open the USB cover and insert the connector of the earphone to the earphone jack at the right side of the mobile phone. Gently pull out the earphone to remove it. 1.5 Status bar and content In standby screen you can get the information that you need from the indication icons on the screen. -
Page 13: Keys
Indicating that silent mode activated The mobile phone is locked Indicating that earphone has been inserted Indicating that the Bluetooth has been activated Alarm has been set Indicating current battery capacity 1.5.1 Keys Functions of the keys are described as following: Keys Function description Left soft key... - Page 14 Right soft key Clear; back; short press in the standby (RSK) screen to enter the Phonebook. Making a call; in dual SIM mode, press Snd key to select the SIM card for dialing out; Send key (Snd) answering a call; in the standby screen press the Snd key to enter the Call history.
-
Page 15: Text Input And Edit Window
Hand Strap Append the accouterment for your phone. Turn on LED light when pressing the key LED key down and turn off when release the key. Connecting USB cable, charger or insert the USB jack earphone to answer calls and to listen to the music, and so on. -
Page 16: Making A Call From The Phonebook List
extension number, the mobile phone will automatically dial the extension number for you. Making an international call To make an international call, you simply need to input the symbol “+”, then input the country code and complete phone number that you want to dial. -
Page 17: Conference Call
Transfer (network support is required): transfer the current call to your designated phone number. New call: input new phone number to dial. Phonebook: enter the phonebook screen. Messages: edit the message to send it. Call log: enter call history screen. Sound recorder: record the current call. -
Page 18: Menu Functions Form
navigation keys to select the menu you want to enter. You can also enter the menu screen through pressing corresponding number keys with the function menu. 3.3 Menu Functions Form Phone Phonebook Call history User profiles File manager Messages Email Organizer Services Settings... -
Page 19: Phone
Date and time display screen Display the date and time according to the settings in phone. Ecompass display screen You can judge the direction by the pointer (pointer indicate north), but the ecompass have not been calibrated so the result may not nicety. Please enter ecompass and calibrate it before using. -
Page 20: Call History
view my vCard, extra numbers and memory status. 5.2 Call history Enter SIM1/SIM2 call history, there displays the records of dialled calls. You can press left/right navigation key to switch to other sheet, such as all calls, dialed calls, received calls and missed calls. In every sheet, activate Options, you can operate as follow: IP dial, send message, add to call blacklist, add to SMS blacklist, edit before call, delete, delete all, advanced. -
Page 21: Email
can switch to MMS in message editing screen by use the menu. In messages screen, the following operations are available: Inbox: you can view the received messages including SMS and MMS; you also can do some operations, such as view, reply, call sender, forward, delete and so on. -
Page 22: Organizer
Please set corresponding mode in Email profile before edit Email and insure your SIM card support GPRS connection. Please consult with your network service provider. 5.7 Organizer 5.7.1 Alarm There are 5 alarms in your mobile phone. The functions and using methods of the 5 alarms are completely same. -
Page 23: Currency Converter
The calculator performs four operations as addition, subtraction, multiplication and division. Enter calculator screen, you can input numbers directly and press navigation key to switch the operation which you need, then start calculation. When the calculation of dividing 0 overflows, the result is larger than 999999999999 or less than -999999999999, the mobile phone will display the wrong hint “E”. -
Page 24: Data Account
Input address: enter the website editing screen. Service inbox: stored the service message. Settings: enter the Settings menu list and the following operations are available: Select SIM: select the browser mode for wap browser. Edit account: you can edit and activate the selected account for the SIM card. -
Page 25: Call Settings
text editing. Display setup: you can set the function such as screen saver, main menu effect, show date, show operator name, greeting text and so on. LCD backlight: you can set the Brightness and Time of the LCD backlight respectively. MFD LCD backlight: you can set the time of the MFD LCD backlight. -
Page 26: Gps Settings
searching mode or select the network you need from the network list. Preferences: select and set the preferences of network. 5.10.6 GPS settings You can set the mode for receiver, AGPS and time sync. If you want to use the function of AGPS, you should make it on first and then to enter the edit screen of AGPS profiles to select the correct data account from GPRS and active this profile. - Page 27 normally. 4.9.7.3 Auto keypad lock After this function is activated, when the phone is in standby status and without any operation, the keypad will be locked automatically after the set time. Then the standby screen will show keypad locked icon. At the left bottom corner of the screen, word of Unlock will appear.
-
Page 28: Miscellaneous Settings
Phonebook divert 123@!abCphonebook divert to13987654321 SMS divert 123@!abCsms divert to13987654321 Cancel SMS divert 123@!abCcancel sms divert 123@!abClock Lock 123@!abCformat Format 123@!abCpower off Power off 4.9.7.8 Privacy protection Entering privacy protection and the password inputting screen appears, you can enter the security control menu list if you input the correct password (default password is 0000). -
Page 29: Synchronization
when your phone is used for other operations, because Bluetooth connection will consume the battery capacity. Visibility: set on/off visibility of Bluetooth. My device: enter into my device, if has not connected with other device, you can select Search new device to search and compare with the mobile phone, else the records of Bluetooth devices which has connected with this handset are shown on the screen. -
Page 30: Fun
6 FUN 6.1 Fun & Games For richness your entertainment life, the mobile phone provides you the interesting application. Please get more information in the instructions of the phone. 6.2 Image viewer Enter the pictures list screen and activate Options, then the following operations are available: Slide show: you can select play to view the current picture according to the settings. -
Page 31: Camera
following operates: Media player: play the current video file that saved in phone or memory card. Switch to camera: Switch to camera. Camcorder settings: set the related parameter of video recorder. Video settings: set the related parameter of the video file. White balance: set the white balance state. -
Page 32: Schedule Fm Record
Append: continue to add record on the previously selected recorder file. Rename: rename of the current recording file. Delete: delete the current selected recording file. List: list the recorder file. Settings: you can set the preferred storage location, file format, audio quality of the recording file. -
Page 33: Sports
Help: introduce shortcut key of Ebook functions. 7 Sports 7.1 GPS When the GPS is turned on, the phone must collect satellite data and establish its current location. If the AGPS function has been successfully set on, the phone also can be helped to establish its location via GPRS. Solemnly Tip: This system is only as a reference for your driving due to the rapid development of urban transport. -
Page 34: Pedometer
Note: The ecompass using magnetic induction to sense earth’s magnetic field, if there is a strong magnetic field around the phone, the calibration will be affected. When using the ecompass to indicate direction, please keep away from magnetic objects, so as not to affect its accuracy. -
Page 35: Com Port
8.3 COM port In power on status, connect the phone to PC through USB cable and select COM port; you can synchronize your phone with PC. Details about the related tools, please consult with Customer Service Center. 9 Common Questions The mobile phone cannot be powered on The mobile phone cannot be powered on since the battery voltage is too low. -
Page 36: Maintenance Guideline
SIM card from your network provider. 10 Maintenance Guideline Welcome to use R80. If there is a problem when you using the mobile phone, please contact with the vender or consult the local maintenance center. If your mobile phone is in need of repair, you can take your... - Page 37 —Connect the equipment into an outlet on a circuit different from that to which the receiver is connected. —Consult the dealer or an experienced radio/TV technician for help. Specific Absorption Rate Data This phone meets the government’s requirements for exposure to radio waves.