
Related Manuals for SMART 550


Summary of Contents for SMART 550
- Page 1 Was this document helpful? smarttech.com/docfeedback/171225 SMART Document Camera™ 550 USER’S GUIDE...
- Page 2 © 2017 SMART Technologies ULC. All rights reserved. No part of this publication may be reproduced, transmitted, transcribed, stored in a retrieval system or translated into any language in any form by any means without the prior written consent of SMART Technologies ULC. Information in this manual is subject to change without notice and does not represent a commitment on the part of SMART.
-
Page 3: Important Information
Ensure that any cables extending across the floor to your SMART product are properly bundled and marked to avoid a trip hazard. To reduce the risk of fire or electric shock, do not expose the SMART product to rain, moisture, or fire. -
Page 4: Federal Communication Commission Interference Statement
Do not block or cover the opening or slots on your SMART product. These slots provide ventilation, ensure reliable operation and protect your SMART product from overheating. Do not carry your SMART product by the camera arm. Carry it by the base of the unit. Do not aim the camera lens at the sun. -
Page 5: Innovation, Science, And Economic Development Canada Statement
IMPORTANT INFORMATION This equipment has been tested and found to comply with the limits for a Class B digital device, pursuant to Part 15 of the FCC Rules. These limits are designed to provide reasonable protection against harmful interference in a residential installation. This equipment generates, uses and can radiate radio frequency energy and, if not installed and used in accordance with the instructions, may cause harmful interference to radio communications. - Page 6 IMPORTANT INFORMATION 1. This device may not cause harmful interference, and 2. this device must accept any interference received, including interference that may cause undesired operation. Ce dispositif est conforme à la norme CNR-210 d’Industrie Canada applicable aux appareils radio exempts de licence.
-
Page 7: Eu Declaration Of Conformity
EU Declaration of Conformity Hereby, SMART Technologies ULC declares that the ratio equipment type Wireless AC Dual Band Adapter, DWA-171 is an compliance with Directive 2014/53/EU. The full text of the EU declaration of conformity is available at the following internet address: www.smarttech.com/compliance. - Page 8 IMPORTANT INFORMATION AT/BE/BG/CZ/DK/EE/FR/DE/IS/IE/IT/EL/ES/CY/LV/LI/LT/LU/HU/MT/NL/NO/PL/PT/RO/SI/SK/TR/FI/S E/CH/UK/HR. 5150MHz-5350MHz is for indoor use only. CAUTION: EXPOSURE TO RADIO FREQUENCY RADIATION This equipment complies with EU radiation exposure limits set forth for an uncontrolled environment. This equipment should be installed and operated with minimum distance 20 cm between the radiator and your body.
-
Page 9: Table Of Contents
Chapter 5: Using your document camera in Playback mode Setting your document camera to Playback mode Using the OSD menu in Playback mode Chapter 6: Using your document camera with SMART software Connecting your document camera to SMART Notebook software smarttech.com/kb/171225... - Page 10 CONTENTS Using a microscope with SMART Notebook software Connecting your document camera to SMART Document Camera software Navigating SMART Document Camera software’s Viewer menu options Chapter 7: Troubleshooting Resolving general issues Resolving image issues Resolving software issues Resolving recording issues...
-
Page 11: Chapter 1: Welcome
This chapter introduces the SMART Document Camera™ 550. About this guide This guide is for users who set up and use the SMART Document Camera 550 in their organizations. It includes information on the document camera’s on-screen display menu, remote control, and basic troubleshooting. -
Page 12: Features
SMART Document Camera software SMART Product Drivers Image and video Supports SD/SDHC cards (maximum 32 GB) storage Supports USB mass storage mode for internal memory and SD card For more information, see the SMART Document Camera 550 specifications (smarttech.com/kb/171224). smarttech.com/kb/171225... -
Page 13: Components
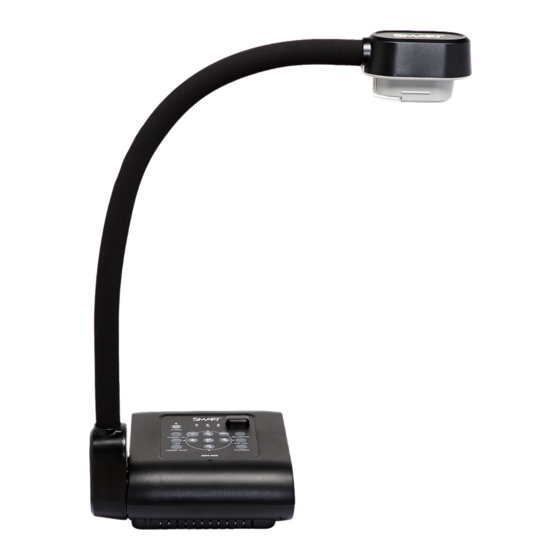
CHAPTER 1 WELCOME Components The SMART Document Camera has a flexible arm to position the lens at any angle. The camera head has LED overhead lighting to enhance lighting conditions. The SMART Document Camera 550 consists of the following components:... -
Page 14: Control Panel
CHAPTER 1 WELCOME Control panel The control panel to enables you to switch between Camera, Computer Pass-Through, and Playback modes. Additionally, using the control panel allows you to adjust the settings and features in the Camera mode’s on-screen display (OSD) menu. The control panel of the document camera consists of the following: Name More information... - Page 15 CHAPTER 1 WELCOME Name More information Navigation arrows Access options from the OSD menu Adjust the volume of a video play back by using Fast-forward to rewind a video by using Menu Access the OSD menu Recording Start or stop recording video and audio Auto-Focus Automatically adjust focus Selection option for Playback mode and OSD menu...
-
Page 16: Right Panel
CHAPTER 1 WELCOME Right panel The right panel of the document camera consists of the following: Name More information Camera holder Holds the camera head for storage SD card slot SD/SDHC memory card slot TV-RGB switch Switch between TV and output display video Security lock slot Attachment for a Kensington compatible lock Left panel... -
Page 17: Rear Panel
CHAPTER 1 WELCOME Name More information Speaker Connect to an amplified speaker Connect to microphone NOTE The built-in microphone will be disabled once the external microphone is connected to the document camera. Reset Resetting the document camera will set it back to standby mode Rear panel The rear panel of the document camera consists of the following connectors:... -
Page 18: Remote Control
CHAPTER 1 WELCOME Remote control All features of the SMART Document Camera 550 can be accessed with the remote control. The remote control requires two AAA batteries. Name More information Power ON/OFF the document camera Power Camera mode displays the video signal from the document... -
Page 19: Power Adapter
Plug adapters are available for Australia, Europe, and North America. USB cable Use the USB cable to connect your document camera to your computer. You can display objects, capture images to SMART Notebook files, and control your document camera from SMART Notebook software. smarttech.com/kb/171225... -
Page 20: Modes
Before using your document camera, download the required software to get the most out of your document camera. IMPORTANT Before connecting your document camera to a computer, ensure the latest versions of SMART Notebook and SMART Product Drivers are installed. The document camera is only compatible with SMART Notebook software through a wired connection. smarttech.com/kb/171225... -
Page 21: Smart Notebook Software And Smart Product Drivers
CHAPTER 1 WELCOME The SMART Document Camera software can be used through both a wireless and wired connection. SMART Notebook software and SMART Product Drivers SMART Notebook collaborative learning software and SMART Product Drivers are required for the full functionality of the document camera. SMART Notebook software is a presentation tool that displays content captured by the document camera, and SMART Product Drivers enables the touch features of a SMART Board®... -
Page 22: Chapter 2: Getting Started
This chapter also explains how to use external memory storage. Setting up your document camera This section provides instructions on setting up your SMART Document Camera. The document camera is designed with a flexible arm that enables you to position the camera head at different angles. - Page 23 CHAPTER 2 GETTING STARTED To unfold and position your document camera 1. Place a hand on the base of the document camera to stabilize it. 2. Press the camera head down, and then pull the camera arm outward and upward. 3.
-
Page 24: Connecting To Different Displays
HDMI connection. For more information on how to switch between the video systems see Accessing the System menu on page 41. To use your document camera with SMART Notebook software ensure your document camera is connected to a computer. -
Page 25: Setting The Tv/Rgb Switch
CHAPTER 2 GETTING STARTED Setting the TV/RGB switch The TV/RGB switch determines the display output selection. To set the switch to RGB Set the switch to RGB (right) when using an HDMI connection for signal output. To set the switch to TV Set the switch to TV (left) when using an RCA connection for a composite output. -
Page 26: Turning Your Document Camera On And Off
CHAPTER 2 GETTING STARTED Turning your document camera on and off After your completed the basic connections, you are ready to turn the document camera on and off. To turn on your document camera Press the power button on the control panel or remote control. The power indicator light changes from flashing red to solid green. - Page 27 CHAPTER 2 GETTING STARTED To connect your document camera to a wireless network 1. Press the WiFi button on the control panel. The WiFi indicator light will flash orange. 2. Press the MENU button on the control panel or remote control. The OSD menu will appear on your display.
-
Page 28: Connecting To External Devices
CHAPTER 2 GETTING STARTED Update your WiFi router to the latest firmware. Check for sources of potential interference (microwave ovens, Bluetooth devices, faulty satellite television cables, power lines, cordless telephones, wireless speakers, flat-panel televisions, etc). Please check with your System or Network Administrator to make sure that the ports are not blocked in the WiFi router. - Page 29 CHAPTER 2 GETTING STARTED 2. Attach the microscope adapter to the microscope eyepiece. 3. Tighten the three bolts until the adapter secures the eyepiece. 4. Attach the microscope adapter to the camera head. 5. Connect the document camera to the microscope. IMPORTANT Make sure the arrow on the camera head and microscope adapter are on the same side.
-
Page 30: Connecting Your Document Camera To A Microphone
CHAPTER 2 GETTING STARTED To optimize microscope images 1. Press the MENU button in the control panel, and then select the Image tab. 2. Use the down arrow button on the control panel or remote control to select the Mode sub- menu, and then press 3. -
Page 31: Shooting Area, Overhead Light, And Anti-Glare Sheet
CHAPTER 2 GETTING STARTED To connect a speakers Connect the speakers’ 3.5 mm cable to the speaker receptacle on your document camera's left side connection panel. Shooting area, overhead light, and anti-glare sheet Shooting area The shooting area can view a maximum area of 17 4/8" x 9 6/8" (44.5 cm x 24.8 cm). To rotate the image Adjust the camera head to shooting area, and press ROTATE on the control panel or remote control. -
Page 32: Using The External Memory Storage
CHAPTER 2 GETTING STARTED Using the external memory storage Your document camera supports an SD/SDHC card for image capture, audio, and video recording. NOTES Your document camera support SD/SDHC cards from 1 GB up to 32 GB. Recordings are in MP4 format. An SDHC card with class-6 or higher is recommended for high-quality recording. - Page 33 Camera mode In Camera mode, you can view document camera images only in SMART Notebook software and SMART Document Camera software. Camera mode allows connection over a USB and live image output. You can view full-screen images from your document camera using a projector or high definition display without a computer.
-
Page 34: Chapter 3: Using Your Document Camera
CHAPTER 3 USING YOUR DOCUMENT CAMERA Use SMART Notebook software to save images and then present them at a later time, or if your computer is connected to an interactive whiteboard, projector, or television, you can deliver your SMART Notebook presentation with live images from your document camera. -
Page 35: Setting Document Camera Modes
Camera mode Computer Pass- Playback mode Through mode Control the document camera from a computer Capture to SMART Notebook software Capture to an SD/SDHC memory card Yes Access the related on-screen display menu Capture to a USB drive The following table describes outputs when your document camera is connected to a display with HDMI, USB, or Composite Video Out. -
Page 36: Displaying Printed Documents
CHAPTER 3 USING YOUR DOCUMENT CAMERA Setting your document camera to Computer Pass-Through mode To set your document camera to Computer Pass-Through mode 1. Connect your document camera to your computer with the USB cable. 2. Connect your computer with the HDMI cable to your document camera’s HDMI IN receptacle. 3. -
Page 37: Using An Sd/Sdhc Card
CHAPTER 3 USING YOUR DOCUMENT CAMERA Reducing glare If glare makes it difficult for you to read the printed documents that you’re displaying, place the anti-glare sheet on top of the documents. Optimizing the image To optimize the image for text documents 1. - Page 38 CHAPTER 3 USING YOUR DOCUMENT CAMERA document camera images to an SD/SDHC card when your document camera is in Camera or Computer Pass-Through mode. When your document camera is in Playback mode you can display previously captured images from an SD/SDHC card. CAUTION Avoid static electricity near a card because it can cause damage.
-
Page 39: Chapter 4: Using Your Document Camera In Camera Mode
You can use your document camera in Camera mode to perform the following tasks: Display objects. Capture images to an SD/SDHC card. Capture images to SMART Notebook software. Use the features and settings in the OSD menu. Use a microscope with a standard eyepiece and additional adapters. -
Page 40: Switching To Camera Mode
CHAPTER 4 USING YOUR DOCUMENT CAMERA IN CAMERA MODE IMPORTANT Your document camera must be connected to a display when using the OSD menu. Switching to Camera mode To switch to Camera mode 1. Connect your document camera to a projector or flat-panel display with the appropriate cable. -
Page 41: Using The On-Screen Display Menu In Camera Mode
CHAPTER 4 USING YOUR DOCUMENT CAMERA IN CAMERA MODE To stop recording a video Press the FREEZE/STOP button on the control panel or remote control to stop recording. Using the on-screen display menu in Camera mode Use the OSD menu to adjust settings for your document camera in Camera mode. The following OSD menu options are available when your document camera is in Camera mode. -
Page 42: Accessing The Image Menu
CHAPTER 4 USING YOUR DOCUMENT CAMERA IN CAMERA MODE Accessing the Image menu To access the Image menu 1. Set your document camera to Camera mode. 2. Press the MENU button on the control panel or remote control. The OSD menu appears. smarttech.com/kb/171225... - Page 43 CHAPTER 4 USING YOUR DOCUMENT CAMERA IN CAMERA MODE 3. Use the button on the control panel or remote control to navigate to the Image tab. Image setting options Description Brightness Adjust the image brightness level manually. Contrast Adjust the image contrast level manually. Mode Select an option from three image display settings: Text –...
-
Page 44: Accessing The Presentation Menu
CHAPTER 4 USING YOUR DOCUMENT CAMERA IN CAMERA MODE Image setting options Description Advanced Adjust the advanced image settings: Auto Image – Select to automatically adjust white balance and exposure, and to correct color and exposure compensation. Exposure – Select the exposure settings: AUTO –... - Page 45 CHAPTER 4 USING YOUR DOCUMENT CAMERA IN CAMERA MODE 3. Use the button on the control panel or remote control to navigate to the Presentation tab. Presentation setting Description options Spotlight Select to highlight an are on the presentation screen. Set and move the overlay frame on the presentation screen.
-
Page 46: Accessing The Setting Menu
CHAPTER 4 USING YOUR DOCUMENT CAMERA IN CAMERA MODE Presentation setting Description options Split Screen Select to divide the screen into two parts. Half of the screen displays eight thumbnail images and the other half displays the image from your document camera. Select the display location: left, right, top, or bottom. - Page 47 CHAPTER 4 USING YOUR DOCUMENT CAMERA IN CAMERA MODE 3. Press the button on the control panel or remote control to navigate to the Setting tab. Setting options Description Select to set the capture resolution, quality, type, and interval Capture settings.
-
Page 48: Accessing The Wifi Menu
CHAPTER 4 USING YOUR DOCUMENT CAMERA IN CAMERA MODE Setting options Description Select refresh rate: Flicker 50 Hz 60 Hz Adjust the saturation setting. Saturation Set the time and date. Date/Time Accessing the WiFi menu To access the WiFi menu 1. -
Page 49: Accessing The System Menu
CHAPTER 4 USING YOUR DOCUMENT CAMERA IN CAMERA MODE Accessing the System menu To access the System menu 1. Set your document camera to Camera mode. 2. Press the MENU button on the control panel or remote control. The OSD menu appears. 3. -
Page 50: Capturing And Transferring Images And Videos
CHAPTER 4 USING YOUR DOCUMENT CAMERA IN CAMERA MODE System setting options Description Set the resolution to display an image on the screen: Output Display 1024 × 768 1280 × 720 1280 × 800 1280 × 1024 1600 × 1200 1920 ×... -
Page 51: Recording A Video On An Sd Card
CHAPTER 4 USING YOUR DOCUMENT CAMERA IN CAMERA MODE To capture images to memory 1. Set your document camera to Camera mode (see Page 13). 2. Position your document camera. 3. Adjust the camera settings using the Camera mode’s OSD menu (see Page 33). 4. -
Page 52: Using A Microscope
CHAPTER 4 USING YOUR DOCUMENT CAMERA IN CAMERA MODE To transfer images to your computer 1. Use the OSD menu to set your document camera USB to PC mode and select STORAGE. 2. Connect your document camera to your computer with the USB cable. See Page 13. 3. - Page 53 CHAPTER 4 USING YOUR DOCUMENT CAMERA IN CAMERA MODE 8. Press the button on the control panel or remote control to navigate to the Microscope mode and then press the button on the control panel or remote control. smarttech.com/kb/171225...
-
Page 54: Chapter 5: Using Your Document Camera In Playback Mode
Chapter 5 Using your document camera in Playback mode Setting your document camera to Playback mode Using the OSD menu in Playback mode Navigating the OSD menu in Playback mode Using Playback mode OSD menu options This chapter explains how to use your document camera in Playback mode. Setting your document camera to Playback mode When you set your document camera to Playback mode, you can connect to a display or a projector and play back the images or videos from an SD/SDHC card or the internal memory. -
Page 55: Using The Osd Menu In Playback Mode
CHAPTER 5 USING YOUR DOCUMENT CAMERA IN PLAYBACK MODE Using the OSD menu in Playback mode Use the Playback mode OSD menu to view and select your source storage location and control how the stored images are displayed. Navigating the OSD menu in Playback mode To navigate the OSD menu in Playback mode 1. - Page 56 CHAPTER 5 USING YOUR DOCUMENT CAMERA IN PLAYBACK MODE Using Playback mode OSD menu options The following OSD menu options are available when your document camera is in Playback mode. Playback menu option Description Slide Show Displays all captured still images in an automated slide show. Interval Set the slide show interval before displaying the next image.
- Page 57 CHAPTER 5 USING YOUR DOCUMENT CAMERA IN PLAYBACK MODE To select the settings for a slide show 1. Press the MENU button on the control panel or remote control to access the Playback mode OSD menu. 2. Press the button on the control panel or remote control panel to make a selection, and then press the button.
- Page 58 CHAPTER 5 USING YOUR DOCUMENT CAMERA IN PLAYBACK MODE 5. Press the button on the control panel or remote control to select the video you want to play. 6. Press the MENU button on the control panel or remote control to stop the video or to return to thumbnail view.
- Page 59 CHAPTER 5 USING YOUR DOCUMENT CAMERA IN PLAYBACK MODE 3. Press the CAP/DEL button on the control panel . The DELETE THIS IMAGE warning appears. Press DEL on the remote control. The DELETE THIS IMAGE warning appears. 4. Press the buttons on the control panel or remote control to select YES or NO.
-
Page 60: Chapter 6: Using Your Document Camera With Smart Software
Connecting your document camera to SMART Document Camera software Navigating SMART Document Camera software’s Viewer menu options This chapter explains how to use your document camera with SMART Notebook collaborative learning software and SMART Document Camera software. Using your document camera with SMART Notebook and SMART Document Camera software enables you to display and capture images/videos. - Page 61 CHAPTER 6 USING YOUR DOCUMENT CAMERA WITH SMART SOFTWARE 4. Select Insert from the main menu and then select SMART Document Camera Viewer. The SMART Document Camera window appears. 5. Place the object you want to display under the camera.
-
Page 62: Using A Microscope With Smart Notebook Software
1. Connect your document camera to your computer. See Connecting to external devices on page 19. 2. Open the SMART Document Camera window. 3. Press Additional Settings on the SMART Document Camera window menu bar, and then select Start Microscope Mode. 4. Press Additional Settings, and then select Stop Microscope Mode when you’re done. -
Page 63: Navigating Smart Document Camera Software's Viewer Menu Options
4. Place the object you want to display under the camera. Navigating SMART Document Camera software’s Viewer menu options Once your document camera is connected to SMART Document Camera software you can easily capture and adjust images. The following options are available in the SMART Document Camera Viewer window. - Page 64 CHAPTER 6 USING YOUR DOCUMENT CAMERA WITH SMART SOFTWARE Option Description Camera Control Pause Auto focus Auto adjust Zoom in Zoom out Zoom reset Rotate right Rotate left Image adjustments Brightness Contrast White balance Manual focus Exposure Straighten image Color effect...
- Page 65 CHAPTER 6 USING YOUR DOCUMENT CAMERA WITH SMART SOFTWARE Option Description Capture Capture HD capture Area capture Continuous capture Widget Mode Camera control Record Capture Camera capture smarttech.com/kb/171225...
-
Page 66: Chapter 7: Troubleshooting
Chapter 7 Troubleshooting Resolving general issues Resolving image issues Resolving software issues Resolving recording issues Resolving connection issues This chapter provides troubleshooting information for your document camera. NOTE These procedures vary depending on your Windows operating system and your system preferences. Resolving general issues Issue Solutions... -
Page 67: Resolving Image Issues
CHAPTER 7 TROUBLESHOOTING Issue Solutions The SD/SDHC card does Format the SD/SDHC card using the document camera’s OSD not play videos properly. menu (Menu > SETTING > Format > SD CARD). CAUTION This erases all the data on the SD/SDHC. Your document camera has Restart the document camera using the power button on the an issue not described... -
Page 68: Resolving Software Issues
Press the auto focus button on the control panel or remote control to adjust the image. Resolving software issues Issue Solutions SMART Notebook software Ensure your USB cable is connected. or SMART Document NOTE Camera software doesn’t detect your document If you are not directly connected through a single USB cable, camera. -
Page 69: Resolving Connection Issues
If your computer and document camera are not connected to but is unable to detect your the same network rescan and connect the document camera. document camera on the (SMART > Options > Camera Setting > IP). Options page. smarttech.com/kb/171225... -
Page 70: Appendix A: Hardware Environmental Compliance
Products should be disposed of in the appropriate recycling stream and not as regular waste. Batteries The SMART Document Camera 550 contains rechargeable lithium batteries. The remote contains two AAA batteries. Recycle or dispose of batteries properly. smarttech.com/compliance for more information. - Page 71 SMART TECHNOLOGIES smarttech.com/support smarttech.com/contactsupport smarttech.com/kb/171225...
Need help?
Do you have a question about the 550 and is the answer not in the manual?
Questions and answers