
Subscribe to Our Youtube Channel
Related Manuals for Hyundai BAPE-L3000N


Summary of Contents for Hyundai BAPE-L3000N
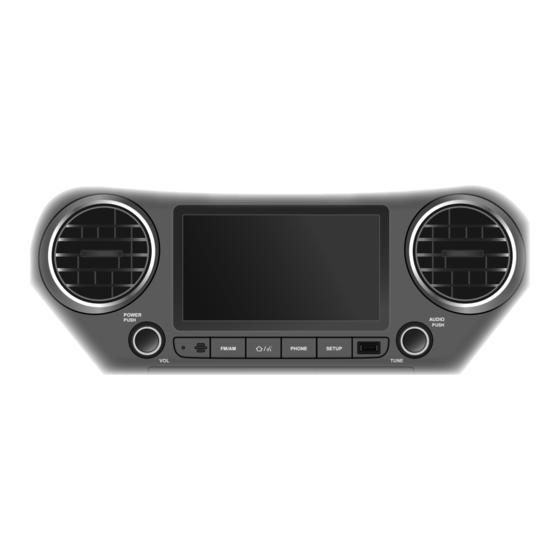
- Page 1 User Manual BAPE-L3000N USB/Bluetooth/iPod Player with AM/FM Radio POWER POWER AUDIO AUDIO PUSH PUSH PUSH PUSH FM/AM FM/AM PHONE PHONE SETUP SETUP TUNE TUNE...
- Page 3 USB/Bluetooth/iPod Player with AM/FM Radio BAPE-L3000N / User Manual Please read this manual carefully before operating your set and retain it for future reference. Designs and specifications are subject to change without prior notice.
- Page 4 This device complies with Part 15 of the FCC Rules. Operation is subject to the following two conditions: (1) This device may not cause harmful interference, and (2) This device must accept any interference received, including interference that may cause undesired operation. Note: This equipment has been tested and found to comply with the limits for a digital device, pursuant to part 15 of the FCC Rules.
-
Page 5: Table Of Contents
Contents Safety Information ....... 5 Apple CarPlay (optional) ....22 Getting started ........7 About Apple CarPlay ......22 Accessing Apple CarPlay ...... 22 Control buttons, functions and device connections ..........7 Returning to the Apple CarPlay home Control unit buttons and functions screen ............ - Page 6 Contents Bluetooth Connectivity ....... 31 Settings..........38 About the Bluetooth feature ....31 Setting the sound........38 Pairing devices ........31 Adjusting the sound balance and Connecting devices ......31 fader ............ 38 Using the hands-free feature and Selecting the EQ style ......38 listening to music ........
-
Page 7: Safety Information
Safety Information Safety warnings Read and follow all safety instructions in this manual to operate the device safely and appropriately. Malfunctions or defects Warning caused by the user are not covered by the warranty. ● Do not use the unit if there are audio or screen problems. - Page 8 Safety Information Safety cautions Caution ● Some countries have laws restricting the use of video screens while driving. Use the unit only where it is legal to do so. ● Do not operate the unit for a long period while the engine is not operating.
-
Page 9: Getting Started
Getting started Control buttons, functions and device connections This unit can be controlled by using the buttons on the unit or the controls on the steering wheel. It also provides connections for media devices. This section explains the buttons and functions that are available on the unit and the steering wheel and provides information about connecting media devices. -
Page 10: Steering Wheel Remote Control And Functions
Getting started ► Steering wheel remote control and functions ➋ ➌ ➊ ➍ ➎ ➏ VOL +/- buttons ➊ Skip button ➍ ● Press to adjust the volume. ● Press to move to the previous or next file, track, or preset station. MUTE button ➋... -
Page 11: Basic Operation
Getting started Basic operation Once the unit's system starts, the clock screen appears, which means that the unit This section explains basic operations such is in standby mode. as switching to standby mode, adjusting the volume, quickly muting the sound, and using the touch screen. -
Page 12: Adjusting The Volume
Getting started ► Adjusting the volume ► Using the touch screen Rotate the VOL dial on the unit or press Touch gestures for built-in the VOL +/- buttons on the steering wheel applications to increase or decrease the volume. When the volume is adjusted, the volume level Tapping bar will appear as shown below. - Page 13 Getting started Touch gestures for Apple CarPlay and Swiping Android Auto (optional) Tapping Swipe left, right, upwards or downwards on the screen to scroll through pages or a list of items. Open an application, select a menu item, or activate an on-screen button. Note Tapping and holding Touch gesture for Apple CarPlay and...
-
Page 14: Using The Rearview Camera Screen
Getting started ► Using the rearview camera screen If equipped, a rearview camera will display the area behind the vehicle on the screen when power is turned on and the reverse gear is selected. The rearview camera display is not a substitute for proper and safe driving procedures. -
Page 15: Audio And Video System
Audio and Video System Home menu screen Radio This section explains each menu on the This section explains how to use radio and Home screen. access various radio frequencies (FM1, FM2, and AM). Also, it covers automatically To open the Home menu screen, press or manually locating and storing your the HOME [ ] /VOICE [ ] button on the... -
Page 16: Listening To Radio Stations (Fm/Am)
Audio and Video System Frequency indicator bar: Indicates the ➑ to automatically search position of the current radio frequency in for the station you want to store. the frequency band. or rotate the AUDIO/TUNE : Tap to automatically search ➒ dial on the unit to manually search for for radio stations above or below the the station you want to store. -
Page 17: Selecting A Preset Radio Station
Audio and Video System ► Selecting a preset radio station ► USB or iPod music player screen To open the USB or iPod music player Press the FM/AM button to change to screen: the desired frequency band. Press the HOME [ ] /VOICE [ ] Tap PRESET to show the list of button on the unit to display the Home... -
Page 18: Selecting A File From A List
Audio and Video System RDM: Tap to activate and select the For USB devices: ➐ random playback modes. When a USB device is connected, the following file list will be displayed. ● : Plays all files in the playlist in a random order. - Page 19 Audio and Video System Note Caution ● Some USB devices may not operate ● When using a USB device or iPod, properly due to compatibility issues. make sure to disconnect the device Check that the device is supported when it is not in use. Do not connect before using it.
-
Page 20: Usb Video Player
Audio and Video System USB video player ● If high capacity USB devices are used, there may be situations that require This section explains how to use the USB the logical drive to be partitioned for video player. user convenience. In these situations, You can play AVI, MP4, WMV, and MKV it will only be possible to play music on files that are stored on a USB device. -
Page 21: Selecting A File From A List
Audio and Video System : Tap to pause or resume Root Folder: Tap to move to the ➎ ➐ playback. root folder. RPT: Tap to change the playback ➏ Select the desired file to start mode as follows. playback. ● : Repeats the current file. -
Page 22: Selecting A File From A List
Audio and Video System USB image player : Tap to rotate the image in ➏ a clockwise or counterclockwise This section explains how to use the USB direction. image player. List: Tap to open the file list. ➐ You can view JPG, BMP, and PNG files that are stored on a USB device. -
Page 23: Bluetooth Audio Player
Audio and Video System Bluetooth audio player Song information: Displays the album, ➋ artist, and song details. This section explains how to use the : Tap to skip to the previous or ➌ Bluetooth audio player. next file. This unit supports the A2DP (Advanced : Tap to pause or resume playback. -
Page 24: Apple Carplay (Optional)
Apple CarPlay (optional) About Apple CarPlay Note Apple CarPlay integrates your iPhone’s ● If your iPhone is locked, you need apps with your car’s media system, to enter the passcode to unlock the allowing you to access the applications iPhone. To access Apple CarPlay and your device more easily. -
Page 25: Apple Carplay Home Screen
Siri. Now Playing: Tap to play streaming ➎ music or a music file that are previously played or currently playing. HYUNDAI: Tap to display the the Home ➏ menu screen. Podcasts: Tap to play podcasts stored ➐ Note on your iPhone. -
Page 26: Phone
Apple CarPlay (optional) Phone ► Making a call using Contacts From the Apple CarPlay home ► Making a call using Siri screen, tap Phone. From the Apple CarPlay home Tap Show Contacts. screen, tap Phone. You can also press the PHONE button on the unit to open the Phone application. -
Page 27: Accepting Or Declining A Call
Apple CarPlay (optional) ► Accepting or declining a call Albums: Tap to select an album. ➌ Artists: Tap to select songs from a When you receive an incoming call on ➍ specific artist your iPhone while using Apple CarPlay, the following screen will appear. -
Page 28: Maps
Apple CarPlay (optional) Maps ► Searching for a location From the Apple CarPlay home ► Viewing your current location screen, tap Maps > Destinations. From the Apple CarPlay home screen, tap Maps. Your current location will be indicated on the map. ➍... -
Page 29: Messages
Apple CarPlay (optional) Messages Select a message. Siri will read the selected message out loud. ► Sending a text message From the Apple CarPlay home screen, tap Messages. Tap New Message. Podcasts ► Playing a podcast Say the desired name from your From the Apple CarPlay home contacts to send a text message screen, tap Podcasts. -
Page 30: Android Auto (Optional)
Android Auto (optional) About Android Auto Note Android Auto allows you to gain access to The user agreement screens may differ maps, make phone calls, listen to music, depending on Android phones. and more by connecting a compatible Android phone to the unit. The Android Auto screen will appear. -
Page 31: Android Auto Screen
The following are the main menu options ● To return to the Home menu screen, available on the Android Auto screen. tap the Vehicle info icon > Return to HYUNDAI MOTORS. ● You can use compatible third-party ➏ apps. Refer to the Android Auto website for a list of compatible apps. -
Page 32: Music
Android Auto (optional) Missed: Tap to see your missed calls ➍ and make a call. ➋ Music ➌ ► Playing music ➊ From the Android Auto screen, tap the Music icon. : Tap to locate your current position ➊ Select the desired music app. on the map. -
Page 33: Bluetooth Connectivity
Bluetooth Connectivity About the Bluetooth feature ► Connecting devices After the devices are paired, subsequent The Bluetooth feature enables you to Bluetooth connections for previously wirelessly connect two devices that are paired devices start automatically. You near to each other. You can connect can connect to any of the devices on the your unit and a wide variety of Bluetooth- paired device list. -
Page 34: Connecting A Bluetooth Device
Bluetooth Connectivity ► Connecting a Bluetooth device On the device that you are connecting to, confirm the pairing and data To search for and connect a Bluetooth- access request from the unit. enabled device from the unit: If a passkey is required at the Press the PHONE button on the unit Bluetooth device, enter the passkey to display the phone screen. -
Page 35: Disconnecting A Bluetooth Device
Bluetooth Connectivity Tap Setup > Pairing. When the devices are paired and connected, the name of the Bluetooth A list of paired devices will be device appears on the screen showing displayed and the currently connected "Bluetooth device connected" as its status device will be highlighted. -
Page 36: Phone Functions
Bluetooth Connectivity Phone functions ► Accepting a call When a call is received at the unit, the After connecting the unit to a smartphone, Incoming Call screen will appear. you can use various call functions that are available on the connected smartphone Tap Accept on the screen or press from the unit. -
Page 37: Using Options During A Call
Bluetooth Connectivity Using the call history Select a record from the phone book list. From the phone screen, tap Send. The call history will be displayed. Tap Download to import the call history from the smartphone. Select a record from the call history list. -
Page 38: Managing The Call History And The Phone Book
Bluetooth Connectivity ► Managing the call history and the Select an record and tap Delete > Yes. phone book ➊ You can import call history and phone book data from the smartphone to use various call functions and delete obsolete items from the unit. -
Page 39: Changing The Bluetooth Passkey
Bluetooth Connectivity Tap - or + to adjust the phone volume. Tap On to activate auto connection or Off to deactivate it. When auto connection is activated, the unit will automatically search for and connect to the device that was most recently connected. -
Page 40: Settings
Settings Setting the sound Tap OK. This section explains how to customize the ► Selecting the EQ style settings for media and system sounds. Press the SETUP button on the unit to display the SETUP menu screen. ► Adjusting the sound balance and fader Tap Sound >... -
Page 41: Setting The Initial Volume
Settings Setting the display Tap the checkbox next to Loudness on to activate the loudness feature. This section explains how to customize the display settings. ► Adjusting the brightness and color of the screen Press the SETUP button on the unit to display the SETUP menu screen. -
Page 42: Setting The Power-Off Display Type
Settings Setting the system ► Setting the power-off display type This chapter explains how to customize the unit settings and keep the unit up to date. Press the SETUP button on the unit to display the SETUP menu screen. ► Checking/Updating/Initializing the unit Tap Display >... -
Page 43: Selecting The Language
Settings To return the unit to the factory default ➊ settings and delete user data, tap Default Settings > Yes. The unit will restart and initialize the system. ➋ If touch point does not fit well, tap Touch Calibration > Yes. It can be calibrated so that its position is more appropriate. -
Page 44: Enabling Or Disabling Android Auto
Settings ► Enabling or disabling Android Auto (optional) Press the SETUP button on the unit to display the SETUP menu screen. Tap System > Android Auto. To enable Android Auto, tap Enabled. To disable Android Auto, tap Disabled. Note ● If any device is connected to the iPod/ USB port, you cannot set Android Auto on or off. -
Page 45: Troubleshooting
Troubleshooting Problem Cause Solution The unit does not The ignition switch is not Place the ignition switch in the start. turned on. IGN (ON) position. The ignition switch is not in Place the ignition switch in the the accessory (ACC) position. ACC position. -
Page 46: Specifications
Specifications Range of tuning AM: 530 ~ 1,710 kHz / 10 kHz Steps FM: 87.5 ~ 107.9 MHz / 200 KHz Steps Sensitivity AM: 35 dB under FM: 12 dB under Division Stereo FM 20 dB Format logical file ISO 9550 (level 1, 2 & 3), Joliet Usable sampling MP3: Sampling Rate 44 kHz bit rate 32-320 KB/s with VBR rates and bit... -
Page 47: Limited Warranty
Limited Warranty ORIGINAL NAVIGATION HEAD UNIT SUPPLIED BY VEHICLE DEALER Product : Product No. : ► WHAT THIS WARRANTY COVERS The Limited Warranty does not cover the installation, removal or maintenance 1. Vehicle Dealer Shop ("Dealer") of the Hardware or any costs related warrants to you that the Hardware will be free from defects in workmanship herewith. - Page 48 Limited Warranty 6. Except for the Limited Warranty and to ►LIMITATION OF LIABILITY the maximum extent permitted by 9. Neither DEALER nor its suppliers shall applicable law, DEALER and its be liable to you or to any third party for suppliers provide the Hardware "AS IS any damages either direct, indirect, AND WITH ALL FAULTS", and hereby...
- Page 49 Support - HOTLINE Antonio Dovali Jaime 70 Torre D Piso 10 KOR Email: neilsuh@motrex.co.kr ● Phone: +52-1-664-188-9184 ● Support - HOTLINE Motrex Mexico S. de RL. de CV Antonio Dovali Jaime 70, Torre D 10 Col Santa Fe, Del. Alvaro Obregon, Distrito Federal, CP 01210, Mexico Email: neilsuh@motrex.co.kr ●...
- Page 52 PN : 3264-00158 3264-00158 BAPE-L3000N Rev. 1.0...
Need help?
Do you have a question about the BAPE-L3000N and is the answer not in the manual?
Questions and answers