Table of Contents
Advertisement
Advertisement
Table of Contents
Troubleshooting

Related Manuals for BLADDERSCAN BVI 9400


Summary of Contents for BLADDERSCAN BVI 9400
- Page 1 BLADDERSCAN BVI 9400 Operations & Maintenance Manual...
- Page 2 0900‑4412‑06‑60...
- Page 3 BLADDERSCAN BVI 9400 Operations & Maintenance Manual Effective: September 29, 2017 Caution: Federal (United States) law restricts this device to sale by or on the order of a physician.
- Page 4 Copyright © 2017 by Verathon Inc. All rights reserved. No part of this manual may be copied or transmitted by any method without the express written consent of Verathon Inc. Verathon, the Verathon torch symbol, BladderScan, the BladderScan symbol, Scan Point, and NeuralHarmonics are trademarks or registered trademarks, and Total Reliability Plan is a service mark of Verathon Inc. Bluetooth word mark and logos are owned by the ®...
-
Page 5: Table Of Contents
TABLE OF CONTENTS IMPORTANT INFORMATION ..........................1 Overview ................................1 Product Description ............................1 Notice to All Users ............................2 Statement of Prescription ..........................2 Statement of Intended Use ..........................2 Essential Performance ............................2 Safety Information ..............................2 Biological Safety ..............................2 Contraindications .............................2 Cautions & Warnings ............................3 INTRODUCTION ..............................7 Components &... - Page 6 SETTING UP ................................34 Procedure 1. Perform the Initial Inspection ....................34 Procedure 2. Set Up the Battery .......................35 Procedure 3. Attach the Probe to the Console ..................37 Procedure 4. Program the Facility Name ....................38 Procedure 5. Set the Date and Time ......................40 Procedure 6.
- Page 7 TROUBLESHOOTING ............................62 Help Resources ..............................62 Device Repair ..............................62 Warranty ................................62 Troubleshooting Procedures ..........................63 Procedure 1. Troubleshoot Scan Point Connection ..................63 Procedure 2. Troubleshoot Power Issues ....................64 Procedure 3. Instrument Too Hot ......................64 Procedure 4. Clear a Paper Jam ........................64 PRODUCT SPECIFICATIONS ..........................65 Component Specifications ..........................65 Console &...
-
Page 9: Important Information
BladderScan instruments are quick and easy to use. When the user presses the Scan button, within seconds the BVI 9400 measures ultrasonic reflections on multiple planes inside the body and produces a three‑dimensional image. -
Page 10: Notice To All Users
The ultrasound output power of the BladderScan BVI 9400 is not user adjustable and is limited to the minimum level necessary for effective performance. Data on acoustic output levels can be found in the Product Specifications. -
Page 11: Cautions & Warnings
If you are using the BladderScan BVI 9400 Bluetooth link and wireless LAN devices simultaneously, you may experience less‑than‑optimal network performance or even lose your network connection. If this happens, you may need to move the BladderScan and Scan Point ®... - Page 12 Risk of explosion. If you use the BladderScan BVI 9400 in the presence of flammable anesthetics, the hazard of potential explosion exists. WARNING Risk of electric shock or burns. Do not use the BladderScan instrument in conjunction with HF surgical equipment.
- Page 13 BladderScan BVI 9400, accessories, and computer are outside the patient vicinity (more than 2 m [6 ft] from the patient). WARNING Risk of explosion, fire, or serious injury. The BladderScan BVI 9400 is powered by a lithium‑ion battery. Failure to note the following when handling the battery may result in serious injury: •...
- Page 14 However, medical professionals should use ultrasound only when clinically indicated, using the lowest exposure times possible to obtain accurate measurements. The ultrasonic output of the BladderScan BVI 9400 is not user adjustable and is limited to the minimum level necessary for effective performance. For...
-
Page 15: Introduction
• Familiarize yourself with the contents of this manual. • Watch the onboard tutorial provided on the instrument. The BladderScan BVI 9400 has two main components: the console and the probe. The console and probe are linked by a detachable cable. -
Page 16: Probe Components
PROBE COMPONENTS The probe transmits and receives ultrasound waves, automatically moving its internal transducer 360º to scan twelve planes to produce a three‑dimensional image of the bladder. The probe is attached to the console by a cable. The probe has three main features: Figure 2. -
Page 17: Console Components
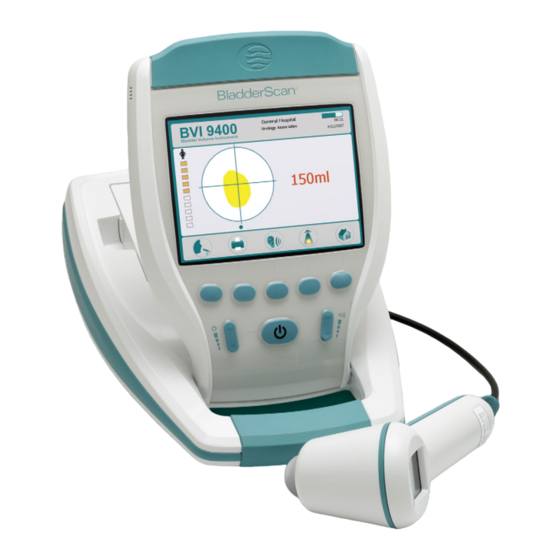
CONSOLE COMPONENTS The console provides most operating controls for the scanning process by means of five variable function buttons. The measured bladder volume and target‑shaped aiming icons are clearly shown on the main display. The console also provides controls for adjusting brightness and volume, turning the power on/off, interfacing with a Scan Point host computer (optional), and adjusting user settings and preferences. -
Page 18: Battery Charger/Wireless Hub Components
BATTERY CHARGER/WIRELESS HUB COMPONENTS The BladderScan BVI 9400 is powered by a lithium‑ion battery. The battery charger provided with the BVI 9400 can charge two lithium‑ion batteries while simultaneously functioning as the wireless hub linking the BVI 9400 to the Scan Point host computer. A battery icon on the instrument display is always present, ®... -
Page 19: System Components & Accessories
BVI 9400 probe Battery charger/wireless hub with AC power adapter and power cord ACCESSORIES Lithium‑ion battery (2 provided) BladderScan BVI 9400 In‑Service CD or USB, containing the operations & maintenance manual Thermal paper roll for the printer Ultrasound gel Mobile cart (Optional) Universal accessory basket (Optional) Scan Point... -
Page 20: Icons & Buttons
ICONS & BUTTONS The console's main display presents user information and prompts that vary depending on the current device function. The five buttons below the display have variable functions according to device mode. Button functions are indicated by icons in the display footer, immediately above each button. CONSOLE DISPLAY ICONS The following icons may appear on the console main display. -
Page 21: Variable Button Functions
• Select the “female” icon to scan a female patient who has not had a hysterectomy. • Select the “BladderScan” icon to scan all other patients. Go to the Home screen. Go to the Tutorial screen. Go to the Settings screen. -
Page 22: Button Functions For Each Display Screen
ICON PURPOSE Stop recording a voice annotation. Play video playback. Pause video playback. Add, increase, or toggle characters, as appropriate. Remove, decrease, or toggle characters, as appropriate. No function. BUTTON FUNCTIONS FOR EACH DISPLAY SCREEN The Power, Brightness, and Volume buttons are constant buttons on the body of the console and can be pressed at any time. - Page 23 SCREEN/MODE ACTIVE BUTTONS (1) Record—Press to record. Changes to a stop button during recording. Results screen (2) Print—Print to onboard printer. Appears when a scan is complete. (3) Listen—Press to listen to the voice annotations, otherwise, Prominently displays calculated bladder no function.
- Page 24 SCREEN/MODE ACTIVE BUTTONS (1) Down Arrow—Move forward to the next changeable unit. (2) Up Arrow—Move back to the previous changeable unit. Date & Time screen (3) Plus Sign—Increase or toggle the selected value. Allows the user to set the date and time. (4) Minus Sign—Decrease or toggle the selected value.
-
Page 25: Display Screens
• In the center panel, right side: A cost saving summary. Displays the savings to your organization due to using the BladderScan BVI 9400 rather than catheterization. The values used to calculate the savings are user‑variable and are entered from the Savings Preferences screen. - Page 26 27 kg (60 lbs). • Select the “female" icon to scan a female patient who has not had a hysterectomy. • Select the “BladderScan" icon to scan all other patients. View the onboard tutorial. Go to the Settings screen (set the time, date, facility name, and user preferences).
- Page 27 RESULTS SCREEN The Results screen appears automatically when an ultrasound scan is complete. The display presents the result of the exam: crosshairs, bladder outline, and the calculated bladder volume. You may choose to print this result to the onboard printer and also record a voice annotation to save the exam. After the annotation is recorded, the Listen and Review buttons become active, and the newly recorded exam appears on the main display as an open blue folder icon.
- Page 28 REVIEW SCREEN The Review screen opens when you select a saved exam (orange folder icon) to review. The display shows the ultrasound images associated with the selected exam. A blue open‑folder icon indicates which exam is being viewed. While reviewing saved exams, the buttons below the display allow you to print, listen to, or delete exam data.
- Page 29 TUTORIAL SCREEN To open the Tutorial screen, press the Tutorial button from the Home screen. The Tutorial screen presents a menu of training modules. Note: When this screen is open, the Scan button on the probe is disabled. Table 10. Tutorial Screen Button Functions BUTTON FUNCTION...
- Page 30 VIDEO VIEWING SCREEN The Video Viewing screen is activated by pushing the Enter button on the Tutorial screen. Press the Play button to begin the desired tutorial. Note: When this screen is open, the Scan button on the probe is disabled. Table 11.
- Page 31 SETTINGS SCREEN To open the Settings screen, push the Settings button on the Home screen. The display presents a list of user‑configurable settings: Name, Date & Time, General Preferences, Savings Preferences, and Self Test. Note: When this screen is open, the Scan button on the probe is disabled. Table 12.
- Page 32 NAME SCREEN This screen allows you to select the appropriate alpha numeric characters for entering your facility's name. For more information, see the procedure Program the Facility Name on page 38. Table 13. Name Screen Button Functions BUTTON FUNCTION Move to the character below. Move to the character to the right.
- Page 33 DATE & TIME SCREEN This screen allows you to set the date and time. For more information, see the procedure Set the Date and Time on page 40. Note: If the time display is set to show a 24‑hour clock, the hour units are 0–23. If the clock is set to show a 12‑hour clock, the hour units are 1–12 followed by AM or PM.
- Page 34 GENERAL PREFERENCES SCREEN This screen displays a list of available settings and their current values. Available settings: • Language: Multiple languages are available. English is the default setting. • Date Format: mm/dd/yyyy; dd.mm.yyyy; yyyy‑mm‑dd. • Time Format: 12‑hour or 24‑hour. •...
- Page 35 Figure 5. B‑Mode and C‑Mode Print Reports Table 15. General Preferences Screen Button Functions BUTTON FUNCTION Move down a setting in the list. Move up a setting in the list. Select the next option. Press and hold to move through options more quickly. Select the previous option.
- Page 36 SAVINGS PREFERENCES SCREEN The system calculates and displays information related to cost savings, catheterizations avoided, and UTIs avoided. The default settings can be customized to reflect the rates and costs at your facility. For more information on cost savings, see Histogram of Cost Savings on page 33 Preferences lists and options:...
- Page 37 SCAN COUNTER FEATURE ON THE SELF TEST SCREEN The BladderScan BVI 9400 is equipped with a scan counter feature. It counts all Scan button pushes captured by the console. It is designed to enable clinical users or service technicians to determine the number of scans the device has performed over its lifetime.
- Page 38 To ensure reliability, a backup copy of the scan count is stored in device memory. If both the scan counter and its backup copy are corrupted, the scan counter will automatically reset to a zero value. The scan counter feature is designed so that the value cannot be manually reset or modified by the clinical user or service partner.
- Page 39 TROUBLESHOOTING The scan counter feature is designed for redundancy, so the scan value is stored in multiple locations in the instrument’s internal memory. If one of the storage locations fails, the text “EEPROM Failed” will be added to the DSP status line. In the event of an EEPROM failure, the counter will continue to work but will not have a backup copy stored in the instrument.
- Page 40 Home screen. The Scan Point screen displays information about the ® status of the link between the BladderScan instrument and the Scan Point host computer. Note: The Scan Point screen (connected) is only available if the optional Scan Point software is installed on a PC. Figure 8.
-
Page 41: Sleep Mode
Each volume measurement from a completed scanning procedure is stored in the memory of the BladderScan BVI 9400 in one of eleven volume ranges (each with a 100 mL increment). This data is analyzed and can be displayed on the BVI 9400 at any time. The Savings Preferences screen lists: Date Started, Number of Scans, Cath Avoided, UTI (urinary tract infection) Avoided, Savings. -
Page 42: Setting Up
SETTING UP To help you get up and running as quickly as possible, the next few pages explain how to: Perform the Initial Inspection Set Up the Battery Attach the Probe to the Console Program the Facility Name Set the Date and Time Load the Thermal Paper Attach the Instrument to a Medical Cart (Optional) Install Scan Point with QuickPrint (Optional) -
Page 43: Procedure 2. Set Up The Battery
BladderScan BVI 9400 for the first time, you need to charge both batteries. The BladderScan BVI 9400 draws very little power when it is turned off. However, if you do not plan to use the BladderScan instrument for several weeks, you should remove the battery to prevent it from discharging. - Page 44 INSERT A BATTERY INTO THE INSTRUMENT 4. Insert the charged battery into the battery well in the console, slide it under the ledge and push down gently until the battery clicks into place. Note: The battery is designed to prevent incorrect installation. If the battery does not slide into the battery well easily, remove the battery, reorient it, and try again.
-
Page 45: Procedure 3. Attach The Probe To The Console
PROCEdURE 3. ATTACH THE PROBE TO THE CONSOLE 1. Locate the cable port on the back of the console. 2. Align the silver arrow on the probe cable connector ring to the top of the cable port. Arrow on cable connector 3. -
Page 46: Procedure 4. Program The Facility Name
PROCEdURE 4. PROGRAM THE FACILITY NAME You can customize your BladderScan BVI 9400 by entering your facility’s name. This information is included on BladderScan displays and all printouts of exam results. 1. Turn on the instrument by pressing the Power button 2. - Page 47 4. On the Name screen, use the Right Arrow button and Down Arrow button to move to the desired character. When the desired character is highlighted in red, press the Plus button to add it to your text. Use the Minus button to delete characters.
-
Page 48: Procedure 5. Set The Date And Time
PROCEdURE 5. SET THE dATE ANd TIME 1. Turn on the instrument by pressing the Power button 2. From the Home screen, press the Settings button to open the Settings screen. 3. On the Settings screen, push either the Up Arrow button or Down Arrow button until “Date &... -
Page 49: Procedure 6. Load The Thermal Paper
PROCEdURE 6. LOAd THE THERMAL PAPER If paper appears to be stuck in the printer, see the procedure Clear a Paper Jam on page 64. 1. Locate the paper compartment door on the base of the console, behind the display. 2. Slide the door out, then lift up. 3. -
Page 50: Procedure 7. Attach The Instrument To A Medical Cart (Optional)
ATTACH THE INSTRUMENT TO A MEdICAL CART (OPTIONAL) The BladderScan BVI 9400 is completely portable and can be easily moved and positioned for convenient use. Installing the instrument on the optional mobile cart will allow you to move it, along with related accessories, to the patient examining area or bedside. - Page 51 PERMANENTLY ATTACH THE POST TO THE WHEELEd BASE (OPTIONAL) 5. Place the wheeled cart base on a level floor. 6. Open the two tubes of Loctite 680 supplied with the cart by snapping off the tips of the tubes. ® 7.
-
Page 52: Procedure 8. Install Scan Point With Quickprint (Optional)
The onboard tutorial provides an overview of how to perform an ultrasound scan of the bladder using the BladderScan BVI 9400. The video is: • Approximately 5 minutes long. • Available at verathon.com • Available for review anytime on the BladderScan BVI 9400 device by pushing the Tutorial button from the Home screen. -
Page 53: Using The Device
USING THE DEVICE WARNING Risk of explosion. If you use the BladderScan BVI 9400 in the presence of flammable anesthetics, the hazard of potential explosion exists. WARNING Potential patient hazard. To date, exposure to low‑power, pulsed diagnostic ultrasound has not been shown to produce adverse effects. However, medical professionals should use ultrasound only when clinically indicated, using the lowest exposure times possible to obtain accurate measurements. -
Page 54: Procedure 1. Prepare For The Exam
PROCEdURE 1. PREPARE FOR THE EXAM 1. Ensure you are familiar with the parts and functions of the BladderScan instrument. For more information, see the Introduction chapter on page 7. 2. If you are a new BladderScan instrument user, Verathon recommends you perform your first exam on a ®... -
Page 55: Procedure 2. Measure Bladder Volume
PROCEdURE 2. MEASURE BLAddER VOLUME 1. Turn on the instrument by pressing the Power button 2. Select the exam mode. Select to scan a patient less than 122 cm (48 in) tall and weighing less than 27 kg (60 lbs). Select to scan a female patient who has not had a hysterectomy. Select to scan all other patients 3. - Page 56 6. Aim the probe toward the expected location of the bladder. For most patients, this means angling the probe slightly toward the patient’s tail bone (coccyx) so the scan clears the pubic bone. 7. If you are scanning an obese patient, lift as much abdominal adipose tissue out of the way of the instrument as possible.
- Page 57 10. When the Results screen appears, assess the accuracy of the scan as follows. Table 20. Bladder Measurement Accuracy RESULT INDICATOR(S) EXAMPLE If the scan is successful and “on target,” the probe will show eight arrows on the aiming Successful display.
-
Page 58: Procedure 3. Save, Review, & Print Exam Results
11. If necessary, use the following orientation in order to re‑aim the probe, and then re‑scan the patient: • The small dot at the base of the crosshairs represents the feet of the patient. • The top of the crosshairs represents the patient’s head. •... -
Page 59: Procedure 4. Delete A Saved Exam
6. To print via the onboard printer, press the Print button The label provides fields for patient ID, patient name, operator ID, and physician. This information must be written on the printout. Note: If the facility name, date, and time have not been set, those lines will be skipped on the printout. Note: The BVI 9400 prints on thermal paper, which fades over time. -
Page 60: Cleaning & Maintenance
CLEANING & MAINTENANCE WARNING This product may only be cleaned and disinfected by using the approved processes provided in this manual. Cleaning and disinfection methods listed are recommended by Verathon based on compatibility with component materials. WARNING Availability of cleaning and disinfection products varies by country, and Verathon is unable to test products in every market. -
Page 61: Procedure 1. Clean & Disinfect The Instrument
• Do not use CidexPlus to disinfect the instrument. CidexPlus will damage the plastic enclosure. ® Use this procedure in order to clean the BladderScan BVI 6100 instrument. Review the information in the Best Practices Compatibility & Availability sections before completing this procedure. -
Page 62: Regular Inspections
11. Allow the instrument to air dry or towel dry with a clean, dry cloth. REGULAR INSPECTIONS Verathon recommends that the BVI 9400 be certified by an authorized BladderScan service center once a ® year. Certification service includes comprehensive inspection and testing of the instrument to ensure accurate performance in clinical use. -
Page 63: Maintenance
MAINTENANCE PROCEdURE 1. RUN A SELF‑TEST The BVI 9400 can perform a number of self‑diagnostic tests. 1. From the Home screen, press the Settings button 2. When the Settings screen opens, press the Up Arrow button or Down Arrow button until Self Test is highlighted in red, then press the Enter button . -
Page 64: Procedure 2. Update The Software
PROCEdURE 2. UPdATE THE SOFTWARE 1. On the instrument, from the Home screen, press the Scan Point button 2. On the computer, double‑click the Scan Point with QuickPrint icon. Scan Point ® opens. 3. On the computer, in the Scan Point QuickPrint window, click Find New. QuickPrint establishes a connection with the instrument, and an icon for the device appears in the left pane. - Page 65 4. Select the 9000 Series device, verify that the serial number on the screen matches the serial number on the bottom of console, and then click the Update Instrument button. 5. If any updates are available, the device downloads and installs them. The console displays a progress bar and automatically restarts when the installation is complete.
-
Page 66: Procedure 3. Calibrate The Probe Using The Scan Point System
PROCEdURE 3. CALIBRATE THE PROBE USING THE SCAN POINT SYSTEM If you do not have Scan Point with QuickPrint software, you must send your instrument to an authorized ® Verathon service center for calibration. Contact Verathon Customer Care for more information. ® At minimum, the BVI 9400 must be calibrated every 12 months in order to ensure accurate results. - Page 67 4. Replace the tank lid on the tank base. Ensure that the opening for the scanhead is directly above the spiral target. 5. Place the probe into the cutout in the lid. Ensure that the tip of the probe is submerged in the water. 6.
- Page 68 9. Select the 9000 Series device, verify that the serial number on the screen matches the serial number on the bottom of console, and then click the calibration tank icon. 10. Click the Calibrate button. Scan Point begins to scan and analyze the data in order to ensure that it ®...
-
Page 69: Device Disposal
13. Remove the probe from the tank lid, and then dry the probe with a clean, soft cloth. DEVICE DISPOSAL The BladderScan BVI 9400 and related devices may contain mineral oils, batteries, and other environmentally hazardous materials. When the instrument has reached the end of its useful service life, return the device, battery charger/wireless hub, and related accessories to a Verathon service center for proper disposal. -
Page 70: Troubleshooting
DEVICE REPAIR The BladderScan BVI 9400, probe, and battery charger/wireless hub are completely sealed. There are no user‑serviceable components. Verathon does not make available any type of circuit diagrams, component parts lists, descriptions, or other information that would be required for repairing the device and related accessories. -
Page 71: Troubleshooting Procedures
TROUBLESHOOTING PROCEDURES PROCEdURE 1. TROUBLESHOOT SCAN POINT CONNECTION Complete this procedure if the console cannot connect to Scan Point ® 1. Ensure the Scan Point button was pressed and the console is searching for a connection. 2. In Scan Point, try connecting again by clicking the Find New button. Repeat this step up to 3 times. If the console does not connect, continue to the next step. -
Page 72: Procedure 2. Troubleshoot Power Issues
PROCEdURE 2. TROUBLESHOOT POWER ISSUES If the instrument does not turn on, this is usually due to a dead or discharged battery and can be remedied by replacing the dead battery with a charged battery. When the battery charge is too low to allow normal operation (but not too low to permit operation of the internal circuitry) the device displays the following message: Battery charge level is too low for instrument operation. -
Page 73: Product Specifications
PRODUCT SPECIFICATIONS COMPONENT SPECIFICATIONS CONSOLE & PROBE SPECIFICATIONS Table 21. General Specifications ITEM SPECIFICATION Input Lithium‑ion battery Classification Internally powered, Type BF Expected product life 5 years Weight 2.36 kg (5.2 lbs), with battery Display 13.36 x 10.13 cm (5.26 x 3.99 in) (640 x 480 pixels, 120 dpi) Integrated printer Thermal printer Table 22. - Page 74 Table 23. Ultrasound Acoustic Output Parameters (IEC Standard) Values in this table are the maximum readings obtained from three test results. INDEX LABEL NON‑SCAN NON‑ SCAN SCAN ≤1 cm² A >1 cm² APRT APRT Maximum index value 0.460 2.84E‑3 — —...
- Page 75 Table 24. Accuracy Specifications SPECIFICATION DESCRIPTION Bladder volume accuracy ± (15% + 15 mL) Bladder volume range 0–999 mL (0–200 mL in small child scan mode) The following example shows how the accuracy ranges shown in Table 24 could affect reported volume measurements.
-
Page 76: Battery Specifications
BATTERY SPECIFICATIONS The BladderScan BVI 9400 is provided with two lithium‑ion batteries. A battery icon on the instrument display is always present indicating how much power remains and when the battery needs to be changed. You can change the battery whenever necessary. Verathon recommends that you replace your batteries every two years. -
Page 77: Battery Charger/Wireless Hub Specifications
BATTERY CHARGER/WIRELESS HUB SPECIFICATIONS The battery charger/wireless hub is powered from a standard wall outlet (adaptable to international power standards). The battery charger/wireless hub can charge two batteries simultaneously. Table 27. Battery Charger/Wireless Hub Specifications SPECIFICATION DESCRIPTION Operating Conditions Ambient temperature range 5–40ºC (41–104ºF) Atmospheric pressure range 700–1060 hPa... -
Page 78: Bluetooth Wireless Technology
Group. ELECTROMAGNETIC COMPATIBILITY The BladderScan BVI 9400 system is designed to be in compliance with IEC 60601‑1‑2:2007, which contains electromagnetic compatibility (EMC) requirements for medical electrical equipment. The limits for emissions and immunity specified in this standard are designed to provide reasonable protection against harmful interference in a typical medical installation. -
Page 79: Electromagnetic Immunity
IEC 61000‑4‑8 Portable and mobile RF communications equipment should be used no closer to any part of the BladderScan BVI 9400 system, including cables, than the recommended separation distance Conducted RF 3 Vrms 3 V calculated from the equation IEC 61000‑4‑6... - Page 80 RF transmitters, an electromagnetic site survey should be considered. If the measured field strength in the location in which the BladderScan BVI 9400 system is used exceeds the applicable RF compliance level above, the BladderScan BVI 9400 system should be observed to verify normal operation.
-
Page 81: Recommended Separation Distances
RECOMMENDED SEPARATION DISTANCES Table 31. Recommended Separation Distances between Portable and Mobile RF Communications Equipment and the system The system is intended for use in an electromagnetic environment in which radiated RF disturbances are controlled. The customer or the user of the system can help prevent electromagnetic interference by maintaining a minimum distance between portable and mobile RF communications equipment (transmitters) and the system as recommended below, according to the maximum output power of the communications equipment. -
Page 82: Glossary
GLOSSARY The following table provides definitions for specialized terms used in this manual or on the product itself. For a full list of caution, warning, and informational symbols used on this and other Verathon® products, please refer to the Verathon Symbol Glossary at verathon.com/symbols. TERM DEFINITION Ampere...
Need help?
Do you have a question about the BVI 9400 and is the answer not in the manual?
Questions and answers