Table of Contents
Advertisement
Advertisement
Table of Contents

Related Manuals for Jovision JVS-H411


Summary of Contents for Jovision JVS-H411
-
Page 1: User Manual
User Manual ... - Page 2 CHANGE THE DEFAULT PASSWORD Default Network Camera Account : Username: abc Password: 123 The default password (123) for the abc account is for first‐time log‐in purposes only. You should change this default password to better protect against security risks, such as the unauthorized access by others to the product that may prevent the product from functioning properly and/or lead to other undesirable consequences. For your privacy, we strongly recommend changing the password to something of your own choosing (using a minimum of 8 characters, including upper case letters, lower case letters, numbers, and special characters) in order to increase the security of your product. Proper configuration of all passwords and other security settings is the responsibility of the installer and/or end‐user. FCC Certification Requirements Caution: Any changes or modifications in construction of this device which are not expressly approved by the party responsible for compliance could void the user's authority to operate the equipment. This device complies with part 15 of the FCC Rules. Operation is subject to the following two conditions: (1) This device may not cause harmful interference, and (2) This device must accept any interference received, including interference that may cause undesired operation. The manufacturer is not responsible for any radio or TV interference caused by unauthorized modifications to this equipment. Such modifications could void the user’s authority to operate the equipment. This equipment has been tested and found to comply with the limits for a Class B digital device, pursuant to Part 15 of the FCC Rules. These limits are designed to provide reasonable protection against harmful interference in a residential installation. This equipment generates, uses and can radiate radio frequency energy and, if not installed and used in accordance with the instructions, may cause harmful interference to radio communications. ...
-
Page 3: Table Of Contents
Contents 1. Introduction ............................3 1.1 Appearance and Interface ....................3 1.2 Specification ........................3 Installation............................4 2.1 Ceiling Mounting .........................4 Network Connection .........................5 3.1 Wireless connection......................5 3.2 Wired Connection .......................5 Preparation on Smart Phone (iOS, Android) ..................6 4.1 Get NVSIP APP........................6 4.2 Register NVSIP Account.......................6 4.3 Power‐on the Device ......................6 Add HD Cloud Camera on Phone ......................7 5.1 How to Choose Device Adding Methods................7 5.2 Add by Sound Wave ......................7 5.3 Add Wi‐Fi Device on iPhone....................9 5.4 Add Wi‐Fi Device on Android....................12 5.5 Add by Device ID .......................13 5.6 Scan devices in LAN......................14 ... -
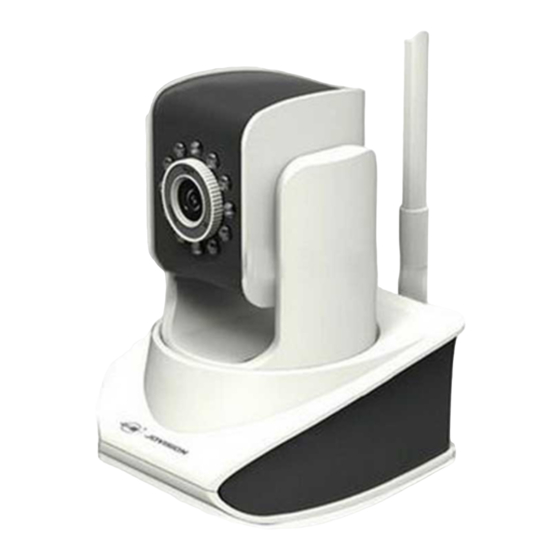
Page 4: Introduction
Introduction 1.1 Appearance and Interface 1.2 Specification Image Sensor 1/4″CMOS Resolution 1280×720 Pixel 1.0MP Frame Rate 25fps View Angle 71° Focus 3.6mm Fixed Local Storage 64G Infrared Lamp 10 LED Lamps 10m IR distance(m) Best distance(m) 8m Temperature ‐20℃~55℃ Humidity 10%~90% Power Supply DC 5V/adapter AC 120V Power ≦3.2W Material White ABS+PC Size(W×H×D)(mm) 95×123×122 Weight(g) 300 ... -
Page 5: Installation
2 Installation 2.1 Ceiling Mounting Before you start: This camera can be installed to wall/ceiling or fixed on desktop. Ceiling mounting is taken as an example in this section; if you adopt wall mounting, you can also take below procedure as a reference. Steps: 1. Attach the mounting base (not provided) to the ceiling and tighten the screws to fix it. 2. Use the lock screw to secure the camera on the mounting base. Notes: Please make sure that the ceiling can support more than 50(N) Newton gravities if the camera is fixed to the ceiling. 4 ... -
Page 6: Network Connection
3 Network Connection 3.1 Wireless connection Notes: With wireless connection, you can add the device by “Add Wi‐Fi Device”, which is based on AP function. Once you connect the camera to the router with Ethernet cable, it will disable AP, which means the function mentioned above won’t work. 3.2 Wired Connection Notes: “Add Wi‐Fi Device” does not apply to wired connection. 5 ... -
Page 7: Preparation On Smart Phone (Ios, Android)
4 Preparation on Smart Phone (iOS, Android) 4.1 Get NVSIP APP 1. Search “NVSIP” in App Store (iOS) or Google play (Android). 2. Get and install NVSIP on your smart phone. 4.2 Register NVSIP Account Notes: You need to register a NVSIP account before using NVSIP service which is free. Although you can use “Visitor Login”, but we strongly recommend that register your own account for better experience. With NVSIP service account, devices list will automatically upload and store on server, and when you login NVSIP with your account on other smart phones, you can access to all these devices without adding them again. 1. Open NVSIP App, and tap “Register” on 2. Input your E‐mail and password, make sure Login Page. the E‐mail has not been registered, tap Register, account will login automatically if the register succeed. 4.3 Power‐on the Device ... -
Page 8: Add Hd Cloud Camera On Phone
5 Add HD Cloud Camera on Phone Before you start: The device has to be configured by “Add by Sound Wave” or “Add Wi‐Fi Device” for first‐time use if you want to use wireless connection. Press reset button for about 3 seconds and release to start sound wave configuration Press reset button for about 15 seconds and release to reset the device. 5.1 How to Choose Device Adding Methods Methods Situation Connection The device had been connect to Internet Add by Device ID Wireless, Ethernet Cable and get device ID online. The device had been connect to Internet Scan QR Code and get device ID online.(The same as Wireless, Ethernet Cable “Add by Device ID”) First‐time use or the device has been Add Wi‐Fi Device Wireless reset. The device has been connected to the Scan Devices in LAN Wireless, Ethernet Cable same network as your smart phone. First‐time use or the device has been Add by sound wave Wireless reset. 5.2 Add by Sound Wave Notes: ... - Page 9 ② ① Select the network which your phone joined, ○ + , and select “Add by sound wave” input the password and tap Next. ③ ④ Press reset button for at least 3 seconds until There will be a demonstration with audio hear the voice “Start voice configuration”, instructions on how to use this function. then release the button and tap Next Then close the demonstration. 8 ...
-
Page 10: Add Wi-Fi Device On Iphone
⑤ ⑥ Keep the speaker of your phone close enough Then NVSIP starts scanning devices in the to the MIC of the camera, click the sound wave network. Choose the one you want to add, icon to send sound wave, you can send it for and click Add many times until hear the voice “Receive network configuration”, which means the device has joined the network. ⑦ ⑧ The device will be added. Tap the device on the list, live video will display. 5.3 Add Wi‐Fi Device on iPhone Notes: Do not connect Ethernet cable before this operation. 9 ... - Page 11 ① ② Power‐on the device, wait for about 40 ○ + , and select “Add Open NVSIP App, Tap seconds, it will create an AP, choose this AP (IPC‐H‐XXXXXXX) from the WLAN settings of Wi‐Fi Device”. your iPhone, and enter the password (12345678) when prompted. ③ ④ NVSIP will prompt that a new device has been Then the live video of the device will display, found. Tap NEXT. you can access Audio, PTZ, Talk function here, but we haven’t finished configuring ...
- Page 12 ⑤ ⑥ Select the Wi‐Fi network for the camera and When the Wi‐Fi connection is completed, input the password, tap Configure. After Open NVSIP App again. hearing success from the device, you NEED to close the app and switch Wi‐Fi network of your iPhone to the one which the camera is connected. ⑦ ⑧ Confirm the information of the device, and NVSIP will prompt that “A new device has tap Save been configured by you”, tap Add. 11 ...
-
Page 13: Add Wi-Fi Device On Android
⑨ ⑩ The device will be added. Tap the device on the list, live video will display. 5.4 Add Wi‐Fi Device on Android ① ② The app will scan AP from the camera(s) and ○ + , and select “Add Open NVSIP App, Tap list them, select the one you want to add. Wi‐Fi Device”. You can check whether it is the one in next step, or go back to this page to choose another. 12 ... -
Page 14: Add By Device Id
③ ④ Then the live video of the device will display, Select the Wi‐Fi network for the camera and check the picture and confirm you can also input the password, tap Configure. access PTZ, Two‐way Talk function here, but we haven’t finished configuring yet, Tap NEXT. ⑤ ⑥ Then NVSIP will prompt that “Discovering Tap the device on the list, live video will Device”, and click Add display. 5.5 Add by Device ID Notes: This method requires that the device be connected to Internet and get NVSIP ID online first. 13 ... -
Page 15: Scan Devices In Lan
① ② Input device ID, Username, Password of the ○ + , and select “Add by Open NVSIP App, Tap device, tap Save Device ID”. ③ ④ The device will be added. Tap the device on the list, live video will display. 5.6 Scan devices in LAN Notes: This method requires that the device be connected to the SAME Wi‐Fi network with your smart phone first. ... - Page 16 ① ② Then NVSIP will detect devices in the LAN, ○ + , and select “Scan Open NVSIP App, Tap choose the device(s) and tap Add. devices in LAN”. ③ ④ Tap the device on the list, live video will The device will be added. display. 15 ...
Need help?
Do you have a question about the JVS-H411 and is the answer not in the manual?
Questions and answers