Table of Contents
Advertisement
Quick Links
useR MANuAl
4
opeRATIoN
The appliance can be operated either by the switches located on the top right hand
side of the heater body or by supplied remote control.
Plug the heater into a 10Amp wall socket.
MANuAl opeRATIoN
1. The main power ON/OFF switch in position O, the heater is OFF.
2. When main power ON/OFF switch is at position I, the heater is ready to use.
3. Press the HEAT button repeatedly to set the heater to desired heat setting. The heater
indicator LED will glow which shows the current heater setting.
heATeR INdIcAToR led Red – 2000W heAT ouTpuT
heATeR INdIcAToR led blue – 1000W heAT ouTpuT
heATeR INdIcAToR led puRple – AuTo Mode
AuTo Mode
Under this mode the heater will automatically turn ON at high heat setting 2000W heat output
when the room temperature drops below 22˚C. When the room temperature is between
22-25˚C the heater output will switch to low heat setting 1000W. When the room temperature
goes above 25˚C the heater will be turned off and the cycle will continue. The LED indicator
will be purple in colour under this mode.
HIGH/ 2000W
LOW/ 1000W
AUTO MODE
HEAT INDICATOR
HEAT INDICATOR LED
HEAT INDICATOR LED
LED COLOUR - RED
COLOUR - BLUE
COLOUR - PURPLE
OFF
NoTe: If operated at the Low heat setting, the heater will not provide as much heat output as in the
High heat setting, however the low setting will not require as much electrical power to operate.
To avoid overloading a circuit, do not plug the heater into a circuit that already has other appliances
working. When the heater is not in use switch off and unplug.
sAfeTy cuT-off
• This appliance is fitted with a safety cut-off which will operate if the heater
overheats (eg. due to blocked air vents). For safety reasons, the heater will NOT
automatically reset.
• To reset the appliance, disconnect the appliance from the mains supply for at least
30 minutes. Reconnect the supply to the mains and switch on the appliance.
5
Remote Control opeRATIoN
1. For remote to function make sure the heater is plugged-in
and mains power switch located on the bottom right hand
side is at position I.
2. When operating the remote make sure you point the
remote to the centre of the heater unit and make sure
each time you press the button the LED indicator located
on top right hand corner of the remote blinks. The buzzer
inside the unit will beep once; if the LED fails to blink
check the batteries. It takes some time for the receiver
to respond to the transmitter. Do not PRESS the buttons
more than once within two seconds for correct operation
3. Power On "
" button: The power-on button at top left
corner of the remote is the mains ON/OFF power button.
This will turn off all the functions and the heater will be in
standby mode.
4. Flame Power On button
: This button controls both
the amber and blue colour flame. Press this button once
to turn ON the flame effect. Once the flame effect is ON
use the + and – buttons as explained below to adjust the
flame brightness as desired. Press this button again to
turn OFF the flame effect.
+5
-5
minimum brightness is reached.
• The Red
or
buttons control the
You can mix the red and the blue flame to
brightness of the red flame.
create a realistic flame effect.
To increase the brightness / flame height,
+5
press and release the
button.
5. heATeR
button: This button is the
Each time you press this button the brightness
heater ON/OFF button. Press this button to
will increase by a small amount, until the
turn the heater ON. The heater will always
maximum is reached.
start at high heat setting 2000W. To turn OFF
To decrease the brightness / flame height,
-5
press and release the
button.
the heater press this button again.
hIGh button: Press the high button to switch
Each time you press this button the brightness
will decrease by small amount, until the
the heater to high heat setting 2000W.
loW button: Press the high button to switch
minimum brightness is reached.
the heater to LOW heat setting 1000W.
+5
-5
RooM TeMp button: Press the high button to
The blue
or
buttons control the
switch the heater to AUTO mode. Under this
brightness of the blue flame.
mode the heater will operate in similar way as
To increase the brightness / flame height,
+5
explained above for the manual operation.
press and release the
button.
Each time you press this button the
6. To turn OFF the heater unit completely press
brightness will increase by a small amount,
the "
" button once.
until the maximum is reached.
Realistic flame effect:
To decrease the brightness / flame height,
-5
The flame effect is controlled by LEDs; the
press and release the
button.
LEDs are non-replaceable type but have been
Each time you press this button the brightness
manufactured to last for long life.
will decrease by small amount, until the
6
MAINTeNANce & cleANING
1. Before cleaning, turn off the heater, unplug the power cord and allow the heater to cool.
2. Do not immerse cord, plug or heater into water or other liquid or pour water or other
liquid over the heater.
3. Use a vacuum cleaner to remove dust and dirt from air openings.
4. Clean exterior surfaces using a solution of water and mild detergent with wrung out
damp sponge. Use and wring out the damp sponge and wipe the exterior surface again.
Finally wipe with a dry cloth. Allow sufficient time to dry before plugging electrical cord
into outlet.
5. The tempered glass front panel can be clean with glass cleaner detergents.
6. Any other servicing should be performed by an authorised service representative.
Do not use the heater if it has malfunctioned or become damaged in any way.
WARRANTy
TechNIcAl specIfIcATIoNs
Arlec guarantees this product in accordance with the Australian
Model efh422
Consumer Law.
Max heater Power 2000W max
Arlec also warrants to the original first purchaser of this product
("you") from a retailer that this product will be free of defects
Rated Frequency 50hz
in materials and workmanship for a period of 12 months from
the date of purchase; provided the product is not used other
Rated Voltage 220-240Vac
than for the purpose, or in a manner not within the scope of the
recommendations and limitations, specified by Arlec, is new and
Flame Effect Lights led (Non-
not damaged at the time of purchase, has not been subjected
Replaceable lights)
to abuse, misuse, neglect or damage, has not been modified or
repaired without the approval of Arlec and has not been used for
commercial purposes ("Warranty").
If you wish to claim on the Warranty, you must, at your own
expense, return the product, and provide proof of original purchase
and your name, address and telephone number, to Arlec at the
address below or the retailer from whom you originally purchased
the product within 12 months from the date of purchase.
Arlec will (or authorise the retailer to) assess any claim you may
make on the Warranty in the above manner and if, in Arlec's
reasonable opinion, the Warranty applies, Arlec will at its own
option and expense (or authorise the retailer to) replace the
product with the same or similar product or repair the product and
return it to you or refund the price you paid for the product. Arlec
will bear its own expenses of doing those things, and you must bear
any other expenses of claiming on the Warranty.
The Warranty is in addition to other rights and remedies you
may have under a law in relation to the product to which the
For all Sales & Warranty enquiries
Warranty relates.
Arlec Australia Pty. Ltd. ACN 009 322 105
Our goods come with guarantees that cannot be excluded under
("Arlec") gives the Warranty.
the Australian Consumer Law. You are entitled to a replacement
Building 3, 31 – 41 Joseph Street, Blackburn North, Victoria, 3130
or refund for a major failure and for compensation for any
other reasonably foreseeable loss or damage. You are also
Blackburn North LPO, P.O. Box 1065, Blackburn North, 3130
entitled to have the goods repaired or replaced if the goods
Customer Service: (03) 9982 5111
fail to be of acceptable quality and the failure does not amount to
New Zealand Toll Free: 0800 003 329
a major failure.
Email: custservice@arlec.com.au
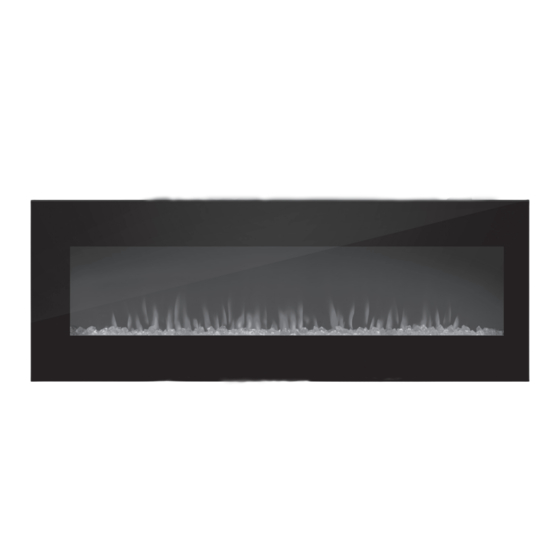
2000W
FIREPLACE HEATER
wall mountable wItH flat tempered glass panel
User ManUal
FOR PERSONAL INDOOR USE ONLY
WARNING!
Magnus
To Reduce The RIsk of fIRe, elecTRIc shock,
oR peRsoNAl INjuRy, ReAd, uNdeRsTANd
ANd folloW INsTRucTIoNs befoRe
EFH422
usING ThIs heATeR
Keep this manual in a safe place for future reference
CPIN002614/2
CPIN002614/3
Advertisement
Table of Contents

Related Manuals for Arlec EFH422


Summary of Contents for Arlec EFH422
- Page 1 To increase the brightness / flame height, product with the same or similar product or repair the product and explained above for the manual operation. return it to you or refund the price you paid for the product. Arlec press and release the button.
- Page 2 CPIN002614/3 IMpoRTANT sAfeGuARds useR MANuAl • Please retain all packaging until you have 14. Do not use this appliance with a programmable poWeR coNTRol checked and counted all the parts and the timer or any other device that switches the INsTAllATIoN Magnus contents of the fixing pack against the parts list.
Need help?
Do you have a question about the EFH422 and is the answer not in the manual?
Questions and answers
Hi .i got Arlec electric heater model no:FFH422 but I lost my remote . Are you able to send me a new remote if yes how much ?