AEG SANTO N 8 18 40-4 i Operating And Installation Instructions
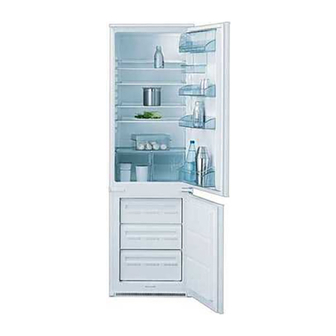
Integrating fridge freezer
Hide thumbs
Also See for SANTO N 8 18 40-4 i:
- User manual (44 pages) ,
- Operating and installation instruction (32 pages) ,
- Operating and installation instructions (32 pages)
Table of Contents
Advertisement
AEG Hausgeräte GmbH
Postfach 1036
D-90327 Nürnberg
http://www.aeg.hausgeraete.de
Technische Änderungen vorbehalten
© Copyright by AEG
Subject to change without notice
2222 208-33
12/03
Med forbehold om endringer
SANTO N 8 18 40-4 i
Integrierbare Kühl-Gefrierkombination
Integrating Fridge Freezer
Integrerbare Kjøle-frysekombinasjoner
Gebrauchs- und Einbauanweisung
Operating and Installation Instructions
Bruksanvisning
Advertisement
Table of Contents

Related Manuals for AEG SANTO N 8 18 40-4 i


Summary of Contents for AEG SANTO N 8 18 40-4 i
- Page 1 SANTO N 8 18 40-4 i Integrierbare Kühl-Gefrierkombination Integrating Fridge Freezer Integrerbare Kjøle-frysekombinasjoner Gebrauchs- und Einbauanweisung Operating and Installation Instructions Bruksanvisning AEG Hausgeräte GmbH Postfach 1036 D-90327 Nürnberg http://www.aeg.hausgeraete.de Technische Änderungen vorbehalten © Copyright by AEG Subject to change without notice...
- Page 2 Customer Service Störung Mögliche Ursache Abhilfe An den undichten Stellen Tür- dichtung vorsichtig mit einem If you cannot find the remedy for a malfunction in these operating instruc- Haartrockner erwärmen (nicht Starke Reifbildung im Gerät, tions, please contact your dealer or our customer service department. Türdichtung ist undicht (evtl.
-
Page 3: Changing The Light Bulb
Bestimmungen, Normen, Richtlinien Malfunction Possible Cause Remedy Appliance is not level. Readjust the feet. Das Kältegerät ist für den Haushalt bestimmt und wurde unter Beachtung der für diese Geräte geltenden Normen hergestellt. The appliance is touching the Move the appliance slightly. wall or other objects. -
Page 4: What To Do If
Dear customer, What to do if ... Before placing your new refrigerator/freezer into operation please read the- se operating instructions carefully. They contain important information for Correcting Malfunctions safe use, for installation and for care of the appliance. A malfunction may be caused by only a minor fault that you can rectify Please keep these operating instructions for future reference. -
Page 5: Table Of Contents
Defrost the freezer compartment prior to cleaning (see "Defrosting" sec- Contents tion). Switch the appliance off and remove the plug from the mains, or switch off Safety ..........28 or turn out the circuit breaker or fuse. -
Page 6: Safety
Switching off the appliance Safety To switch off the appliance, turn the temperature regulator to position "0". The safety aspects of our refrigerators/freezers comply with accepted tech- If the appliance is not going to be used for an extended period: nical standards and the German Appliance Safety Law. -
Page 7: Preparation Of Ice Cubes
Preparation of Ice Cubes fridge when playing (there is risk of suffocation!)or get themselves into other dangerous situations. • Often children cannot recognise the hazards present in household Fill the ice cube tray 3/4 full with cold water, place it in the freezer com- appliances. -
Page 8: Disposal
Disposal • Please note the maximum storage times specified by the manufacturer. • Thawed foods which have not been processed further (cooked into meals) may not under any circumstances be frozen a second time. Appliance Packaging Information • Containers with flammable gases or liquids can leak at low temperatures. There is a risk of an explosion! Do not store any containers with flamma- All materials are environmentally sound! They can be dumped or burned at an incinerating plant without danger! -
Page 9: Installation
Fresh food refrigeration To remove them proceed as follows: Raise the shelf from the back, push it in the direction of the arrow until it To obtain the best performance: is freed and remove the retainers. • do not store warm food or evaporating liquide in the refrigeator •... -
Page 10: Rehingeing The Door
Your appliance needs air Moisture regulator min. 50 mm 200 cm For safety reasons, minimum There is an adjustable air grille in front of the shelf above the fruit and vege- ventilationmust be as shown Fig. table compartments. Attention: keep ventilation ope- The opening in the ventilation slots can be adjusted with the slider. -
Page 11: Instructions For Total Built-In
Interior Accessories site side Unscrew the lower pin and remo- ve the spacer and refit them on Storage Shelves the opposite side The glass shelf above the fruit and Housing dimensions vegetable compartment should always remain in position, to ensure Height 1780 mm fruit and vegetables stay fresh lon-... -
Page 12: Freezer Compartment
Starting up and temperature regulation of Open the door and push the appliance against the side of the freezer compartment kitchen unit opposite to that of appliance hinges. • Turn the temperature regulator (B) in the direction of “1”. The green(A) Fasten the appliance with 4 comes on. - Page 13 The temperatures in the refrigerator compartment and freezer co partment Place guide (A) on the inside part of cannot be independently regulated. the furniture door, up and down as shown in the figure and mark the If you want the freeze fresh food rapidly, select setting „6“, ensuring that position of external holes.
-
Page 14: Electrical Connection
Electrical connection Should the lining up of the furniture door be necessary, use the clearance of slots. Before initial start-up, refer to the appliance rating plate to ascertain if sup- At the end of operations, it is neces- ply voltage and current values correspond with those of the mains at the sary to check if the door of the fur- installation location.
Need help?
Do you have a question about the SANTO N 8 18 40-4 i and is the answer not in the manual?
Questions and answers