Sony STR-ZA3100ES Operating Instructions Manual
Multi channel
Hide thumbs
Also See for STR-ZA3100ES:
- Help manual (333 pages) ,
- Installation manual (77 pages) ,
- Operating instructions manual (61 pages)
Table of Contents
Advertisement
Available languages
Available languages
Quick Links
Download this manual
See also:
Installation Manual
Advertisement
Chapters
Table of Contents

Related Manuals for Sony STR-ZA3100ES


Summary of Contents for Sony STR-ZA3100ES
- Page 1 MULTI CHANNEL Operating Instructions AV RECEIVER Mode d’emploi Manual de instrucciones STR-ZA3100ES/STR-ZA2100ES/STR-ZA1100ES...
- Page 2 Record these numbers in the spaces provided below. Refer to these the Hot Surface that may be hot if it is touched during the normal operation. numbers whenever you call upon your Sony dealer regarding this product. This symbol is intended to alert the user to the presence of uninsulated “dangerous voltage”...
- Page 3 13) Unplug this apparatus during lightning storms or when unused for long CAUTION periods of time. You are cautioned that any changes or modifications not expressly 14) Refer all servicing to qualified service personnel. Servicing is required when approved in this manual could void your authority to operate this the apparatus has been damaged in any way, such as power-supply cord equipment.
- Page 4 If you are unable to insert If you have any questions or problems concerning your receiver, please the plug fully into the outlet, contact your dealer. consult your nearest Sony dealer. AC power cord (mains lead) must be changed only at a qualified service shop.
- Page 5 For details on which signals the receiver supports, formats decode up to 9 channels using the extra power refer to “Supported video formats” (page 22) and amplifier (for STR-ZA3100ES/STR-ZA2100ES) or up to “Supported digital audio formats” (page 22) under 7 channels (for STR-ZA1100ES). “Specifications.”...
- Page 6 Feature Description Speaker Relocation The receiver analyses the distance and the angle to the speakers by using the supplied stereo calibration with A.P.M. (D.C.A.C. microphone. With these information and Speaker EX) function Relocation with A.P.M. (D.C.A.C. EX) function, the receiver’s DSP produces optimum sound by simulating ideally positioned and angled speakers.
-
Page 7: Table Of Contents
Table of contents Manuals provided for this product........8 Main parts and controls ............. 9 Preparation 1: Preparing the receiver and the remote control................13 Preparation 2: Performing Easy Setup ......14 Enjoying video/sound from the connected device... 15 Using the menu on the TV screen ........16 Changing the settings ............ -
Page 8: Manuals Provided For This Product
The following manuals are provided for this product. The information included in each manual is as shown below: MULTI CHANNEL Operating Instructions AV RECEIVER Mode d’emploi Manual de instrucciones STR-ZA3100ES/STR-ZA2100ES/STR-ZA1100ES Startup Guide Operating Help Guide Instructions (online) (this booklet) Preparation... -
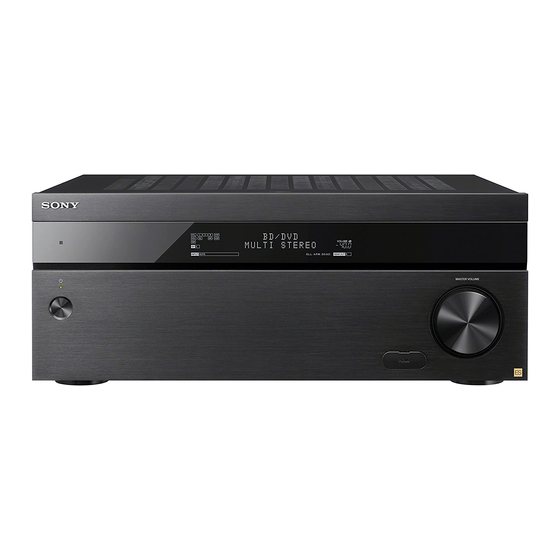
Page 9: Main Parts And Controls
Remote sensor Receives signals from the remote control. MASTER VOLUME Turns to adjust the volume level. HDMI jack cover Open the cover when you use the HDMI IN 6 (for STR-ZA3100ES/ (GAME) jack. STR-ZA2100ES only) continued... -
Page 10: Front Panel
SOUND FIELD (2CH/ Selects the sound field you want. DIRECT, A.F.D., MOVIE, MULTI ST.) HDMI IN 6 (GAME) jack Connect to a video game console. The video (for STR-ZA3100ES/ and sound from your video game console is STR-ZA2100ES only) input. -
Page 11: Remote Control
Parts Functions Remote Control MAIN (power) Turns the receiver on or sets it to standby mode. ZONE2, ZONE3, MAIN Selects the location to be controlled. PURE DIRECT Press to use the Pure Direct function. IN-CEILING SP Activates the In-Ceiling Speaker Mode. - Page 12 Parts Functions SOUND FIELD (2CH/ Selects the sound field you want. DIRECT, A.F.D., MOVIE, MULTI ST.) + (*)/–, Adjusts the volume level. * The + button has a tactile dot. Use the tactile dot as a reference when operating the receiver.
-
Page 13: Preparation 1: Preparing The Receiver And The Remote Control
Press to turn the AV receiver on. Preparation 1: Preparing the receiver and the remote control Before starting the following steps, connect speakers and AV devices to the receiver referring to the supplied Startup Guide. Place the calibration microphone at your listening position Insert batteries into the remote control with correct polarity. -
Page 14: Preparation 2: Performing Easy Setup
Notes Preparation 2: Performing Easy Setup If the Easy Setup screen does not appear or you want to display the Easy Setup screen manually, you can display it by selecting [Setup] - [Easy Setup] from the home menu. The Easy Setup screen appears on the TV screen when you turn on the receiver for the first time or after the receiver is initialized. -
Page 15: Enjoying Video/Sound From The Connected Device
Turn on the device you want to play. Enjoying video/sound from the connected Turn the receiver on. device Turn the TV on, and then switch the input of the TV to which the receiver is connected. Press HOME. The home menu is displayed on the TV screen. , ///... -
Page 16: Using The Menu On The Tv Screen
Press HOME. Using the menu on the TV screen The home menu is displayed on the TV screen. You can display the menu of the receiver on the TV screen. Press / repeatedly to select the menu you want to use, and then press to enter the menu. -
Page 17: Changing The Settings
Direct A.F.D. Dolby Surround Neural:X Turn the TV on, and then switch the input of the TV to which Multi Stereo the receiver is connected. For Details on each mode, visit the Help Guide. http://rd1.sony.net/help/ha/strza312111/h_uc2/... -
Page 18: Troubleshooting
You can search by a keyword using the online troubleshooting guide. HDMI cable made by Sony. Be sure to use High Speed HDMI™ If you still cannot find a solution, consult your nearest Sony dealer. cables with Ethernet. Premium High Speed HDMI™ cable with... - Page 19 Either the Height1 left or Height1 right speaker is not Irregular current is output to the speakers due to a short circuit on connected (for STR-ZA3100ES/STR-ZA2100ES). the speaker terminals. The receiver will automatically turn off after Either the Height2 left or Height2 right speaker is not connected (for STR-ZA3100ES/STR-ZA2100ES).
-
Page 20: Specifications
(6 ohms 20 Hz – 20 kHz, THD 0.09%): 95 W + 95 W Reference Power Output at Stereo Mode STR-ZA3100ES (8 ohms 20 Hz – 20 kHz, THD 0.09%): 75 W + 75 W With 6 ohm loads, both channels driven, from 20 – 20,000 Hz; rated Reference Power Output 100 watts per channel minimum RMS power, with no more than 0.09%... - Page 21 IN (BD/DVD) (Coaxial) Impedance: 75 ohms Wired LAN S/N: 96 dB (A, 20 kHz LPF) STR-ZA3100ES: 1000BASE-T* IN 1 (AUX), IN 2 (TV) (Optical) S/N: 96 dB (A, 20 kHz LPF) STR-ZA2100ES/STR-ZA1100ES: 100BASE-TX* We recommend using a Category 7 cable.
- Page 22 3840 × 2160p @ 23.98/24 Hz The HDMI IN 6 (GAME) jack (STR-ZA3100ES/STR-ZA2100ES only) 1920 × 1080p @ 59.94/60 Hz supports bandwidths of up to 9 Gbps. 1920 × 1080p @ 50 Hz ...
- Page 23 [ATMOS - TrueHD] 5.1.2 or 7.1 Mass (including the front cover) (Approx.) DTS [DTS] COAXIAL/OPTICAL, STR-ZA3100ES: 13.3 kg (29 lb 6 oz) HDMI STR-ZA2100ES: 12.8 kg (28 lb 4 oz) DTS-ES Discrete [DTS-ES Dscrt] COAXIAL/OPTICAL, STR-ZA1100ES: 12.8 kg (28 lb 4 oz)
- Page 24 être très chaude au toucher dans des conditions de fonctionnement normal. Annotez ces numéros dans les espaces fournis ci-dessous. Reportez- vous à ces numéros chaque fois que vous appelez votre revendeur Sony Ce symbole est destiné à renseigner l’utilisateur sur la au sujet de ce produit.
- Page 25 13) Débranchez cet appareil en cas d’orage ou d’inutilisation prolongée. ATTENTION 14) Confiez toutes les réparations à du personnel de service qualifié. L’appareil Vous êtes prévenu que toute modification ou changement non doit être réparé en cas de dommage quelconque, notamment lorsque le expressément approuvé...
- Page 26 Pour ne pas risquer de vous brûler, ne touchez pas le coffret. Pour toute question au sujet de l’ampli-tuner ou tout problème, La partie supérieure du boîtier peut devenir trop chaude au toucher. adressez-vous au revendeur Sony le plus proche.
- Page 27 Vous pouvez profiter de la lecture de signaux vidéo l'amplificateur de puissance supplémentaire (pour le et audio de nombreux formats différents. lecture de différents STR-ZA3100ES/STR-ZA2100ES) ou jusqu'à 7 canaux Pour des informations détaillées sur les signaux pris formats de signaux (pour le STR-ZA1100ES).
- Page 28 Fonction Description In-Ceiling Speaker L’ampli-tuner possède un mode enceinte pour adapter le son à la position de l’écran, même si vous Mode utilisez des enceintes fixées au plafond. Sound Optimizer La fonction Sound Optimizer permet d’optimiser la sortie audio en fonction du niveau du volume. Champs sonores Vous pouvez choisir parmi un grand choix de modes de champs sonores selon les connexions des...
- Page 29 Table des matières Manuels fournis pour ce produit........8 Pièces et commandes principales........9 Préparation 1 : Préparation de l’ampli-tuner et de la télécommande............. 13 Préparation 2 : Exécution d’Easy Setup ......14 Profiter de la vidéo/du son à partir de l’appareil raccordé...
-
Page 30: Manuels Fournis Pour Ce Produit
Les manuels suivants sont fournis pour ce produit. Les informations incluses dans chaque manuel sont les suivantes : MULTI CHANNEL Operating Instructions AV RECEIVER Mode d’emploi Manual de instrucciones STR-ZA3100ES/STR-ZA2100ES/STR-ZA1100ES Guide de Mode Guide d’aide démarrage d’emploi (en ligne) (ce manuel) Préparation... -
Page 31: Pièces Et Commandes Principales
Reçoit les signaux provenant de la télécommande télécommande. MASTER VOLUME À tourner pour régler le niveau du volume. Capuchon de la prise Ouvrez le capuchon lorsque vous utilisez la HDMI prise HDMI IN 6 (GAME). (pour le STR-ZA3100ES/ STR-ZA2100ES seulement) suite... -
Page 32: Panneau Avant
Permet de sélectionner le champ sonore DIRECT, A.F.D., MOVIE, souhaité. MULTI ST.) Prise HDMI IN 6 (GAME) Permet de connecter une console de jeux (pour le STR-ZA3100ES/ vidéo. La vidéo et le son de votre console de STR-ZA2100ES seulement) jeux vidéo sont entrés. - Page 33 Pièces Fonctions Télécommande MAIN (alimentation) Permet d’allumer l’ampli-tuner ou de le régler en mode veille. ZONE2, ZONE3, MAIN Permet de sélectionner l’emplacement à commander. PURE DIRECT Appuyez sur cette touche pour utiliser la fonction Pure Direct. ...
- Page 34 Pièces Fonctions SOUND OPTIMIZER Appuyez sur Sound Optimizer pour profiter d’un son clair et dynamique à de faibles niveaux de volume. CUSTOM PRESET (1, 2, 3, Permet d’enregistrer et de rappeler divers réglages pour l’ampli-tuner. SP SETUP Affiche le menu Speaker Setup.
-
Page 35: Préparation 1 : Préparation De L'ampli-Tuner Et De La Télécommande
Appuyez sur pour mettre l’ampli-tuner AV sous tension. Préparation 1 : Préparation de l’ampli-tuner et de la télécommande Avant de démarrer la procédure suivante, raccordez les enceintes et les périphériques AV à l’ampli-tuner en vous reportant au Guide de démarrage fourni. -
Page 36: Préparation 2 : Exécution D'easy Setup
Remarques Préparation 2 : Exécution d’Easy Setup Si l’écran Easy Setup ne s’affiche pas ou si vous souhaitez afficher manuellement l’écran Easy Setup, vous pouvez le faire en sélectionnant [Setup] - [Easy Setup] depuis le menu d’accueil. L’écran Easy Setup s’affiche sur l’écran du téléviseur la première fois que vous mettez l’ampli-tuner sous tension ou après son ... -
Page 37: Profiter De La Vidéo/Du Son À Partir De L'appareil Raccordé
Mettez sous tension l’appareil sur lequel vous voulez lire. Profiter de la vidéo/du son à partir de Mettez sous tension l'ampli-tuner. l’appareil raccordé Mettez le téléviseur sous tension, puis commutez l’entrée du téléviseur sur celle à laquelle l’ampli-tuner est raccordé. Appuyez sur HOME. -
Page 38: Utilisation Du Menu Sur L'écran Du Téléviseur
Appuyez sur HOME. Utilisation du menu sur l’écran du téléviseur Le menu d’accueil s’affiche sur l’écran du téléviseur. Vous pouvez afficher le menu de l’ampli-tuner sur l’écran du téléviseur. Appuyez à plusieurs reprises sur / pour sélectionner le menu que vous souhaitez utiliser, puis appuyez sur pour accéder au menu. -
Page 39: Modification Des Réglages
Direct A.F.D. Dolby Surround Mettez le téléviseur sous tension, puis commutez l’entrée du Neural:X téléviseur sur celle à laquelle l’ampli-tuner est raccordé. Multi Stereo Pour en savoir plus sur chaque mode, consultez le Guide d’aide. http://rd1.sony.net/help/ha/strza312111/h_uc2/... -
Page 40: Dépannage
(page 10) ou la touche HDMI OUTPUT de la télécommande Vous pouvez rechercher à l’aide d’un mot-clé grâce au guide de (page 11). Sony vous recommande d’utiliser un câble agréé HDMI ou un dépannage en ligne. Si vous ne trouvez toujours pas de solution, consultez votre câble HDMI fabriqué... - Page 41 Reportez-vous aux points suivants pour résoudre le problème. Si le Code 31 Les enceintes avant ne sont pas correctement sélectionnées. problème persiste, consultez votre revendeur Sony le plus proche. Sélectionnez les enceintes avant à l’aide de SPEAKERS et PROTECTOR procédez de nouveau à l’Auto Calibration (page 10).
- Page 42 Affichage Explication Avertissement La distance et la position d’un caisson de graves n’ont pas pu être détectées. Cela est peut-être dû aux parasites. Essayez de procéder à la mesure dans un environnement silencieux. Avertissement La mesure est terminée. Toutefois, les enceintes ne sont pas correctement positionnées les unes par rapport aux autres.
-
Page 43: Spécifications
PUISSANCE DE SORTIE ET DISTORSION HARMONIQUE TOTALE : (6 ohms, 1 kHz, THD 0,9 %) 150 W par canal STR-ZA3100ES STR-ZA2100ES Avec des charges de 6 ohms, les deux canaux actifs, de 20 à 20 000 Hz ; puissance de sortie nominale minimum de 100 watts RMS par canal, avec... - Page 44 IN (BD/DVD) (coaxiale) Impédance : 75 ohms Réseau LAN câblé S/B : 96 dB (A, 20 kHz filtre passe- STR-ZA3100ES : 1000BASE-T* bas) STR-ZA2100ES/STR-ZA1100ES : 100BASE-TX* IN 1 (AUX), IN 2 (TV) (optique) S/B : 96 dB (A, 20 kHz filtre passe- Nous conseillons l’utilisation d’un câble catégorie 7.
- Page 45 Format] dans le menu [HDMI Setup] est réglé sur [Standard format]. 3840 × 2160p à 25 Hz La prise HDMI IN 6 (GAME) (STR-ZA3100ES/STR-ZA2100ES 3840 × 2160p à 23,98/24 Hz seulement) prend en charge des bandes passantes allant jusqu’à...
- Page 46 DTS-ES Discrete [DTS-ES Dscrt] COAXIAL/OPTICAL, HDMI Masse (avec le capot avant) (env.) STR-ZA3100ES : 13,3 kg (29 lb 6 oz) DTS-ES Matrix [DTS-ES Mtrx] COAXIAL/OPTICAL, HDMI STR-ZA2100ES : 12,8 kg (28 lb 4 oz)
- Page 48 Anote estos números en los espacios provistos abajo. Refiérase a estos números siempre que se ponga en contacto con su proveedor Sony en Este símbolo señala al usuario la presencia de “voltaje relación con este producto.
- Page 49 13) Desenchufe este equipo durante tormentas eléctricas o cuando no se vaya PRECAUCIÓN a utilizar por períodos prolongados. Queda notificado que ante cualquier cambio o modificación que no haya 14) Consulte a personal de servicio calificado para cualquier mantenimiento. sido aprobado expresamente en este manual se podrían invalidar sus Se requiere servicio de mantenimiento cuando se ha dañado el equipo de facultades para utilizar este equipo.
- Page 50 Si utiliza el receptor continuamente a Si tiene alguna duda o problema relacionado con su receptor, consulte al volumen alto, la temperatura aumentará considerablemente en las distribuidor Sony más cercano. partes superior, laterales e inferior de la caja*. No toque la caja para no quemarse.
- Page 51 9 canales receptor, consulte “Formatos de video admitidos” utilizando el amplificador de potencia adicional (para (página 23) y “Formatos de audio digital admitidos” STR-ZA3100ES/STR-ZA2100ES) o hasta 7 canales (página 24) en “Especificaciones”. (para STR-ZA1100ES). Además, el receptor es compatible con varios...
- Page 52 Característica Descripción Campos de sonido Puede seleccionar entre una variedad de modos de campos de sonido de acuerdo con las conexiones de los altavoces o las fuentes de entrada. (2ch Stereo, Direct, A.F.D., etc.) Función Speaker El receptor analiza la distancia y el ángulo hasta los altavoces utilizando el micrófono de calibración Relocation with estéreo suministrado.
- Page 53 Índice de contenido Manuales provistos para este producto ......8 Partes y controles principales ..........9 Preparación 1: Preparación del receptor y el mando a distancia............... 13 Preparación 2: Realización de Easy Setup ......14 Para disfrutar contenido de video/sonido del dispositivo conectado ..............
-
Page 54: Manuales Provistos Para Este Producto
Para este producto se proveen los manuales siguientes. La información incluida en cada manual se muestra abajo: MULTI CHANNEL Operating Instructions AV RECEIVER Mode d’emploi Manual de instrucciones STR-ZA3100ES/STR-ZA2100ES/STR-ZA1100ES Guía de inicio Manual de Guía de ayuda instrucciones (online) (este folleto) Preparación... -
Page 55: Partes Y Controles Principales
Sensor remoto Recibe señales del mando a distancia. MASTER VOLUME Se gira para ajustar el nivel de volumen. Tapa de la toma HDMI Abra la tapa cuando utilice la toma HDMI IN 6 (para STR-ZA3100ES/ (GAME). STR-ZA2100ES solamente) continuación... -
Page 56: Panel Frontal
Permite seleccionar el campo de sonido que DIRECT, A.F.D., MOVIE, usted quiere. MULTI ST.) Toma HDMI IN 6 (GAME) Permite conectar una consola de (para STR-ZA3100ES/ videojuegos. Por ella entra el video y el sonido STR-ZA2100ES solamente) de la consola de videojuegos. -
Page 57: Mando A Distancia
Partes Funciones Mando a distancia MAIN (alimentación) Permite encender el receptor o ponerlo en modo de espera. ZONE2, ZONE3, MAIN Permite seleccionar la ubicación que se va a controlar. PURE DIRECT Presione para usar la función Pure Direct. ... - Page 58 Partes Funciones SOUND OPTIMIZER Presione para utilizar Sound Optimizer y disfrutar de un sonido claro y dinámico a niveles de volumen bajos. CUSTOM PRESET (1, 2, 3, Permite guardar e invocar varios ajustes para el receptor. SP SETUP Visualiza el menú...
-
Page 59: Preparación 1: Preparación Del Receptor Y El Mando A Distancia
Presione para encender el receptor de AV. Preparación 1: Preparación del receptor y el mando a distancia Antes de comenzar los pasos siguientes, conecte los altavoces y dispositivos AV al receptor consultando la Guía de inicio suministrada. Ponga el micrófono de calibración en su posición de escucha y ajústelo a la misma altura que sus oídos. -
Page 60: Preparación 2: Realización De Easy Setup
Notas Preparación 2: Realización de Easy Setup Si la pantalla Easy Setup no aparece o si usted quiere visualizar la pantalla Easy Setup manualmente, puede visualizarla seleccionando [Setup] - [Easy Setup] en el menú de inicio. La pantalla Easy Setup aparece en la pantalla del televisor cuando usted enciende el receptor por primera vez o después de ... -
Page 61: Para Disfrutar Contenido De Video/Sonido Del Dispositivo Conectado
Encienda el dispositivo que quiere reproducir. Para disfrutar contenido de video/sonido Encienda el receptor. del dispositivo conectado Encienda el televisor, y después cambie la entrada del televisor a la que está conectado el receptor. Presione HOME. Se visualiza el menú de inicio en la pantalla del televisor. , ///... -
Page 62: Utilización Del Menú En La Pantalla Del Televisor
Presione HOME. Utilización del menú en la pantalla del Se visualiza el menú de inicio en la pantalla del televisor. televisor Puede visualizar el menú del receptor en la pantalla del televisor. Pulse / repetidamente para seleccionar el menú que quiere utilizar, y después pulse para entrar en el menú. -
Page 63: Para Cambiar Los Ajustes
Direct A.F.D. Dolby Surround Encienda el televisor, y después cambie la entrada del Neural:X televisor a la que está conectado el receptor. Multi Stereo Para obtener detalles sobre cada modo, visite la Guía de ayuda. http://rd1.sony.net/help/ha/strza312111/h_uc2/... -
Page 64: Solución De Problemas
(página 10) o el botón HDMI OUTPUT del mando a distancia http://rd1.sony.net/help/ha/strza312111/h_uc2/ (página 11). Sony recomienda utilizar un cable HDMI homologado o un cable Puede buscar por palabra clave utilizando la guía de solución de problemas online. HDMI fabricado por Sony. Asegúrese de utilizar cables HDMI de Si todavía no puede encontrar una solución, consulte con el... - Page 65 Puede comprobar el estado del receptor por medio del mensaje. Consulte lo siguiente para resolver el problema. Si el problema Pantalla Explicación persiste, consulte con el distribuidor Sony más cercano. Código 31 Los altavoces delanteros no están seleccionados PROTECTOR debidamente. Seleccione los altavoces delanteros utilizando ...
- Page 66 Pantalla Explicación Advertencia La entrada desde el micrófono de calibración es demasiado grande. Advertencia Puede que la distancia entre el altavoz y el micrófono de calibración sea demasiado pequeña. Sepárelos y realice la medición otra vez. Advertencia No se pueden detectar la distancia y la posición de un altavoz potenciador de graves.
-
Page 67: Especificaciones
SALIDA DE POTENCIA Y DISTORSIÓN ARMÓNICA TOTAL: (6 ohm, 1 kHz, distorsión armónica total 0,9%) 150 W por canal STR-ZA3100ES STR-ZA2100ES Con cargas de 6 ohm, ambos canales accionados, de 20 a 20.000 Hz; potencia RMS mínima de 100 W de potencia nominal por canal, con no... - Page 68 S/N*: 105 dB (A, 20 kHz LPF, 500 mV) Sección de Internet * Cuando “Direct” está siendo utilizado y hay seleccionada una entrada LAN con cable analógica. STR-ZA3100ES: 1000BASE-T* STR-ZA2100ES/STR-ZA1100ES: 100BASE-TX* Entradas (digitales) Recomendamos utilizar un cable de categoría 7. IN (BD/DVD) (Coaxial)
- Page 69 [Standard format]. 3840 × 2160p @ 25 Hz La toma HDMI IN 6 (GAME) (STR-ZA3100ES/STR-ZA2100ES 3840 × 2160p @ 23,98/24 Hz solamente) admite anchos de banda de hasta 9 Gbps.
- Page 70 Peso (incluyendo la cubierta frontal) (Aprox.) DTS 96/24 [DTS 96/24] COAXIAL/OPTICAL, HDMI STR-ZA3100ES: 13,3 kg (29 lb 6 oz) STR-ZA2100ES: 12,8 kg (28 lb 4 oz) DTS-HD High Resolution Audio HDMI [DTS-HD HI RES] STR-ZA1100ES: 12,8 kg (28 lb 4 oz)
- Page 72 ©2017 Sony Corporation Printed in Malaysia 4-686-527-13(1)
Need help?
Do you have a question about the STR-ZA3100ES and is the answer not in the manual?
Questions and answers