Table of Contents
Advertisement
User Guide (English)
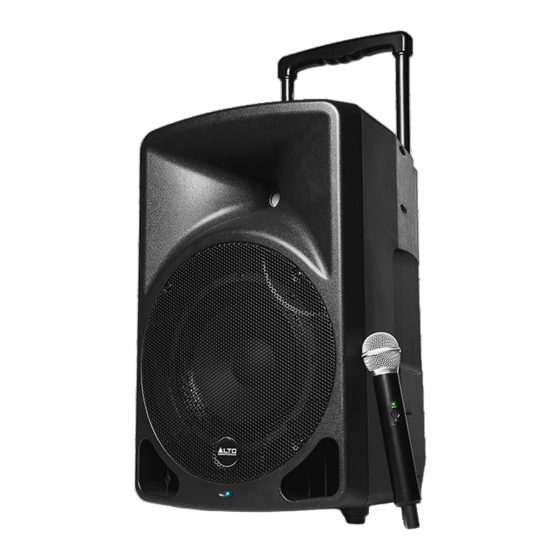
Introduction
Key Features:
•
400-watt peak power output
•
Rechargeable lithium ion battery allows for up to 8 hours of continuous performance
•
12" (305 mm) woofer, 1" (25 mm) HF compression driver
•
Handheld UHF wireless microphone system included
•
XLR+1/4" (6.35 mm) combo mic/line input
•
Voice priority feature automatically lowers music during announcements
•
Built-in USB media player for convenient music playback—no DJ required
•
Retractable handle and tilt-back wheels for easy transport
•
35 mm speaker pole socket for flexible positioning
Box Contents
Transport 12
Wireless Microphone
Wireless Microphone Bracket
BNC Antenna
Power Cable
User Guide
Safety & Warranty Manual
Support
For the latest information about this product (system requirements, compatibility information,
etc.) and product registration, visit altoprofessional.com.
3
Advertisement
Table of Contents

Related Manuals for Alto Professional Transport 12


Summary of Contents for Alto Professional Transport 12
- Page 1 Built-in USB media player for convenient music playback—no DJ required • Retractable handle and tilt-back wheels for easy transport • 35 mm speaker pole socket for flexible positioning Box Contents Transport 12 Wireless Microphone Wireless Microphone Bracket BNC Antenna Power Cable User Guide Safety &...
-
Page 2: Important Safety Precautions
Important Safety Precautions Please note: Alto Professional and inMusic are not responsible for the use of its products or the misuse of this information for any purpose. Alto Professional and inMusic are not responsible for the misuse of its products caused by avoiding compliance with inspection and maintenance procedures. - Page 3 Operation > Using Microphones & Other Audio Sources to learn more. Note: When using Transport 12 with a guitar, we recommend using one with active pickups rather than passive pickups. If you use a guitar with passive pickups, connect it to an external preamp or direct input (DI) box, and connect the line-level output to the loudspeaker.
-
Page 4: Rear Panel
5. Battery Level Indicator: These lights show the current amount of life in Transport 12’s internal battery. When only the Low light is lit, connect Transport 12’s power input to a power outlet to recharge its battery. 6. Recharge Indicator: This light will be red when Transport 12’s internal battery is... - Page 5 11. Wireless Mic Display: This display shows the current reception settings of the wireless module. See Operation > Using the Wireless Microphone to learn more. 12. Up/Down: Use these buttons to move to the next-highest or next-lowest channel of the wireless module.
-
Page 6: Operation
Recharge to recharge its battery. While Transport 12 is recharging, the Recharge light will be on. Tip: If you are charging the internal battery but not using Transport 12, set the power switch to Recharge. Using Microphones & Other Audio Sources You can use a “wired”... -
Page 7: Using The Wireless Microphone
Using the Wireless Microphone Transport 12 has an included wireless microphone, which sends its signal to the wireless receiver on Transport 12’s rear panel. The wireless receiver’s display has the following settings: • Channel: The large 2-digit number on the left edge is the current channel. - Page 8 To adjust the wireless microphone’s gain level, remove the battery compartment cover on the wireless microphone, and use the small plastic tool inside the battery compartment to turn the Gain knob. Reattach the battery compartment cover when you are done. Note: This setting works in conjunction with the Wireless Mic Volume knob and input volume setting.
-
Page 9: Using The Usb Player
Using the USB Player Important: To use the USB player, your USB drive must use a FAT32 file system. The USB player can play MP3, WAV, and WMA file formats. The USB port is for file playback only, not for charging other devices. To activate or deactivate the USB player, press and hold Power/Stop ( ) for 3 seconds. -
Page 10: Product Warranty
What is covered and for how long? All Products: inMusic Brands, Inc. (“inMusic”) warrants to the original purchaser that Alto Professional (“Alto Pro”) products and all other accessories are free from defects in material and workmanship under normal use and service for the period commencing upon the date of purchase from an authorized Alto Pro dealer and continuing for the following period of time after that date for one (1) year. - Page 11 (purchases made in U.S.A.) 1. inMusic Brands, Inc. (“inMusic”) warrants to the original purchaser that Alto Professional (“Alto Pro”) products are free from defects in material and workmanship under normal use and service for the period commencing upon the date of purchase from an authorized Alto Pro dealer and continuing for the following period of time after that date for (1) Year.
-
Page 12: Return Information
Return Information • A Return Authorization number must be obtained from your local Alto Pro Representative. For your representative go to altoprofessional.com. • A copy of the original sales receipt must also be included for the equipment to be repaired under warranty. -
Page 13: Important Safety Instructions
Important Safety Instructions Read these instructions. Keep these instructions. Heed all warnings. Follow all Instructions. Do not use this apparatus near water. Clean only with dry cloth. Do not block any ventilation openings. Install in accordance with the manufacturer’s instructions. Do not install near any heat sources such as radiators, heat registers, stoves, or other apparatus (including amplifiers) that produce heat. - Page 14 INSTRUCTIONS: The exclamation point within the equilateral triangle is intended to alert the user to the presence of important operating and maintenance (servicing) instructions in the literature accompanying this appliance. WARNING: To reduce the risk of fire or electrical shock, do not expose this appliance to rain or moisture. Electrical equipment should NEVER be kept or stored in damp environments.
Need help?
Do you have a question about the Transport 12 and is the answer not in the manual?
Questions and answers