Table of Contents
Advertisement
Quick Links
Advertisement
Table of Contents

Related Manuals for Stairville DMX-Master 3-FX


Summary of Contents for Stairville DMX-Master 3-FX
- Page 1 DMX-Master 3-FX DMX controller user manual...
- Page 2 Musikhaus Thomann Thomann GmbH Hans-Thomann-Straße 1 96138 Burgebrach Germany Telephone: +49 (0) 9546 9223-0 E-mail: info@thomann.de Internet: www.thomann.de 03.05.2017, ID: 294610 (V3) | SW V1.5...
-
Page 3: Table Of Contents
8.9 Assigning the jog wheels Pan and Tilt for rotation and inclination ..34 8.10 Playback......................... 35 8.11 MIDI control........................38 8.12 ‘Easy Mode’........................41 8.13 Saving data and reloading..................42 8.14 Complementary functions..................43 Technical data........................46 Plug and connection assignment................. 47 Protecting the environment................... 48 DMX-Master 3-FX... -
Page 4: General Information
General information General information This manual contains important instructions for the safe operation of the unit. Read and follow the safety instructions and all other instructions. Keep the manual for future reference. Make sure that it is available to all those using the device. If you sell the unit please make sure that the buyer also receives this manual. -
Page 5: Symbols And Signal Words
NOTICE! This combination of symbol and signal word indicates a possible dangerous situation that can result in mate‐ rial and environmental damage if it is not avoided. Warning signs Type of danger Warning – danger zone. DMX-Master 3-FX... -
Page 6: Safety Instructions
Safety instructions Safety instructions Intended use This device is intended to be used to control spot lights, dimmers, light effects, moving heads or other DMX-controlled devices. Use the device only as described in this user manual. Any other use or use under other operating conditions is consid‐ ered to be improper and may result in personal injury or property damage. -
Page 7: Features
‘Play Mode’ , ‘Program Mode’ , ‘Setup Mode’ and ‘Easy Mode’ Functions: desk lock, auto-start, blackout, freeze, copy MIDI control (synthesizer and MIDI keyboard) data backup and restore via USB interface suitable for 19" racks (four rack units) DMX-Master 3-FX... -
Page 8: Installation
Installation Installation Unpack and carefully check that there is no transportation damage before using the unit. Keep the equipment packaging. To fully protect the device against vibration, dust and moisture during transportation or storage use the original packaging or your own packaging material suitable for transport or storage, respectively. Rack mounting The device is designed for mounting in 19"... -
Page 9: Setup
Turn on the device using the main switch on the rear panel. Turn on the device using the main switch at the back side. After turning the device on the displays shows the software version and the operation mode for a short time. The related display LEDs light up. DMX-Master 3-FX... -
Page 10: Connections And Controls
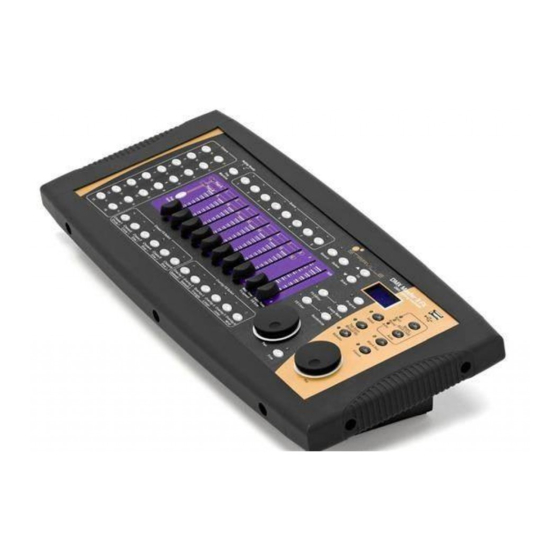
Connections and controls Connections and controls Front panel, total view Front panel, detail view A 1 Button group [Fixture] Buttons 1 to 16 to select the control channels. The corresponding indicator LED shows whether the respective channel is switched (LED on) or deactivated (LED off). 2 Button [Fog Machine] Activates a connected fog machine. - Page 11 11 Button [Page Select] Button for switching between memory banks 1…8 and 9…16 (slider with dual function for adjusting the DMX channels). The LEDs [Page A] and [Page B] indicate which of the two memory banks is currently active. DMX-Master 3-FX...
- Page 12 Connections and controls Front panel, detail view B 12 Buttons | [Up] and | [Down] Buttons for switching between the 30 banks and for setting the starting angle in the effects editor. 13 Display 14 Buttons [Program], [Setup] Buttons with LED indicators for switching between function modes. 15 USB socket for a USB drive or a USB lamp (included in delivery).
- Page 13 RCA input for connecting audio equipment for sound control. Once you connect an audio device here, the built-in microphone is turned off and the signal of this input is then used for music control instead. 30 [Fog] Connection for the fog machine. 31 [MIDI IN] MIDI input socket. DMX-Master 3-FX...
- Page 14 Connections and controls 32 [DMX OUT] Lockable DMX output socket. 33 [DC IN] Connection socket for the 9 V power supply unit. 34 [OFF | ON] Main switch to turn the device on and off. DMX controller...
-
Page 15: Basics
(internal channel assignment). It is no problem to use a start address more than once in a DMX chain. In that case, the relevant receivers operate synchronously (identical movement, light intensity, colour, and so on). DMX-Master 3-FX... - Page 16 Basics Addressing When setting the DMX address, the counting method of the device determines the first channel. Depending on the device, the channel numbers may start from 0 or from 1. The address range may therefore reach from 0 to 511 or from 1 to 512. DMX controller...
-
Page 17: Instructions For Use
Switching between the operating modes is possible at any time. To return to the operating mode ‘Play Mode’, press and hold the button of that mode to which you have previously changed from the ‘Play Mode’ for three seconds. DMX-Master 3-FX... - Page 18 Instructions for use Display In normal operation, the display shows the current mode in the top line. In the fol‐ lowing lines, the corresponding values are displayed depending on the mode: ‘Play Mode’ In this mode, the selected bank and the running scene appear in the second line or the name of the chaser sequence appears in the first line, the current step in the second line of the display.
-
Page 19: Scenes And Banks
19. To return to ‘Play Mode’, keep [Program] pressed for three seconds. ‘Empty’ scenes can not be loaded. When selecting a scene that does not contain any data, the display shows the error message ‘NULL’ . DMX-Master 3-FX... - Page 20 Instructions for use Copying scenes To enter ‘Program Mode’, keep [Program] pressed for three seconds. | [Up] or | [Down] to select the bank in which the desired scene is stored. Load the scene you want to copy (Source) via the [ Scene] button. | [Up] or | [Down] to select the bank into which you want to copy the scene (destination).
- Page 21 | [Down] to select the bank you want to delete. Simultaneously press [DELETE] and [Music Bank Copy]. ð The LED flashes three times briefly. This indicates that all scene of the bank have been deleted successfully. To return to ‘Play Mode’, keep [Program] pressed for three seconds. DMX-Master 3-FX...
-
Page 22: Chasers
Instructions for use 8.3 Chasers Programming Chaser sequences A chaser sequence (Chaser) is a programme that calls up a maximum of 250 scenes one after the other. The scenes that make up a chaser sequence must have been pro‐ grammed previously. Inserting a scene into a chaser With this function, a scene is inserted at the current edit point in a chaser sequence. - Page 23 Press [Tap Sync Manual Go]. Now you can insert scenes or banks in the changed edit point ( Ä ‘Inserting a scene into a chaser sequence’ on page 22). To return to ‘Play Mode’, keep [Program] pressed for three seconds. DMX-Master 3-FX...
- Page 24 Instructions for use Removing scene from a chaser With this function, the scene in the current edit point is removed from a chaser sequence sequence. To enter ‘Program Mode’, keep [Program] pressed for three seconds. Press the [CHASER] of that chaser sequence you want to edit. You can only edit one chaser sequence at a time.
-
Page 25: Blackout
This ensures that all channels are restored with the correct values when you cancel the blackout mode. If a channel with a set fade time is overridden by the blackout mode, it is only gradually restored to its previous value when cancelling the blackout. DMX-Master 3-FX... - Page 26 Instructions for use Resetting the blackout settings Use this function to set all 256 channels in relation to the blackout mode to ‘on’ with the associated value 0. To reset the blackout mode settings, proceed as follows: To enter ‘Program Mode’, keep [Program] pressed for three seconds. | [Up] or | [Down] to select bank 31.
-
Page 27: Overlay Scenes
Press the [Overlay] button assigned to the scene 1…6 you want to store. ð The LED flashes three times briefly. This indicates that the overlay settings have been saved. To return to ‘Play Mode’, keep [Program] pressed for three seconds. DMX-Master 3-FX... -
Page 28: Effects Generator
Instructions for use Deleting overlay scenes To delete an overlay scene, proceed as follows: To enter ‘Program Mode’, keep [Program] pressed for three seconds. | [Up] or | [Down] to select bank 31. ð The display shows ‘Overlay’ . Press [DELETE] and the [Scene] button assigned to the overlay scene you want to delete. - Page 29 Complex, asymmetric and relatively rapid move‐ ment pattern, which is formed from a superposi‐ tion of sinus-shaped and cosinus-shaped move‐ ment. This effect can be combined with the random function. This allows multiple devices to operate seemingly independently. DMX-Master 3-FX...
- Page 30 Instructions for use Wave motion with the ‘Create Wave’ If you have selected an effect in the effects generator, each time you press the button [Create Wave] button you can move the default angle of the previously selected DMX devices, so that a wave motion is created. This assumes that the default angles of all selected DMX devices are initially identical.
- Page 31 [FX Clear]. It is not necessary to open the Effects Gen‐ erator. If you want to delete an effect to an already stored scene, you have to load that scene first, then delete the effect and subsequently store the scene again. DMX-Master 3-FX...
-
Page 32: Cross-Fades
Instructions for use Saving an effect in an overlay scene To enter ‘Program Mode’, keep [Program] pressed for three seconds. Press [FX Editor]. ð The LEDs of the buttons light up. Press die [Fixture] buttons of those DMX devices that you want to be affected by the changes. -
Page 33: Channel Inversion
If necessary, repeat steps 3 to 5 for further DMX devices connected. Press [Record] to save, otherwise your changes are currently effective, but won't be applied permanently, though. ð The LED flashes three times briefly. To return to ‘Play Mode’, keep [Setup] pressed for three seconds. DMX-Master 3-FX... -
Page 34: Assigning The Jog Wheels Pan And Tilt For Rotation And Inclination
Instructions for use Turning off inversion for all channels To turn off the inversion for all DMX channels, proceed as follows: To enter ‘Setup Mode’, keep [Program] pressed for three seconds. | [Up] or | [Down] to select the option ‘Invert’ . Select all [Fixture] buttons to be able to remove the inversion on all devices. -
Page 35: Playback
Set the fade time using the [Fade Time] slider. It determines in steps from 0 to 255 how fast the device fades from one step to the next. The longest fade time is 30 seconds. Smaller movements are executed faster. To cancel the Auto Beat function, press again [Auto]. DMX-Master 3-FX... - Page 36 Instructions for use Bank playback with music control Press [Music Bank Copy]. ð The last set sound sensitivity is automatically used and appears in the dis‐ play. The LED ‘Music’ is lit. | [Up] or | [Down] to choose a bank. The assigned scenes of the bank are being called up music-controlled one after the other.
- Page 37 [Tap Sync Manual Go]. Several chaser sequences can be selected at a time. Then they run in par‐ allel. At the end of the top line, the display shows the number of the cur‐ rently running chaser sequence. DMX-Master 3-FX...
-
Page 38: Midi Control
Instructions for use Chaser sequence playback with music control Press at least one of the [Chaser] buttons. If you press the button again, the chaser sequence is deactivated. Press [Music Bank Copy]. ð The LED ‘Music’ is lit. Use [Tap Sync Manual Go] to skip to the next scene. This function is also available for playback with auto beat. - Page 39 Chaser sequence 3 Chaser sequence 3 on/off Chaser sequence 4 Chaser sequence 4 on/off Chaser sequence 5 Chaser sequence 5 on/off Chaser sequence 6 Chaser sequence 6 on/off Chaser sequence off All chaser sequences off Blackout Blackout on/off DMX-Master 3-FX...
- Page 40 Instructions for use MIDI keyboard assignment It is possible without problems to change scenes via MIDI (with a synthesizer or a computer) at 30 Hz. The MIDI functions of the device are fast enough for live applica‐ tions. Buttons MIDI note Function Buttons 1…30 Bank 1 on (white and black)
-
Page 41: Easy Mode
So you can use the device as a DMX slider unit for larger DMX configurations. The [Scene] buttons are used as flash buttons. By pressing one of the [Scene] buttons, the value 255 will be sent on the respective DMX channel. The display shows ‘Flash’ . DMX-Master 3-FX... -
Page 42: Saving Data And Reloading
Instructions for use 8.13 Saving data and reloading Saving data Connect a USB drive to the device. Simultaneously press [Record] and | [Up] for three seconds. ð The display shows ‘Saving File’ . Press one of the [Fixture] buttons to choose the file you want to save. ð... -
Page 43: Complementary Functions
If you want the user interface of the device to become active immediately after switching on, make the appropriate settings using the Auto Start function ( Ä ‘Auto- start function’ on page 44). DMX-Master 3-FX... - Page 44 Instructions for use Auto-start function The auto-start feature allows you to specify that the device is in a preselected play‐ back configuration after power on. You can also specify that immediately after turning on the key lock is active. Setting up the auto-start function To enter ‘Setup Mode’, keep [Program] pressed for three seconds.
- Page 45 ð The display shows ‘Loading’ , the firmware update starts. After firmware update is complete, the display shows ‘Write Success!’ . Switch the device off and on again. ð The unit will now start with the updated firmware. DMX-Master 3-FX...
-
Page 46: Technical Data
Technical data Technical data Mains power supply 12 V (DC) Dimensions (W × H × D) 526 mm × 232 mm × 88 mm (4 rack units) (20.7 in. × 9.1 in. × 3.4 in.) Weight 3.5 kg (7.7 lbs) DMX controller... -
Page 47: Plug And Connection Assignment
DMX controller, a short circuit or ‘just’ a not working light show! DMX socket A female 3-pin XLR socket is used for the DMX output. The figure and the table below show the pin assignment. Assignment Ground (shielding) Signal inverted (DMX–, ‘cold’) Signal (DMX+, ‘hot’) DMX-Master 3-FX... -
Page 48: Protecting The Environment
Protecting the environment Protecting the environment Disposal of the packaging material For the transport and protective packaging, environmentally friendly materials have been chosen that can be supplied to normal recycling. Ensure that plastic bags, packaging, etc. are properly disposed of. Do not just dispose of these materials with your normal household waste, but make sure that they are collected for recycling. - Page 49 Notes DMX-Master 3-FX...
- Page 50 Notes DMX controller...
- Page 52 Musikhaus Thomann · Hans-Thomann-Straße 1 · 96138 Burgebrach · Germany · www.thomann.de...
Need help?
Do you have a question about the DMX-Master 3-FX and is the answer not in the manual?
Questions and answers