Table of Contents
Advertisement
Quick Links
Advertisement
Table of Contents

Related Manuals for Hauppauge DEC 2000-t


Summary of Contents for Hauppauge DEC 2000-t
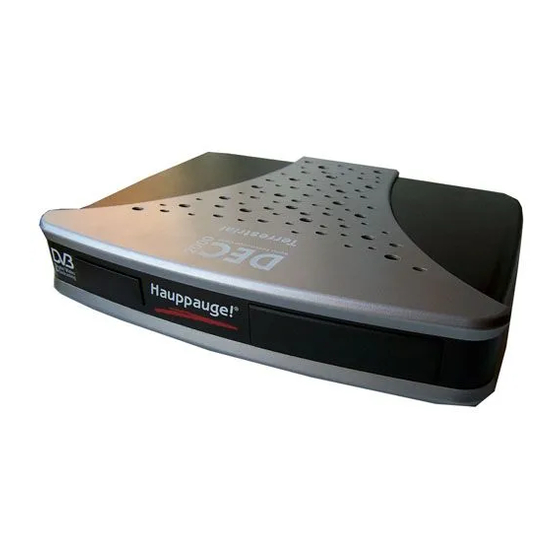
- Page 1 DEC2000-t Installation Reference Manual English...
- Page 2 Tel: (+49) 2161/69 48 80 Fax: (+49) 2161/69 48 815 email: info@hauppauge.de www.hauppauge.de Hauppauge Computer Works, Inc. 91 Cabot Court, Hauppauge, NY 11788 USA Phone: (+1) 631.434.1600 Fax: (+1) 631.434.3198 Tech support: (+1) 631.434.3197 www.hauppauge.com ©2002 Hauppauge Digital Europe Sarl.
- Page 3 Trademarks: Hauppauge logo and WinTV product name: Hauppauge Computer Works, Inc. DEC name and logo: Hauppauge Digital Europe Sarl. Windows, Video for Windows, NetMeeting and Internet Explorer: Microsoft Corporation. Pentium is a registered trademark of Intel Corporation. All other trade names are the service mark, trademark or registered trademark of their respective holders.
-
Page 4: Table Of Contents
Contents 1. Overview What is Digital TV? ................1-1 Why is Digital TV Better?..............1-1 What Channels can I get?..............1-2 Why switch to Digital TV? ..............1-3 Do I need a subscription? ..............1-3 2. What's in the DEC2000 box 3. - Page 5 Installation of the DEC2000-t USB Hardware ........6-2 Installation of the DEC2000-t USB driver software ......6-3 Installation of the DEC2000-t USB Application Software ....6-3 DEC2000-t USB TV & Radio Application for the PC ......6-3 Installation of the MHEG Teletext Application........6-4 Menu Options ..................
-
Page 6: Overview
1. OVERVIEW a) What is Digital TV? Digital TV has recently been introduced in the UK. Digital refers to the way the transmission of images and sound that make up a TV programme are transmitted to your TV set. Much in the way a computer works by coding data in a stream of ones and zeros - digital TV sends a coded signal to your TV set. -
Page 7: What Channels Can I Get
DEC2000-t Installation and reference Manual digital TV is the medium that more and more people will be turning to. Analogue TV will have no new developments and it is unlikely that any new resources will be pumped into this ageing broadcast format. c) What Channels Can I get? These are the Free to View Digital Terrestrial channels available in the UK, at the time of publication. -
Page 8: Why Switch To Digital Tv
DEC2000-t Installation and Reference Manual d) Why Switch to Digital TV? There are many reasons as to why one should switch to Digital TV. More choice is one of the most obvious reasons. While with Analogue TV's there are 5 channels, there is also no monthly cost. Digital TV and the DEC mean that not only are you presented with choice but for a small one off cost you have all these channels to choose from, with no monthly fee to pay at the end of each month. - Page 9 DEC2000-t Installation and Reference Manual...
- Page 10 2. WHAT IS IN THE DEC2000-t BOX? 1 Infra-red Remote 1 DEC2000 unit Control 1 12Volt Power Supply 1 SCART to SCART Cable 1 USB cable 1 RF loop through cable 1 Audio output cable...
- Page 11 DEC2000-t Installation and reference Manual...
-
Page 12: Getting Started
3. GETTING STARTED DEC2000-t Connections arning: Incorrect wiring and connections can lead to operational disturbances or defects in the device. Misuse can also cause harm to the user: Failure to comply may seriously damage your product. a) DEC2000-t cables and connectors These are the several different connections that can be made to the back of the DEC2000-t. -
Page 13: Connecting The Dec2000 To Your Tv Set
DEC2000-t Installation and reference Manual b) Inserting batteries into the remote control transmitter i. Slide off battery cover ii. Insert batteries (note correct polarity +/- ) iii. Replace the battery cover c) Connecting the DEC2000 to your TV set There are two ways to connect the DEC2000 to your TV set: through a SCART cable or through an RF cable. -
Page 14: Connecting The Dec2000 To Your Tv Set Via Scart
DEC2000-t Installation and Reference Manual Connecting the DEC2000 to your TV set via SCART i. Locate the supplied SCART to SCART cable. You will need to connect one end to the DEC2000-t SCART socket and the other end into the SCART connector on your TV set (as illustrated below). -
Page 15: Connecting The Dec2000 To Your Tv Set Via Rf Cable
DEC2000-t Installation and reference Manual Set your TV set to the channel being used by the VCR (see your VCRs documentation for instructions). When you turn on the DEC2000, you should see the Welcome Menu on your TV set. Connecting the DEC2000 to your TV set via RF cable If you cannot use the SCART connection, you can also connect the DEC2000-t to your TV with the supplied RF Loop-through cable. - Page 16 DEC2000-t Installation and Reference Manual Plug one end of the supplied RF Loop-through cable into the RF-out on the DEC2000-t (as illustrated below). Plug the other end of the RF Loop cable into your VCR's RF-in socket. Another RF cable (not sup- plied) will connect between your TV and VCR.
-
Page 17: Connecting Your Tv Antenna
Antenna signal strength is strong enough to receive Digital transmissions from your local transmitter. You can either check with your local Antenna installer or you can call the Hauppauge Aerial Support Line on 0870 010 6192 who will provide assistance with aerial related issues. -
Page 18: Powering Up Your Dec2000 For The First Time
DEC2000-t Installation and Reference Manual Plug the connector from the sup- plied 12v DC power supply unit into the Power supply socket on the DEC2000-t Plug the other end into the mains power socket, and switch on only after you have made sure that all connections have been made. -
Page 19: Initial Scan For Channels
DEC2000-t Installation and reference Manual Initial scan for channels: A progress bar which overlays the picture will indicate how many TV and Radio channels have been received. Please note this may take a few min- utes. Once completed, it will automatically switch to the first available TV channel. - Page 20 DEC2000-t Installation and Reference Manual change channels you are presented with the Mini EPG, which shows you the current channel, program description, duration and time.
- Page 21 DEC2000-t Installation and Reference Manual 3-10...
-
Page 22: Remote Control And Basic Functions
4. REMOTE CONTROL & BASIC FUNCTIONS You control the DEC 2000 - t with the Remote Control (see below). This enables you see the Menu options, changes channels in every day use and controls the sound level. The most used buttons are the 'OK' button to set an option and the 'ESC' button to escape, cancel or return to a previ- ous screen. -
Page 23: Detailed Description Of Each Button
DEC2000-t Installation and reference Manual Detailed description of each button function: 1. Power On / Off button - use this button to power the DEC2000-t On and Off 2. Mute button - this button enables you to mute the volume, or to put the volume back on if it is already muted (note that if your vol- ume bar is at zero - sound will not be restored to the normal level) - Page 24 DEC2000-t Installation and Reference Manual 8. Right Button · By pressing the Right button you can reduce the volume. · By clicking OK and then accessing the Channel List, the Right button will now enable you to scroll forward a whole page, rather than scrolling individual channels.
- Page 25 DEC2000-t Installation and reference Manual 13. Language - (The yellow button) allows you to select between dif- ferent languages when available for multilingual programs. If the channel is broadcast in more than one language, pressing on the Yellow L button will enable you to select which language you wish to view the show in.
-
Page 26: Menu Operation
5. MENU OPERATION To access the main menu press the SETUP button located on your Remote Control. The icons to the left are the menu selections. The RED square around the icon indicates which menu is selected at that time. In order to select an option move the red square using your arrow buttons. -
Page 27: Programme Information
DEC2000-t Installation and reference Manual · · Programme Information This option enables you to modify the duration of the short EPG display. Using the Left and Right buttons, you can select the amount of time that your Information Bar stays on the screen. The default setting is to show the Information for 5 seconds after you change a channel, this can be adjusted between On, Off and anywhere between 0 and 20 seconds. - Page 28 DEC2000-t Installation and Reference Manual Antenna on or off. By having it off you are enabling the possibility of volt- age surges through the antenna. By having it on, you are ensuring that no such voltage surges are able to go through your unit. ·...
-
Page 29: List Editor
DEC2000-t Installation and reference Manual This section pro- vides you with technical informa- tion on the pro- grams. This is pro- vided for the chan- nel that you are currently tuned into. The following are indicated in this menu: · · Station ·... -
Page 30: Pin Code Menu
DEC2000-t Installation and Reference Manual MOVE: enables you to move the channels around into the order that you want them in DELETE: enables you to delete individual channels DELETE LIST: here you are able to delete the entire list LOCK: allows you to lock the channel so that it cannot be viewe without a pin code. -
Page 31: Software Update Menu
DEC2000-t Installation and reference Manual f) Software update Menu At the top of the screen you are given information on the current software for your DEC2000-t. The top box, indicates your software version. At this time, software updates via digital terrestrial are not currently avail- able in the UK... -
Page 32: Connecting The Dec2000-T To Your Pc
6. CONNECTING THE DEC2000-t TO YOUR PC In addition to connecting the DEC2000-t to your TV set, it can be connect- ed to your PC. The key features when connecting the DEC2000 to your PC are the ability to watch digital TV on your PC while you work, plus the ability to record your digital TV shows to your PC’s hard disk. -
Page 33: Installation Of The Dec2000-T Usb Hardware
DEC2000-t Installation and Reference Manual This section will take you through the following steps a........Installation of the DEC2000-t USB Hardware b........Installation of the DEC2000-t USB driver software c.......Installation of the DEC2000-t USB Application Software d..........DEC2000-t USB TV & Radio Application e ........ -
Page 34: Installation Of The Dec2000-T Usb Application Software
DEC2000-t Installation and Reference Manual · · The Windows Hardware Wizard will load the DEC 2000-t driver from the Installation CD-ROM. Click Next several times until you see Finish. It may be necessary to have your Windows Installation CD-ROM at hand, in case Windows requests this for the installation. -
Page 35: Installation Of The Mheg Teletext Application
DEC2000-t Installation and Reference Manual e: Installation of the MHEG Teletext Application Make sure that the DEC2000-t application software is installed (section 6c). To install the Digital Teletext software, click Start/Run and D:\Digital_Teletext_v1.0.01\Setup.exe (substitute your CD-ROM drive let- ter for D:\). Ensure that the DEC2000-t is highlighted in the Setup type selection. -
Page 36: Channel Scan
DEC2000-t Installation and Reference Manual g. Channel Scan This icon opens dialogue for Channel Scan. This dialogue allows you to search for new digital TV broadcasters and to update the program list. Select Scan to start the scanning process. Note: because new Digital Terrestrial channels are being made available all the time, we recommend scanning for new and updated channels every 2 months. -
Page 37: Program Information
DEC2000-t Installation and Reference Manual h. Program Information In this group the start-time, title and a brief description of the current and next broadcast are displayed. This is only displayed, when the station provides the information. i. Program list This lists the channels that have been scanned in during the Auto Scan channel search. -
Page 38: View Modes
DEC2000-t Installation and Reference Manual k. View modes In the normal operating mode you can change to full screen mode by clicking the ICON for Full Screen in the main application window: Full Screen Mode In the normal operating mode you can change to No Title Mode by click- ing the ICON for No Title Mode in the main application window: No Title Mode You can also change to No Title Mode by double clicking the left mouse... -
Page 39: Intervideo Windvd
DEC2000-t Installation and Reference Manual A red flashing button indicates recording in progress. You must not change the channel while recording. Stop the recording before you change the channel. The TIME_SHIFT button starts the time shift mode, allowing you to record a running telecast and begin playback while the same recording is still ongoing. - Page 40 DEC2000-t Installation and Reference Manual Note: Audio and video streams are written in the MPEG2 format onto your hard disk. The recording process performing a transfer rate of up to sever- al Mbit/s requires fast, capacious disk drives. For example, recording a one minute video stream at its typical data rate (4Mbit/s) requires 30 MBytes of free space, one hour of video will require approximately 1.8 GBytes.
-
Page 41: Playback Of Recorded Tv Shows On Your Pc
DEC2000-t Installation and Reference Manual o. Playback of recorded TV shows on your PC Your recorded television programs are played back through "InterVideo WinDVD". WinDVD is automatically installed with the WinTV-NOVA-t soft- ware during the software installation. Playing back a recorded TV show from WinDVD: To launch the InterVideo WinDVD application click Start, then go to Programs and go to InterVideo WinDVD 1. - Page 42 DEC2000-t Installation and Reference Manual (the default directory is C:\Program Files\Hauppauge\WinTV-NOVA-t) Note: You will navigate by using the + or - buttons to expand the list. 5. Highlight the recording that you want to play back and click Add. 6. Then click OK. The Playlist menu will close and your video will start playing.
- Page 43 DEC2000-t Installation and Reference Manual tions, the teletext services may change the channel in the Digital TV appli- cation automatically. Digital Teletext software remote control You can use the Software Remote Control window to drive the text service, or alternatively, you can use the keyboard accelerators, listed below. You can move the Software Remote Control to another location on the screen, or attach it to the Digital Teletext window by moving it close to its left or right side, where it will ‘snap’...
-
Page 44: 7: Troubleshooting The Pc Connection
7. Troubleshooting the PC application Many errors are caused by the incorrect installation of the 'Hauppauge - DEC USB Device' driver. We must first check the device manager to see if the driver has been installed correctly (Win98/ME): Open the device man- ager (Start / Settings / Control Panel / System / Device manager). -
Page 45: Technical Support
DEC2000-t Installation and reference Manual the United Kingdom look up http://www.tv-installers.com/index2.html ). Problem: the Hauppauge DEC2000-t USB driver is not installed in the Device Manager This may happen if the driver is not installed correctly (select Update for the driver in the device manager and select the CD ROM driver) or if you are using a USB HUB (Try connecting directly to the system's USB port). -
Page 46: Software Support
· · Which chip set does the Motherboard use? (Intel, SIS, UMC, VIA... Look directly on the Main board). *If you can telephone the Hauppauge Technical Support line while seated at the switched on computer, it will be easier to assist and provide information for you. - Page 47 DEC2000-t Installation and reference Manual...
Need help?
Do you have a question about the DEC 2000-t and is the answer not in the manual?
Questions and answers