Table of Contents
Advertisement
Advertisement
Table of Contents

Related Manuals for Kalerm KLM1602


Summary of Contents for Kalerm KLM1602
- Page 1 KLM1602 Intelligent Fresh Ground Coffee Machine Service Manual KLM1602-SM-EN V002...
- Page 3 KLM1602 Intelligent Fresh Ground Coffee Machine Service Manual English...
-
Page 4: Table Of Contents
4.2.7 Disassemble control panel group 4.2.8 Disassemble drainage valve group 4.2.9 Disassemble solenoid valve group 4.2.10 Disassemble pump group 4.2.11 Disassemble PCBA 4.2.12 Disassemble dispenser valve 2W 4.2.13 Disassemble thermoblock group 4.2.14 Disassemble drive motor group KLM1602 Intelligent Fresh Ground Coffee Machine Service Manual... - Page 5 Contents 4.3 Precautions for maintenance and installation 4.3.1 Brew unit group 4.3.2 Grinder group 4.3.3 Control panel group Precautions for assembling 5. Function test and maintenance 5.1 Function test and test standards 5.2 Coffee machine maintenance 5.2.1 Coffee machine decalcifying 5.2.2 Rinse the brew unit 5.2.3 Wipe the coffee machine 6.
-
Page 6: Introduction
The maintenance technician must inform the retailer or manufacturer promptly of any problems when installing ● or using the appliance. The coffee machine must be used at the temperature between 5℃ and 40℃. ● KLM1602 Intelligent Fresh Ground Coffee Machine Service Manual... -
Page 7: Symbol Description
Introduction Symbol description Non-compliance with the operation, may cause electric shock, and threat to life. Non-compliance with the operation may cause coffee machine damaged, or personal injury. Non-compliance with the operation, may cause scalded or burned. This symbol, if prompted, please carefully read information with it. -
Page 8: Structure
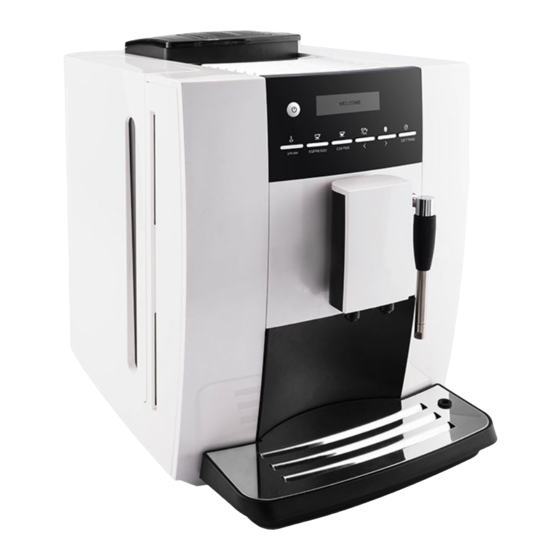
Bean container lid Drip tray decoration cover Water tank cover Top cover Water tank ornament cover Cup support Water tank Front cover right Front cover left Drip tray cover Export decorative cover Drip tray KLM1602 Intelligent Fresh Ground Coffee Machine Service Manual... - Page 9 Structure Bean container Grinder adjustment knob Ground coffee container lid Hot water export Coffee export Back cover Logo Right side section...
- Page 10 Structure Left side section Power line Power switch Americano button Espresso button Coffee button Double cup Coffee strength button Setting button Screen KLM1602 Intelligent Fresh Ground Coffee Machine Service Manual...
-
Page 11: Description Of Internal Components
Structure Description of internal components Thermoblock Solenoid valve 2W Geared motor Dispenser valve 2W Support PCBA Pump Drainage valve Line pencil connector Transformer Base Brew unit Drip tray microswitch Reed sensor Flowmeter Valve support Control panel Grinder group... -
Page 12: Water Circuit
Structure 2.3 Water circuit 2.3.1 Overview of water circuit Water tank Dispenser valve 2W Sieve Drainage valve Flowmeter Brew unit Pump Solenoid valve 2W Pressure maintaining valve Beverage export Coffee thermoblock KLM1602 Intelligent Fresh Ground Coffee Machine Service Manual... -
Page 13: Water Circuit For Making Coffee
Structure 2.3.2 Water circuit for making coffee Water tank Dispenser valve 2W Sieve Drainage valve Flowmeter Brew unit Pump Beverage export Pressure maintaining valve Coffee thermoblock... -
Page 14: Water Circuit For Making Hot Water
Structure 2.3.3 Water circuit for making water Water tank Solenoid valve 2W Sieve Beverage export Flowmeter Pump Pressure maintaining valve Coffee thermoblock KLM1602 Intelligent Fresh Ground Coffee Machine Service Manual... -
Page 15: Schematic Circuit Diagram
Structure 2.4 Schematic circuit diagram Power switch Drive motor Data interface Transformer LCD screen Thermoblock fused-cord fused-cord Solenoid valve Flowmeter Pump Drip tray microswitch Filter Reed sensor Terminal LED light Power line Thermoblock Grinder motor Microswitch Feedback device Communication cable Power PCBA Solenoid valve 2W Stepper motor... -
Page 16: Technical Data
Coffee grounds container 15 Pieces Coffee bean container 250g Coffee powder volume for brew unit MIN 5g; MAX 14g Various data Dimensions(length×width×height) 450×302×370 mm Cable Length approx 1.5 m Net weight approx 11.5kg KLM1602 Intelligent Fresh Ground Coffee Machine Service Manual... -
Page 17: Troubleshooting
Troubleshooting 3. Troubleshooting check list 3.1 Troubleshooting check list Prob- Item Confirmation Problem Cause Remedy Remarks ability External YES - If necessary - replace the Disassemble the Examine parts are 3.1.1 external parts external parts external broken or NO - continue to 3.1.2 according to 4.2.1 damage damaged... - Page 18 3.3.2.3 water tank is make the ball move inside water sticked tank NO - continue to 3.3.2.4 The following should be replaced or repaired the water tank group KLM1602 Intelligent Fresh Ground Coffee Machine Service Manual...
- Page 19 Troubleshooting Prob- Item Confirmation Problem Cause Remedy Remarks ability YES - replace water tank group, item: 8810101020 The ball is fell off 3.3.2.4 NO - continue to 3.3.2.5 YES - replace water tank group, item: 8810101020 Ball damaged 3.3.2.5 NO - continue to 3.3.2.6 FILL WATER The following should be repaired by dismatling the machine 3.3.2...
- Page 20 4.2.10; YES - replace drainage valve Drainage valve 2. Replace or repair 3.3.6.3 group group damaged damaged components NO - continue to 3.3.6.4 according to drainage valve group explosive view 8810101006 KLM1602 Intelligent Fresh Ground Coffee Machine Service Manual...
- Page 21 Troubleshooting Prob- Item Confirmation Problem Cause Remedy Remarks ability YES - replace brew unit seal, item: Contropistone seal 1. Disassemble brew unit 3.3.6.4 73000065 damaged according to 4.2.3; NO - continue to 3.3.6.5 A little 2. Replace or repair water drops damaged components Press from coffee...
- Page 22 ) Inside pipe connector YES - repair pipes or pipe damaged or connector at the back of brew dropped-coffee 3.5.3.3 unit continue to - 3.5.3.4 leakage(lots of coffee on the table) KLM1602 Intelligent Fresh Ground Coffee Machine Service Manual...
- Page 23 Troubleshooting Prob- Item Confirmation Problem Cause Remedy Remarks ability Drainage valve 1. Disassemble drainage group damaged, valve group according no water comes to 4.2.8; YES - replace drainage valve to brew unit; 2. Replace or repair 3.5.3.4 group water drops to damaged components NO - continue to 3.5.3.5 drip tray directly...
- Page 24 2 cups of 3.5.8.2 creama on too rough coffee, the 3rd cup will meet the the top standard NO - continue to 3.5.8.3 The following should be repaired by dismatling the machine KLM1602 Intelligent Fresh Ground Coffee Machine Service Manual...
- Page 25 8810101002 replace or coffee repair damaged components YES - use Kalerm provided coffee spoon, fill one full spoon of coffee Not enough LACK OF 3.6.2.1 powder coffee powder POWDER NO - continue to 3.6.1.2 displays on 3.6.2...
- Page 26 NO - continue to 3.12.1.7 according to 4.2.11 Connector or pipe 3.8.1.7 damaged- water YES - replace connector or pipe leakage Problem after press ON/OFF to Problems CLEANING refer to 3.3 till power KLM1602 Intelligent Fresh Ground Coffee Machine Service Manual...
- Page 27 Troubleshooting Prob- Item Confirmation Problem Cause Remedy Remarks ability Descale according to Decalcifyi 5.2.1 Clean coffee machine 3.10 cleaning according to 5.2.2 YES - Restart the machine System testing 3.12.1.1 3.11 Malfunction NO - continue to 3.12.1.2 YES - repair or replace coffee Thermoblock According to explosive thermoblock connection line;...
- Page 28 4.2.11 Replace or repair YES - repair or replace coder damaged components Feedback device 3.13.4.4 circuit board, item: 78000005 according to feedback damaged NO - continue to 3.13.4.5 device explosive view 8810101013 KLM1602 Intelligent Fresh Ground Coffee Machine Service Manual...
- Page 29 Troubleshooting Prob- Item Confirmation Problem Cause Remedy Remarks ability 1. Disassemble brew unit according to 4.2.3; 2. Replace or repair YES - replace or repair brew unit Brew unit parts 3.13.4.5 damaged components parts damaged BREW UNIT NO - continue to 3.16.4.4 according to brew unit Information RESET...
-
Page 30: Check List For Minor Failure
EMPTY TRAY- terminal function is all right;If the screen does not remind EMPTY TRAY-internal line fault- disassemble and repair the machine. KLM1602 Intelligent Fresh Ground Coffee Machine Service Manual... - Page 31 Troubleshooting 3.2.1.4 Press button Operation all the function buttons on the control panel to judge if the press buttons are all right,and confirm issues and causes according to check list 3.1. 3.2.2 Circuit 3.2.2.1 Check fuse inside line pencil connector If the fuse is damaged, machine can not be started on.
- Page 32 When touch microswitch contactor, it is on-state. 3.2.3. Leakage Take off drip tray layer board as the picture shows, fill drip tray microswitch with paper, and press rinse button Check leakage of brew unit KLM1602 Intelligent Fresh Ground Coffee Machine Service Manual...
- Page 33 Troubleshooting Check leakage of connectors...
-
Page 34: Repair
Repair 4. Repair 4.1 Tools preparation Torx screwdriver(T6,T10,T15,T20,T25) Slotted type screwdriver (3mm series) Multimeter Needle-nose pliers Electronic scale Temperature tester KLM1602 Intelligent Fresh Ground Coffee Machine Service Manual... -
Page 35: General Disassembly
Repair 4.2 Disassemble process for components 4.2.1 Disassemble exterior parts 4.2.1.1 Take out movable parts 1. Take out drip tray 2. Take out bean container lid group 3. Take out water tank group 4.2.1.2 Disassemble back cover 1. Rotate the Logo support according 2. - Page 36 2. Take out front cover right and front the bottom cover left separately according to the direction of the arrow 4.2.1.4 Disassemble right cover 1. Take out right side section according to the direction of the arrow KLM1602 Intelligent Fresh Ground Coffee Machine Service Manual...
- Page 37 Repair 4.2.1.5 Disassemble coffee bean container group 1. Disassemble 4 screws from the coffee bean container, and take the coffee bean container out 4.2.1.6 Disassemble top cover 1. Disassemble 2 screws from the left 2. Loose top cover and hook of the side of the top cover frame 3.
-
Page 38: Disassemble Power Cord
1. Refer to 4.2.1- Disassemble the exterior parts of the machine 2. Disassemble 2 screws from the 3. Disassemble 1 screw from support, cable rack loose 3 screws inside the line pencil connector and take out the power cord KLM1602 Intelligent Fresh Ground Coffee Machine Service Manual... -
Page 39: Disassemble Brew Unit
Repair 4.2.3 Disassemble brew unit 1. Refer to 4.2.1- Disassemble exterior parts of the machine 2. Disassemble 3 screws, and take 3. Pull out silicon pipe from brew unit out frame support 4. Disassemble 3 screws from brew unit 5. Pull the brewing unit outward and 6. -
Page 40: Disassemble Valve Support Group
2. Pull out the flowmeter terminal, and 3. Pull out the silicone pipe at two pull out the flowmeter according to sides of the flowmeter, and take out the arrow direction flowmeter KLM1602 Intelligent Fresh Ground Coffee Machine Service Manual... -
Page 41: Disassemble Grinder Group
Repair 4.2.6 Disassemble grinder group 1. Refer to 4.2.1.1-4.2.1.6-disassemble top cover 2. Disassemble 3 screws 3. Pull out grinder motor terminal from PCBA and take out grinder group 4.2.8 Disassemble control panel group 1. Refer to 4.2.1-disassemble exterior parts 3. Pull out terminal on PCBA which 2. -
Page 42: Disassemble Drainage Valve Group
1. Refer to4.2.1-disassemble exterior parts 2. Refer to4.2.3-disassemble brew unit group 3. Remove the spring clip,pull out 4. Pull out dispenser valve terminal on the connector PCBA, and take it out from the cable rack KLM1602 Intelligent Fresh Ground Coffee Machine Service Manual... -
Page 43: Disassemble Solenoid Valve Group
Repair Note:There is a sealing element left at 5. Disassemble 4 screws from support the bottom after taking out drainage and take out drainage valve group valve group 4.2.9 Disassemble solenoid valve group 1. Refer to 4.2.1.1-4.2.1.4-disassemble right side section 2. -
Page 44: Disassemble Pump Group
5. Take all cables out from the cable and take it out from the cable rack rack,pull out 3pcs screws ,remove the cable rack 6.Pull out the spring clip and teflon pipe,remove the pump KLM1602 Intelligent Fresh Ground Coffee Machine Service Manual... -
Page 45: Disassemble Pcba
Repair 4.2.11 Disassemble PCBA 1. Refer to 4.2.1.1-4.2.1.4-disassemble right side section 2. Pull out all the terminals on PCBA 3. Disassemble 4 screws on PCBA, and take out PCBA 4.2.12 Disassemble dispenser valve 2W group 1. Refer to4.2.1.1-4.2.1.4-disassemble right side section 2. -
Page 46: Disassemble Thermoblock Group
4. Pull out the terminal on soleniod 5. Pull out the spring clip and teflon valve pipe 6. Pull out the spring clip and teflon 7. Disassemble 2pcs screws pipe KLM1602 Intelligent Fresh Ground Coffee Machine Service Manual... -
Page 47: Disassemble Drive Motor Group
Repair 8. Disassemble hooks from the support and take out thermoblock 4.2.14 Disassemble drive motor group 1. Refer to 4.2.1.1-4.2.1.4-disassemble right side section 2. Pull out the terminals on PCBA 3. Disassemble 2pcs screws ,remove and take it off cable rack the drive motor group... -
Page 48: Precautions For Maintenance And Installation
4. Disassemble 4 hooks from the top the front position of cover of the brew unit,take out top the brew unit. It should cover of brew unit match the wiper KLM1602 Intelligent Fresh Ground Coffee Machine Service Manual... - Page 49 7. Take out left and right pull plate 8. Rotate the gear and pull plate sleeve KLM1602 Intelligent Fresh Ground Coffee Machine Service Manual 9. Take out the contropistone 10. Take out the connector, pay attention to the direction of the spring.
- Page 50 12. Disassemble release link,and release link. take out piston 14. Disassemble seal from 13. Disassemble the screw from contropistone contropistone, and take out filter screen KLM1602 Intelligent Fresh Ground Coffee Machine Service Manual...
-
Page 51: Grinder Group
Repair 4.3.3 Grinder group 1. Disassemble the 3 hooks from the 2. Rotate the upper burr group grinder adjustment sector and take out anticlockwise the grinder adjustment sector 3. Disassemble the three hooks from 4. Disassemble 1 middle screw the motor support for grinder, and take out the grinder adjustment ring 5. - Page 52 10. Disassemble steel ball support and gearbox, and then take out the coffee 34 pcs steel ball 11. Take out the epicyclic gear 12. Take out filler piece and the group B epicyclic gear group A KLM1602 Intelligent Fresh Ground Coffee Machine Service Manual...
-
Page 53: Control Panel Group
Repair 13. Disassemble the 2 screws inside the gearbox, and take out the grinder motor 4.3.4 Control panel group 1. Pull out the terminal 2. Disassemble 2pcs screws NOTE: the location of two silicone tube, top tube for 3. Remove the coffee outlet group coffee, bottom pipe for water... - Page 54 6. Remove the decorative cover 7. Disassemble 2pcs hooks on both panel and the power button sides 8. Remove the HMI,pull out 3pcs 9. Disassemble 2pcs hooks on both terminals sides and remove the switch support KLM1602 Intelligent Fresh Ground Coffee Machine Service Manual...
- Page 55 Repair 10. Remove the HMI 11. Remove the HMI group,disassemble 5pcs screws,pull out LCD terminal 12. Disassemble 2pcs hooks on both 13. Remove the LCD screen sides...
-
Page 56: Precautions For Assembling
Repair Valve support group 1. When installing the support seal, the downside should be with bigger diameter. Brew unit 1. Install the piston and release link into the coffee brewing unit, oil(MI-setral-61B) coating position should be as the picture shows. 2. - Page 57 Note: The direction of the contropistone should be the same as the picture showed. 7. Rotate the gear onto the brew unit frame, install the sleeve pipe, the small head of sleeve pipe should be inward. KLM1602 Intelligent Fresh Ground Coffee Machine Service Manual...
- Page 58 Repair 8. Install the left and right pull plate and left and right cover on brew unit frame, oil (MI-setral-61B) coating position for left and right pull plate should be as the picture shows. Note: Pay attention to the direction of the brew unit top cover, the deeper groove should be in front.
- Page 59 Screw tightly. 10. Insert the already installed grinder motor 11. Install the coffee powder hopper on the in the grinder support, and lock screws. coffee powder container, and lock the screw. KLM1602 Intelligent Fresh Ground Coffee Machine Service Manual...
- Page 60 Repair 12. Install 3 spring sleeves into the hole of 13. Install the screw pin worm drive and the support lower grinder. conical burr to support lower grindor. 14. Put 3 conical burr protective steel balls 15. Put the felt ring into the already installed and spring into support lower grinder.
- Page 61 22. The already installed grinder group should be tested when the whole machine is installed. The thickness of the powder should be adjusted properly. KLM1602 Intelligent Fresh Ground Coffee Machine Service Manual...
-
Page 62: Function Test And Test Standards
90~120ml 25~35s 5.2 Coffee machine maintenance 5.2.1 Coffee machine decalcifying Use Kalerm decalcifier only. It may damage machine if use other decalcifier. The whole process costs about 25 minutes. 1. Empty tray 2. Dissolve decalcifier in the clean water, and pour into the water tank- the water inside the water tank should be half of the water tank. - Page 63 11. The screen shows READY,cleaning is completed, then you can make coffee. Daily descale comparison table Water hardless level Descale cycle ●●●● around2~4weeks ●●●○ around4~6weeks ●●○○ around once per 2 months ●○○○ around once per 3 months KLM1602 Intelligent Fresh Ground Coffee Machine Service Manual...
- Page 64 Function test and maintenance methods 5.2.2 Rinse the brew unit Use Kalerm cleaning agent only. It may damage machine if use other cleaning agent. The whole process costs about 10 minutes. 1. When machine in READY state, press “P” button to enter in the program menu, press the button “<>”...
-
Page 65: Function Test And Maintenance
Use dry rag or tissue clean rest oil inside bean container. Do not use water to wash bean container. 4. Clean hopper Use dry rag clean the channel of hopper. Do not use water to wash hopper channel. KLM1602 Intelligent Fresh Ground Coffee Machine Service Manual... -
Page 66: Rinse The Brew Unit
Function vtest and maintenance methods 5. Clean the internal machine Clean base Clean brew unit-coffee brewing box( position 1) and contropistone( position 3 and position 2 is the back side) 6. Clean coffee machine. Use dry and soft rag to clean the appearance of the coffee machine. -
Page 67: Wipe The Coffee Machine
Repair Grinder group 1. Assemble the grinder motor and gearbox together, and screw them tightly. The screw should be covered with loctite. The teeth of the gearbox should be coated with oil(MI-setral-61B). The red mark place should correspond to one hole of the gearbox. 2. - Page 78 Suzhou Industrial Park Kalerm Electric Appliances Co., Ltd www.kalerm.com +86-4006-800-866 Add: #100 Sumu Rd, SIP Suzhou,215021,Jiangsu China T e l : +86-512-68180758 F ax : +86-512-68181050...
Need help?
Do you have a question about the KLM1602 and is the answer not in the manual?
Questions and answers