Table of Contents
Advertisement
Quick Links
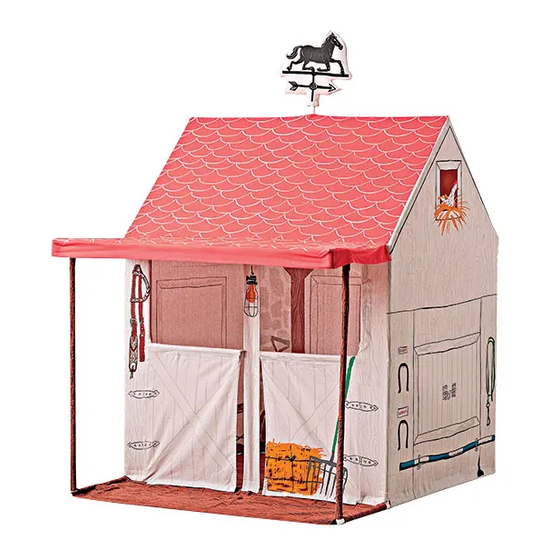
Horse Stable Playhouse
This page lists the contents included in the box. Please take
time to identify the hardware as well as the individual
components of the product. As you unpack and prepare for
assembly, place the contents on a carpeted or padded area
to protect them from damage. Please follow the assembly
instructions closely. Improper assembly can result in
personal or property damage.
Note: 2 adults are required to safely assemble this product.
A
B
x 04
C
x 02
D
x 02
E
x 02
G
x 04
H
x 04
I
x 02
J
x 08
8135 River Drive • Morton Grove, IL 60053 • p: (800) 933-9904 • e: customerservice@landofnod.com • www.landofnod.com
F
x 02
K
x 01
x 04
x 02
1
x 08
4
x 04
2
3
x 04
x 04
5
6
x 01
x 04
x 01
Advertisement
Table of Contents

Summary of Contents for The Land of Nod Horse Stable Playhouse
- Page 1 Horse Stable Playhouse Assembly Instructions This page lists the contents included in the box. Please take time to identify the hardware as well as the individual components of the product. As you unpack and prepare for assembly, place the contents on a carpeted or padded area to protect them from damage.
- Page 2 Horse Stable Playhouse Assembly Instructions Arrange marked poles and connectors as shown in diagram and fit together. Make sure each pole is securely supported by connectors. Arrange marked poles and connectors as shown in diagram and fit together. 8135 River Drive • Morton Grove, IL 60053 • p: (800) 933-9904 • e: customerservice@landofnod.com • www.landofnod.com...
- Page 3 Horse Stable Playhouse Assembly Instructions Arrange marked poles and connectors as shown in diagram and fit together. Fit assembled pole/connector into corresponding poles as shown in diagram. 8135 River Drive • Morton Grove, IL 60053 • p: (800) 933-9904 • e: customerservice@landofnod.com • www.landofnod.com...
- Page 4 Horse Stable Playhouse Assembly Instructions Arrange marked poles and connectors as shown in diagram and fit together. Front roof frame Back roof frame Fit assembled pole/connector onto corresponding poles as shown in diagram. 8135 River Drive • Morton Grove, IL 60053 • p: (800) 933-9904 • e: customerservice@landofnod.com • www.landofnod.com...
- Page 5 Horse Stable Playhouse Assembly Instructions Fit noted pole into corresponding connectors as shown. Attach noted connector and pole onto top of frame assembly as shown. 8135 River Drive • Morton Grove, IL 60053 • p: (800) 933-9904 • e: customerservice@landofnod.com • www.landofnod.com...
- Page 6 Horse Stable Playhouse Assembly Instructions Fit noted poles and connectors onto frame assembly as shown. Arrange marked poles and connectors as shown in diagram and fit together. 8135 River Drive • Morton Grove, IL 60053 • p: (800) 933-9904 • e: customerservice@landofnod.com • www.landofnod.com...
- Page 7 Stable Playhouse Assembly Instructions Fit assembled pole/connector onto frame assembly as shown. Playhouse frame is now complete. Remove Poles I from frame assembly and insert fabric sleeves to each pole. Fit each covered pole in corresponding connec- tors. At this point, cover the frame assembly with the stable plahouse fabric cover.
- Page 8 Horse Stable Playhouse Assembly Instructions Place the wood texture fabric on the floor on the front of the frame assembly and secure with Hook and Loop closure at the bottom. Place the weather vane at the top of the frame assembly.


Need help?
Do you have a question about the Horse Stable Playhouse and is the answer not in the manual?
Questions and answers