
Related Manuals for eversense XL


Summary of Contents for eversense XL
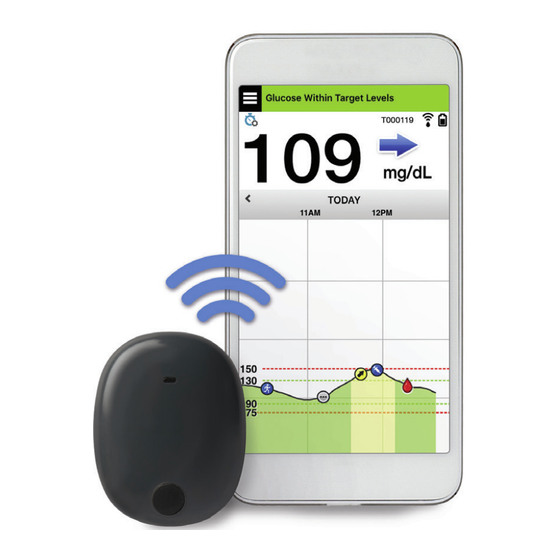
- Page 1 User Guide A guide for using the Eversense XL Continuous Glucose Monitoring System Sensor Smart Transmitter Mobile App...
- Page 3 Eversense XL Trademark Eversense XL, Eversense XL Continuous Glucose Monitoring, Eversense XL CGM, Eversense XL Sensor, Eversense XL Smart Transmitter, Eversense App and the Eversense XL logo are trademarks of Senseonics, Incorporated. Other brands and their products are trademarks or registered trademarks of their respective holders.
-
Page 4: Table Of Contents
4. Inserting and Linking the Sensor 1. Introduction 5. Using the Help and Support Smart Transmitter Eversense XL CGM System Components 8 System Requirements Daily Use End User License Agreement Secure the Smart Transmitter and Privacy Policy over Inserted Sensor... - Page 5 My Reports Logging out 13. Product and General 9. Alert Descriptions Information on the App Alerts and Notifications 14. Viewing Eversense XL Data Alert History on the Apple Watch Alert Descriptions and Actions Glance View 10. Event Log 15. About the Sensor...
- Page 6 Connection with Smart Transmitter USB Cable* for Charging and Calibration Downloading Alerts and Notifications Electrical and Safety Standards Glucose Readings Symbols on the Eversense Mobile App 149 Trend Arrows Symbols on Packaging and Devices Eversense Smart Transmitter Sensor Limited Warranty (Terms) Events...
-
Page 7: Glossary
Glossary Alert An alert warns you that a situation needs Do Not Disturb Mode (DND in the Eversense App) your attention and that you should respond/take When enabled, the smart transmitter will stop providing appropriate action. vibratory notifications for non-critical alerts. The Do Not... - Page 8 Interstitial Fluid (ISF) The fluid between cells in the mmol/L Millimoles per liter, a unit of measure that body. The Eversense XL CGM measures glucose from shows the concentration of a substance in a specific an interstitial fluid sample, versus glucose in a blood amount of fluid.
-
Page 9: Introduction
Congratulations on having the latest technology to assist you in managing your diabetes. Your Eversense XL CGM System with the extended life Eversense XL Sensor is intended to continually measure glucose levels for the operating life of the sensor. Glucose information collected by the system is automatically sent to your mobile device. You must contact your doctor’s office to schedule the insertion and removal of your sensor. -
Page 10: Eversense Xl Cgm System Components
These glucose levels are then calculated by the smart transmitter and sent to the app. The Eversense XL Sensor lasts up to 180 days. The system will provide you with notifications through the mobile app so you can schedule a replacement. - Page 11 Eversense App The Eversense App is a software application that runs on a mobile device (e.g., smartphone or tablet) and displays glucose data in a variety of ways. It also provides alerts based on the glucose settings you choose. The Eversense App screens layout will vary based on your mobile device’s model and/or operating...
- Page 12 It is safe for you to wear your sensor and smart transmitter when you go through metal detectors at airports. While flying, the smart transmitter performs similar to any other Bluetooth device. Be sure to follow the specific safety guidelines mandated by the airline. Eversense XL CGM User Guide...
- Page 13 Some of the features of the Eversense XL CGM System: • Wireless communication with the sensor, smart transmitter and app. • Long-term sensor wear in the upper arm for the operating life of the sensor. • Alerts when pre-set Low or High Glucose Alert levels (hypoglycaemia or hyperglycaemia) are reached.
-
Page 14: System Requirements
End User License Agreement and Privacy Policy Use of the Eversense App is subject to the terms and conditions of the most current Eversense App End User License Agreement and Eversense App Privacy Policy. These documents are updated from time to time and are posted at www.eversensediabetes.com. -
Page 15: Indications For Use
Indications for Use The Eversense XL CGM System is indicated for continually measuring interstitial fluid glucose levels in adults (18 years and older) with diabetes for the operating life of the sensor. The system is intended to: • Aid in the management of diabetes. -
Page 16: What Is Included In This Package
What is Included in this Package This Eversense XL Smart Transmitter Pack contains the following: Eversense XL Smart Transmitter Charging Cradle Power Supply (USB cable and AC power adapter) Also included in this package is this User Guide and a Quick Reference Guide (not shown). -
Page 17: Benefits And Risks
2. Benefits and Risks This section describes the benefits, expectations and risks associated with using the Eversense XL CGM System. Continuous glucose monitoring aids in the management of diabetes and glucose control, which can improve your quality of life. Best results are achieved when you are fully informed about the risks and benefits, insertion procedure, follow-up requirements, and self-care responsibilities. -
Page 18: Warnings
Close contact with direct electromagnetic interference (EMI) may interfere with the smart transmitter’s ability to send data to your mobile device. Move away from the source of EMI and check that your mobile device is connected to your smart transmitter. Eversense XL CGM User Guide... - Page 19 Failure to do so could result in infection at the insertion site. • Please review this User Guide with your healthcare professional. For additional Eversense XL product questions and troubleshooting issues, contact Roche Diabetes Care at 0800-701000 (UK) or 1800-709600 (ROI).
-
Page 20: Cautions
A warm sensor could mean there is an infection or a sensor malfunction. • Remove the smart transmitter from your arm before charging the smart transmitter battery. Failure to remove the smart transmitter while it is charging could result in electrical shock. Eversense XL CGM User Guide... - Page 21 (excluding topical, optical or nasal, but including inhaled). • The Apple Watch is a secondary display of Eversense CGM data and should not be used in place of the primary Eversense CGM display. Eversense XL CGM User Guide...
-
Page 22: Getting Started
3. Getting Started This section describes the initial start-up steps required before you can begin using your new Eversense XL CGM System on a daily basis. You may perform these steps before your doctor inserts the sensor. To get started you need: •... -
Page 23: Charge Your Smart Transmitter
Plug the standard end of the USB cable into the Plug the micro end of the USB cable into the adapter on the USB port. charging cradle on the USB port. Eversense XL CGM User Guide... - Page 24 • Slide the smart transmitter into place in the LED Indicator charging cradle. (lights green • Once positioned, push down on the smart or orange) transmitter until it snaps into place. Eversense XL CGM User Guide...
-
Page 25: Step 1. Download And Install The App
Eversense App Icon Note: Make sure your mobile device is using the latest operating system. IMPORTANT: Make sure that you have a wireless internet connection and that Bluetooth is turned ON before continuing. Eversense XL CGM User Guide... -
Page 26: Step 2. Set Up The App - Account Creation, Pairing And Settings
Once the app is downloaded, connect the app and smart transmitter by pairing the smart transmitter with your mobile device. Launch the app by tapping the Eversense App After you accept the Agreement, you will be icon on your mobile device. The END USER prompted to create and register an account with LICENSE AGREEMENT will appear. - Page 27 Enter your account information and then tap Enter your email address and password and tap Register. LOG IN. You will see a confirmation screen. Tap OK. Note: The password is case sensitive. Eversense XL CGM User Guide...
- Page 28 Make sure your smart transmitter is not plugged (skip to step 12). into the power supply. • The LED will blink green and orange to indicate the smart transmitter is in Discoverable mode. Eversense XL CGM User Guide...
- Page 29 LED appears, press and Tap Not Connected to hold the power button for about begin pairing process. 5 seconds to turn it on. Eversense XL CGM User Guide...
- Page 30 (see Inserting and time to make a calibration entry. • Linking the Sensor). Tap Morning to change the time and repeat for • Tap Next. Evening. • Tap Next when done. Eversense XL CGM User Guide...
- Page 31 24-hour Warm-Up Phase is completed, you tap Finish. can begin calibration. If you have not yet had your sensor inserted, you can review this User Guide to become familiar with the app and its features. Eversense XL CGM User Guide...
-
Page 32: Inserting And Linking The Sensor
Placement Guide indicates there is no Placement Guide. connection, try rotating the smart transmitter slightly to the left or right so the power icon and LED are parallel to the sensor. LED indicator (lights green or orange) Power button Eversense XL CGM User Guide... -
Page 33: The Sensor
Caution: The sensor and smart transmitter should be linked the day of the sensor insertion. Failure to link the sensor and smart transmitter could result in a delay in receiving glucose readings. Eversense XL CGM User Guide... - Page 34 The system will prompt you to calibrate using the app. IMPORTANT: If your smart transmitter is not turned on and paired with the Eversense App and linked to the sensor, the system is not able to prompt you to calibrate.
-
Page 35: Using The Smart Transmitter
This section describes the many features of the smart transmitter and how to get uninterrupted and continuous monitoring of your glucose levels. Your smart transmitter communicates with both the sensor and the app to provide CGM information. Your Eversense XL Smart Transmitter does the following: • Powers the sensor. -
Page 36: Daily Use
: If your smart transmitter is damaged or cracked, DO NOT use, as this could create an electrical safety hazard or malfunction, and could result in electrical shock. Caution: Always remove the smart transmitter from your body before charging the battery. Eversense XL CGM User Guide... -
Page 37: Secure The Smart Transmitter Over Inserted Sensor
If you have any concerns about allergic reaction to silicones, contact your doctor prior to use. Discard the patch after 24 hours of use. Peel off the paper backing with the Eversense XL Align the smart transmitter over the sticky side Smart Transmitter outline on it. - Page 38 Signal strength can also be improved by attaching your smart transmitter to ensure there rotating the smart transmitter over the sensor is some connection between the sensor and such that the sensor aligns with the smart smart transmitter. transmitter. Eversense XL CGM User Guide...
- Page 39 Smooth the adhesive onto the skin. Make sure the • The smart transmitter should be positioned so patch is flat on the skin surface. that the patch wings lay horizontally on the arm. Eversense XL CGM User Guide...
-
Page 40: Turn The Smart Transmitter On And Off
At any time, you can press the power button once to see if the smart transmitter is ON. If the LED appears, the smart transmitter is ON. If no LED appears, the smart transmitter is OFF. LED indicator Power button Eversense XL CGM User Guide... -
Page 41: Smart Transmitter Care And Maintenance
10% power. It is recommended to always charge the smart transmitter for a full 15 minutes using a wall outlet to ensure a full charge. See the next page for more information on the LED indicators. Eversense XL CGM User Guide... -
Page 42: Led Status Indicators
Charge for 15 minutes before 0% - 65% charged to the USB cable disconnecting from power supply Solid green when connected to the Charge for 15 minutes before 65% - 100% charged USB cable disconnecting from power supply Eversense XL CGM User Guide... -
Page 43: Calibrating The System
6. Calibrating the System This section describes the calibration procedure and schedule of your Eversense XL CGM System. To ensure best performance, routine calibration is required using fingerstick readings from a blood glucose meter. DO NOT use alternative test sites such as your forearm when entering BG values for calibration. Any commercially available meter may be used for calibration. - Page 44 Blood glucose meter reading is greater than 22.2 mmol/L. Blood glucose meter reading was taken more than 10 minutes before entering the result in the Eversense App. Sensor glucose reading is significantly different than the blood glucose meter reading.
-
Page 45: Calibration Phases
Glucose readings will start displaying in the app a few minutes after the 2nd calibration is successfully completed. IMPORTANT: If your smart transmitter is not turned on and paired with the Eversense App and sensor, the system is not able to prompt you to calibrate. - Page 46 If a Daily Calibration test is missed, no additional CGM readings will be displayed after 16 hours have elapsed since the last accepted calibration result. If a calibration test result is not entered within 24 hours from the last accepted calibration, the system will re-enter the Initialisation Phase. Eversense XL CGM User Guide...
-
Page 47: How To Calibrate
You can enter additional calibration readings as long as each calibration is at least one hour apart. Tap Menu > Calibrate. • If the time chosen is not within the calibration time frame, the CALIBRATE screen will indicate that it is not yet time for a calibration test. Eversense XL CGM User Guide... - Page 48 When it is time for calibration, the app displays the Obtain a fingerstick reading from your CALIBRATE NOW screen. blood glucose meter. • Tap Calibrate. • The CALIBRATE screen appears. • Tap Not Now if you want to wait until later. Eversense XL CGM User Guide...
- Page 49 Tap Time and enter the time of day when the fingerstick Tap Glucose and enter the value from blood glucose test was taken. your fingerstick blood glucose test. • • Tap Done. Tap Done. Eversense XL CGM User Guide...
- Page 50 3 and 4. result you entered is correct. • • When correct, tap Submit. Tap Cancel to go back and re-enter the correct time or glucose test result. • When correct, tap Submit. Eversense XL CGM User Guide...
- Page 51 5 minutes before the test to 15 minutes after the test while calibration is in progress. The Status Bar at the top of the screen lets you know when calibration will be complete. Eversense XL CGM User Guide...
-
Page 52: Using The App
Check Your Mobile Device Settings You will need a mobile device (such as your smartphone) to use the Eversense XL CGM System. It is very important that your mobile device is set up properly to ensure accurate display of your glucose data in the app. Follow the manufacturer’s instructions for your mobile device to set up the following:... -
Page 53: Get To Know The "My Glucose" Screen
Multiple events mark High Glucose Alert level (Top red dashed line) High Glucose Target level (Top green dashed line) Event mark Low Glucose Target level (Bottom green dashed line) Low Glucose Alert level (Bottom red dashed line) Eversense XL CGM User Guide... - Page 54 X. • You can view a snapshot of the Home screen on your iOS device if you add the Eversense App widget to your widget page. For information on managing widgets, consult your iOS device user guide.
- Page 55 Glucose levels over time. You can scroll back and forth to see trends or zoom Glucose trend graph in to display as few as 3 hours of data, or zoom out to see up to 3 days. Menu Provides easy navigation to various sections of the Eversense App: My Glucose Reports Settings...
-
Page 56: Trend Arrows
Very rapidly falling glucose levels, falling at a rate more than 0.11 mmol/L per minute. The app uses the last 20 minutes of continuous glucose data for calculating glucose trends. When there are not enough sensor values available for the calculation, the arrow is displayed in grey. Eversense XL CGM User Guide... -
Page 57: Trend Graph
You can view the trend graph in either portrait or landscape mode. In landscape mode, there are shortcut buttons to see 7, 14, 30 and 90 day views. Note: All of your glucose data will be stored in the app as long as you have memory available on your mobile device. Eversense XL CGM User Guide... -
Page 58: Menu Options
Download or export your CGM data via a .csv file. Check the communication between the smart transmitter and sensor. Use this screen Placement whenever you are attaching the smart transmitter to be sure communication is Guide established. Eversense XL CGM User Guide... - Page 59 Customise settings such as glucose target levels, alert levels, sounds, temporary profile Settings and calibration reminder times. See Customising your Settings for more information. View information about your CGM System, including sensor and smart transmitter ID About numbers. Eversense XL CGM User Guide...
-
Page 60: Customising Your Settings
Glucose Levels The Eversense XL CGM System is designed to provide alerts on your smart transmitter and mobile device when your glucose level has reached the alert levels you set. You will decide the settings for your glucose alerts, targets, and rates of change based on input from your healthcare professional. - Page 61 – Glucose Targets are used in the reports and line graphs to show how your glucose levels have been performing compared to the targets you set. You will not receive an alert when you have reached your Glucose Target levels. Eversense XL CGM User Guide...
-
Page 62: Setting Glucose Target Levels
Allowable setting Low: 3.6 - 6.7 mmol/L High: 6.7 - 19.3 mmol/L On/Off setting Always ON (cannot be turned OFF) Notes Used in graphs and charts on the app to show time spent in target range. Eversense XL CGM User Guide... - Page 63 Tap Menu > Settings > Glucose to display Under Glucose Target Levels, tap the GLUCOSE SETTINGS screen. High Target and select the appropriate High Glucose Target level. • Tap Done when complete. • Repeat step to make your Low Target selection. Android Eversense XL CGM User Guide...
-
Page 64: Setting Glucose Alert Levels
Setting Glucose Alert Levels Your Eversense XL CGM System will alert you when your glucose levels are outside the alert settings you choose. When you have reached your low and high glucose alert levels, the smart transmitter vibrates, and the mobile app gives an audible alert as well as displays a message on the screen. - Page 65 Tap Menu > Settings > Glucose to Under Glucose Alert Levels, tap High Alert and display the GLUCOSE SETTINGS select the appropriate High Glucose Alert level. • screen. Tap Done when complete. • Repeat step to make your Low Alert selection. Eversense XL CGM User Guide...
-
Page 66: Setting Predictive Alerts
You can turn this feature ON. On/Off setting No predictive alerts will occur until this feature is turned ON. The default is 20 minutes. Notes Audio notification and visual alerts on your mobile device and smart transmitter on-body vibe alerts. Eversense XL CGM User Guide... - Page 67 To turn this feature ON, tap Menu > Next to Predictive Alerts, slide the OFF button right Settings > Glucose to display the to ON. GLUCOSE SETTINGS screen. Tap Minutes to select the amount of advance warning • Tap Done when complete. Eversense XL CGM User Guide...
-
Page 68: Setting Rate Of Change Alerts
On/Off setting You can turn this feature ON. No rate of change alerts will occur until this feature is turned ON. Notes Audio notification and visual alerts on your mobile device and transmitter vibration alerts. Eversense XL CGM User Guide... - Page 69 To turn this feature ON, tap Menu > Next to Rate Alerts, slide the OFF button right to ON. Settings > Glucose to display the GLUCOSE SETTINGS screen. Tap Rate of Change to select the rate. • Tap Done when complete. Eversense XL CGM User Guide...
-
Page 70: Setting Daily Calibration Times
The morning and evening calibration times are set to remind you when to calibrate. You can calibrate up to 2 hours before your scheduled calibration time. Your morning and evening calibration times must be between 10 and 14 hours apart. Tap Menu > Settings > Daily Calibration. Eversense XL CGM User Guide... - Page 71 Tap Morning to set your morning calibration time. When both times are correct, • tap Save. Tap Done when complete. Tap Evening to set your evening calibration time. • Tap Done when complete. Android Eversense XL CGM User Guide...
-
Page 72: Setting System Information
Setting System Information The SYSTEM screen lets you view and edit other settings in your Eversense XL CGM System. Tap Menu > Settings > System to display the SYSTEMS screen. On the SYSTEMS screen, you can tap each of the following to set: •... -
Page 73: Setting Mealtimes Schedule
CGM values during each mealtime interval. Tap Menu > Settings > Meal Times to display the MEAL TIMES screen. Tap each meal time listed, then tap Start and End to set a beginning and end mealtime. Eversense XL CGM User Guide... -
Page 74: Setting Sounds
SOUND SETTINGS screen. IMPORTANT: Be sure the sound on your mobile device is turned on. If you turn the sound on your mobile device off, you will not hear any sounds from the app. Eversense XL CGM User Guide... - Page 75 Note: When you enable Do Not Disturb mode on your mobile device you will not receive any alerts or notifications from the Eversense App. For a list of alerts, please see Alert Descriptions. Eversense XL CGM User Guide...
-
Page 76: Setting Temporary Profile
Settings > Glucose will automatically resume. Tap Menu > Settings > Temp Profile to Select the duration. You can set a Temp Profile for display the TEMP PROFILE screen. up to 36 hours in 30 minute increments. Eversense XL CGM User Guide... - Page 77 Set the High and Low Targets and High and Low Alert changed when the duration has been started. levels desired. Tap START. While a Temp Profile is active, the Temp Profile icon will be displayed on the MY GLUCOSE screen. Temp Profile icon Eversense XL CGM User Guide...
- Page 78 To end the Temp Profile earlier than the time you set, go to Settings > Temp Profile and tap STOP. displays a notice and the Temp Profile icon is no longer displayed on the MY GLUCOSE screen. Eversense XL CGM User Guide...
-
Page 79: Logging Out
Logging out To log out of your Eversense account, tap Settings > Log Out. IMPORTANT: If you log out, no glucose data will be displayed on the app until you log back in using the email and password you entered when you set up your account for the first time. -
Page 80: Alert Descriptions
This section describes the various alerts and notification messages you may see on the Eversense App screens and actions you may need to take. Your CGM System provides you with alerts and notifications related to glucose readings and system status on both your smart transmitter and mobile device. -
Page 81: Alert History
Dismiss All. This can happen when your mobile device has been out of range of your smart transmitter and then re-syncs. You can review each alert in Alert History. Example of ALL Example of alerts only Eversense XL CGM User Guide... -
Page 82: Alert Descriptions And Actions
Alert Descriptions and Actions The following table lists the alerts and notifications you may receive on the Eversense App. Note: For each message, you can also tap the information icon to receive additional details about the message. IMPORTANT: On-body vibe alerts for the alerts marked with a * cannot be turned off using DND in the app. - Page 83 2.2 mmol/L, glucose readings will resume on the treatment decision. display. Once the sensor glucose value is at or lower than 22.2 mmol/L, glucose readings will resume on the display. Eversense XL CGM User Guide...
- Page 84 4 days. been inserted for 146 days. Contact your doctor to schedule your sensor Contact your doctor to schedule your sensor removal removal and insertion of new sensor. and insertion of new sensor. Eversense XL CGM User Guide...
- Page 85 150 days. No glucose readings can be displayed until calibration is performed. Contact your doctor to schedule your sensor Perform a fingerstick calibration in order to resume removal and insertion of new sensor. displaying glucose values. Eversense XL CGM User Guide...
- Page 86 4 fingerstick calibration tests spaced 2 - 12 hours the smart transmitter from your body before apart. Display of glucose readings will resume after connecting it to the power supply. the 2nd successful fingerstick calibration test. Eversense XL CGM User Guide...
- Page 87 Reduce ambient light by doing one or more of the following: • Move to an area where there is less light exposure. • Place a dark material over the smart transmitter. • Wear the smart transmitter under clothing. Eversense XL CGM User Guide...
- Page 88 26 - 40 °C You may temporarily remove the smart transmitter (81 - 104 °F). to cool it down. Once the smart transmitter is back to a lower temperature, be sure to replace it over the sensor. Eversense XL CGM User Guide...
- Page 89 If glucose is still not displayed, follow the steps transmitter back on to start receiving glucose values shown in the Troubleshooting section to reset your again from the sensor. smart transmitter. If you are unable to complete the reset, contact Customer Support. Eversense XL CGM User Guide...
- Page 90 4 fingerstick calibration tests spaced 2 - 12 hours symptoms, and trends. Confirm your glucose value apart. Display of glucose readings will resume after with a blood glucose meter test before making a the 2nd successful fingerstick calibration test. treatment decision. Eversense XL CGM User Guide...
- Page 91 Confirm your glucose value symptoms, and trends. Confirm your glucose value with a blood glucose meter test before making a with a blood glucose meter test before making a treatment decision. treatment decision. Eversense XL CGM User Guide...
- Page 92 Settings. soon. Pay close attention to your glucose values, Charge your smart transmitter as soon as possible. symptoms and trends. Confirm your glucose value with a blood glucose meter test before making a treatment decision. Eversense XL CGM User Guide...
- Page 93 72 hours, you will receive a Transmitter Error Alert every during the Initialisation Phase. 20 minutes until you replace the smart transmitter. Re-initialisation of the system begins in 6 hours. Contact Customer Support to have your smart transmitter replaced immediately. Eversense XL CGM User Guide...
- Page 94 Incompatible Firmware Version Appears when your calibration value is significantly Appears when the firmware in your smart transmitter different from your sensor glucose value. is incompatible with the Eversense mobile app version on your mobile device. Re-calibrate when prompted. Contact Customer Support.
- Page 95 Alert Descriptions and Actions (continued) Alerts Upgrade Eversense App Incompatible Device/Operating System Appears when a newer version of the Eversense Appears when an incompatible device/operating App is available to download. system is being used with the app. Tap Yes to install the update.
- Page 96 24-hour Warm-Up Phase. You do not alternative site (such as forearm) to obtain your need to wear your smart transmitter over the sensor blood glucose reading. until the Warm-Up Phase is complete. Eversense XL CGM User Guide...
- Page 97 120 days. been inserted for 136 days. Contact your doctor to schedule the removal and Contact your doctor to schedule your sensor removal replacement of your sensor. and insertion of new sensor. Eversense XL CGM User Guide...
-
Page 98: Event Log
10. Event Log This section describes how to review and log events to help better track glucose patterns. View Events The Eversense XL CGM System allows you to log and track You can view past events entered from the EVENT LOG screen. -
Page 99: Glucose
EVENT LOG screen, or tap Cancel to exit without saving changes or to edit the information before saving. Note: Glucose Events do not replace calibration measurements. You will still have to enter calibration readings. Android Eversense XL CGM User Guide... -
Page 100: Meals
Tap Carbs to enter correct number of carbohydrates. Tap Done. Tap Notes to enter any notes. Tap Done. Tap Save to save entry and return to EVENT LOG screen. Tap Cancel to exit without saving changes. Eversense XL CGM User Guide... -
Page 101: Insulin
Tap Type to enter the correct Type of Insulin. Tap Done. Tap Notes to enter any notes. Tap Done. Tap Save to save entry and return to EVENT LOG screen. Tap Cancel to exit without saving changes. Eversense XL CGM User Guide... -
Page 102: Health
Tap Condition to enter the health condition. Tap Done. Tap Notes to enter any notes. Tap Done. Tap Save to save entry and return to EVENT LOG screen. Tap Cancel to exit without saving changes. Eversense XL CGM User Guide... -
Page 103: Exercise
Tap Done. Tap Duration to enter the duration. Tap Done. Tap Notes to enter any notes. Tap Done. Tap Save to save entry and return to EVENT LOG screen. Tap Cancel to exit without saving changes. Eversense XL CGM User Guide... -
Page 104: Reports
To view the glucose reports tap Menu > Reports and swipe to move across the three different reports. You can also email each report as a pdf file by tapping the email icon in the top right hand corner. Eversense XL CGM User Guide... -
Page 105: Weekly Modal Summary
(percent of readings that fall within the low and high glucose target levels). The information is shown based on mealtime slots. Note: To review or change the mealtime slots, please see Setting Mealtimes Schedule. Eversense XL CGM User Guide... -
Page 106: Glucose Pie Chart
Target levels. You can choose the last 1, 7, 14, 30 or 90 days. with standard deviation within a mealtime slot period. You can choose the last 1, 7, 14, 30 or 90 days. Android Eversense XL CGM User Guide... -
Page 107: Share My Data
Eversense CGM System mobile app. This program is offered at no cost to users of the Eversense XL CGM System. To learn about the Eversense DMS Program, go to www.eversensediabetes.com. When you create and register your account during the installation of the Eversense mobile app, an Eversense DMS account is automatically created for you. -
Page 108: Sync
As long as you have an internet connection, Auto Sync is turned on, and you are logged into the app, your glucose readings sync to your Eversense DMS account about every 2 hours. You can turn off Auto Sync. To turn off Auto Sync, tap Sync on the SHARE MY DATA screen. -
Page 109: My Reports
Select the number of days of your glucose readings you want to export then tap Done. • Tap Export. • Email the CSV-file format by tapping the email icon on the top right hand corner. Eversense XL CGM User Guide... -
Page 110: Product And General Information On The App
13. Product and General Information on the App This section describes the information available from the About section of the Main Menu. You can view product information about your smart transmitter, your sensor and your Eversense mobile app. On the MY TRANSMITTER On the MY SENSOR screen, Tap Menu >... - Page 111 About menu. Senseonics, Inc., the manufacturer • Tap Contact Us to send an of the Eversense XL CGM System. email to Senseonics, Inc. To find your local distributor on our website, tap Help. IMPORTANT: This email is not monitored 24/7.
-
Page 112: Viewing Eversense Xl Data On The Apple Watch
Eversense mobile app on your mobile device, follow the Apple Watch instructions for adding the app to your watch. The Apple Watch is a secondary display of Eversense CGM data and should not be used in place of the primary Eversense CGM display. -
Page 113: Glance View
The Eversense Apple Watch Glance is not available for Apple Watch users running watchOS 3.0 or higher. If your Apple Watch operating system supports the Glance view, and you have already set the Eversense App on your mobile device to Show in Glances under the Apple Watch settings, simply swipe up on the watch HOME screen to display the Eversense App Glance View. - Page 114 CGM data. range for the past 24 hours. calibration time, and the current system calibration phase. Swipe up to display the same data shown as percentages. Eversense XL CGM User Guide...
-
Page 115: About The Sensor
15. About the Sensor This section describes the Eversense XL Sensor and how it is inserted by your doctor. The Eversense XL Sensor is a miniaturised fluorometer that uses fluorescent intensity to measure glucose in interstitial fluid. The sensor is implanted subcutaneously (under the skin) on the upper arm, leaving no part of the sensor protruding from the skin. -
Page 116: Insertion Steps
24 hours of sensor insertion, position and secure the smart transmitter over the sensor and ensure you have a connection. (See Secure the Smart Transmitter over Inserted Sensor.) Then you can perform your Initialisation Phase calibration of 4 fingerstick blood glucose tests to start getting glucose readings. Eversense XL CGM User Guide... -
Page 117: Removal Steps
Step 3: Sensor removal – the sensor will be removed and discarded. Step 4: Site closure – once removed, the incision will be closed with a steri-stip (sutures may be used depending on provider’s preference). Eversense XL CGM User Guide... -
Page 118: Travel
Your smart transmitter will automatically sync to your smartphone’s current time and date when time zones are changed. The Eversense XL CGM System is safe for use on U.S. commercial airlines. The Eversense XL Smart Transmitter is a Medical Portable Electronic Device (M-PED) with emission levels that meet FAA mandates for use in all modes while in flight. -
Page 119: Troubleshooting
17. Troubleshooting This section lists information about troubleshooting your Eversense XL CGM System and includes a list of frequently asked questions (FAQs). Smart Transmitter 2. Use the PLACEMENT GUIDE screen on the app to confirm connection between the sensor and Q: How do I turn my smart transmitter OFF? the transmitter. - Page 120 The updated name of the smart transmitter will over the sensor to see if the orange LED disappears appear in your connection status screen. and observe any notifications on the app. If the orange LED continues to stay lit, contact Customer Support. Eversense XL CGM User Guide...
-
Page 121: Smart Transmitter Battery And Charging
It is important to charge your battery when you receive the smart transmitter will turn off to conserve battery the “Low Battery” alert. power. To turn on the smart transmitter, press and hold the button for about 5 seconds. Eversense XL CGM User Guide... -
Page 122: Connection With Smart Transmitter
CONNECT screen. The app will then begin the closer to the smart transmitter. searching process. • Close the Eversense App and reopen the app. • Your smart transmitter ID is the same as the In Android devices select ‘Force Stop’ from serial number listed on the back of the smart Application Manager. - Page 123 1. Place the smart transmitter into the charging cradle and connect the USB cable. Plug the cable into the A: The Eversense XL CGM System utilises a secure wall outlet. (You can also plug the standard USB Bluetooth connection and will not allow others end of the cable directly into a USB port on your to connect.
- Page 124 • Bluetooth on your mobile device is turned OFF. • Smart transmitter pairing to your mobile device has not been established or has been “un-paired”. You must re-establish pairing. See Troubleshooting for more information. Eversense XL CGM User Guide...
- Page 125 The smart transmitter battery is completely drained. • Bluetooth on your mobile device is turned OFF. • Smart transmitter pairing to your mobile device has not been established or has been “un-paired”. You must re-establish pairing. Eversense XL CGM User Guide...
-
Page 126: Calibration
A: Tap Menu > Settings > Daily Calibration. Select the morning or evening time to change. Morning and evening times must be set a minimum of 10 hours apart and maximum of 14 hours apart. Eversense XL CGM User Guide... - Page 127 Q: What are the different types of calibration phases? Q: Can I calibrate earlier than my scheduled time? A: The Eversense XL CGM System has two types of Calibration Phases, the Initialisation Phase and the A: You can calibrate up to 2 hours before the scheduled Daily Calibration Phase.
-
Page 128: Alerts And Notifications
If you need to change your glucose alert settings, tap Menu > Settings > Glucose. Eversense XL CGM User Guide... -
Page 129: Glucose Readings
A: Refer to your mobile device instructions to enable the glucose meter reading? notifications in the background. A: The Eversense XL CGM System measures glucose in interstitial fluid (ISF) between the body’s cells. Physiologic differences between ISF and blood from... -
Page 130: Trend Arrows
Sensor Suspend Alert. displaying the trend arrow. When there are not Please follow the instructions provided in the enough sensor values available for the calculation, notification message to clear the Alert. the arrow is displayed in grey. Eversense XL CGM User Guide... - Page 131 Q: What is the Do Not Disturb option? A: You can find the app software version by tapping A: When Do Not Disturb is enabled in the Eversense App Menu > About > Product Information. Settings, the smart transmitter will stop providing vibratory notifications for non-critical alerts.
-
Page 132: Sensor
A: It may take up to 10 minutes for the linking process to A: The Eversense XL CGM System was only tested in the complete. Be sure the smart transmitter is on top of upper arm during clinical studies. - Page 133 1. Remove the smart transmitter from the insertion site. 2. Connect it with the charging cable and power supply. Eversense XL CGM User Guide...
-
Page 134: Events
Your data is being uploaded to your Q: Is there a short cut to enter an event, like meals or exercise? Eversense DMS account. A: From the MY GLUCOSE screen, tap on the graph to display the EVENT ENTRY screen. Eversense XL CGM User Guide... -
Page 135: Device Performance
Clinical Study Performance - PRECISE STUDY The performance of the Eversense XL CGM System was evaluated in a multi-site, non-randomised clinical study. Adult (18 years and older) subjects with diabetes were enrolled at 7 different sites in 3 different countries. Each subject had 2 separate sensors inserted, one in each upper arm. -
Page 136: Overall System Performance Compared To Ysi
80% or greater of differences were within 20%/1.1 mmol/L (20% for YSI values greater than 3.9 mmol/L, within 1.1 mmol/L for YSI values ≤ 3.9 mmol/L). The level of agreement increased to above 90% for differences within 30%/1.7 mmol/L and above 95% for differences within 40%/2.2 mmol/L. Eversense XL CGM User Guide... -
Page 137: Clarke Error Grid Analysis
Zone E (high risk) contains CGM values that were incorrectly identified as hypoglycaemic when the reference system correctly identified them as hyperglycaemic (and vice versa). – Mistakenly identifying a CGM value as hypoglycaemic when it is actually hyperglycaemic (or vice versa) is a potentially dangerous situation. Eversense XL CGM User Guide... - Page 138 Clarke Error Grid Scatterplot Clarke Error Grid percentages were calculated by glucose range, and at certain “wear duration” points in the study. Clarke Error-Grid Plot Reference glucose (YSI) (mmol/L) Eversense XL CGM User Guide...
- Page 139 0.2% 0.0% Overall 21527 84.3% 14.9% 0.0% 0.7% 0.0% Overall, 84.3% of CGM readings fell within zone A. This indicates CGM readings were in close agreement with reference values for the great majority of readings. Eversense XL CGM User Guide...
- Page 140 Overall, 84.3% of CGM readings fell within zone A. This indicates CGM readings were in close agreement with reference values for the great majority of readings. Also, there were no real differences in zone A percentages as the duration of wear increased. Eversense XL CGM User Guide...
-
Page 141: Consensus (Parkes) Error Grid Analysis
5 “clinical risk” regions. But the CEG differs from the Clarke EGA in that the risk regions are continuous (A through E), whereas with the Clarke EGA they are not continuous (e.g., A is next to D). CEG percentages were calculated for the total number of CGM readings. Reference glucose (mmol/L) Eversense XL CGM User Guide... - Page 142 86.4% 2853 13.3% 0.3% 0.0% 0.0% Total 21527 100.0% Overall, 86.4% of CGM readings fell within zone A. This indicates CGM readings were in close agreement with reference values for the great majority of readings. Eversense XL CGM User Guide...
-
Page 143: Calibration Performance
8 - 12 hrs 3618 84.2% 95.1% 98.0% Total 20685 84.6% 94.3% 97.5% Overall, there is no real difference in accuracy based on how long after the last blood glucose calibration the CGM readings were recorded. Eversense XL CGM User Guide... -
Page 144: Smart Transmitter Wear
Clinical data for devices under test during the PRECISE study showed accuracy 60 days of the system was sustained throughout the 90 days life of the sensor. 120 days 150 days 180 days Eversense XL CGM User Guide... -
Page 145: Technical Specifications
(HEMA) based Hydrogel, Platinum, Silicone, Dexamethasone Acetate, epoxy 301-2 Glucose Range 2.2 - 22.2 mmol/L Sensor Life Up to 180 days Calibration Commercially available self-monitoring blood glucose meter Calibration Range 2.2 - 22.2 mmol/L Sterilization Sterile by Ethylene Oxide Eversense XL CGM User Guide... -
Page 146: Smart Transmitter
Charge time using AC adapter 15 minutes to fully charge Communication Distance Between app and smart transmitter is up to 7.6 metres (25 feet) Cabin Pressure 700hPa to 1060hPa Relative Humidity Range 15% to 90% (non-condensing) Eversense XL CGM User Guide... -
Page 147: Power Supply And Charger
AC power outlet. To isolate the system, unplug the charger/power supply from the outlet. If you charge the smart transmitter using a USB port on your personal computer, ensure the personal computer complies with the IEC 60950-1 (or equivalent) safety standard. Eversense XL CGM User Guide... -
Page 148: Electrical And Safety Standards
30%. Power Frequency Power frequency magnetic fields (110VAC/60Hz, 230VAC/50 Hz) should be at levels characteristic 30 A/m 30 A/m Magnetic Field IEC 61000-4-8 of a typical location in a typical commercial or hospital environment. Eversense XL CGM User Guide... - Page 149 RF transmitters, an electromagnetic site survey should be considered. If the measured field strength in the location in which the Eversense XL CGM System is used exceeds the applicable RF compliance level above, the Eversense XL CGM System should be observed to verify normal operation.
- Page 150 Guidance and Manufacturer’s Declaration – Electromagnetic Emissions The Eversense XL CGM Mobile System is intended for use in the electromagnetic environment specified in the next table. The customer or the user of the System should ensure that it is used in such an environment.
-
Page 151: Symbols On The Eversense Mobile App
Symbols on the Eversense Mobile App Symbol Explanation Glucose Alert Appears when the glucose is above the high glucose alert range and below the low glucose alert range. The icon appears in the ALERT HISTORY screen. Falling Rate Alert Appears when the glucose value is falling beyond a defined rate. - Page 152 Symbols on the Eversense Mobile App (continued) Symbol Explanation Calibration Alert Appears when there are calibration-related alerts. Calibration Notification Appears when there are calibration-related notifications. Calibration Failure Appears when the smart transmitter rejects the user-entered calibration value. Connection Failure Appears when the smart transmitter is disconnected from the smartphone or when the sensor is not linked to the smart transmitter.
-
Page 153: Symbols On Packaging And Devices
Non-ionising electromagnetic European Community radiation Date of manufacture Not made with natural rubber latex Storage temperature limits FCC ID is assigned to all devices 2AHYA-3401 subject to certification Lot number Non-sterile Universal Serial Bus (USB) Eversense XL CGM User Guide... - Page 154 Magnetic Resonance Imaging (MRI) procedures are contraindicated for this device. European Union WEEE Directive 2012/19/EU Single use only Do not re-sterilise Do not use if package is damaged Sterilised using Ethylene Oxide Follow instructions for use Eversense XL CGM User Guide...
-
Page 155: Eversense Smart Transmitter Limited Warranty (Terms)
Eversense Smart Transmitter Limited Warranty (Terms) 1. Coverage and duration of limited warranty. Senseonics, Incorporated (“Senseonics”) warrants to the original end user (“you”) of the Eversense Smart Transmitter (the “Smart Transmitter”) that the Smart Transmitter shall be free from defects in material and workmanship under normal use, and conform with the Terms, for a period of two years commencing on the date that you first received the Smart Transmitter from your physician (“Limited Warranty Period”). - Page 156 RESALE PURPOSES. TO THE EXTENT THAT SENSEONICS MAY BE LIABLE TO YOU FOR LOSS YOU SUFFER AS A RESULT OF YOUR NON-COMMERCIAL USE OF THE SMART TRANSMITTER, SENSEONICS IS ONLY RESPONSIBLE FOR LOSS OR DAMAGE YOU SUFFER THAT IS A FORESEEABLE RESULT OF SENSEONICS’ BREACH OF THE TERMS OR SENSEONICS’ Eversense XL CGM User Guide...
- Page 157 SENSEONICS MAY NOT, AS A MATTER OF APPLICABLE LAW, DISCLAIM ANY IMPLIED WARRANTY OR LIMIT ITS LIABILITIES, THE SCOPE AND DURATION OF SUCH WARRANTY AND THE EXTENT OF LIABILITY OF SENSEONICS SHALL BE THE MINIMUM PERMITTED UNDER SUCH APPLICABLE LAW. System component Part Number Eversense XL Smart Transmitter Kit FG-3400-25-101 Charging Cable FG-6100-00-301 Charging Adapter...
-
Page 158: Legal Notices
Your smart transmitter uses Bluetooth® Smart to pair with the mobile device and to send results to the app. Bluetooth® Trademark The Bluetooth® word mark and logos are owned by the Bluetooth® SIG, Inc. and any use of such marks by Senseonics, Inc. is under license. Eversense CGM User Guide... -
Page 159: Fcc Information
If you experience smart transmitter interference problems, try moving away from the source of the interference. You can also move the electronic device or its antenna to another location to solve the problem. If you continue to experience interference, contact customer service for the manufacturer of the electronic device causing the interference. Eversense CGM User Guide... -
Page 160: Index
RF, radio frequency USB, cable communication Charging cradle USB, port Sensor, about 8, 113 Discoverable mode 26, 120, 122 Wireless 11, 20, 23, 50, 156 Sensor, insertion Do Not Disturb mode and removal 30, 114, 115 Eversense CGM User Guide... - Page 161 Notes...
- Page 162 Notes...
- Page 164 Manufactured by Senseonics, Inc. Distributed by: 0086 Emergo Europe 20451 Seneca Meadows Parkway Roche Diabetes Care Limited Authorised 2016 Germantown, MD 20876-7005 USA Charles Avenue Prinsessegracht 20 844.SENSE4U 301.515.7260 Burgess Hill 2514 AP, The Hague The Netherlands (844.736.7348) West Sussex RH15 9RY eversensediabetes.com United Kingdom...
Need help?
Do you have a question about the XL and is the answer not in the manual?
Questions and answers