Table of Contents
Advertisement
Quick Links
Hisense F102 User Manual
Manufactured by Hisense Communications Co.,Ltd.
4G LTE Ready
* Please check with your network operator if 4G LTE is
available on your SIM.
5"HD 2.5D,
•
13MAF+8MFF
Screen displays and
•
illustrations may differ
from those you see on
actual phone.Some of
the contents of this
guide may not apply to
your phone, depending
on the software and
your service provider.
All information in this
document is subject to
change without notice.
Advertisement
Table of Contents

Subscribe to Our Youtube Channel
Related Manuals for Hisense F102


Summary of Contents for Hisense F102
- Page 1 Hisense F102 User Manual Manufactured by Hisense Communications Co.,Ltd. 4G LTE Ready * Please check with your network operator if 4G LTE is available on your SIM. 5“HD 2.5D, • 13MAF+8MFF Screen displays and • illustrations may differ from those you see on actual phone.Some of...
-
Page 2: Table Of Contents
Content Safety Precautions ............1 Medical Device ............2 Road Safety .............. 2 Power Supply & Charging ........3 Specific Absorption Rate (SAR) ........ 4 Hearing Protection ............ 4 Protecting the Environment ........4 Cleaning and Maintenance ........5 Emergency Call ............5 Compliance ............... -
Page 3: Safety Precautions
Safety Precautions Please read the safety precautions carefully to ensure the correct use of your mobile phone. Do not crash, throw, or puncture your mobile phone. Avoid the falling, squeezing, and bending of your mobile phone. Do not use your mobile phone in a moist environment, such as the bathroom. -
Page 4: Medical Device
14. Strictly follow the relevant instructions of this manual while using the USB cable. Otherwise your mobile phone or PC may be damaged. 15. Use a dry soft cloth to clean the product; do not use water, alcohol, detergent or any chemicals. 16. -
Page 5: Power Supply & Charging
governing the use of electronic devices by the driver may be applicable in your country and/or jurisdiction. 3. Give full attention to driving. 4. Pull off the road and park before making or answering a call if driving conditions so require. 5. -
Page 6: Specific Absorption Rate (Sar)
14. Battery contains materials which are hazardous and harmful for the environment. 15. Do not plug or unplug USB port with wet hands – risk of electric shock. Specific Absorption Rate (SAR) The device complies with RF specifications when the device used at 10 mm form your body. -
Page 7: Cleaning And Maintenance
Please observe the local regulations on phone packaging, battery and used phone disposal and bring them to the collection point for proper recycling. Do not dispose of used phones or batteries in a household rubbish bin. Please take your used, unwanted lithium batteries to a designated place. -
Page 8: Copyright
Copyright This product is for private use only. Copying CDs or downloading music, video or picture files for sale or other business purposes may be a violation of copyright law. Copyrighted materials, works of art and/or presentations may require authorization to be fully or partially copied or recorded. Please be aware of all such applicable laws concerning the recording and use of such contents for your country and jurisdiction. -
Page 9: Getting To Know Your Phone
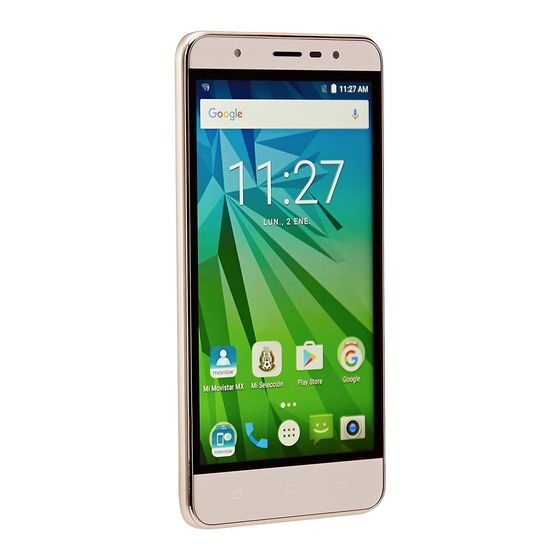
Getting to Know Your Phone Phone Overiew... - Page 10 Front camera Flashlight Proximity sensor De-noising mike Receiver Speaker Front flashlight Volume keys Touch screen Power key Back key Headset connector Home key Microphone Recent key Micro-USB connector Camera Key’s function Power key: Press to light up or close the screen, •...
-
Page 11: Insert The Micro-Sim Card/ Sd Card
2. Please do not remove the Micro-SIM/SD card while the card is in use; otherwise, data loss or damage may occur. Hisense shall not be liable to any loss, including data loss, due to misuse of a Micro-SIM/SD card. 3. Please turn off your mobile phone before replacing or removing its Micro-SIM/SD card. -
Page 12: Charging The Battery
separately. Charging the Battery Charging Battery 1. Insert the large end of the USB cable into the mobile phone charger and insert the small end into the mobile phone USB slot, while paying attention to the direction. 2. Insert the charger into a 100~240V 50/60Hz outlet to start charging. -
Page 13: Basic Operations
safety instructions during operation. Basic Operations Turning Your Device On/Off Turn on the phone: Press the Power key located on the right side of phone and wait for a few seconds until the screen lights up. Note: If the battery is empty, make sure you charge it for at least 30 minutes. - Page 14 The configuration of a Google account is essential to use all the features and services of your Android phone, such as access to Google Play™, synchronization of contacts or your calendar. If you don’t have Gmail or any other Google Account, go ahead and create one.
-
Page 15: Home Screen
Home screen The Home screen is the starting point for many applications and functions, and it allows you to add items like application shortcuts to give you instant access to information and applications. Status Bar: Shows phone's status information including the time, signal strength, battery status, and notification icons. - Page 16 Pending Wi-Fi notifications signal strength & battery status Opening the notifications panel Hold the status bars with your finger, and drag it downwards to open the notifications page. Swipe down it once again to open the notifications panel. From the shortcut menu, you can quickly access to Bluetooth, Wi-Fi, etc.
-
Page 17: Customizing Your Screen
Customizing Your Screen Long press the blank space of the standby interface, then select “WALLPAPERS”and“WIDGETS”. You can customize your screen by setting the widget and wallpaper. -
Page 18: Access To Applications
Access to Applications You can click the iconin to the applications list, click the applications icon to start the application. Main Function Making and Receiving a Call Touch to enter dialer interface on idle screen or main menu screen, touch to open the dial pad, input phone number and click to make a call, click... -
Page 19: Sending Messages
card. Click on the top of the screen, then input the part of the phone number or name, all the contacts with the information appear. Sending Messages Tap the message icon Click to create a message. Input receipant’s phone number or name to search in contacts. Click “Type text message”... -
Page 20: Music
Music Touch the music application icon to enter music player. Camera The camera app is a combination of camera and camcorder. It consists of two cameras: the front camera... -
Page 21: Chrome
(facing you) and the main camera in behind of the phone. Take photos Tap the photo icon 1. Frame your subject on the screen. 2. A green square around the subject indicates that the camera has focused. 3. Tap to take a photo. Your picture will be automatically saved to the Gallery. -
Page 22: Getting Connected (Connection To Wi-Fi)
When you get access to the network, you may incur additional costs. Consult your local operators for detailed charges. Getting Connected (connection to Wi-Fi) 1. Tap the settings icon. 2. Tap “Wi-Fi” and select on. 3. Touch the desired network you wish to connect. 4. -
Page 23: Important Information
Important Information For an optimal experience, the phone regularly connects to mail and internet servers. This automatically and inevitably generates data exchanges that may be charged in addition to your existing package, or may be deducted from prepaid credit or a prepaid system. To avoid billing problems related to services that use the Internet, it is strongly recommended to have a suitable option which includes unlimited Internet and emails and... -
Page 24: Troubleshooting
Troubleshooting This chapter lists some problems you might encounter when using your phone. Some problems require you to call your service provider, but most are easy to fix yourself. Possible Message Possible causes corrective measures There is no SIM Make sure that the card in the phone SIM card error SIM card is... - Page 25 inserted. restrictions. Pre-paid charge Contact service limit reached. provider. Power key Press the Power pressed too key for at least Phone cannot briefly. two seconds. be switched Charge battery. Battery is not Check the charged. charging indicator on the display. Outside temperature is too Charge battery.
- Page 26 Defective Change computer to computer computer port. port. Call logs are Time is wrongly Check the time not saved set. setting. Hisense Mexico S. de R. L. de C. V. Boulevard Miguel de Cervantes Saavedra No. 301, Torre...
- Page 27 Norte, Piso 2. Col. Ampliación Granada. C.P. 11520, Deleg. Miguel Hidalgo. Distrito Federal Tel. 01 (55) 55-31-35-15 BRAND: HISENSE MODEL: Hisense F102 FCC ID: 2ADOBF102 ELECTRIC CHARACTERISTICS: ADAPTOR BRAND: HISENSE MODEL: A31-501000 INPUT: 100 - 240 V ~ 50/60 Hz 0.15 A OUTPUT: 5.0 V...
- Page 28 Warning: Changes or modifications not expressly approved by the manufacturer may void the authority of the user to operate the equipment. Note: This equipment has been tested and complies with limits for a class B digital device, pursuant to section 15 of the FCC Regulations.
- Page 29 FCC ID: 2ADOBF102...
Need help?
Do you have a question about the F102 and is the answer not in the manual?
Questions and answers