Table of Contents
Advertisement
Available languages
Available languages
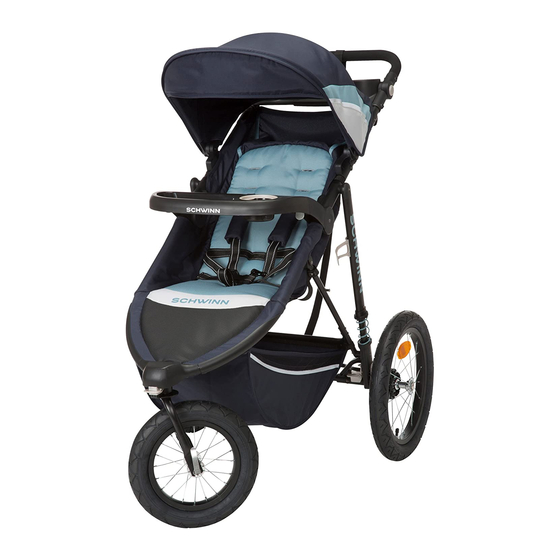
Interval Jogger
CV309
OWNER'S MANUAL
This manual contains safety, assembly, use and maintenance
instructions. Read these instructions carefully before use and keep
them for future reference. Your child's safety may be affected if you do
not follow these instructions. The Interval Jogger must be assembled
by an adult who has read and understands the instructions in this
manual.
Keep the packaging away from children and dispose of all
packaging before use. Do not return this product to the place of
purchase. If any parts are missing, call Consumer Care at
(800) 544-1108. Or visit our web site at www.safety1st.com. Have the
model number and date code (manufacture date) located on the
back of stroller available.
Recommend having manual air pump for tire inflation.
Keep instructions for future reference.
Advertisement
Chapters
Table of Contents

Related Manuals for Schwinn CV309


Summary of Contents for Schwinn CV309
- Page 1 Interval Jogger CV309 OWNER’S MANUAL This manual contains safety, assembly, use and maintenance instructions. Read these instructions carefully before use and keep them for future reference. Your child’s safety may be affected if you do not follow these instructions. The Interval Jogger must be assembled by an adult who has read and understands the instructions in this manual.
- Page 2 Thank You For purchasing the Schwinn® Interval Jogger. You will be sure to enjoy hours of pleasurable exercise and family time. If you have any questions or comments, our Consumer Care team is available: Monday through Thursday: 8:00 AM – 6:00 PM EST Friday: 8:00 AM –...
-
Page 3: Table Of Contents
Contents 1 SAFETY ........... . . 1 5 TO INSTALL INFANT CAR SEAT (SOLD SEPARATELY) . -
Page 4: Safety
Safety WARNING: handle or canopy. The stroller may tip over or the canopy may collapse. FOR THE SAFETY OF YOUR CHILD, PLEASE READ THE • This product will become unstable if a parcel bag or rack is FOLLOWING WARNINGS AND ASSEMBLY INSTRUCTIONS used when there is no provision for one. - Page 5 • Check frequently to be sure that child is properly secured in Before each use check: restraint system • The stroller for damage. Do not use if damaged. • Always maintain a safe speed. Avoid quick, sharp changes in • The tire pressure. If necessary inflate the tires to within the direction, as tip-over may occur.
-
Page 6: Parts And Features
Parts and Features parent tray fold release wrist strap child tray frame lock rear wheels (2) front wheel wheel release lever... -
Page 7: Assembly
Assembly UNFOLD THE STROLLER WARNING : • ALWAYS keep fingers away from moving parts, when folding, unfolding or adjusting stroller to prevent finger entrapment. • Ensure that all locking devices are engaged before use. Figure 3.1 ❶ Unlatch side frame lock. Figure 3.1 . ❷... -
Page 8: Attach The Rear Wheels
ATTACH THE REAR WHEELS ❶ Push rear wheel into hole until it clicks into place. Pull on wheel to make sure it is secure. Repeat on other wheel. Figure 3.4 ❷ To remove rear wheels: Lift release lever while pulling on wheel. Repeat on other wheel. Figure 3.5 . -
Page 9: Attach The Front Wheel
ATTACH THE FRONT WHEEL ❶ Loosen the locking nut by hand. Figure 3.6 Fork Fork ❷ Align wheel axle with front wheel forks and insert wheel. Figure 3.7 Finger tighten the locking nut located on one side of the axle. ❸... -
Page 10: Attach The Parent Tray
ATTACH THE PARENT TRAY ATTACH THE CHILD TRAY ❶ Align posts with holes on parent tray. Snap parent tray onto ❶ To Attach: Guide tray tabs into slots on stroller frame. Figure 3.10 handlebar tubes. Figure 3.9 Push until tray clicks into place. To Remove: Squeeze release levers on both sides and lift tray up and off. -
Page 11: Using The Stroller
Using the Stroller ADJUST THE CANOPY ADJUST THE HANDLEBAR ❶ Rotate the canopy into any position. Figure 4.1 ❶ Press buttons on both sides of the handlebar and rotate up or down as desired. Figure 4.2 Figure 4.2 Figure 4.1... -
Page 12: Using The Safety Wrist Strap
USING THE WRIST STRAP TO STORE WRIST STRAP WARNING: ❶ Two ways to store wrist strap when not in use: hang wrist strap on handlebar Figure 4.4, or place strap in basket. Figure 4.5 Using the stroller without the safety wrist strap may result in the user becoming separated from the stroller and serious injury or death to the passenger. -
Page 13: Using The 5-Point Safety Restraint System
USING THE 5-POINT RESTRAINT SYSTEM WARNING: • NEVER LEAVE CHILD UNATTENDED. ALWAYS keep child in view when in stroller. • AVOID SERIOUS INJURY from falling or sliding out. ALWAYS use seat belt. Check frequently to make sure it is secure. •... -
Page 14: Adjusting The Seat
ADJUSTING THE SEAT ADJUSTING THE SHOULDER STRAP HEIGHT WARNING: WARNING: Improper adjustment of the 5-point safety harness when For proper installation of the restraint system, make sure both the seat is in the reclined position may result in the child anchors lay flat against the back board. -
Page 15: Using The Front Wheel And Swivel Lock
USING THE FRONT WHEEL AND SWIVEL LOCK USING THE PARKING BRAKE WARNING: ❶ Lock Brakes: Step down onto brake bar between rear wheels to lock both rear wheels. Figure 4.17 To park stroller, BRAKES MUST • FALL HAZARD from tip over. Before running, jogging, or BE LOCKED. -
Page 16: To Install Infant Car Seat (Sold Separately)
To Install Infant Car Seat (Sold separately) WARNING: ❶ Recline seat back to lowest position. Figure 5.1 Close canopy. To avoid serious injury: • Use ONLY IC178, IC181, IC201, IC203, IC205, IC206, IC207, IC208, IC210, IC211, IC212, IC217, IC218, IC219, IC220, IC224, IC226, IC228, IC229, IC230, IC231, IC233, IC234, IC240, IC244, IC250, IC251, IC252, IC258, IC259, Figure 5.1... - Page 17 Figure 5.4 Figure 5.5 Figure 5.6 ❸ When properly installed, car ❹ Pull up on car seat to make sure ❺ To remove the car seat, pull the release lever seat will come to rest on child it is securely installed. Figure 5.5 as shown.
-
Page 18: To Fold Stroller
To Fold Stroller Fold release ❶ Lock rear brakes. Remove your baby. Close canopy. Unlock front buttons wheel. ❷ Pull up on BOTH fold release buttons found on both sides of the stroller underneath the parent tray. Figure 6.1 ❸ Push the handlebar down until the side frame lock clicks into place. Figure 6.2 ❹... -
Page 19: Replaceable Parts
Replaceable Parts One-Year Limited Warranty • Single front wheel Dorel Juvenile Group, Inc. warrants to the original purchaser that this product (Interval Jogger), is free from material and workmanship defects • Single rear wheels when used under normal conditions for a period of one (1) year from the •... - Page 20 ©2017 PACIFIC CYCLE INC. SCHWINN® AND SCHWINN QUALITY® ARE REGISTERED TRADEMARKS AND ARE USED UNDER LICENSE FROM PACIFIC CYCLE INC., A DIVISION OF DOREL INDUSTRIES. ©2017 Dorel Juvenile. (800) 544-1108 Styles and colors may vary. Los estilos y los colores pueden variar.
- Page 21 Carriola para salir a trotar "Interval" CV309 MANUAL DE USUARIO Este manual contiene instrucciones de seguridad, armado, uso y mantenimiento. Lea estas instrucciones detenidamente antes de utilizar la carriola y consérvelas para uso futuro. La seguridad de su hijo podría verse afectada si no sigue estas instrucciones. Un adulto que haya leído y comprendido las instrucciones de este manual deberá...
- Page 22 Muchas gracias Por comprar la Carriola para salir a trotar "Interval" de Schwinn®. Sin lugar a dudas disfrutará horas de ejercicio placentero y tiempo en familia. Si tiene preguntas o comentarios, nuestro Servicio de atención al consumidor se encuentra disponible: De lunes a jueves: 8:00 AM –...
- Page 23 Índice 1 SEGURIDAD ..........21 5 PARA INSTALAR LOS AUTOASIENTOS DE BEBÉ...
-
Page 24: Seguridad
Seguridad ADVERTENCIA: • NUNCA coloque ni cuelgue paquetes, bolsas ni accesorios en el asa ni en la capota. La carriola podría volcarse o la capota podría POR LA SEGURIDAD DE SU HIJO, POR FAVOR LEA LAS colapsarse. SIGUIENTES ADVERTENCIAS E INSTRUCCIONES DE •... - Page 25 • Si no bloquea la rueda delantera antes de salir a trotar con la Antes de utilizar la carriola, verifique: carriola, esto podría hacer que la carriola quede desequilibrada, Antes de utilizar la carriola, verifique: que vuelque o que pierda el control. •...
-
Page 26: Piezas Y Características
Piezas y características charola para los padres botón de liberación para plegar correa para la muñeca charola para el niño traba del armazón rueda trasera (2) rueda delantera palanca de liberación de las ruedas Figura 2.1... -
Page 27: Armado
Armado CÓMO DESPLEGAR LA CARRIOLA ADVERTENCIA: • SIEMPRE mantenga los dedos alejados de las piezas movibles, al plegar, desplegar o ajustar la carriola, con el fin de evitar que se atrapen los dedos. • Asegúrese de que todos los dispositivos de bloqueo estén trabados antes de utilizar la carriola. -
Page 28: Cómo Trabar Las Ruedas Traseras
CÓMO TRABAR LAS RUEDAS TRASERAS ❶ Coloque a presión la rueda trasera en el orificio correspondiente hasta escuchar un clic. Tire de la rueda para asegurarse de que se haya encajado bien. Repita el mismo procedimiento en la otra rueda. Figura 3.4 ❷... -
Page 29: Cómo Trabar La Rueda Delantera
CÓMO TRABAR LA RUEDA DELANTERA ❶ Afloje la tuerca de seguridad con la mano. Figura 3.6 Horquilla Horquilla ❷ Alinee el eje de la rueda con la horquilla de la rueda delantera e inserte la rueda. Figura 3.7 Ajuste con los dedos la tuerca de seguridad que se encuentra en el costado del eje. -
Page 30: Cómo Sujetar La Charola Para Los Padres
CÓMO SUJETAR LA CHAROLA PARA LOS PADRES CÓMO SUJETAR LA CHAROLA PARA EL NIÑO ❶ Alinee los puntales con los orificios en la charola para los padres. ❶ Para sujetar: Guíe las lengüetas de la charola dentro de las Encaje la charola para los padres en los tubos del asa del ranuras del armazón de la carriola. -
Page 31: Para Ajustar La Capota
Cómo utilizar la carriola PARA AJUSTAR LA CAPOTA PARA AJUSTAR EL MANUBRIO ❶ Lleve la capota a cualquier posición. Figura 4.1 ❶ Presione los botones a ambos lados del manubrio y gírelo hacia arriba o hacia abajo. Figura 4.2 Figura 4.1 Figura 4.2... -
Page 32: Cómo Utilizar La Correa Para La Muñeca
CÓMO UTILIZAR LA CORREA PARA LA MUÑECA CÓMO GUARDAR LA CORREA PARA LA MUÑECA ADVERTENCIA: ❶ Dos formas de guardar la correa para la muñeca cuando no se usa: cuélguela del manubrio Figura 4.4, o colóquela en el cesto. Si utiliza la carriola sin la correa de seguridad para la muñeca, Figura 4.5 podría quedar separado de la carriola y resultar en lesiones graves o la muerte del niño. -
Page 33: Cómo Utilizar El Cinturón De Retención De 5 Puntos
CÓMO UTILIZAR EL CINTURÓN DE RETENCIÓN DE 5 PUNTOS ADVERTENCIA: • NUNCA DEJE AL NIÑO SIN SUPERVISIÓN. Siempre mantenga al niño a la vista cuando esté en la carriola. • EVITE UNA LESIÓN GRAVE por caída o resbalamiento. SIEMPRE use el cinturón de seguridad. Revise con frecuencia para asegurarse que esté... -
Page 34: Cómo Ajustar La Posición Del Asiento
CÓMO AJUSTAR LA POSICIÓN DEL ASIENTO CÓMO AJUSTAR LA ALTURA DE LAS CORREAS DE LOS HOMBROS ADVERTENCIA: ADVERTENCIA: Para la instalación correcta del sistema de retención, asegúrese de Si no ajusta bien el arnés de seguridad de 5 puntos que ambos anclajes queden planos contra la tablilla del respaldo. cuando el asiento está... -
Page 35: Cómo Utilizar La Traba De La Rueda Giratoria Delantera
CÓMO UTILIZAR LOS FRENOS CÓMO UTILIZAR LA TRABA DE LA RUEDA GIRATORIA DELANTERA ADVERTENCIA: ❶ Trabe los frenos: Pise la barra de freno entre las ruedas traseras para bloquearlas. Figura 4.17 Para estacionar la carriola, FRENOS • Evite una LESIÓN POR CAÍDA. Antes de correr, trotar o DEBEN ESTAR BLOQUEADOS. -
Page 36: Para Instalar Los Autoasientos De Bebé (Se Vende Por Separado)
Para instalar los autoasientos de bebé (Se vende por separado) ADVERTENCIA: ❶ Recline el respaldo del asiento a la posición más baja. Figura 5.1 Cierre la Para evitar lesiones graves: capota. • SÓLO use autoasientos de bebé IC178, IC181, IC201, IC203, IC205, IC206, IC207, IC208, IC210, IC211, IC212, IC217, IC218, IC219, IC220, IC224, IC226, IC228, IC229, IC230, IC231, IC233, IC234, IC240, IC244, IC250, IC251, IC252,... -
Page 37: Para Plegar La Carriola
Para plegar la carriola Figura 5.4 Figura 5.5 Botones para de ❶ Ponga los frenos liberación plegar traseros. Saque al bebé. Cierre la capota. Desbloquear rueda delantera. ❷ Tire hacia arriba de los DOS botones para de liberación plegar situados en ambos ❸... -
Page 38: Piezas De Repuesto
Piezas de repuesto Cuidado y mantenimiento • Para limpiar la tela de la carriola y la almohadilla del asiento utilice una • Rueda delantera sencilla esponja o paño húmedo, agua fría y jabón suave. Déjelo secar. No utilice • Ruedas traseras sencillas limpiadores para el hogar abrasivos o blanqueadores para limpiar la •... -
Page 39: Garantía Limitada De Un Año
Garantía limitada de un año Dorel Juvenile Group, Inc. garantiza al comprador original que este producto (Carriola para salir a trotar “Interval”) estará libre de defectos de material y mano de obra cuando se utilice bajo condiciones normales durante un periodo de un (1) año a partir de la fecha de compra. Si el producto tuviese defectos de material o mano de obra, Dorel Juvenile Group, Inc. - Page 40 ©2017 PACIFIC CYCLE INC. SCHWINN® AND SCHWINN QUALITY® ARE REGISTERED TRADEMARKS AND ARE USED UNDER LICENSE FROM PACIFIC CYCLE INC., A DIVISION OF DOREL INDUSTRIES. ©2017 Dorel Juvenile. (800) 544-1108 Styles and colors may vary. Los estilos y los colores pueden variar.
Need help?
Do you have a question about the CV309 and is the answer not in the manual?
Questions and answers