Table of Contents
Advertisement
Advertisement
Table of Contents

Summary of Contents for NUANCE SafeCom Controller
- Page 1 Jan 16, 2015...
- Page 3 Patent: Nuance Communications, Inc. has received the following British patent GB 2350 713 B, US patent US 6,952,780 B2 and Europe EUR EP1 120 701. © Copyright 1995 - 2012 Nuance Communications, Inc. All rights reserved Nuance Communications, Inc. Lautrupvang 12...
-
Page 4: Table Of Contents
2.6.11 Enable copy locking on Xerox WorkCentre 75xx ....29 SafeCom Controller web interface ............ 30 2.7.1 Log in to the SafeCom Controller web interface ....30 2.7.2 Advanced Configuration web page ........30 2.7.3 SafeCom web page ............31 2.7.4... - Page 5 2.9.2 Update software via Mini-FTP .......... 42 2.10 Monitor link to SafeCom Color Front-end ..........43 2.11 SafeCom Color Front-end, Cotag ............43 2.11.1 Initial configuration via card ........... 43 Using SafeCom Color Front-end..............44 Login ..................44 Pull Print – Document list ............... 46 Copy ..................
-
Page 6: Introduction
Users log in either through the attached SafeCom Color Front-end or stand-alone SafeCom ID Device. SafeCom Controller works together the SafeCom G3 Server software and is designed to help companies and organizations gain control over their printing costs and document security. -
Page 7: Safecom Id Devices
1 Introduction SafeCom ID Devices Table 1 SafeCom Controller supported SafeCom ID Devices Card Card Color Reader Reader Front-end Identification Method Serial Serial Windows authentication / User code 672040 SafeCom AWID Reader 696020 696010 696040 SafeCom Barcode Reader 694020 694010... -
Page 8: Copy Control On Mfps
(requires SafeCom Tracking). The number (nnn010) is the SafeCom part number of the cable. Please contact safecom_sales@nuance.com to hear about support for other MFPs. SafeCom Canon MFP cable... - Page 9 1 Introduction SafeCom MFP cable Notes HP Color LaserJet 965010 SafeCom Controller. CM4540 MFP HP LaserJet M4555 HP LaserJet None SafeCom Go HP. M3035 MFP, M4345 MFP, 4345mfp, M5035 MFP, M9040 MFP, M9050 MFP 9040mfp, 9050mfp HP Color LaserJet CM3530 MFP,...
- Page 10 1 Introduction SafeCom Kyocera Mita MFP cable Notes Kyocera Mita 661010 SafeCom Controller. KM-2530, KM-3035, Network interface card KM-3530, KM-4035, firmware must be up-to- KM-5035, date, e.g. KM-C850, KM-C2630 IB-21E version 1.3.3 SB-110 version 9.5.17 … SafeCom Océ MFP cable Notes Océ...
- Page 11 3232C (DSc432), 3235C (DSc435), 3245C (DSc445), 3260C (DSc460), 5560C (CS555), 450, 650, 1022, 1027, 966010 SafeCom Controller. 1032, 1035, 1045, 1060, 1075, 1515, 2015, 2018, 2018D, 2022, 2027, 2035, 2035e, 2045, 2045e, 2051, 2060, 2075, 2090, 2105 1224C, 1232C, 2232C, 966010 SafeCom Controller.
- Page 12 SafeCom Go Sharp. Sharp product key for the Sharp External Account Module (MX-AMX3) MUST be registered on the MFP. Sharp MX 663010 SafeCom Controller. MX2300N, MX2700N, MX3501, MX4501 Sharp AR Color 963010 SafeCom Controller. AR-C260M Sharp AR Mono and MX-M 665010 SafeCom Controller.
- Page 13 Xerox WorkCentre Pro None SafeCom Go Xerox. 232, 238, 245, Xerox EIP must be enabled. 255, 265, 275 962010 SafeCom Controller and Xerox Foreign Interface Kit. Xerox p/n 498K10230. Xerox Phaser 962010 SafeCom Controller and 3635 Xerox Foreign Interface Kit...
- Page 14 A3 page or one color A4 page is copied. Likewise one color A3 page would be reported as 4 pages. When a SafeCom Controller and stand-alone card reader is used, copying can begin only after any pending Pull Print jobs have been printed. If a SafeCom Front-end is attached the user is free to log in to copy, print or both.
-
Page 15: Available Documentation
Chapter 1 Introduction lists the supplied SafeCom documentation, lists system requirements and how this manual is organized. Chapter 2 SafeCom Controller describes the installation and the web interface of the external solution. Chapter 3 Using SafeCom Color Front-end describes how to interact with the SafeCom Color Front-end. -
Page 16: Document History
Updated section on how to SafeCom setup Xerox Phaser 3635 via FDI instructions (2.6.10). Revision D60700-05 SafeCom Controller version S80 508.780*55. Xerox WorkCentre 4250 and 4260 are now supported (1.6). Revision D60700-04 SafeCom Controller version S80 508.780*44. Updated section: D60700-07... - Page 17 1 Introduction Lights on SafeCom Controller (2.5). Added section: Copy Control with SafeCom MFP Cable (2.6). Possible to reference multiple SafeCom servers (2.7.3). Added details about Post Tracking support (2.7.4). Added section: Monitor link to SafeCom Color Front-end (2.10).
-
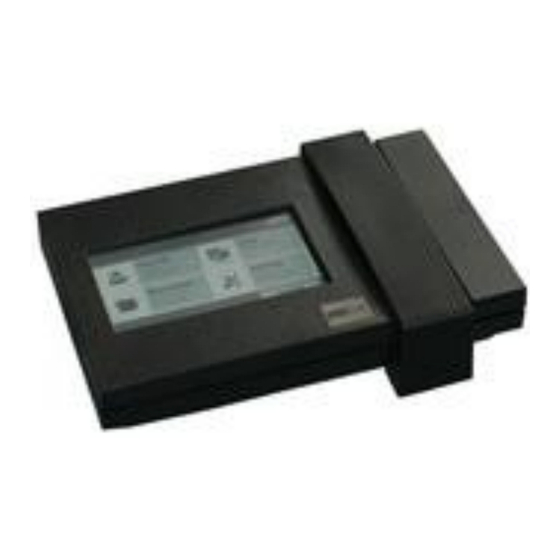
Page 18: Safecom Controller
Connect the power supply to the SafeCom Controller. When you power on, you must wait approx. 1 minute while SafeCom initializes. Switch on the power to the printer. Next the SafeCom Controller needs to be setup to reference the SafeCom G3 Server. Choose one of the two following methods: ... -
Page 19: Setup Process Via Safecom Color Front-End
The screen shows: Setup Completed. Restarting Setup process via SafeCom Administrator The SafeCom Controller’s LAN light changes from flashing to fixed when an IP address is set. Next you need to determine the IP address of the SafeCom Controller so you can add it to the SafeCom solution. - Page 20 (duplex and color supported). Click Add to register the device and save it in the database. After approx. 1 minute the SafeCom Controller has restarted and you can verify the connection to the printer by pressing the test button once on the SafeCom Controller's rear panel.
-
Page 21: Lights On Safecom Controller
2 SafeCom Controller Lights on SafeCom Controller The SafeCom Controller is equipped with four green colored lights labeled: PRINT, LOGIN , LAN, and SESSION. These lights are either on or off and indicate different sequences as listed below: State PRINT... -
Page 22: Copy Control With Safecom Mfp Cable
It is a split cable with three connectors. A blue PS2 male connector connects to the SafeCom Controller’s serial port. A black PS2 female connector connects to the SafeCom serial cable supplied with your SafeCom Color Front-end or to the cable attached to your stand-alone SafeCom Card Reader. -
Page 23: Safecom Mfp Cable Canon
2 SafeCom Controller Connect SafeCom MFP Cable: Power off the MFP and the SafeCom Controller. Connect the SafeCom MFP Cable. Refer to the relevant subsections for additional instructions. Power on the MFP. Power on the SafeCom Controller. On the SafeCom Controller: Open the Advanced Configuration web page (2.7.2). -
Page 24: Safecom Mfp Cable Hp 9055Mfp And 9065Mfp
2 SafeCom Controller 2.6.3 SafeCom MFP Cable HP 9055mfp and 9065mfp The MFP’s FIH connector is located behind the MFP’s back cover. See pictures below. Remove the back cover. Remove the male connector with the two wires and connect the equivalent black connector from the supplied SafeCom MFP cable. -
Page 25: Safecom Mfp Cable Konica Minolta
(jam). Please ensure that printing is possible without key counter. Note: On the SafeCom Controller’s Printer web page (2.7.4) you need to set Printer Manufacturer to OCE. If you try to make copies without being logged in via SafeCom, the MFP’s control panel displays Please insert key counter. -
Page 26: Safecom Mfp Cable Océ
A and / or CCD-B or external finisher. Set the configuration in the Key Operator mode for the Copy Control Devices. Select Accounting --> copy charge device --> on. Check the installation of the SafeCom Controller and SafeCom MFP cable D60700-07... -
Page 27: Safecom Mfp Cable Ricoh
2 SafeCom Controller 2.6.7 SafeCom MFP Cable Ricoh Connect the SafeCom MFP Cable’s white 4-pin connector to the Ricoh MFP’s FIH connector. On newer Ricoh MFPs: On the MFP press the User Tools button (<>/123). On the touch-screen click System Settings and then Administrator Tools. -
Page 28: Safecom Mfp Cable Xerox
2 SafeCom Controller 2.6.9 SafeCom MFP Cable Xerox How to install and enable copy control on Xerox MFPs depends on the model. Xerox WorkCentre Pro 35 and similar models Install the Xerox Foreign Interface Kit P/N 498K03490 on the MFP according to the instructions. -
Page 29: Safecom Setup With Fdi Instructions For Xerox Ph3635
Return to the Accounting Enablement dialog and select Foreign Interface Device Setup. Set Job Timer to Disable. Set Print Job Control to Disable. Set Inhibit Services to All Services Set Internal Credits to Enable. Set Image Counter to Charge. Setup SafeCom Controller via Web page: D60700-07... -
Page 30: Enable Copy Locking On Xerox Workcentre 75Xx
2 SafeCom Controller Open the SafeCom controller webpage by entering the controller IP address in a browser (2.7.1). Select Advanced Configuration. Select SafeCom from SafeCom Controller Administration menu. Make sure to specify the SafeCom Group Name, SafeCom Server Address, and SafeCom Server Port Number. -
Page 31: Safecom Controller Web Interface
English. 2.7.1 Log in to the SafeCom Controller web interface Open a web browser and enter the IP address of the SafeCom Controller in the address field. Use of JavaScript (Active Scripting) must be enabled (4.15). -
Page 32: Safecom Web Page
Controller will attempt to contact the servers in their order of appearance (2.8.1). If the IP Address is 0.0.0.0 the SafeCom Controller will send a broadcast on the Broadcast subnets. Front End Language determines the language used on the touch-screen of the SafeCom Front-end. -
Page 33: Printer Web Page
Select Network – Port 9100 if the SafeCom Controller connects to the printer via the network. On the obsolete SafeCom Controller 3 Port and 1 Port select Parallel Port if the printer is connected to the SafeCom Controller’s PAR1 port. - Page 34 High Speed Print Enabled should be YES if print data is to be sent directly (and unencrypted) to the printer from the SafeCom server rather than through the SafeCom Controller. The pace of high speed print is then comparable to that of printing the document directly to the printer.
-
Page 35: Tcp/Ip Web Page
The TCP/IP web page can be opened from the Advanced Configuration web page (2.7.2) by clicking on TCP/IP. Select Automatic as IP Lookup Method. The SafeCom Controller can obtain its IP address and related information automatically from a DHCP, BOOTP, or RARP server in the network. -
Page 36: Safecom Controller - How To
Click Printer and check Network – Port 9100. Enter the Printer IP address. Click Save and Continue. Click Restart. After approx. 1 minute the SafeCom Controller restarts and you can make a settings printout. 2.8.2 Register device The device can be registered when a user with Technician or Administrator rights has logged in at the device. -
Page 37: Select User Identification
Click SafeCom. Change Front End Identification. Click Save and Continue to save your settings. Select Restart. Click Restart again. You must wait approx. 1 minute while the SafeCom Controller initializes. 2.8.5 Disable the test button To prevent unauthorized users from restoring factory defaults, disable the SafeCom Controller’s test button. -
Page 38: Assign Ip Address Using Arp And Ping
Syntax: arp -s <IP Address> <MAC Address> The MAC address can be found on the rear side of the SafeCom Controller. If you want to use the IP address: 194.192.134.86 for the SafeCom Controller and the 12-digit hexadecimal MAC address is 00C076FF00F2. Enter: arp -s 194.192.134.86 00-C0-76-FF-00-F2... -
Page 39: Specify Help Desk Contact
Click Restart. 2.8.12 Specify the LAN speed The obsolete SafeCom Controller 3 Port and 1 Port can operate at 10 or 100 Mbps. The SafeCom Controller will by default sense and decide the speed (100 Mbps, unless the number of ports using 10 Mbps are in majority). The LAN Speed can be set explicitly via the SafeCom Controller web interface. -
Page 40: Enable Copy Control
Click Save and Continue. Click Restart. 2.8.14 Restore factory default You can either restore settings by holding down the SafeCom Controller's test button for 8 seconds, or from the SafeCom Controller web interface: Open the Advanced Configuration web page (2.7.2). -
Page 41: Control Ftp And Telnet Network Access
2 SafeCom Controller 2.8.18 Control FTP and TELNET network access By default the SafeCom Controller can be accessed via FTP to update software (2.9.1) and via TELNET to do troubleshooting if instructed to do so by support personnel. To disable these network access methods follow these steps: Open the Advanced Configuration web page (2.7.2). -
Page 42: Update Software Via Ftp
This software update method preserves the current settings. From the command prompt window, issue the ftp command. Enter: ftp <IP address> The SafeCom Controller prompts you for a username and a password. Both are adm by default. Put the SafeCom Controller into software update mode by downloading the software file into the codes folder. -
Page 43: Update Software Via Mini-Ftp
Syntax: arp -s <IP Address> <MAC Address> The MAC address can be found on the rear side of the SafeCom Controller. If you want to use the IP address: 194.192.134.86 for the SafeCom Controller and the 12-digit hexadecimal MAC address is 00C076FF00F2. -
Page 44: Monitor Link To Safecom Color Front-End
2.10 Monitor link to SafeCom Color Front-end The status of the serial link between the SafeCom Controller and the SafeCom Color Front-end is reflected in the SNMP value hrDeviceStatus (1.3.6.1.2.1.25.3.2.1.5) and can assume the value 2 (Running) or 5 (Down). A party SNMP tool can be used to monitor the status. -
Page 45: Using Safecom Color Front-End
3 Using SafeCom Color Front-end Using SafeCom Color Front-end Login In most cases you initiate the login sequence by using your card. However, if login is by user code you start by touching the screen, entering the user code and tap OK. D60700-07... - Page 46 3 Using SafeCom Color Front-end Enter your 4-digit PIN code. This is not required if Login without PIN code is enabled for the user. Once logged in you can select an option from the touch-screen. Touch Print All to print all documents (except any retained documents). Documents are printed in chronological order (oldest first).
-
Page 47: Pull Print - Document List
3 Using SafeCom Color Front-end Pull Print – Document list Touch Documents to print individual documents. Documents appear in chronological order with the newest at the top of the list. If Print all at login is checked any documents pending collection will be printed first. In the above example the preceding R shows the document is retained. -
Page 48: Copy
3 Using SafeCom Color Front-end Copy Once logged in touch Copy on the SafeCom Color Front-end touch-screen to allow copying. The actual copy process is done as described in the MFP’s manual, typically by pressing a copy or start button. There is a configurable Copy idle timeout that defaults to 60 seconds (2.8.13). -
Page 49: Change Pin Code
3 Using SafeCom Color Front-end Change PIN code Users can change their PIN code if Allow users to change PIN code is checked on the Users tab in the Server properties dialog. Log in on the SafeCom Color Front-end. Touch Settings and then Change PIN code. Enter the new PIN code twice. -
Page 50: Troubleshooting
Is there a firewall blocking the communication? Is the SafeCom Controller connected to the network via the LAN port? If the network is up and running the port’s green light should be on and it’s yellow light should be flashing. -
Page 51: At The Printer: Restricted Access
4 Troubleshooting At the printer: Restricted access The user is not allowed to use the device. A Pay user is trying to log in and Pay is not checked on the License tab in the Device properties dialog. At the printer: Error printing document ... -
Page 52: Document Is Not Printed
It could also be because either the printer or the network is running at 10 Mbps. The SafeCom Controller can operate at 10 or 100 Mbps. The SafeCom Controller will by default sense and decide the speed (100 Mbps, unless the number of ports using 10 Mbps are in majority). -
Page 53: Regulatory Information
5 Regulatory information WARNING NOTE: This equipment has been tested and found to comply with the Limits for a Class A digital device, pursuant to part 15 of the FCC Rules. These Limits are designed to provide reasonable protection against harmful interference in a residential installation. -
Page 54: Index
Front-end, 5 Restore factory default, 39 Restricted access, 50 SafeCom Controller, 41 Ricoh, 10 Gestetner, 10 SafeCom Controller, 5, 17 SafeCom Front-end, 5 Help Desk Assistant, 49 SafeCom Help Desk Assistant, 49 Help desk contact, 38 Savin, 10 High speed printing, 33, 39... - Page 55 6 Index D60700-07...
Need help?
Do you have a question about the SafeCom Controller and is the answer not in the manual?
Questions and answers