
Related Manuals for Parts Connect IM70

Summary of Contents for Parts Connect IM70
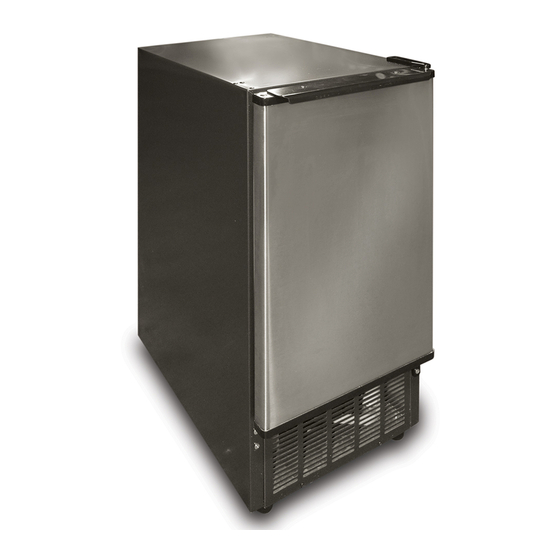
- Page 1 Household Ice Machine User’s Manual Be sure the unit is standing upright for 24 hours prior to plug-in IM70 Model # Made in China Indianapolis, Indiana, USA www.parts-connect.com...
-
Page 2: Table Of Contents
Table of Contents ............Page ICE MACHINE SAFETY . -
Page 3: Ice Machine Safety
ICE MACHINE SAFETY Your safety and the safety of others is very important. In this manual and on your appliance we have provided many important safety messages. Always read and obey all safety messages. This is the Safety Alert Symbol. This symbol alerts you to potential hazards that can injure or kill you and others. -
Page 4: Important Safeguards
IMPORTANT SAFEGUARDS Before the ice machine is used, it must be properly positioned and in- stalled as described in this manual. Read the manual carefully. We strongly recommend that you have a professional install your new ma- chine. The warranty may be affected or voided by an incorrect installa- tion. - Page 5 ● Use two or more people to move and install ice machine. Failure to do so can result in back or other injury. ● Never install or operate the unit in an enclosed area, such as a closed cabinet. To en- sure proper ventilation for your ice machine, the front of the unit must be completely un obstructed.
-
Page 6: Technical Information
Extension Cord Because of potential safety hazards under certain conditions, it is strongly recommended that you do not use an extension cord with this ice machine. TECHNICAl INFORMATION Model: IM70 Electrical power: 115VAC ~ 60Hz Power consumption: 13.2kWh/100 lbs of ice Ice-making/Ice-harvest rated current: 3.0A/3.6A... -
Page 7: Component Locations
COMPONENT lOCATIONS Control Panel Water Distribution Tube Evaporator (Ice Mold) Ice Full Swivel Water Trough Float Switch Ice Storage Bin ON/OFF Switch FRONT VIEW 6’ Drain Hose Power Cord 6’ Fill Hose Water Inlet Drain Outlet Ice Scoop REAR VIEW... -
Page 8: Ice Machine Installation
ICE MACHINE INSTAllATION Excessive Weight Hazard Use two or more people to move and install ice machine. Failure to do so can result in back or other injury. Remove packaging materials IMPORTANT: Do not remove any permanent instruction labels or the data label on your ice machine. Remove tape and glue from your ice machine before using. - Page 9 ● This ice machine should be installed by qualified personnel. ● To ensure proper ventilation for your ice machine, the front of the unit must be completely unob- structed. ● When installing the ice machine under a counter, follow the recommended spacing dimensions shown on the previous page.
-
Page 10: Electrical Requirements
Electrical Requirements Electrical Shock Hazard Plug into a grounded 3- prong outlet. Never remove the ground prong from the plug. Never use an 3-prong adapter. Never use an extension cord. Failure to follow these instructions can result in fire, electrical shock or death. -
Page 11: Function Of Casters & Leveling Legs
Casters and Leveling Legs The ice machine has been pre-installed with: leveling legs • Fixed casters at rear In Front • 360˚ casters in front • Leveling legs in front. The ice machine can easily moved by rolling it to a desired location on the pre- installed casters. -
Page 12: Onboard Water Filter
Onboard Water Filter The ice machine requires the use of an internal water filter. The water filter is provided, but not in- stalled. After installation of a new filter, please discard the first two ice harvests to insure that the filter is purged of any impurities. -
Page 13: Water Supply
Connect the water inlet to an appropriate water supply. Use of a professional plumber is recommended. Drain You must connect the drain line before using the ice machine. Fill Hose Follow the steps outlined below. Connecting the drain line: NOTE: If there is a drain line near the ice machine or it will be used as an outdoor unit, the best choice is to drain water Water Inlet to the drain line through the drain hose provided with the ice... -
Page 14: Installation Types
Installation Types This ice machine has been designed for Mobile (free-standing), Enclosed (as under a cabinet) or Built- in (sealed) installation, indoor or outdoor. In any case, there must be adequate air space around the unit for proper ventilation. (See diagrams on page 8 or below.) Mobile installation: A mobile installation will allow you to install the ice machine free-standing in any place you desire pro- vided you have access to a water supply. -
Page 15: Operation
OPERATION Final Check List before Operation 1. Have all packing materials and tape been removed from the interior and exterior of the ice machine? 2. Did you clean the ice storage bin? Initialize the cleaning proceedure, this proceedure will last 6 min. and then enter into the icemaking proceedure. -
Page 16: How The Machine Makes Ice
How the Machine Makes Ice Turn the Power switch to the I/ON position. The Power indicator light will light and the machine will au- tomatically go into the ice-making stage. There are two distinct cycles: freeze and harvest. During the freeze cycle, water flows to the evaporator surface. In the harvest cycle, the ice is released. A complete cycle can take 15 to 40 minutes, depending on temperature and operating conditions. -
Page 17: Control Panel
Control Panel lEDs DISPlAY Buttons lED light Switch lED/Button Name Color Function ERROR error light With error light on, SMG shows error code (E01 to E11), check error code list for details FIlTER filter light When filter light is on filter has worked more than 180 days, need to change the filter and reset dates. -
Page 18: Working Procedures
Working Procedures Procedure Indicator Starting Point/ light Detail All lights ON Machine is plugged in, short press of ON/OFF (I/O) Startup for 1 second, button. then OFF Machine program initialized. COO-> Machine program initialized. Water Water Light Water tank must be filled before pump runs, other- Count Fillup wise dry run damage will occur. - Page 19 Working Procedures (continued) Procedure Indicator Starting Point/ light Detail Ice cubes harvested from the evaporator. Continue Ice-Full Harvest light If after the harvest procedure the swivel returns to its Count Checking initial position within 40 seconds, the system runs the Seconds pre-chill procedure and starts a new ice making cycle.
-
Page 20: Button Operation
Button Operation 1. Main power off, means you unplug the ice machine or turn the main power switch off. 2. SMG off, means the ice machine is plugged in and main power switch is on, but SMG shows OFF. 1. Short press means press the button more than 1 second, less than 3 seconds then release. 2. -
Page 21: Parameter Settings
Parameter Setting Status Operation light & SMG Details Ice Making Short press MODE SMG: shows current The parameter 1xx means set the Cycle button number for 2 thickness of the ice cube, xx will seconds and then flash during setting. Short press set shows 1xx button can change the 1xx, Ice making light: on... -
Page 22: Cleaning And Maintenance
ClEANING AND MAINTENANCE If the ice machine is left unused for a long time, it must be thoroughly cleaned before the next use. Follow carefully any instructions provided for cleaning by use of sanitizing solution. Do not leave any solution inside the ice machine after cleaning. -
Page 23: Interior Cleaning
Interior Cleaning The ice storage bin should be sanitized regularly. Clean the trough before the ice machine is used for the first time and restarted after stopping for an extended period of time. It is usually convenient to sanitize the trough after the ice-making system has been cleaned and the storage bin is empty. 1. -
Page 24: Water Distribution Tube Cleaning
Water Distribution Tube Cleaning When you find that the ice cubes are incompletely formed or the output of ice cubes is low, the water distribution tube may be blocked. Set the Power switch to O/OFF, gently take out the water distribution tube, and locate the holes in the distribution tube. -
Page 25: Major Functions
Ice-Making System Cleaning (Continued) • Ice Machine Cleaner contains acids. • DO NOT use or mix with any other solvent-based cleaner products. • Use rubber gloves to protect hands. Carefully read the material safety instructions on the container of the ice machine cleaner. -
Page 26: Error Codes
ERROR CODES Error Error Status lights Reason Treatment Code 1. Ice full swivel is not Error 1. Ice full swivel is jammed 1. Free swivel of jam. functioning correctly Light 2. Ice full switch needs to be 2. Replace ice full switch 2. -
Page 27: Troubleshooting
TROUBlESHOOTING Before Calling for Service f the unit appears to be malfunctioning, read through the OPERATION section of this manual first. If the problem persists, check the Troubleshooting Guide below and on the following page. The problem could be something very simple that can be solved without a service call Troubleshooting Guide Problem Possible Cause... - Page 28 Troubleshooting Guide (Continued) Problem Possible Cause Probable Correction Noise during Certain sounds are normal. See “Normal Sounds”. operation The electricity is off. Reconnect the power supply line. Cut off the electricity; allow the ice The ice machine stops The room temperature is out of the machine to stop functioning until suddenly while making acceptable range.
-
Page 29: Parts Breakdown
PARTS BREAKDOWN IM70 ICE MACHINE 01 3011827 13 3210322 25 3281701 37 3040325 49 3040320 02 3281702 14 3040326 26 3210320 38 2051505 50 PAL5641P 03 3011828 15 3030302 27 3212501 39 3040330 51 3283002 04 3030304 16 3011824 28 3231104 40 3040329... - Page 30 WARRANTY ONE YEAR WARRANTY PARTS AND SERVICE. Parts Connect (“Seller”) will repair or replace, at Seller’s option, free of charge, any defective part in the product for a period of ONE YEAR from the date of delivery. DISCLAIMER OF WARRANTIES. THE WARRANTIES SET FORTH HEREIN ARE THE ONLY WAR- RANTIES MADE BY SELLER IN CONNECTION WITH THE PRODUCTS AND THE TRANSACTIONS CONTEMPLATED AS A RESULT OF THIS SALE.
Need help?
Do you have a question about the IM70 and is the answer not in the manual?
Questions and answers