Draytek vigor3900 Quick Start Manual
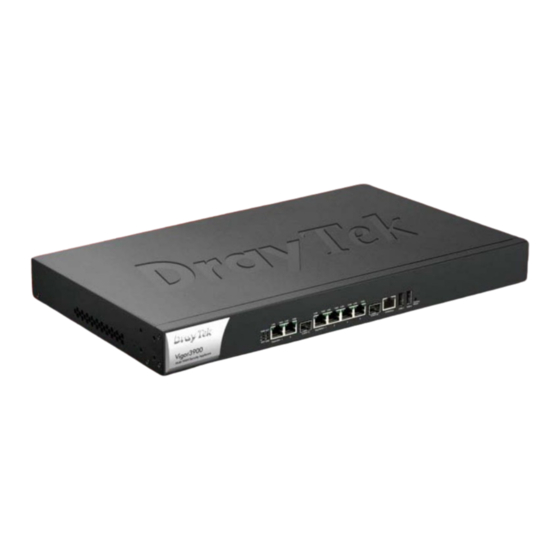
Multi-wan security appliance
Hide thumbs
Also See for vigor3900:
- User manual (516 pages) ,
- User manual (311 pages) ,
- User manual (460 pages)
Table of Contents
Advertisement
Quick Links
Download this manual
See also:
User Manual
Advertisement
Table of Contents

Subscribe to Our Youtube Channel
Related Manuals for Draytek vigor3900


Summary of Contents for Draytek vigor3900
- Page 2 Vigor3900 Series Multi-WAN Security Appliance Quick Start Guide Version: 2.5 Firmware Version: V1.2.2 (For future update, please visit DrayTek web site) Date: January 20, 2017...
- Page 3 Intellectual Property Rights (IPR) Information © All rights reserved. This publication contains information that is protected Copyrights by copyright. No part may be reproduced, transmitted, transcribed, stored in a retrieval system, or translated into any language without written permission from the copyright holders. The following trademarks are used in this document: Trademarks ...
- Page 4 County, Taiwan 303 Product: Vigor3900 Series DrayTek Corp. declares that Vigor3900 of routers are in compliance with the following essential requirements and other relevant provisions of EC, Directive 2004/108/EC. The product conforms to the requirements of Electro-Magnetic Compatibility (EMC) Directive 2004/108/EC by complying with the requirements set forth in EN55022/Class A and EN55024/Class A.
- Page 5 Web registration is preferred. You can register your Vigor router via http://www.draytek.com. Firmware & Tools Updates Due to the continuous evolution of DrayTek technology, all routers will be regularly upgraded. Please consult the DrayTek web site for more information on newest firmware, tools and...
-
Page 6: Table Of Contents
1. Introduction......................1 2. Package Content ....................2 3. Panel Explanation....................3 3.1 LED ............................3 3.2 Connectors ..........................4 4. Hardware Installation ................... 5 4.1 Connecting Device ........................5 4.2 Wall-Mounted Installation ......................6 5. Software Configuration ..................7 5.1 Accessing Web Page ......................... -
Page 7: Introduction
Vigor3900 series router is a Multi-WAN Security Appliance which allows the connection to multiple ISPs and provides multiple VPN tunnels for connecting different devices. With gigaLAN and gigaWAN feature, the router increases the performance of data transmission with highest speed which is more than 500Mbps. -
Page 8: Package Content
Take a look at the package content. If there is anything missed or damaged, please contact DrayTek or dealer immediately. Vigor router Quick Start Guide RJ-45 Cable (Ethernet) Rack mount kit (brackets) Console Connector RJ-45 to RJ-45 Cable The type of the power adapter depends on the country that the router will be installed. -
Page 9: Panel Explanation
Status Explanation The router is powered on. The router is powered off. The system is active. Blinking The system is hanged. The fiber connection is established. Blinking The data is transmitting. No fiber connection is established or the system is hanged. The USB device is installed and ready. -
Page 10: Connectors
Interface Description Console Provided for technician use. GigaLAN1 / 2 Connecter for local network devices. 3(SFP) Connecter for SFP module. GigaWAN1/2/3/4 Connecter for remote network devices. 5(SFP) Connecter for SFP module. Console Provided for technician use. USB1 / USB2 Connecter for the USB device. Factory Reset Used to restore the default settings. -
Page 11: Hardware Installation
WAN port of Vigor3900 with Ethernet cable (RJ-45). The WAN1 (to WAN4) LED will light up. Connect the power cord to Vigor3900’s power port on the rear panel, and the other side into a wall outlet. Power on the device by pressing down the power switch on the rear panel. -
Page 12: Wall-Mounted Installation
The Vigor3900 Series can be mounted on the wall by using standard brackets shown below. Choose a flat surface (on the wall) which is suitable for placing the router. Make the screw holes on the short side of the bracket aim at the screw holes on the router. -
Page 13: Software Configuration
To access Internet, please finish basic configuration after completing the hardware installation. 1. Make sure your PC connects to the router correctly. Note You may either simply set up your computer to get IP dynamically from the router or set up the IP address of the computer to be the same subnet as the default IP address of Vigor router 192.168.1.1. -
Page 14: Changing The Password
5. Now, the Main Screen will pop up. The first job that you have to do is changing the user password. Follow the steps below to modify: 1. Go to System Maintenance page and choose Administrator Password. 2. Enter the login password on the field of Original Password. Type a new one in the field of New Password and retype it on the field of Confirm Password. -
Page 15: Quick Start Wizard For Network Connection
3. Now, the password has been changed. Next time, use the new password to access the Web User Interface for this router. Quick Setup is a wizard which is designed for configuring your router accessing Internet with simply steps. In the Quick Setup group, you can configure the router to access the Internet with different modes such as Static, DHCP, PPPoE, or PPTP modes. - Page 16 Internet. If you choose DHCP mode, the DHCP server of your ISP will assign a dynamic IP address for Vigor3900 automatically. It is not necessary for you to assign any setting. (Host Name and Domain Name are required for some ISPs).
-
Page 17: Step 2
After clicking Next, you can see the following page which will vary according to the IPv4 protocol type selected in Step 1. For Static type, the page will be displayed as follows: Available settings are explained as follows: Item Description IP Address Type the IP address of the router for the WAN profile. - Page 18 Item Description Finish Click it to save the configuration and exit the dialog. Cancel Click it to discard the settings configured in this page. For DHCP type, the page will be displayed as follows: Type a name as the host name for identification (optional) for identification. Click Finish.
- Page 19 For PPPoE type, the page will be displayed as follows: Available settings are explained as follows: Item Description Username Type in the username provided by ISP in this field Password Type in the password provided by ISP in this field. Previous Click it to return to previous setting page.
- Page 20 For PPTP type, the page will be displayed as follows: Available settings are explained as follows: Item Description PPTP Over Usually ISP dynamically assigns IP address to you each time you connect to it and request. In some case, your ISP provides service to always assign you the same IP address whenever you request.
-
Page 21: Check The Connection Status
Item Description Add – Click this button to have a field for adding a new IP address. Save – Click this button to save the configuration. – click the icon to remove the selected entry. Previous Click it to return to previous setting page. Finish Click it to save the configuration and exit the dialog. -
Page 22: Customer Service
– up has been displayed on the field of Connection. If the router cannot work correctly after trying many efforts, please contact your dealer for further help right away. For any questions, please feel free to send e-mail to support@draytek.com.
Need help?
Do you have a question about the vigor3900 and is the answer not in the manual?
Questions and answers