Table of Contents
Advertisement
Quick Links
Advertisement
Table of Contents

Subscribe to Our Youtube Channel
Related Manuals for Hamilton/Buhl HDV5200-1


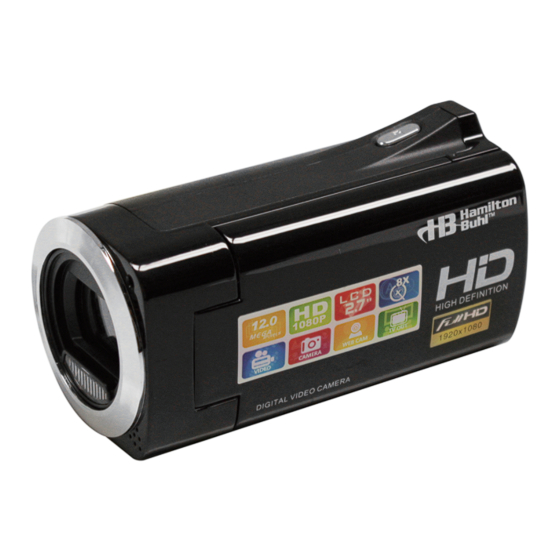
Summary of Contents for Hamilton/Buhl HDV5200-1
-
Page 1: Instruction Manual
™ Instruction Manual HDV5200-1... -
Page 2: Safety Information
We appreciate your purchase of HD5200-1 (HD Digital Video Camera). Prior to usage, please make sure to review this instruction manual carefully and store the manual for future references. Safety Information Before using the DVC (Digital Video Camera), please ensure that you have read and understood the following safety precautions. -
Page 3: Components Of The Video Camera
1. Components of the Video Camera 1. Display Menu/On/Off Button 2. LED Light On/Off Button 3. Mode Selection (Movie/Picture/Playback) Button 4. Power On/Off Button 5. Menu Button 6. Recording On/Off Button 7. Zoom-In / Up Arrow Button 8. OK Button 9. - Page 4 23. Self-Timer Indicating Light 24. Lens 25. Built-in LED Light 26. Microphone 2. Preparations before operating the camcorder Charging the Battery 1. Make sure lithium battery is properly inserted in the battery compartment 2. Fully charge the camcorder via USB charger prior to use...
-
Page 5: Installing The Memory Card
Installing the memory card There is no built-in memory in this camera. A compatible external memory card is required to take or save pictures and movies. If you want to shoot and save the files, please use a proper SD or MMC card. Before inserting or taking out the card, please turn off the unit first to avoid any damages. -
Page 6: Format Memory Card
Format Memory Card All the data in the Memory Card (including the protected files) will be deleted when the Memory Card is formatted. Therefore, please back up the important files before formatting. 1. Power on the DVC, to show the setting menu. 2. -
Page 7: Lcd Display
LCD Display Video Recording Mode Video File Size FHD 1920X1080 HD 1280X720 D1 848X480 640 640X480 Video Recording Remaining Time Mode Memory Card Battery Level... - Page 8 Photography Mode Image Size 12MP 4000X3000 8MP 3264X2448 5MP 2592X1944 White Balance 3MP 2048X1536 Auto 1MP 1280X960 Daylight Cloudy Exposure Compensation Value Fluorescent Photos Available Tungsten Photography Mode Memory Card Battery Level...
-
Page 9: Basic Operation
Playback Mode Sequential Number of Current File/ Total Number of Recorded Files Playback Mode File Lock Icon Memory Card Voice Memo File Format Video file Image file 3. Basic Operation Power on or off the DVC 1. Turn on the LCD screen, and press the On/Off button to power on the DVC. -
Page 10: Mode Switch
Mode Switch 1. Press the On/Off button to power on the DVC. 2. Press the Mode button to change the working mode of the DVC. Pressing the Mode button each time, the mode of the DVC will be changed once. Icon Mode Description... - Page 11 ·The number shown on the LCD screen will be lessened by one automatically after a photo is taken. For example: if the number shown on the LCD screen is 018, the number on the LCD screen will become 017 after a photo is taken, and the LCD screen will show “Insufficient Space”...
- Page 12 5. Press the OK button to confirm the setting, and press the Menu button to quit. 6. Press the Shutter button to take photos. 4. Setting of the DVC When menu option is shown, use Up, Down, Left and Right button to set the option.
- Page 13 Menu Option Available Options and Functions Selecting the small size will enable a prolonged Video Format recording when the memory space is the same. There are two options: 1920X1080/1280X720/ X480/640X480 There are three metering modes: Metering Central Metering: conduct metering to the light in the Mode central part.
- Page 14 Menu in Photography Mode Available Options and Functions Menu Option Set the size of pictures, and there are five options Image Size available for selection: 12M[4000X3000] / 8M[3264X2448] /5M[2592X1944] /3M[2048×1536]/ 1M[1280X960] Selecting a lower image quality may reduce the space Image Quality occupied by images, so as to take more pictures.
-
Page 15: Setting Menu
Manually set Exposure Compensation Value, so as to Exposure conduct compensation under special conditions such as in indoor light condition, back light condition or strong light condition. The scope of Exposure Compensation is from -2.0 to 2.0. The DVC has four photography modes: [Disable] / Photography [2s Self-Timber] / [10s Self-Timber] / [Burst] Mode... - Page 16 1. Power on the DVC, and press the Menu button to show the menu. 2. Press the Right button to select 3. Press the Up or Down button to select the option you want to set. 4. Press the OK button or enter into the submenu under this option. 5.
- Page 17 Auto In order to save power, the DVC will power off Power-off automatically after a period of idle time. The function has four options: 1 minute / 3 miniutes / 5 minutes / disable. Date and Time Set date and time, month/date/year/hour: minute. Language Select one language from the following languages to show menu and other information:...
-
Page 18: Other Functions Under Playback Mode
5. Playback Playback of Video 1. Set the DVC into the Playback Mode. 2. Press the Left or Right button to select the video file you want to play. 3. Press the OK button to begin playing. Press the OK button to pause playing, and press the OK button again to continue playing. -
Page 19: Menu In Playback Mode
1. Press the Menu button in the Playback Mode to enter into the menu interface. 2. Press the Up or Down button to select File Deletion. 3. Press the OK button to enter into the submenu: [Delete Single]: delete the current file; [Delete All]: delete all files. 4. - Page 20 File Deletion Refer to pages of file deletion for details. Slide Show Use this function to automatically play files. [Start]: start playing after setting the playing direction of screen sheet and time interval. Press the Right button to set the time interval of playing between two files. [Interval]: 1s-10s.
- Page 21 4. When the DVC is in the Playback Mode, you can browse and play the recorded picture, video and audio files on the TV. HDMI Connection: Connect the DVC to TV with HDMI wire (not included), the LCD screen of the DVC will be shut off, and the TV is equal to the LCD screen of the DVC.
-
Page 22: Installation Of Software
2. Open My Computer or Windows Explorer, then double click the removable icon of the Memory Card. 3. Copy the images to the directory you select in the computer from the Memory Card. Connect the DVC to Computer with USB wire 1. -
Page 23: Technical Indicators
Installation of PC Camera Function (1) Open the contents of the drivers CD, click “Setup.exe” to complete installation according to the instruction. (2) Copy the “PCCAM.exe” in the CD to the Desktop or the root directory you want in the computer. How to Use PC Camera Drivers 1. - Page 24 Focal Length 150cm ~ infinate Range Aperture F: 3MM f=6.5mm Shutter 1/6,000~1/20 seconds Resolution Static Picture: 12M(4000X3000); 8M(3264X2448); 5M(2592x1944); 3M(2048×1536); 1M(1280×960) Video: 1920X1080; 1280X720; 848X480; 640X480 Light Automatic Sensitivity White Balance Auto / Daylight / Cloudy / Fluorescent / Tungsten Exposure -2.0~2.0, the interval is 0.3 Compensation...
- Page 25 Speaker Built-in Size 4.5” (L) x 2.5” (W) x 2.5”(H) Weight 0.43lbs (without battery) & 0.49lbs (with battery) ™ Product Registration Instructions Visit: www.HamiltonBuhl.com 1. Click on Customer Support 2. Click on Product Registration Form 3. Please fill out all field marked with * to register your product Our Mission: Since our founding in 1993, HamiltonBuhl continues to evolve as a leader in technology products for education and industry.
Need help?
Do you have a question about the HDV5200-1 and is the answer not in the manual?
Questions and answers