Table of Contents
Advertisement
Advertisement
Table of Contents

Related Manuals for OHAUS RU-U2


Summary of Contents for OHAUS RU-U2
- Page 1 Service Manual RU – U2 RU – C2 Edition: January 2010...
- Page 2 No part of this manual may be reproduced or transmitted in any form or by any means, electronic or mechanical, including photocopying and recording, for any purpose without the express written permission of Ohaus, Inc. U.S. Government Restricted Rights: This documentation is furnished with Restricted Rights.
-
Page 3: Table Of Contents
Service Manual RU OHAUS Content Page PRECAUTIONS ......................4 Specifications RU..................... 5 General Description ....................5 Features ......................6 Customer/Vendor Display ...................7 Weighing Capacity ....................8 Tare ........................8 Memory Specifications ..................8 Label Printer......................8 Electrical......................9 Operating & Storage Temperature ..............9 2.10 Major Component Map ..................10 Troubleshooting ..................... -
Page 4: Precautions
DO NOT allow untrained personnel to operate, clean, inspect, maintain, service, or tamper with this equipment. ALWAYS DISCONNECT this equipment from the power source before cleaning or performing maintenance. CALL Ohaus for parts, information, and service. Page 4 / 53 11/01/2010 Ohaus... -
Page 5: Specifications Ru
The RU, like all other Ohaus products is designed for maximum durability and reliability in even the most demanding application environments. The RU is manufactured in one of Ohaus's ISO 9001 and ISO 14001 certified facilities so you are assured to receive a high quality product. -
Page 6: Features
• Compliance with H44 3000e, R76 OIML 3000e. • Tactile feel membrane keyboard and an audible beeper. • A 142 position preset keyboard (RU-U2) for fast PLU retrieval. (Different type may have different preset key quantity. RU-C2 has 56.) • Real time clock and RAM are backed up by a lithium rechargeable battery with at least 1 month memory retention without external power. -
Page 7: Customer/Vendor Display
Service Manual RU OHAUS Customer/Vendor Display There are two displays on the scale, one is on the vendor side and the other is on the customer side. These two LCD displays incorporate LED backlight. Both the customer and vendor displays show 5 digits of weight, 5 digits of tare, 7 digits of unit price and 7 digits of total price values along with cursors for Zero, Net and Prepack mode. -
Page 8: Weighing Capacity
Service Manual RU OHAUS Weighing Capacity The RU is available in 3/6kg x 0.001/0.002kg, 6/15kgx0.002/0.005kg, 12kgX0.002kg and 30kgx0.005kg capacities. The scale is designed to withstand static overloads up to five times the rated capacity without sustaining permanent damage. A weight greater than five increments over capacity causes the weight display to "-----"... -
Page 9: Electrical
Service Manual RU OHAUS liner. In the unstripped mode, the label and liner will be delivered. A tear/bar allows continuous stock to be torn to exact length needed. Print specifications for the thermal printer are as follows: PRINTER HEAD TYPE:... -
Page 10: Major Component Map
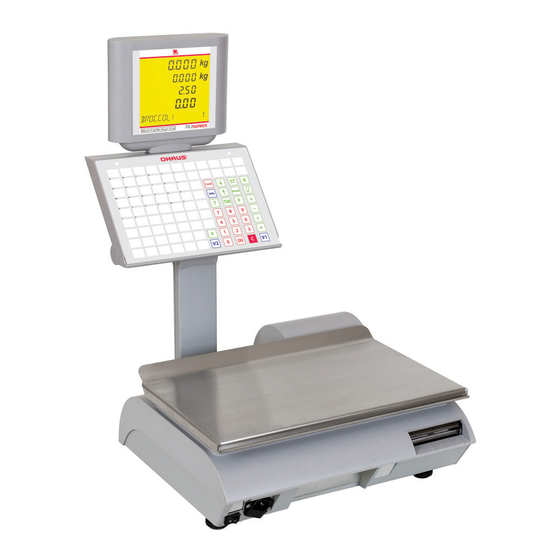
Service Manual RU OHAUS 2.10 Major Component Map Description Display Tower Platter supporter Printer Numeric Keypad Preset Keypad Power switch Page 10 / 53 11/01/2010 Ohaus... -
Page 11: Troubleshooting
Service Manual RU OHAUS Troubleshooting Following is a list of symptoms that could occur, and the recommended action to correct the problem. SCALE INOPERATIVE/BLANK DISPLAYS 1. Check AC power at outlet. 2. Check Voltage on Main Logic PCB. If voltages are zero, check Power Supply. - Page 12 Service Manual RU OHAUS PRINTER WON'T DELIVER LABEL 1. Check printer for obstructions. 2. Check if there is a label which has not been removed. 3. Check Take Label sensor obstructions. 4. Clean Take Label sensor. 5. Test Take label sensor with SENSOR TEST in Service Mode.
- Page 13 Service Manual RU OHAUS LABEL PRINT IS MOTTLED WITH LIGHT SPOTS 1. Check with other known good label stock. 2. Check and clean printer head resistor line and platen. 3. Replace printer head. LABELS NOT STRIPPING CORRECTLY 1. Check with other known good label stock, e.g. Nashua.
-
Page 14: Calibration
Service Manual RU OHAUS Calibration • Open sealing wire; • Screw out sealing screw; • operation: operation: display: description: enter the menu enter calibration ambience condition, QUIET 0-2 0=quiet; 1= normal; 2=disquiet ... - Page 15 Service Manual RU OHAUS CAPACITY 15 (INPUT CAPACITY) INPUT CAPACITY INC.0.002/0.005 Select increment(if select increment necessary) READ THE ZERO capture zero ADD WEIGHT 0.000 (input standard weight value put standard weight on ...
-
Page 16: Pc Software
PC Software PLU records and setup data of the RU can be programmed through a PC (Personal Computer) using the Ohaus program. New scales can be easily set up by using this program. Which requires an IBM or compatible PC with Windows 95/NT or higher version operating system. -
Page 17: Flashing Software
Service Manual RU OHAUS Flashing Software The RU Operating System Software is retained in Flash EPROM's on the Main Logic PCB. The EPROM's can be reprogrammed using a PC and a downloader program "HyperTerminal". Cables and components are the same as above RS232 cable. -
Page 18: Power Supply
Service Manual RU OHAUS POWER SUPPLY Following is a list of symptoms that could occur, and the recommended action to correct the problem. Place the Power Switch to the OFF position. Remove the platter, spider, and top cove. To check the +24VDC output voltage from the Power Supply terminal between the terminals marked +V and GND, the acceptable output range is +24VDC +/-0.50 VDC. -
Page 19: Main Logic Pcb
Service Manual RU OHAUS Main Logic PCB The Main Logic PCB receives +24VDC from the Power Supply and uses this to supply +10VDC and +5VDC to other components. The Main Logic PCB controls all functions in the unit including the thermal printer. Inputs and Outputs to the Main Logic include the Label Taken Sensor, Gap Sensor, Printer head, Stepper Motor, Rewind Motor, Load Cell and etc. - Page 20 Service Manual RU OHAUS Page 20 / 53 11/01/2010 Ohaus...
-
Page 21: Load Cell
Service Manual RU OHAUS Load Cell The Load Cell can be tested for proper analogue voltage input and millivolt output by measuring the voltage on the Main Logic PCB. To check the input voltage across +EXC & -EXC, place your meter on volts and put the positive lead on the left pin of F1 and the negative lead on the left pin of F4. -
Page 22: Warning Messages
Service Manual RU OHAUS Warning Messages INPUT TOO BIG The input is too big. INPUT TOO SMALL The input is too small. TOO MUCH INPUT The input is out of limit. WRONG CODENR. The code number is invalid. KEY NO FUNCTION The key has no function. -
Page 23: Error Messages
Service Manual RU OHAUS 10.1 Error Messages Listed below are the possible error codes are listed. When an error code appears, the scale should be switched off and on. In many cases the error will disappear. There are 3 different kinds of error messages: Error Status 1: Warning! After the warning the scale can still be used. - Page 24 Service Manual RU OHAUS Meaning of XX 01 Operator 07 Group data 02 Ticket data 13 Label data 03 Time total data 15 Date text data 04 Text data 21 PLU label data 05 Barcode data 23 Store adress 06 Tare data...
-
Page 25: Interconnecting Diagram
Service Manual RU OHAUS Interconnecting Diagram Page 25 / 53 11/01/2010 Ohaus... -
Page 26: Replace Main Pcb
Service Manual RU OHAUS Replace main PCB ! All the data saved in main PCB, as you change the main PCB you will lose all of them. • Power off and take out the power cable from electrical outlet. • Take away platter. -
Page 27: Replace Switch Power
Service Manual RU OHAUS Replace switch power Take out switch power • Power off and take out the power cable from electrical outlet. • Take away platter. • Screw out the 5 bolts (A) from base and take away. • Pull out the harness in switch power. -
Page 28: Replace Display
Service Manual RU OHAUS Replace display Take out display • Power off and take out the power cable from electrical outlet. • Take away platter. • Take away the tower kits. • Screw out 2 bolts in the display cover, and take out the front cover, show the display. -
Page 29: Replace Load Cell
Service Manual RU OHAUS Replace load cell Page 29 / 53 11/01/2010 Ohaus... - Page 30 Service Manual RU OHAUS Take out load cell • Power off and take out the power cable from electrical outlet. • Take away platter. • Screw out 2 bolts for fix the cover of print paper (D). • Take out the cover (E).
- Page 31 Service Manual RU OHAUS • Install the up cover, print paper cover,up spacer,screws in interface PCB, cover of main PCB at bottom etc. • Adjust 4 screws in up spacer and let the spacer levelly. • Put on platter. • Power on scale.
-
Page 32: Replace Keyboard
Service Manual RU OHAUS Replace keyboard Take out keyboard • Power off and take out the power cable from electrical outlet. • Take away platter. • Screw out 3 bolts (H) in keyboard at bottom. • Take out keyboard and cover kits. -
Page 33: Replace Printer
Service Manual RU OHAUS Replace printer Page 33 / 53 11/01/2010 Ohaus... - Page 34 Service Manual RU OHAUS Take out printer • Power off and take out the power cable from electrical outlet. • Take away platter. • Screw out 2 bolts (I) at the bottom of the scale. • Open the printer door.
-
Page 35: Replace Printer Head
Service Manual RU OHAUS Replace printer head DON’T GRIDE THE PRINTER HEAD. Take out printer head. • Power off and take out the power cable from electrical outlet. • Take away platter. • Open printer door, pull out printer. • Screw out 2 screws (J) for fixing printer head. -
Page 36: Install Wireless Card
Service Manual RU OHAUS Install wireless card ! Steps as below. (A1) (B1) (C1) (D1) (E1) (F1) (G1) (H1) (I1) (J1) (K1) (L1) Page 36 / 53 11/01/2010 Ohaus... - Page 37 Service Manual RU OHAUS (M1) (N1) (O1) (P1) • Power off and take out the power cable from electrical outlet. • Take away platter. • Screw out bolts from up spider (C1) and screw out sealing bolts (D1). • Take apart the main PCB cover in bottom (F1), also take apart the cover of scale as screw out the bolts in the bottom of scale.
-
Page 38: Maintenance
Slide out the printer. Press the trigger to open the print head. Clean the printer head with a soft clean cloth soaked in isopropyl alcohol, OHAUS liquid cleaner or equivalent, or the OHAUS Cleaning Pen. Push back the print head until it clicks. -
Page 39: Rezeroing
Service Manual RU OHAUS 20.3 Rezeroing This scale is equipped with an automatic zeroing device, which compensates for small weight change. This device is not activated when a package tare is compensated. After cleaning the dirt from the platter with the scale on, the display can read: •... -
Page 40: Ru License
Alternatively the LID can be printed out at any time on your scale in menu [306] once it was entered. In case the LID gets lost due to a software Update and/or a Reset Configuration Ohaus can not be hold reliable. -
Page 41: Exploded Diagrams
Service Manual RU OHAUS Exploded Diagrams RU-C2 RU-C2 Item P/N Description 72240536 Label roll cover, RU 183021 Platter 102326 Leveling Bubble 124041 Cap,Spider,Center 154555 Cap,Spider,Corner 180974 Spider Page 41 / 53 11/01/2010 Ohaus... - Page 42 Service Manual RU OHAUS 180943 Main Housing 174032 PCB Assembly, AD board 9(1) 72193829 Keyboard,Touch pad,Silicon,RU C2 9(2) 72239243 Keyboard, Programming layer,RU C2 9(3) 72239241 Keyboard, Operation layer,RU C2 9(4) 72193827 Keyboard, Rubber button padding,RU C2 9(5) 72193825 Keyboard, Membrane layer,RU C2...
- Page 43 Service Manual RU OHAUS 72186985 Loadcell Assembly,AMI-11 for 3/6kg 72186878 Loadcell Assembly,AMI-40 for 30kg 6000e 72186875 Loadcell Assembly,AMI-22 for 12kg 6000e 72186402 Printer Rail 72185419 Loadcell spacer 72185423 Spider support 72188157 Plastic cover B,Front,Compact,RU-C2 72188192 Tower, Compact, RU-C2 72188156 Plastic cover A,Rear,Compact, RU-C2...
- Page 44 Service Manual RU OHAUS 72192905 SLOT SCREW, M5X16,GB79-85 72194324 NUT M4 72201474 SCREW, M2.9X6.5,GB845 72201466 SCREW, M3X6,GB818 102661 SPRING WASHERS 72201469 SCREW, M4X14,GB819 142884 SLOT SCREW, M3X8,GB79-85 143133 SCREW, M3X6,GB819 Page 44 / 53 11/01/2010 Ohaus...
- Page 45 Service Manual RU OHAUS RU-U2 RU-U2 Item P/N Description 180945 Sheet Metal,support A,display 72189191 Display Assembly,segment, EURO Page 45 / 53 11/01/2010 Ohaus...
- Page 46 Service Manual RU OHAUS 180944 Display Housing 72239246 Display Lens, U2, RU 180977 Tower B RU-U2 173476 PCB Assembly,keyboard convert 72183679 Sheet Metal,support,keyboard 72186085 Keyboard Housing,Top Cover 72186578 Keyboard,Membrane layer 72186679 Keyboard, Pin 72186581 Keyboard, Rubber button padding,RU U2 72239242 Keyboard, Operation layer, U2,RU...
- Page 47 Service Manual RU OHAUS 72186878 Loadcell Assembly,AMI-40 for 30kg 6000e 72186875 Loadcell Assembly,AMI-22 for 12kg 6000e 180973 Aluminum Base Casting 72191369 COVER A,Base 72191370 COVER B,Base 180975 Printer Rail Slider 72186193 Printer Assembly,2" Label 72185419 Loadcell spacer 72191008 Harness,segment Display...
- Page 48 Service Manual RU OHAUS 72201468 SCREW, M3X10,GB819 72189609 SCREW M4X8,GB818-85 72201473 SCREW,M6X20,GB70-85 72194324 NUT, M4 72201464 SCREW M2X6,GB67 72201470 SCREW M4X5 150684 CIRCLIPS 3.2 102661 SPRING WASHERS 72201469 SCREW,M4X14, GB819 Page 48 / 53 11/01/2010 Ohaus...
- Page 49 Service Manual RU OHAUS Page 49 / 53 11/01/2010 Ohaus...
-
Page 50: Spare Parts
Service Manual RU OHAUS Spare parts CIMF Desc_ENG 72183359 Adjust bracket, keyboard,C2,RU 72189191 Display Assembly, Segment, EURO, RU 72239246 Display Lens, U2, RU 72180947 Printer Door, RU 71207517 Foot, long, left, RU 72188140 Foot, short, right, RU 72187455 Harness, AC power socket, RU... - Page 51 Service Manual RU OHAUS 72192055 Plastic cover, RU 72196605 Interface Plastic Cover, RU 72193806 Plug, Diameter 16mm, hole, RU 72192725 Lock, PCB connector, RU 72183021 Weighing Platter, RU 71208034 Clip, Motor, Printer, RU 72173190 Moter, DC Motor, Printer, RU 72173191...
- Page 52 Change “seite” to page Others Change as to RU requirements Edition Dec/09 V0 Chapter changed canceled discription Changed from bC/RU service manual. Only for RU-U2, C2 scales Page 52 / 53 11/01/2010 Ohaus...
- Page 53 Thank you for your contribution to environmental protection. www.ohaus.com P/N: 72243488 (01/10) 1.0 OHAUS® is a Trademark of OHAUS,Inc. ©2009 OHAUS,Inc. Printed in Switzerland Page 53 / 53 11/01/2010 Ohaus...
Need help?
Do you have a question about the RU-U2 and is the answer not in the manual?
Questions and answers