OHAUS Ranger Instruction Manual
Hide thumbs
Also See for Ranger:
- Instruction manual (102 pages) ,
- Service manual (82 pages) ,
- Operating instructions manual (32 pages)
Table of Contents
Advertisement
Quick Links
Download this manual
See also:
Instruction Manual
Advertisement
Table of Contents

Subscribe to Our Youtube Channel
Related Manuals for OHAUS Ranger


Summary of Contents for OHAUS Ranger
- Page 1 Ranger Counting Scale Instruction Manual...
- Page 2 Ohaus Corporation, 19A Chapin Road, P.O. Box 2033 Pine Brook, New Jersey, 07058, USA Declaration of Conformity We, Ohaus Corporation, declare under our sole responsibility that the balance models listed below marked with “CE” - are in conformity with the directives and standards mentioned.
- Page 3 BVQI, se comprueba periódicamente si el sistema de calidad se manipula de forma correcta. Certificato ISO 9001 per la Ohaus Corporation..ll sistema di garanzia della qualità della Società Ohaus Corporation, USA è certificato ISO 9001 sin dal 1994 dal Bureau Veritas Quality International BVQI, e così...
-
Page 5: Table Of Contents
Contents Contents OVERVIEW OF CONTROLS ........................3 INTRODUCTION ..........................5 Introduction ............................5 Overview of the scale ......................... 5 INSTALLATION ..........................4 Unpacking and checking the standard contents ..................4 Safety considerations ......................... 4 Locating and leveling the scale ......................7 Connecting power .......................... - Page 6 Contents RS232-1 / RS232-2 menus ......................21 Lockout menu ..........................22 Quit menu ............................23 CALIBRATION AND SEALING ......................24 Calibration masses .......................... 24 Calibration ............................25 Unlocking the menus ........................25 Weights and measures sealing ......................26 CARE AND MAINTENANCE ....................... 27 Troubleshooting ..........................
-
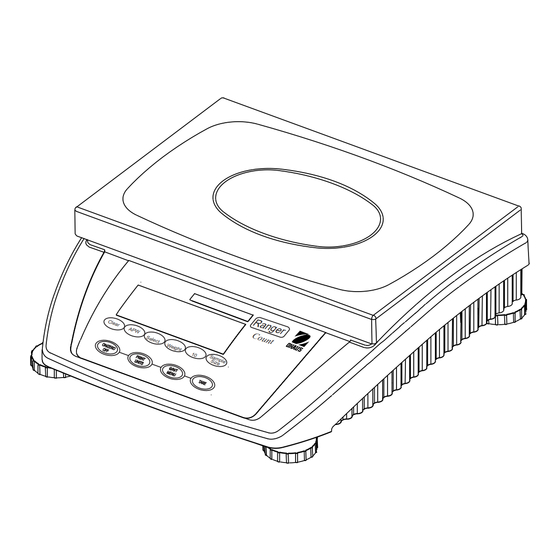
Page 7: Overview Of Controls
Overview of controls Rear of scale 9 10a 11 12 13 14 Display Auto Opt S c a l e S c a l e S c a l e C o u n t C o u n t C o u n t C o u n t C o u n t... -
Page 8: Unpacking And Checking The Standard Contents
18 Weighing range display (for dual range scales) Scale 19 Symbols for net/gross weight Keypad 20 Battery discharge status (optional battery) Function keys 21 Weighing unit Display 22 Number of user selected reference pieces Scale specifications 23 Weighing range bar graph Weighing pan 24 Center of zero Power cord... -
Page 9: Introduction
OHAUS also has a Customer Service Department to answer any inquiries regarding applications and accessories. To ensure you make full use of the possibilities offered by your new Ranger Counting Scale, please read the manual completely before installation and operation. -
Page 10: Installation
Section 2 - Installation In this section, you will learn how you unpack and install your new Ranger Counting Scale and prepare it for operation. On completion of the steps described in this section, your Scale is ready for operation. -
Page 11: Locating And Leveling The Scale
Check to ensure the voltage printed on the scale label matches your local line voltage. If this is not the case, DO NOT connect the scale to the power supply, but contact your responsible OHAUS dealer. Connect the power cord from the scale to a suitable power source. If the scale is equipped with an optional internal battery, connect the AC cord supplied to the rear of the scale. -
Page 12: Battery Operation
2.5 Battery operation Scales with a built-in battery automatically switch to battery operation if there is a power failure or the power cord is removed. The battery symbol indicates the current discharge status of the battery (1 segment = 25% capacity). -
Page 13: Connecting A Second Scale For Piece Counting
Connect the cable between the scales. The host scale (scale 1) must be a Ranger Count. In the RS menu of the host ‘MODE’ should be set to: If remote scale is used for average piece weight reference. -
Page 14: Operation
Section 3 - Operation 3.1 Menu structure The following table illustrates the first three menu’s in the Ranger Scale. The Main Menu contains 7 sub menus. The remaining menus appear on the next page. SETUP CALIBRATION READ Read Setup reset... - Page 15 3.1 Menu structure RS232-1 LOCKOUT RS232-2 QUIT rs232-1 rs232-2 Com 1 Com 2 Quit reset reset Store ? YES, NO YES, NO ON, OFF Mode Mode quit Print, On Stb, Stb Print, On Stb, Stb Setup only, Cont, Dialog, only, Cont, Dialog, ON, OFF Disp 2, Ref 2, Bulk2 Disp 2, Ref 2, Bulk2...
-
Page 16: Switch Functions
3.2 Switch functions There are two sets of button switches located on the front panel of the scale. The six button switches located directly under the display are used for counting functions. The four button switches located below the six switches provide basic scale operation and menu setups. -
Page 17: Menu Operation
3.3 Menu operation In this section, you will learn how to work with the menu. The menu allows you to match your scale to your specific weighing needs. In the menu, you can change the settings of your scale and activate functions. The Main Menu contains 7 sub menus. -
Page 18: Turning On The Scale And Zeroing
How to save and store an individual menu item When a menu item has been changed once the desired selection is shown, make a short press on G/N/T MENU button, Quit appears on the PRINT G/N/T display. If NO is selected by pressing the PRINT UNITS button, the next UNITS MENU menu item appears. -
Page 19: Weighing With Tare
3.6 Weighing with tare Place an empty weighing container or packaging on the scale. Press the TARE button briefly to tare the scale. The zero display and NET (net weight) symbol appear. Items to be weighed can now be placed on the platform. -
Page 20: Unit Switch Operation
3.8 Unit switch operation When the Read menu Unit 1 and Unit 2 have been set to either g, kg, oz or lb, you may press and hold the PRINT UNITS button to select one of Auto Opt the preset units. See Read Menu for selecting units. Auto Opt PRINT UNITS... -
Page 21: Counting Pieces Out Of A Container
3.10 Counting pieces out of a container Put container full of parts on scale and press the Tare button. TARE Count out pieces equal to the sample size and press the Sample Size button. Number of pieces removed from the container are displayed as a nega- tive number. -
Page 22: Piece Counting With 2-Scale Systems
3.13 Piece counting with 2-scale systems A second scale can be connected to your Ranger Counting Scale, e.g. a Ranger 60kg weighing only model for counting large number of pieces that would exceed the capacity of the Ranger Count. Before using a second scale, the interconnecting communication cable must be connected between the scales as described in paragraph 2.7. -
Page 23: Setting Up Your Scale
Section 4 - Setting up your scale 4.1 Overview In this section, each of the menus are described as to the settings and application in the scale. Using the buttons previously described, you can configure your scale to specific weighing needs. The menus, allow you to change the settings and activate functions. -
Page 24: Read Menu
4.2 Setup menu (Cont.) Auto add Calculates the minimum refer- ence sample for the most accurate counting. List Print Prints a setup list to the RS232. End Settings End of setup menu, when End of setup menu. selected by pressing G/N/T MENU button, display advances to READ MENU. -
Page 25: Rs232-1 / Rs232-2 Menus
4.3 Read menu (Cont.) Function/Display Function/Display Available Settings Available Settings Application Application Function/Display Function/Display Function/Display Available Settings Available Settings Available Settings Application Application Application Auto-Zero Tracking Settings minimize temperature 0.5d, 1d, 3d, Off and small disturbances on the zero reading. Auto Tare Enables automatic tare when set to ON. -
Page 26: Lockout Menu
4.4 RS232-1 / RS232-2 menus (Cont.) Function/Display Function/Display Function/Display Function/Display Function/Display Available Settings Available Settings Available Settings Available Settings Available Settings Application Application Application Application Application Baud Rate Various baud rates are avail- 300, 600, 1200, 2400, 4800, able to match external equip- 9600, 19200 ment communication require- ments. -
Page 27: Quit Menu
4.5 Lockout menu (Cont.) Function/Display Function/Display Function/Display Function/Display Function/Display Available Settings Available Settings Available Settings Available Settings Available Settings Application Application Application Application Application Calibration An ON setting locks out the calibration menu. Setup An ON setting locks out the setup menu. -
Page 28: Calibration And Sealing
Section 5 - Calibration and sealing Ranger Counting scales offer a choice of two calibration methods: Span Calibration, and Linearity Calibration. Span - Span calibration ensures that the sale reads within specifications using two weight values: zero and a weight value close to 100% of the full capacity. -
Page 29: Calibration
5.2 Calibration NOTE: If the scale is sealed and is used for legal for trade, the seal must be removed to gain access to the unlock switch located underneath the scale in order to calibrate the scale. Refer to paragraph 5.3. Access the menu by pressing and holding the G/N/T Menu button. -
Page 30: Weights And Measures Sealing
The screws can be used in the location as supplied or as an alternate, one screw can be used to replace one of the counter-sunk screws at the front of the scale. (Under the leveling feet on small size Ranger Scales.) HIGH CAPACITY SCALE... -
Page 31: Care And Maintenance
Section 6 - Care and maintenance To keep the scale operating properly, the housing should be kept clean and free from foreign material. If neces- sary, a cloth dampened with a mild detergent may be used. 6.1 Troubleshooting S Y M P T O M S Y M P T O M S Y M P T O M R E M E D Y... -
Page 32: Rs232 Interface
6.2 RS232 interface Ranger Counting Scales are equipped with one bi-directional RS232 compatible interface for communication with printers and computers. A second optional interface is available. When the scale is connected directly to a printer, displayed data can be output at any time by simply pressing PRINT UNITS button , or by using the Auto Print feature. - Page 33 Creating header information Ranger Counting Scale contains provisions for entering a custom header using an external PC connected to the RS232 connector. The header can contain up to 5 lines wiith a maximum of 24 characters per line. This is very useful to identify printed reports.
-
Page 34: Error Codes List
Ohaus Part No. Ranger RS232 Cable to Printer 25 Pin SF42 80500571 Ranger RS232 Cable to IBM PC 25 Pin (standard 9 pin serial extension cable with 9-25 pin adapter) 80500524 Ranger RS232 Cable to IBM 9 Pin (standard 9 pin serial extension cable) -
Page 35: Specifications
Pollution Degree Overvoltage Category All Ranger models meets the requirements of Approval Agencies: UL, FCC, CSA, CE Safety EN61010, Emissions EN55022, Immunity EN50082-1. LIMITED WARRANTY Ohaus products are warranted against defects in materials and workmanship from the date of delivery through the duration of the warranty period. - Page 36 Ohaus Corporation 19A Chapin Road, P.O. Box 2033 Pine Brook, NJ 07058, USA Tel: (973) 377-9000 Fax: (973) 593-0359 www.ohaus.com With offices worldwide *21203629* P/N 21203629 B © Ohaus Corporation 2005, all rights reserved Printed in Germany...
Need help?
Do you have a question about the Ranger and is the answer not in the manual?
Questions and answers