
Related Manuals for DeDietrich MCA 45


Summary of Contents for DeDietrich MCA 45
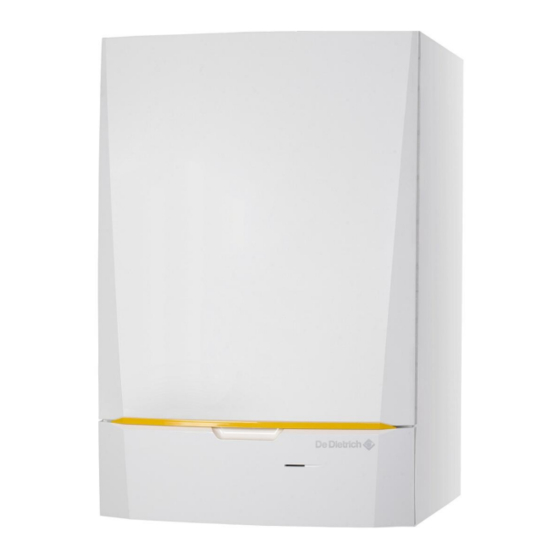
- Page 1 Innovens Pro Wall-hung gas condensing boilers MCA 45 - 65 - 90 - 115 Installation and Service Manual 300024827-001-01...
-
Page 2: Eg Declaration Of Conformity
EG declaration of conformity The device complies with the standard type described in the EG declaration of conformity. It was manufactured and commissioned in accordance with European directives. The original of the declaration of compliance is available from the manufacturer. R000040-A... -
Page 3: Table Of Contents
Contents Introduction ....................6 Symbols used ............6 Abbreviations ............6 General ..............7 1.3.1 Manufacturer's liability ..........7 1.3.2 Installer's liability .............7 1.3.3 User's liability ............7 Homologations ............8 1.4.1 Certifications ............8 1.4.2 Equipment categories ..........8 1.4.3 Additional Directives ..........8 1.4.4 Factory test .............9 Safety instructions and recommendations ..........10 Safety instructions ..........10 Recommendations ..........10 Technical description ................12... - Page 4 Contents 4.3.4 Main dimensions ...........20 Positioning the boiler .........21 Hydraulic connections ........22 4.5.1 Flushing the system ..........22 4.5.2 Connection of the heating circuit ......22 4.5.3 Connecting the expansion vessel ......23 4.5.4 Connecting the condensate discharge pipe ..24 Gas connection ...........24 Flue gas system connections ......25 4.7.1 Classification ............25...
- Page 5 5.2.3 Hydraulic circuit .............62 5.2.4 Electrical connections ...........62 Commissioning the boiler ........62 Gas settings ............64 5.4.1 Adapting to another gas type ........64 5.4.2 Setting the air/gas ratio (Full load) ......65 5.4.3 Setting the air/gas ratio (Part load) ......66 Checks and adjustments after commissioning ...........67 5.5.1 Displaying the parameters in extended...
- Page 6 Contents 6.6.2 Readout from the hour counter and percentage of successful starts ..........102 6.6.3 Status and sub-status .........102 Changing the settings ........103 6.7.1 Parameter descriptions ........103 6.7.2 Modification of the installer-level parameters ..107 6.7.3 Setting the maximum heat input for central heating operation .............107 6.7.4 Return to the factory settings Reset Param ..108...
- Page 7 Spare parts ....................143 11.1 General ..............143 11.2 Spare parts ............143 11.2.1 Casing ..............144 11.2.2 Heat exchanger and burner - MCA 45 ....145 11.2.3 Heat exchanger and burner - MCA 65 ....146 11.2.4 Heat exchanger and burner - MCA 90/115 ..147 11.2.5 Fan - MCA 45/65 ..........148...
-
Page 8: Introduction
1. Introduction MCA 45 - 65 - 90 - 115 Introduction Symbols used In these instructions, various danger levels are employed to draw the user's attention to particular information. In so doing, we wish to safeguard the user's safety, obviate hazards and guarantee correct operation of the appliance. -
Page 9: General
MCA 45 - 65 - 90 - 115 1. Introduction General 1.3.1. Manufacturer's liability Our products are manufactured in compliance with the requirements of the various applicable European Directives. They are therefore delivered with [ marking and all relevant documentation. -
Page 10: Homologations
1. Introduction MCA 45 - 65 - 90 - 115 This appliance is not intended to be used by persons (including children) whose physcial, sensory or mental capacity is impaired or persons with no experience or knowledge, unless they have the... -
Page 11: Factory Test
MCA 45 - 65 - 90 - 115 1. Introduction WARNING Installation of the appliance must be done by a qualified engineer in accordance with prevailing local and national regulations. 1.4.4. Factory test Before leaving the factory, each boiler is set for optimum performance... -
Page 12: Safety Instructions And Recommendations
2. Safety instructions and recommendations MCA 45 - 65 - 90 - 115 Safety instructions and recommendations Safety instructions DANGER If you smell gas: Do not use a naked flame, do not smoke, do not operate electrical contacts or switches ( doorbell, light, motor, lift, etc..). - Page 13 MCA 45 - 65 - 90 - 115 2. Safety instructions and recommendations Only remove the casing for maintenance and repair operations. Put the casing back in place after maintenance and repair operations. Instructions stickers The instructions and warnings affixed to the appliance must never be removed or covered and must remain legible during the entire lifespan of the appliance.
-
Page 14: Technical Description
3. Technical description MCA 45 - 65 - 90 - 115 Technical description General description Wall-hung gas condensing boilers 4 High efficiency heating (Production of domestic hot water can be ensured by a separate hot water calorifier). 4 Low pollutant emissions. -
Page 15: System In Cascade
MCA 45 - 65 - 90 - 115 3. Technical description If possible, install the pump directly under the boiler on the return connection. ¼ See chapter: "Connection of the heating circuit", page 22. CAUTION The pump may have a maximum input of 200 W. Use an auxiliary relay for a pump with a larger input. - Page 16 3. Technical description MCA 45 - 65 - 90 - 115 Boiler type MCA 45 MCA 65 MCA 90 MCA 115 General Flow rate setting Adjustable Modulating, Start/Stop, 0 - 10 V minimum-maximum kW 8,0 - 40,0 12,0 - 61,0 14,1 - 84,2 16,6 - 107,0 Nominal output (Pn) Heating System (80/60 °C)
-
Page 17: Sensor Characteristics
MCA 45 - 65 - 90 - 115 3. Technical description 3.4.1. Sensor characteristics Outside sensor Outlet sensor circuit B+C Boiler sensor Domestic hot water sensor Return sensor -20 °C 2392 ¨ 32014 ¨ -20 °C 98932 ¨ 0 °C -16 °C 2088 ¨... -
Page 18: Installation
Electronic heating pump - MCA 45 HC142 3-speed heating pump - MCA 65 HC143 3-speed heating pump - MCA 90 HC145 Primary pump - MCA 45 / 65 / 90 HC147 3-way valve with motor 1" HC15 Low loss header HW PLUS 70 HC28... - Page 19 MCA 45 - 65 - 90 - 115 4. Installation Boiler options Description package Condensates neutralisation station HC33 Bracket for neutralisation station HC 33 HC34 2 kg refill of granulats to neutralisation station HC 33 HC35 Condensates neutralisation station (Boilers up to 120 kW)
-
Page 20: Choice Of The Location
4. Installation MCA 45 - 65 - 90 - 115 Choice of the location 4.3.1. Data plate The data plate located on top of the boiler provides important information on the appliance: serial number, model, gas category, etc. T001982-A 4.3.2. -
Page 21: Ventilation
MCA 45 - 65 - 90 - 115 4. Installation 4.3.3. Ventilation Distance between the front of the boiler and the internal wall of the casing box. n . 1 Distance to allow on either side of the boiler. If the boiler is installed in a closed casing, respect the minimum dimensions given in the diagram opposite. -
Page 22: Main Dimensions
4. Installation MCA 45 - 65 - 90 - 115 4.3.4. Main dimensions T002614-C Connection of the combustion gas exhaust pipe; Ø 80 mm (≤ 45 kW / Ø 100 mm≥ 65 kW Connection of the air intake pipe; Ø 125 mm (≤ 45 kW) / Ø 150 mm≥ 65 kW â... -
Page 23: Positioning The Boiler
MCA 45 - 65 - 90 - 115 4. Installation Positioning the boiler The boiler is delivered with a mounting template. A suspension clamp situated at the rear of the casing enables the boiler to be directly suspended on the mounting bracket. -
Page 24: Hydraulic Connections
4. Installation MCA 45 - 65 - 90 - 115 Hydraulic connections 4.5.1. Flushing the system Installation must be carried out in accordance with the prevailing regulations, the codes of practice and the recommendations in these instructions. Installing the boiler in new installations (installations less than... -
Page 25: Connecting The Expansion Vessel
MCA 45 - 65 - 90 - 115 4. Installation 4. Remove the anti-dust plug located on the heating return connection z under the boiler. 5. Connect the heating water return pipe to the heating return connection. 6. Fit the pump in the return pipe. -
Page 26: Connecting The Condensate Discharge Pipe
4. Installation MCA 45 - 65 - 90 - 115 4.5.4. Connecting the condensate discharge pipe 1. Fit the condensate drain hose and the syphon of the boiler j : these are supplied separately. 2. Mount a standard drainage pipe, Ø 32 mm or more, leading to the mains drainage system. -
Page 27: Flue Gas System Connections
MCA 45 - 65 - 90 - 115 4. Installation Flue gas system connections 4.7.1. Classification C 83(x) C 33(x) C 43(x) C 83(x) C 43(x) B 23P C 33(x) C 13(x) C 83(x) B 23P C 33(x) C 43(x) -
Page 28: Lengths Of The Air/Flue Gas Pipes
4. Installation MCA 45 - 65 - 90 - 115 Configuration C Air/flue gas connection by concentric pipes in the boiler room and single flex in the chimney (combustive air in counter current in the chimney) WARNING Only factory components are authorised for connecting the boiler and the terminal. -
Page 29: Additional Directives
MCA 45 - 65 - 90 - 115 4. Installation Type of air/flue gas connection Diameter Maximum length in metres MCA 45 MCA 65 MCA 90 MCA 115 Concentric pipes in the boiler aluminium 80/125 mm 15 m room 80 mm... -
Page 30: Installing The Outside Sensor
4. Installation MCA 45 - 65 - 90 - 115 Please contact us for further information. Installing the outside sensor 4.8.1. Choice of the location It is important to select a place that allows the sensor to measure the outside conditions correctly and effectively. -
Page 31: Connecting The Outside Sensor
MCA 45 - 65 - 90 - 115 4. Installation 4.8.2. Connecting the outside sensor Mount the sensor using the screws and dowels provided. Inserts Ø4 wood screw ¼ For the connection of the outside temperature sensor, refer to the chapter "Electrical Connections". -
Page 32: Recommendations
4. Installation MCA 45 - 65 - 90 - 115 Routing of the 230 V cables Power supply cable Cable of housing for control PCBs 6,3 AT fuse 2 AT fuse CAUTION The following components of the appliance are at a... -
Page 33: Fitting And Connecting The Control Panel
MCA 45 - 65 - 90 - 115 4. Installation 4.9.3. Fitting and connecting the control panel 1. Unscrew the 2 screws under the front panel by a quarter turn. 2. Remove the front panel. 3. Fit and connect the control panel. -
Page 34: Accessing The Connection Terminal Blocks
4. Installation MCA 45 - 65 - 90 - 115 Do not connect anything to the terminal block. Optional PCB (Package AD249) Do not connect anything to the terminal block. 4.9.5. Accessing the connection terminal blocks To access the connection terminal blocks, proceed as follows: 1. -
Page 35: Connecting The Pump
MCA 45 - 65 - 90 - 115 4. Installation 6. Unclip the PCB cover. T002862-A 4.9.6. Connecting the pump The pump must be connected to standard control PCB (PCU). To do this, proceed as follows: 1. Connect the cable, that is delivered with the boiler, to the pump. - Page 36 4. Installation MCA 45 - 65 - 90 - 115 2. Remove the grommet from the opening in the middle of the base of the boiler. Pass the pump connection cable through the base of the boiler and seal the opening again by tightening the bayonet fitting to the cable.
-
Page 37: Connecting A Direct Heating Circuit
MCA 45 - 65 - 90 - 115 4. Installation 4. Connect the pump connection cable to the cable bundle by opening and closing the cable bundle bands. T002049-B 4.9.7. Connecting a direct heating circuit On/off 0-10V S AMB C... -
Page 38: Connecting A Direct Heating Circuit And A Domestic Hot Water Tank
4. Installation MCA 45 - 65 - 90 - 115 Connect the outside temperature sensor. The sensor connection is optional on installations with an IniControl control panel. Heating connection pump. Connect a safety thermostat if the heating circuit is for underfloor heating. - Page 39 MCA 45 - 65 - 90 - 115 4. Installation Connect a safety thermostat if the heating circuit is for underfloor heating. Remove the bridge. Connect the wires from the safety thermostat to the connector. Connect the DHW tank anode.
-
Page 40: Connecting Two Circuits And A Domestic Hot Water Tank
4. Installation MCA 45 - 65 - 90 - 115 4.9.9. Connecting two circuits and a domestic hot water tank This configuration is only possible with the DIEMATIC iSystem control panel. TS + On/off 0-10V S AMB C S AMB B... -
Page 41: Hot Water Storage Tank Connection
MCA 45 - 65 - 90 - 115 4. Installation Connect the heating pump (circuit A). If underfloor heating is being used, put a safety thermostat in place after the heating pump. The safety thermostat will shut down the heating pump in the event of overheating. - Page 42 4. Installation MCA 45 - 65 - 90 - 115 On/off 0-10V S AMB C S AMB B S AMB A Tout Tdhw 4 3 2 1 2 1 TS + S SYST + TA - S ECS S EXT S DEP C...
- Page 43 MCA 45 - 65 - 90 - 115 4. Installation DIEMATIC iSystem - Settings to be made for this type of installation Parameters Access Settings to be made See ¼ "Displaying the parameters in extended mode", page INSTALLATION Installer level...
- Page 44 4. Installation MCA 45 - 65 - 90 - 115 n PS storage tank and DHW tank connected to the boiler On/off 0-10V S AMB C S AMB B S AMB A Tout Tdhw 4 3 2 1 2 1...
- Page 45 MCA 45 - 65 - 90 - 115 4. Installation Solar sensor probe. Buffer tank. Do not connect anything to the terminal block. Connect the solar station to the solar collectors. Solar sensor probe DIEMATIC iSystem - Settings to be made for this type of installation...
- Page 46 4. Installation MCA 45 - 65 - 90 - 115 n PS storage tank and DHW tank connected to the storage tank The boiler only starts up production of domestic hot water if the storage tank is not hot enough to guarantee tank loading.
-
Page 47: Pool Connection
MCA 45 - 65 - 90 - 115 4. Installation Domestic hot water boiler. Connect the DHW sensor. Do not connect anything to the terminal block. DIEMATIC iSystem - Settings to be made for this type of installation Parameters Access Settings to be made See ¼... - Page 48 4. Installation MCA 45 - 65 - 90 - 115 Connect the swimming pool sensor. Plate heat exchanger. Pool heating cut-off control When the parameter I.TEL: is on 0/1 B, the swimming pool is no longer heated when the contact is open (factory setting), only the antifreeze continues to be active.
-
Page 49: Connecting A Mixed Tank
MCA 45 - 65 - 90 - 115 4. Installation The swimming pool can also be connected to circuit C by adding the AD249 option: Make the connection to the terminal blocks marked Set the parameters for circuit C. n Hourly programming of the secondary circuit pump The secondary pump operates during programme B comfort periods in summer and winter alike. -
Page 50: Connecting The Options
4. Installation MCA 45 - 65 - 90 - 115 Option of connecting the electric tank (with AD249 option) or to E Outlet circuit A - Option of connecting the electric tank (or to Z) Power control relay to the electrical resistor Connect the DHW tank anode. - Page 51 MCA 45 - 65 - 90 - 115 4. Installation TS + On/off 0-10V S AMB C S AMB B S AMB A Tout Tdhw 4 3 2 1 2 1 TS + S SYST + TA - S ECS...
-
Page 52: Connection In Cascade
4. Installation MCA 45 - 65 - 90 - 115 4.9.14. Connection in cascade n DHW tank after the mixing tank C002910-B Master boiler (DIEMATIC iSystem) Secondary boiler (DIEMATIC iSystem or IniControl) Secondary boiler (DIEMATIC iSystem or IniControl) Cable BUS... - Page 53 MCA 45 - 65 - 90 - 115 4. Installation DIEMATIC iSystem - Settings to be made for this type of installation: Master boiler Parameters Access Settings to be made See ¼ "Displaying the parameters in extended Installer level INSTALLATION...
-
Page 54: 4.10 Electrical Diagram
4. Installation MCA 45 - 65 - 90 - 115 4.10 Electrical diagram 3 2 1 1 2 3 2 3 4 1 1 2 3 1 2 3 2 3 4 5 2 1 3 3 1 2 3 1 2... -
Page 55: 4.11 Filling The System
MCA 45 - 65 - 90 - 115 4. Installation Power supply Ignition power relay Flow sensor SCU Extended control PCB GB Combined venturi and gas valve Pressure sensor unit On/Off switch PUMP A Shunt pump Parameter storage for PCBs PSU... -
Page 56: Filling The Siphon
4. Installation MCA 45 - 65 - 90 - 115 If a water treatment is necessary, De Dietrich Thermique recommends the following manufacturers: Cillit Climalife Fernox Permo Sentinel 4.11.2. Filling the siphon 1. Remove the siphon. 2. Fill the siphon with water. This must be completely filled. -
Page 57: Commissioning - Diematic Isystem
MCA 45 - 65 - 90 - 115 5. Commissioning - DIEMATIC iSystem Commissioning - DIEMATIC iSystem Control panel 5.1.1. Description of the keys AUTO Temperature setting key (heating, DHW, swimming pool) Operating mode selection key DHW override key Key to access the parameters reserved for the installer... -
Page 58: Description Of The Display
5. Commissioning - DIEMATIC iSystem MCA 45 - 65 - 90 - 115 5.1.2. Description of the display n Key functions Access to the various menus > Used to scroll through the menus Used to scroll through the parameters The symbol is displayed when help is available Used to display the curve of the parameter selected <... -
Page 59: Operating Modes
MCA 45 - 65 - 90 - 115 5. Commissioning - DIEMATIC iSystem n Solar (If connected) The solar load pump is running The top part of the tank is reheated to the tank set point The entire tank is reheated to the tank set point <... -
Page 60: System Pressure
5. Commissioning - DIEMATIC iSystem MCA 45 - 65 - 90 - 115 n System pressure Pressure indicator: The symbol is displayed when a water pressure sensor is connected. Flashing symbol: The water pressure is insufficient. Steady symbol: The water pressure is sufficient. -
Page 61: Access To The Various Browsing Levels
MCA 45 - 65 - 90 - 115 5. Commissioning - DIEMATIC iSystem 5.1.3. Access to the various browsing levels n User level The information and settings in the User level can be accessed by everyone. 1. Press the > key. -
Page 62: Browsing In The Menus
5. Commissioning - DIEMATIC iSystem MCA 45 - 65 - 90 - 115 n After Sales level The After Sales Service information and settings can be accessed by the professional providing the After Sales Service. 1. Press the > key. -
Page 63: Check Points Before Commissioning
MCA 45 - 65 - 90 - 115 5. Commissioning - DIEMATIC iSystem 5. To modify the parameter, turn the rotary button. 6. To confirm, press the rotary button. CURRENT PROG.C "Choice of the timeprogram applied C" To cancel, press key h . -
Page 64: Gas Circuit
5. Commissioning - DIEMATIC iSystem MCA 45 - 65 - 90 - 115 5.2.2. Gas circuit WARNING Ensure that the boiler is switched off. 1. Open the main gas supply. 2. Open the gas valve on the boiler. 3. Unscrew the two screws located under the front panel by a quarter turn and remove the panel. - Page 65 MCA 45 - 65 - 90 - 115 5. Commissioning - DIEMATIC iSystem 4. Turn on the boiler using the on/off switch. C002366-B 5. The first time the boiler is powered up, the LANGUAGE menu is displayed. Select the desired language by turning the rotary button.
-
Page 66: Gas Settings
5. Commissioning - DIEMATIC iSystem MCA 45 - 65 - 90 - 115 Gas settings 5.4.1. Adapting to another gas type WARNING Only a qualified engineer may carry out the following operations. The boiler is preset in the factory to operate on natural gas H (G20). -
Page 67: Setting The Air/Gas Ratio (Full Load)
MCA 45 - 65 - 90 - 115 5. Commissioning - DIEMATIC iSystem 5.4.2. Setting the air/gas ratio (Full load) 1. Unscrew the plug of the flue gas measurement point. 2. Connect the flue gas analyser. WARNING Ensure that the opening around the sensor is completely sealed when taking measurements. -
Page 68: Setting The Air/Gas Ratio (Part Load)
5. Commissioning - DIEMATIC iSystem MCA 45 - 65 - 90 - 115 / CO control and setting values for propane (G31) at full load Boiler type Setting value Checking value MCA 45 4,6 ± 0,2 10,7 ± 0,1 4,6 ± 0,5 10,7 ±... -
Page 69: Checks And Adjustments After Commissioning
MCA 45 - 65 - 90 - 115 5. Commissioning - DIEMATIC iSystem 8. If necessary, adjust the gas/air ratio using the adjusting screw (B). control and setting values for gas H (G20) at low speed Boiler type Setting value... -
Page 70: Setting The Parameters Specific To The Installation
5. Commissioning - DIEMATIC iSystem MCA 45 - 65 - 90 - 115 5.5.2. Setting the parameters specific to the installation 1. Access the installer level: Press key - for around 5 seconds. 2. Select the menu #SYSTEM. SUNDAY 11:45 Turn the rotary button to scroll through the menus or TEMP.: 68°... - Page 71 MCA 45 - 65 - 90 - 115 5. Commissioning - DIEMATIC iSystem Installer level - Menu #SYSTEM Parameter Adjustment range Description Factory setting Customer setting Use as a domestic loop pump (1)(3) DHW LOOP DHW LOOP S.AUX Use as an independent programmable outlet PROGRAM.
- Page 72 5. Commissioning - DIEMATIC iSystem MCA 45 - 65 - 90 - 115 Installer level - Menu #SYSTEM Parameter Adjustment range Description Factory setting Customer setting Start anti-freeze in boiler command ANTIFR ANTIFR I.TEL: ON or OFF contact: I.TEL: can be used as an...
- Page 73 MCA 45 - 65 - 90 - 115 5. Commissioning - DIEMATIC iSystem Influence of the parameter setting CT.TEL on the I.TEL: contact CT.TEL I.TEL: C contact closed C contact open The antifreeze mode is active on all boiler circuits. The mode selected on the boiler is active.
-
Page 74: Naming The Circuits And Generators
5. Commissioning - DIEMATIC iSystem MCA 45 - 65 - 90 - 115 Influence of the parameter setting CT.TEL on the I.TEL: contact CT.TEL I.TEL: C contact closed C contact open The mode selected on the boiler is active. The antifreeze mode is active on all boiler circuits. -
Page 75: Setting The Heating Curve
MCA 45 - 65 - 90 - 115 5. Commissioning - DIEMATIC iSystem 3. Select the circuit or generator you wish to rename. Installer level - Menu #NAMES OF THE CIRCUITS Parameter Description Name given by the customer Circuit A CIRC. - Page 76 5. Commissioning - DIEMATIC iSystem MCA 45 - 65 - 90 - 115 3. Select the parameter CIRC. CURVE ..BUILD.INERTIA CIRC.CURVE B CIRC.CURVE C SCREED DRYING < AUTO C002316-E-04 4. To modify the value directly, turn the rotary button.
-
Page 77: Finalizing Work
MCA 45 - 65 - 90 - 115 5. Commissioning - DIEMATIC iSystem n Heating curve with BCT The BCT (Base heat Curve Temperature) parameter allows a minimum operating temperature to be imposed on the heating circuit (this temperature may be constant if the circuit gradient is nil). -
Page 78: Reading Out Measured Values
5. Commissioning - DIEMATIC iSystem MCA 45 - 65 - 90 - 115 Reading out measured values The various values measured by the appliance are displayed in the #MEASURES menu. 1. To access user level: Press the > key. 2. Select the menu #MEASURES. -
Page 79: Changing The Settings
MCA 45 - 65 - 90 - 115 5. Commissioning - DIEMATIC iSystem Changing the settings The boiler control panel is set for the most common heating systems. With these settings, practically all heating systems operate correctly. The user or installer can optimise the parameters according to own preferences. - Page 80 5. Commissioning - DIEMATIC iSystem MCA 45 - 65 - 90 - 115 User level - Menu #SETTING Parameter Adjustment range Description Factory setting Customer setting 15 to 30 °C Used to set the outside temperature above 22 °C SUM/WIN which heating will be shut down.
-
Page 81: Professional Settings
(2) The parameter is only displayed if P.DHW: is set to PUMPThe parameter is only displayed if P.DHW is set to PUMP Type of gas used Parameter Unit MCA 45 MCA 65 MCA 90 MCA 115 Gas H (G20) rpm 1500... - Page 82 5. Commissioning - DIEMATIC iSystem MCA 45 - 65 - 90 - 115 Installer level - Menu #SECONDARY LIMITS Parameter Adjustment range Description Factory setting 20 to 95 °C Maximum temperature (Circuit A) 75 °C MAX.CIRC.A ¼ "MAX.CIRC...", page 83 20 to 95 °C...
- Page 83 MCA 45 - 65 - 90 - 115 5. Commissioning - DIEMATIC iSystem Installer level - Menu #SECONDARY INSTAL.P Parameter Adjustment range Description Factory Customer setting setting 0 (10 hours) to 10 Characterisation of building's inertia: 3 (22 hours) BUILD. INERTIA (50 hours) 0 for a building with low thermal inertia.
- Page 84 5. Commissioning - DIEMATIC iSystem MCA 45 - 65 - 90 - 115 Installer level - Menu #SECONDARY INSTAL.P Parameter Adjustment range Description Factory Customer setting setting The lower temperature is maintained DEC. DEC. NIGHT (Night mode) ¼ "NIGHT", page 85...
- Page 85 MCA 45 - 65 - 90 - 115 5. Commissioning - DIEMATIC iSystem Installer level - Menu #SECONDARY INSTAL.P Parameter Adjustment range Description Factory Customer setting setting The anti legionella function acts to LEG PROTEC prevent the development of legionella in the dhw tank, these bacteria are responsible for legionellosis.
- Page 86 5. Commissioning - DIEMATIC iSystem MCA 45 - 65 - 90 - 115 n CIRC. CURVE ... Heating curve circuit A, B or C Outside temperature (°C) Water flow temperature (°C) Maximum temperature of the circuit B - C M001678-B n ANTICIP.A, ANTICIP.B, ANTICIP.C...
- Page 87 MCA 45 - 65 - 90 - 115 5. Commissioning - DIEMATIC iSystem STOP DRYING TEMP START DRYING TEMP Today NB DAYS DRYING Normal regulation (End of drying) Heating temperature setting (°C) 00:00 00:00 00:00 For example STOP DRYING TEMP: 47 °C START DRYING TEMP: 20 °C...
-
Page 88: Configuring The Network
5. Commissioning - DIEMATIC iSystem MCA 45 - 65 - 90 - 115 4 When the room temperature is higher than the room sensor set point: Heating is shut down during reduced periods. When installation antifreeze is active, the reduced temperature is maintained during reduced periods. - Page 89 MCA 45 - 65 - 90 - 115 5. Commissioning - DIEMATIC iSystem Installer level - Menu #NETWORK Parameter Adjustment range Description Factory setting Customer setting ON / NO ON: System in cascade CASCADE: Specific menu: Enlist VMs in cascade...
- Page 90 5. Commissioning - DIEMATIC iSystem MCA 45 - 65 - 90 - 115 2. Select SYSTEM NETWORK and press the rotary button to go to the specific menu. CASCADE MASTER CONTROLER SYSTEM NETWORK FUNCT TRADITIONAL INTER STAGE TIMER < AUTO C002409-C-04 3.
-
Page 91: Return To The Factory Settings
MCA 45 - 65 - 90 - 115 5. Commissioning - DIEMATIC iSystem n Connecting VM iSystem in cascade It is possible to assign VMs only as slaves. Proceed as follows: 1. Select VM NETWORK and press the rotary button to go to the specific menu. - Page 92 5. Commissioning - DIEMATIC iSystem MCA 45 - 65 - 90 - 115 After reset (TOTAL RESET and RESET EXCEPT PROG.), the control system goes back to the display of the language choice after a few seconds. LANGUE FRANCAIS Français - Deutsch - English - Italiano - Espanol - Nederlands 1.
-
Page 93: Commissioning - Inicontrol
MCA 45 - 65 - 90 - 115 6. Commissioning - IniControl Commissioning - IniControl Control panel 6.1.1. Description of the keys SERVICE °C°Fh barPsi °C % rpm kW uA x10 l/min " " " Return button j, Escape G or Manual reset t... -
Page 94: Description Of The Display
6. Commissioning - IniControl MCA 45 - 65 - 90 - 115 6.1.2. Description of the display n Key functions Back to the previous level without saving the modifications made SERVICE °C°Fh Manual reset barPsi °C % rpm Central heating function: kW uA Access to the max. -
Page 95: Check Points Before Commissioning
MCA 45 - 65 - 90 - 115 6. Commissioning - IniControl n System pressure Pressure indicator: SERVICE The symbol is displayed next to the installation's pressure value. If no water pressure sensor is connected, -.- °C°Fh barPsi °C appears on the display... -
Page 96: Gas Circuit
6. Commissioning - IniControl MCA 45 - 65 - 90 - 115 4 Check the gas circuit. 4 Check the hydraulic circuit. 4 Check the water pressure in the heating system. 4 Check the electrical connections to the thermostat and the other external controls. -
Page 97: Putting The Appliance Into Operation
MCA 45 - 65 - 90 - 115 6. Commissioning - IniControl Putting the appliance into operation WARNING If adapting to another gas type i.e. propane, the gas valve must be adjusted before switching on the boiler. ¼ See chapter: "Adapting to another gas type", page 1. -
Page 98: Gas Settings
6. Commissioning - IniControl MCA 45 - 65 - 90 - 115 If the economy setting (eco setting) is on, then, after central heating operation, the boiler will not start to run for hot tap water production. Gas settings 6.4.1. -
Page 99: Setting The Air/Gas Ratio (Part Load)
MCA 45 - 65 - 90 - 115 6. Commissioning - IniControl 3. Set the boiler to full load. Press keys A and B simultaneously. The display shows h3 . The symbol ) appears. 4. Measure the percentage of O or CO in the flue gases. -
Page 100: Checks And Adjustments After Commissioning
6. Commissioning - IniControl MCA 45 - 65 - 90 - 115 6. If necessary, adjust the gas/air ratio using the adjusting screw (B). control and setting values for gas H (G20) at low speed Boiler type Setting value Checking value MCA 45 4,8 ±... -
Page 101: Finalizing Work
MCA 45 - 65 - 90 - 115 6. Commissioning - IniControl n Heating curve without BCT Maximum temperature of the circuit P1 C° Water temperature in the circuit for an outside temperature of 0°C DAY set point on the circuit S1... -
Page 102: Reading Out Measured Values
6. Commissioning - IniControl MCA 45 - 65 - 90 - 115 Reading out measured values 6.6.1. Reading out measured values The following current values can be read off the information menu 4 5t = State. 4 5v = Sub-status. - Page 103 MCA 45 - 65 - 90 - 115 6. Commissioning - IniControl The current values can be read as follows: 1. Press the two f keys simultaneously. The symbol Q flashes. 2. Confirm using key S . 5t is displayed, alternating with the current status 3 (for example).
-
Page 104: Readout From The Hour Counter And Percentage Of Successful Starts
6. Commissioning - IniControl MCA 45 - 65 - 90 - 115 6.6.2. Readout from the hour counter and percentage of successful starts 1. Press the two keys f simultaneously and then key [+] until the symbol \ flashes on the menu bar. -
Page 105: Changing The Settings
MCA 45 - 65 - 90 - 115 6. Commissioning - IniControl State 5t Sub-status 5v DHW mode running 30 Temperature control 31 Limited temperature control (ΔT safety) 32 Output control 33 Temperature protection gradient level 1 (Modulate down) 34 Temperature protection gradient level 2 (Part load) - Page 106 6. Commissioning - IniControl MCA 45 - 65 - 90 - 115 Parameter Description Adjustment range Factory setting Brightness of display lighting Do not modify Maximum fan speed (Heating) Natural gas H (G20) (x100 rpm) Natural gas L (G25) (x100 rpm)
- Page 107 MCA 45 - 65 - 90 - 115 6. Commissioning - IniControl Parameter Description Adjustment range Factory setting Release waiting time 0 to 255 seconds Flue gas flap switching time 0 to 255 seconds Fault relay function (Optional) 0 = Operation signal...
- Page 108 6. Commissioning - IniControl MCA 45 - 65 - 90 - 115 Parameter Description Adjustment range Factory setting Activation of the TAS function 0 = Deactivation 1 = Activation Telephone input 0 = Anti-freeze (Start anti-freeze in boiler command) 1 = 0/1 A (ON or OFF contact: E.TEL: can be used...
-
Page 109: Modification Of The Installer-Level Parameters
MCA 45 - 65 - 90 - 115 6. Commissioning - IniControl Boiler temperature / Boiler output If the input voltage is less than VMIN/OFF 0-10V, the boiler is off. The boiler temperature setting corresponds strictly to the 0-10 V input. -
Page 110: Return To The Factory Settings Reset Param
6. Commissioning - IniControl MCA 45 - 65 - 90 - 115 1. Press the two keys f simultaneously and then key [+] until the symbol - flashes on the menu bar. 2. Select the installers menu using the key S . c0de appears on the display. -
Page 111: Carrying Out An Auto-Detect
MCA 45 - 65 - 90 - 115 6. Commissioning - IniControl 6.7.5. Carrying out an auto-detect After removing a control PCB, an auto-detect must be carried out. To do this, proceed as follows: 1. Press the two keys f simultaneously and then key [+] until the symbol - flashes on the menu bar. -
Page 112: Switching Off The Boiler - Diematic Isystem
7. Switching off the boiler - DIEMATIC iSystem MCA 45 - 65 - 90 - 115 Switching off the boiler - DIEMATIC iSystem Installation shutdown CAUTION Do not switch off the mains supply to the appliance. If the central heating system is not used for a long period, we recommend activating the HOLIDAYS mode (to ensure the anti-grip of the heating pump). -
Page 113: Switching Off The Boiler - Inicontrol
MCA 45 - 65 - 90 - 115 8. Switching off the boiler - IniControl Switching off the boiler - IniControl Installation shutdown CAUTION Do not switch off the boiler. If the central heating system is not used for a long period, we recommend proceeeding as follows: 4 Press key d until OFF is displayed. -
Page 114: Checking And Maintenance
9. Checking and maintenance MCA 45 - 65 - 90 - 115 Checking and maintenance General instructions WARNING Maintenance operations must be done by a qualified engineer. An annual inspection is compulsory. Only original spare parts must be used. 4 Have the flues swept at least once a year or more, depending on the regulations in force in your country. -
Page 115: Inicontrol Control Panel
MCA 45 - 65 - 90 - 115 9. Checking and maintenance Menu #EMISSION MEASUREMENTS Generator Function available Description Values displayed Generator name AUTO normal operation °C BOILER TEMP. µA CURRENT WIND SPEED °C BACK TEMP Operating at minimum output °C... -
Page 116: Maintenance Message
9. Checking and maintenance MCA 45 - 65 - 90 - 115 9.3.1. Maintenance message The boiler incorporates a function that can be used to display a maintenance message. To set the parameters for this function, proceed as follows: 1. Access the "After Sales" level: Hold down the - key until #PARAMETERS is displayed. -
Page 117: Contact Details Of The Professional For After Sales Support
MCA 45 - 65 - 90 - 115 9. Checking and maintenance 9.3.2. Contact details of the professional for After Sales Support In order to assist the user if an error or service message is displayed, it is possible to provide the contact details of the professional to be contacted. -
Page 118: Checking The Hydraulic Pressure
9. Checking and maintenance MCA 45 - 65 - 90 - 115 9.4.1. Checking the hydraulic pressure The hydraulic pressure must reach a minimum of 0,8 bar. . If the hydraulic pressure is lower than 0.8 bar: 4 DIEMATIC iSystem control panel: The symbol bar flashes. - Page 119 MCA 45 - 65 - 90 - 115 9. Checking and maintenance n DIEMATIC iSystem control panel The check on combustion is done by measuring the percentage of in the flue gas discharge flue. To do this, proceed as follows: 1.
-
Page 120: Checking The Automatic Air Vent
9. Checking and maintenance MCA 45 - 65 - 90 - 115 9.4.5. Checking the automatic air vent 1. Switch off the boiler electrical power supply. 2. Close the gas valve on the boiler. 3. Close the main gas inlet valve. -
Page 121: Checking The Burner And Cleaning The Heat Exchanger
MCA 45 - 65 - 90 - 115 9. Checking and maintenance 9.4.7. Checking the burner and cleaning the heat exchanger CAUTION During inspection and maintenance operations, always replace all gaskets on the parts removed. 1. Remove the air inlet flue on the venturi. -
Page 122: Specific Maintenance Operations
9. Checking and maintenance MCA 45 - 65 - 90 - 115 Specific maintenance operations If the standard inspection and maintenance operations have revealed the necessity to carry out additional maintenance work, proceed as follows, depending on the nature of the work: 9.5.1. -
Page 123: Replacing The Non-Return Valve
MCA 45 - 65 - 90 - 115 9. Checking and maintenance 9.5.2. Replacing the non-return valve Replace the nonreturn valve when faulty or when the maintenance kit contains one. To do this, proceed as follows: 1. Remove the air inlet flue on the venturi. -
Page 124: 10 Troubleshooting
10. Troubleshooting MCA 45 - 65 - 90 - 115 10 Troubleshooting 10.1 Anti-hunting This display only concerns boilers with the DIEMATIC iSystem control panel. When the boiler is in Anti-short-cycle operating mode, the symbol ? flashes. 1. Press the "?" key. - Page 125 MCA 45 - 65 - 90 - 115 10. Troubleshooting Code Messages Description Checking / solution The PSU PCB is incorrectly Parameter error on the PSU PCB BL.CRC.PSU configured DIEMATIC iSystem: Set the type of generator again in the menu #CONFIGURATION (Refer to the original rating plate) ¼...
- Page 126 10. Troubleshooting MCA 45 - 65 - 90 - 115 Code Messages Description Checking / solution Gas pressure too low Incorrect setting of the gas pressure switch on the SCU PCB BL.GAS PRESS Check that the gas valve is fully opened...
-
Page 127: 10.3 Message History
MCA 45 - 65 - 90 - 115 10. Troubleshooting Code Messages Description Checking / solution A boiler vent cycle is underway Switching the boiler on DISGAS Wait 3 minutes Floor drying is active Floor drying is underway. Heating on the circuits not concerned is FL.DRY.B XX... -
Page 128: Inicontrol Control Panel
10. Troubleshooting MCA 45 - 65 - 90 - 115 4. Select a message to consult the information pertaining to it. BL INPUT OPEN M21 28/08/2008 - 13h32 NUMBER OF CASE OUTSIDE TEMP. 1.0 °C OUTLET TEMP.B 12.0°C < AUTO C002382-B-04 10.3.2. -
Page 129: Faults (Code Type Lxx Or Dxx)
MCA 45 - 65 - 90 - 115 10. Troubleshooting n Reading the memorised messages 1. Press the two keys f simultaneously and then key [+] until the symbol c flashes on the menu bar. 2. Select the installers menu using the key S . c0de appears on the display. -
Page 130: Diematic Isystem Control Panel
10. Troubleshooting MCA 45 - 65 - 90 - 115 10.4.1. DIEMATIC iSystem control panel 1. Make a note of the code displayed. The code is important for the correct and rapid diagnosis of the type of failure and for any technical assistance that may be SUNDAY 11:45 needed. - Page 131 MCA 45 - 65 - 90 - 115 10. Troubleshooting Code Faults Cause Description Checking / solution of the fault The boiler flow sensor has Bad connection DEF.OUTLET S. short-circuited Check the wiring between the PCU PCB and the sensor...
- Page 132 10. Troubleshooting MCA 45 - 65 - 90 - 115 Code Faults Cause Description Checking / solution of the fault The return temperature sensor Bad connection BACK S.FAILURE has short-circuited Check the wiring between the PCU PCB and the sensor...
- Page 133 MCA 45 - 65 - 90 - 115 10. Troubleshooting Code Faults Cause Description Checking / solution of the fault Difference between the flow Sensor fault DEP-RET>MAX and return temperatures Check the Ohmic value of the sensor insufficient Replace the sensor if necessary...
- Page 134 10. Troubleshooting MCA 45 - 65 - 90 - 115 Code Faults Cause Description Checking / solution of the fault BURNER FAILURE PCU 5 burner start-up failures No ignition Check the wiring between the PCU PCB and the ignition transformer...
- Page 135 MCA 45 - 65 - 90 - 115 10. Troubleshooting Code Faults Cause Description Checking / solution of the fault Flow and return reversed Bad connection BACK>BOIL FAIL Check that the sensor has been correctly fitted Sensor fault Check the Ohmic value of the sensors...
- Page 136 10. Troubleshooting MCA 45 - 65 - 90 - 115 Code Faults Cause Description Checking / solution of the fault L251 MANOMETRE FAIL PCU Pressure gauge fault Wiring problem The manometer is defective Sensor pcb defective Check the wiring between the PCU PCB and the...
- Page 137 MCA 45 - 65 - 90 - 115 10. Troubleshooting Code Faults Cause Description Checking / solution of the fault A room temperature sensor Bad connection ROOM S.A FAIL. fault ROOM S.B FAIL. ¼ Check whether the sensor is connected: B room temperature sensor ROOM S.C FAIL.
-
Page 138: Deletion Of Sensors From The Memory In The Pcb
10. Troubleshooting MCA 45 - 65 - 90 - 115 Code Faults Cause Description Checking / solution of the fault The Titan Active System® is short-circuited TA-S SHORT-CIR Check that the connection cable between the SCU PCB and the anode is not short-... -
Page 139: 10.5 Failure History
MCA 45 - 65 - 90 - 115 10. Troubleshooting 10.5 Failure history 10.5.1. DIEMATIC iSystem control panel The menu #DEFAULT HISTORIC is used to consult the last 10 faults displayed by the control panel. 1. Access the "After Sales" level: Hold down the - key until #PARAMETERS is displayed. -
Page 140: Inicontrol Control Panel
10. Troubleshooting MCA 45 - 65 - 90 - 115 10.5.2. IniControl control panel 1. Press the two keys f simultaneously and then key [+] until the symbol c flashes on the menu bar. 2. Select the installers menu using the key S . c0de appears on the display. - Page 141 MCA 45 - 65 - 90 - 115 10. Troubleshooting After Sales level - Menu #PARAMETERS Parameter Description Master boiler active PERMUT Number of boilers requesting heating STAGE Number of boilers recognised in the cascade NB.CASC.: Number of DIEMATIC VM control systems recognised in the cascade NB.
- Page 142 10. Troubleshooting MCA 45 - 65 - 90 - 115 After Sales level - Menu #TEST OUTPUTS Parameter Adjustment range Description Stop/start pump circuit A P. CIRC. A ON / NO Stop/start pump circuit B ON / NO P. CIRC. B...
-
Page 143: Inicontrol Control Panel
MCA 45 - 65 - 90 - 115 10. Troubleshooting 10.6.2. IniControl control panel 1. Check the following parameters: After Sales level - Menu #CONFIGURATION Parameter Adjustment range Description S18 - TAS 0 / 1 Activation of the Titan Active System® function 10.6.3. - Page 144 10. Troubleshooting MCA 45 - 65 - 90 - 115 Control system sequence Status Sub-status Operation Stand-by Anti-short cycle activated Blockage: The sub-status shows the error value Blocking Antifreeze protection Bleed 28/08/12 - 300024827-001-01...
-
Page 145: Spare Parts
MCA 45 - 65 - 90 - 115 11. Spare parts 11 Spare parts 11.1 General When it is observed subsequent to inspection or maintenance work that a component in the appliance needs to be replaced, use only original spare parts or recommended spare parts and equipment. -
Page 146: Casing
11. Spare parts MCA 45 - 65 - 90 - 115 11.2.1. Casing 1003 1001 1005 1002 EV 90520-1 T002923-B 28/08/12 - 300024827-001-01... -
Page 147: Heat Exchanger And Burner - Mca 45
MCA 45 - 65 - 90 - 115 11. Spare parts 11.2.2. Heat exchanger and burner - MCA 45 2017 2022 2019 2016 2021 2001 2020 2014 2025 2001 2013 2047 2005 2004 2015 2010 2023 2012 2003 2024 2011... -
Page 148: Heat Exchanger And Burner - Mca 65
11. Spare parts MCA 45 - 65 - 90 - 115 11.2.3. Heat exchanger and burner - MCA 65 2017 2047 2001 2014 2019 2013 2016 2021 2025 2004 2020 2015 2010 2005 2017 2003 2033 2030 2024 2026 2006... -
Page 149: Heat Exchanger And Burner - Mca 90/115
MCA 45 - 65 - 90 - 115 11. Spare parts 11.2.4. Heat exchanger and burner - MCA 90/115 2047 2019 2017 2021 2020 2025 2001 2016 2013 2014 2004 2033 2030 2015 2010 2029 2027 2005 2031 2017 2026... -
Page 150: Fan - Mca 45/65
11. Spare parts MCA 45 - 65 - 90 - 115 11.2.5. Fan - MCA 45/65 3014 3007 3001 3008 3009 3010 3002 3006 3005 3011 3003 3012 3004 3013 EV 90520-3 T002925-B 28/08/12 - 300024827-001-01... -
Page 151: Fan - Mca 90
MCA 45 - 65 - 90 - 115 11. Spare parts 11.2.6. Fan - MCA 90 3014 3001 3007 3008 3009 3010 3006 3002 3003 3016 3015 3011 3005 3012 3013 EV 90522-3 T002937-A 28/08/12 - 300024827-001-01... -
Page 152: Fan - Mca 115
11. Spare parts MCA 45 - 65 - 90 - 115 11.2.7. Fan - MCA 115 3014 3007 3001 3008 3009 3002 3018 3017 3016 3010 3015 3006 3011 3003 3005 3012 3013 EV 90523-3 T002943-C 28/08/12 - 300024827-001-01... -
Page 153: Control Panel
MCA 45 - 65 - 90 - 115 11. Spare parts 11.2.8. Control panel 4023 4022 4020 4023 4021 4024 4008 4007 4011 4012 4013 4005 4014 4007 4002 4006 4018 4015 4019 4001 4004 4009 4017 4010 4015 EV 90520-4... -
Page 154: Spare Parts List
11. Spare parts MCA 45 - 65 - 90 - 115 11.2.9. Spare parts list Markers Code no. Description Part MCA 45 MCA 65 MCA 90 MCA 115 Casing 1001 S101575 Front casing 1002 S101612 Top cover (Control panel) 1003... - Page 155 MCA 45 - 65 - 90 - 115 11. Spare parts Markers Code no. Description Part MCA 45 MCA 65 MCA 90 MCA 115 2032 S100895 Endpiece M7x1 2033 S101570 Silicone hose 8x2x740 2037 S101558 Siphon 2038 S14254 Screw 4,2x9,5...
- Page 156 11. Spare parts MCA 45 - 65 - 90 - 115 Markers Code no. Description Part MCA 45 MCA 65 MCA 90 MCA 115 4004 S43562 3,15 glass fuse A slow 4005 S101619 Ignition transformer with ignition electrode 4006 S101632...
- Page 157 MCA 45 - 65 - 90 - 115 11. Spare parts 28/08/12 - 300024827-001-01...
- Page 158 11. Spare parts MCA 45 - 65 - 90 - 115 28/08/12 - 300024827-001-01...
- Page 160 © Copyright All technical and technological information contained in these technical instructions, as well as any drawings and technical descriptions supplied, remain our property and shall not be multiplied without our prior consent in writing. 28/08/12 DE DIETRICH THERMIQUE 57, rue de la Gare F- 67580 MERTZWILLER - BP 30 300024827- 001- 01...
Need help?
Do you have a question about the MCA 45 and is the answer not in the manual?
Questions and answers