Table of Contents
Advertisement
Quick Links
Advertisement
Table of Contents

Related Manuals for Mia Cucina GYV34M

Summary of Contents for Mia Cucina GYV34M
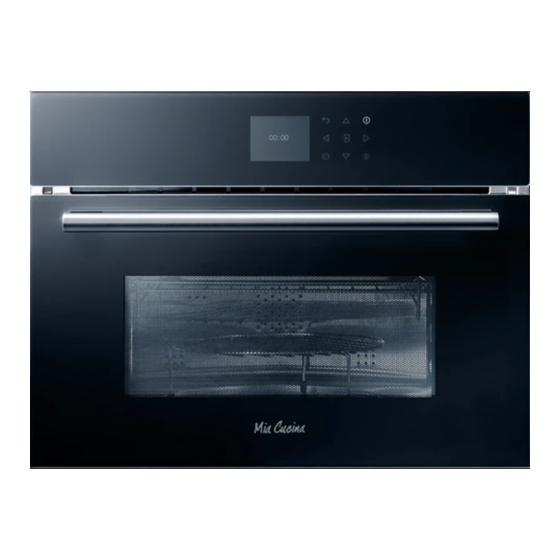
- Page 2 User Manual Built-in Microwave Combi Oven GYV34M Dear Customer Thank you for choosing Mia Cucina products. These meticulously designed products, manufactured with the highest quality materials, have been carefully tested to satisfy all your needs. Please read and follow the following instructions that ensure correct operation and optimal performance.
-
Page 3: Table Of Contents
TABLE OF CONTENTS PAGE TABLE OF CONTENTS PAGE Warnings for Microwave Ovens System Setting Food preparation Event Log Pots and pans Demo Microwave power and duration Starting Your Oven Packaging Switching the oven on and off Beverages Cooking Mode Tables Foods for newborns Traditional Cooking Foods with skin or peel... -
Page 4: Foods For Newborns
IMPORTANT INSTRUCTIONS AND SAFETY WARNINGS Read carefully and keep for future use Dear Customer, ATTENTION We would like to thank you and congratulate you on your choice. • If you see smoke coming out, turn off the appliance or This new product has been carefully designed and built using remove its plug and keep the door closed to extinguish top quality materials, and meticulously tested to ensure that it any flames;... -
Page 5: Warnings For Microwave Ovens
1 - Warnings for Microwave Ovens Food preparation Danger of fire! Only use the microwave function for the preparation of food to be eaten. Any other uses can be dangerous or cause damage. For example, heated slippers or pillows filled with grain or cereals can catch fire even after several hours. - Page 6 Technical breakdown Never use enamelled baking dishes in the microwave because it could cause a technical breakdown. Cooling with the door of the appliance open The cooking chamber must only be cooled with the door closed. Check that nothing is stuck on the door of the appliance. Even if the door is only ajar, nearby cabinets can be damaged over time.
-
Page 7: First Use
First use The oven should be thoroughly cleaned with soap and water and carefully rinsed. Heat the oven for about 30 minutes at the maximum temperature; this eliminates all the residual manufacturing oils that could cause unpleasant odours during cooking. Use the circular plus fan function without accessories in the oven. Before using the accessories for the first time, clean them carefully with a very hot alkaline washing solution and a soft cloth. -
Page 8: Respect For The Environment
Respect for the environment THE SYMBOL on the product or accompanying documentation The documentation for this appliance is printed on paper bleached without chlorine or recycled paper to contribute to indicates that this product must not be treated as domestic waste but must be delivered to a suitable collection protecting the environment. -
Page 9: The Control Panel
2 - The Control Panel Your appliance could vary slightly compared to the illustrations below. - Keypad - Display screen FRIDAY 11/20/2015 04:26 Keypad To operate the key, press gently. The keypad will not work if more than one key is pressed at the same time. Movement arrows Return to previous display page. -
Page 10: General Oven Information
3 - General Oven Information Before using your oven for the first time remove all packing and foreign materials from the oven(s). Any material of this sort left inside may melt or burn when the appliance is used. Error codes Timer This code appears in the event of the electronic control WARNING... -
Page 11: Preheating The Oven
4 - General Oven Tips Preheating the Oven esting dishware • Selecting a higher temperature does not shorten the preheat time. Never turn on the microwave oven before you have put in the • Preheating is necessary for good results when baking cakes, food. -
Page 12: Getting Started
5 - Getting Started Instructions for initial switch-on Once the oven has been connected to the power supply for the first time, the control automatically prepares for setting a number of user settings, which remain stored in case of any subsequent switch-on. -
Page 13: User Settings
6 - User Settings emperature & Weight Press the arrow key to select one of the two With the oven on, select the icon and confirm with the temperature options “°C/°F” or weight options Kg/ib and to enter the SETTINGS menu. This menu permits confirm with the key. -
Page 14: Date
Date Volume Press the arrow key to select the date format from among Press the arrow key to select the required degree of the options “D.M.Y. – Y.M.D. – M.D.Y.” and confirm with the luminosity and confirm with the key key. -
Page 15: System Setting
7 - System Setting Demo With the oven on, select the icon and confirm with the The purpose of this function is to set the DEMO mode, which to enter the SETTINGS menu. This menu permits setting makes the oven useless for cooking but automatically performs a number of parameters or special functions. -
Page 16: Starting Your Oven
8 - Starting Your Oven Switching the oven on and off IMPORTANT • The key does not stop the function. • After switching off the oven, the cooling fan could continue to operate until the inner parts of the oven have cooled down. Press to switch the oven on and press again to switch it off. -
Page 17: Cooking Mode Tables
Cooking Mode Tables Traditional Cooking COOKING MODE ICON TEMPERATURE Min. Preset Max. TRUE CONVECTION 50° C 165° C 230° C RING & GRILL 50° C 210° C 230° C CONVECTION BROIL 50° C 165° C 230° C GRILL 50° C 230°... -
Page 18: Traditional Cooking
9 - Traditional Cooking Changing the cooking mode Pre-heating phase 1. During untimed cooking, a cooking pause can be set by While the oven is in pre-heating phase, the instantaneous pressing the key. temperature is displayed underneath the cooking mode icon. All the settings of the suspended cooking operation remain stored and can be reactivated by pressing the same key again. -
Page 19: Time Oven Mode Operation
10 - Time Oven Mode Operation Be sure that the time-of-day clock is displaying the correct time. To change the cooking time when the oven is already operating, The timed mode turns off the oven at the end of the cook time. simply press the e key and enter the new cooking time before pressing the... -
Page 20: Microwave Cooking
11 - Microwave Cooking NOTE: it is essential to carefully read the instructions and Select the type of meal using the arrows and , then set the warnings to ensure correct use. weight using the arrows , finally start thawing using the key ATTENTION Following are types of meals and relative weights that can be... -
Page 21: Microwave + Grill Function
If you wish to personalise the time and output, open the sub- Once cooking has started, a countdown will be shown on the menu managed as follows: display. The time can be changed at any time using the arrows • TIME: Select the icon and use the keys personalise the time. -
Page 22: Changing Watts Power
Changing Temperature Once the new parameters have been set, press the key start cooking. (only available for microwave and ring) Press the icon and press the key Select the cooking Once cooking has started, a countdown will be shown on the display. -
Page 23: Using Oven Lights
12 - Using Oven Lights A single light key activates the lights. Touch to turn lights on or off . Oven lights turn on automatically when the door is opened. When an oven is in use, oven lights turn on automatically when a mode is started. -
Page 24: Recipes
13 - Recipes The Recipe function of your oven gives you the chance to cook food without having to set the oven manually every time. By selecting a “SET” recipe, the cooking mode, the temperature and the time are automatically set according to the recipe selected from the menu. - Page 25 4. At this point, the recipe can be saved in the list of 7. To start the recipe, confirm with the key. “PERSONAL” recipes by selecting “SAVE” and confirming During a recipe, a number of acoustic and visual messages by means of the key.
-
Page 26: For The Installer
14 - For the Installer Install the oven in the counter The oven must be installed under a cook top, in a column, or combined with the relative food-warmer drawer. The dimensions of the space must be those shown in figure. The cabinet material must be able to withstand the heat. -
Page 27: Electrical Hook-Up
TECHNICAL DATA TYPE AND MINIMUM DIAMETER OF THE CABLES 220-240 V~, Power supply SASO Maximum absorbed power 3200 H05RR-F 3x1,5 mm² H05RR-F 3x2,5 mm² Microwave power H05VV-F 3x1,5 mm² H05VV-F 3x2,5 mm² Grill 1500 H05RN-F 3x1,5 mm² H05RN-F 3x2,5 mm² Hot air 1500 H05V2V2-F... -
Page 28: Solving Traditional Baking Problems
15 - Solving Traditional Baking Problems With either Bake or Convection Bake, poor results can occur for many reasons other than a malfunction of the oven. Check the chart below for causes of the most common problems. Since the size, shape and material of baking utensils directly affect the baking results, the best solution may be to replace old baking utensils that have darkened and warped with age and use. -
Page 29: Solving Operational Problems
16 - Solving Operational Problems Before contacting service, check the following to avoid unnecessary service charges. Oven Problem Problem Solving Steps Other F__ Error appears in the display window. Remove power and turn it back on again after a few seconds. If condition persists, note the code number (in the EVENT LOG list) and contact service. -
Page 30: Assistance Or Service
17 - Assistance or Service Before contacting service, please check “Troubleshooting.” It may save you the cost of a service call. If you still need help, follow the instructions below. When calling, please know the purchase date and the complete model and serial number of your appliance. - Page 31 PRODUCT COD. 2.006.49.1 DOC COD. 2.006.49.1 - 11/16...
- Page 32 G Y V 3 4 M 2 0 1 7 0 2...
Need help?
Do you have a question about the GYV34M and is the answer not in the manual?
Questions and answers