Table of Contents
Advertisement
DOREL ASIA
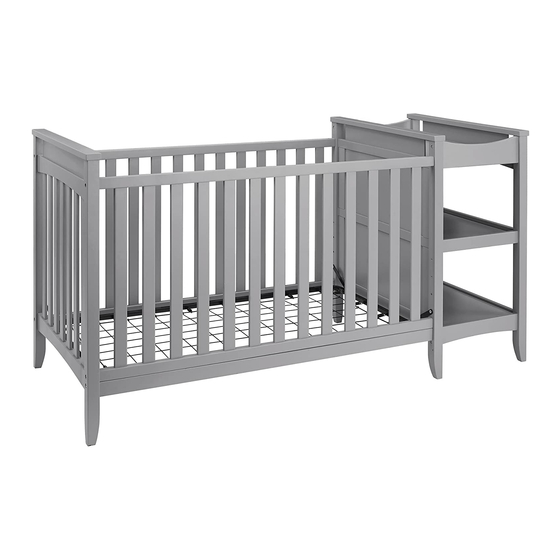
2 IN 1 CRIB
DO NOT RETURN PRODUCT TO THE STORE.
If a part is missing or damaged, contact our customer service
department. We will replace the part FREE of charge.
THIS INSTRUCTION BOOKLET
CONTAINS IMPORTANT SAFETY
INFORMATION. PLEASE READ AND
KEEP FOR FUTURE REFERENCE.
(TAKEN FROM CARTON)
_____________________________________
Date of purchase:
_______ / _______ / _______
Tel #: 1-800-295-1980
NEED HELP!
E-Mail: das@dorel.com
CALL US FOR ASSISTANC
1-800-295-1980
DO NOT RETURN PRODU
Model No:
Da6790 (GREY)
UPC CODE:
0-65857-16721-4
NOTE:
Lot number:
Fax #: 514-353-7819
Advertisement
Table of Contents

Related Manuals for Baby Relax CRIB CHANGER COMBO 2 IN 1 CRIB


Summary of Contents for Baby Relax CRIB CHANGER COMBO 2 IN 1 CRIB
- Page 1 DOREL ASIA Model No: DA6790 (GREY) CRIB CHANGER COMBO UPC CODE: 2 IN 1 CRIB 0-65857-16721-4 NOTE: THIS INSTRUCTION BOOKLET CONTAINS IMPORTANT SAFETY INFORMATION. PLEASE READ AND KEEP FOR FUTURE REFERENCE. Lot number: (TAKEN FROM CARTON) _____________________________________ Date of purchase: _______ / _______ / _______ DO NOT RETURN PRODUCT TO THE STORE.
- Page 2 CUSTOMER SERVICE If you are missing parts or have any questions about this product, contact our customer service representative first! CALL 1-800-295-1980 You can also order parts by writing to the address listed below. Please include the product model number, color and a detailed description of the part.
- Page 3 Changing Table WARNING FALL HAZARD - To prevent death or serious injury, always keep child within arm's reach. Avoid serious injury. Never leave child unattended. Read all instructions before use of the changing table. KEEP INSTRUCTIONS FOR FUTURE USE. DO NOT use the changing table if it is damaged or broken. The changing table is to be used with a changing pad measuring 16 inches X 32 inches and not exceeding 2 inches in thickness (excluding the height of any contoured edges).
- Page 4 CRIB CHANGER COMBO DA6790 HARDWARE LIST Ø1/4" X 13mm X 75mm Ø1/4" X 13mm X 60mm BOLT BOLT 8 PCS 2 PCS Ø1/4" X 13mm X 55mm Ø8mm X 30mm BOLT WOOD DOWEL 10 PCS 14 PCS Ø1/4" X 13mm X 15mm Ø1/4"...
-
Page 5: Parts List
CRIB CHANGER COMBO DA6790 PARTS LIST LEFT SIDE PANEL RIGHT SIDE PANEL BACK PANEL FRONT PANEL 1 PC 1 PC 1 PC 1 PC FRONT RAIL MATTRESS SUPPORT RIGHT SIDE FRAME TOP BACK RAIL 1 PC 1 PC 1 PC 1 PC MIDDLE BACK RAIL BOTTOM BACK RAIL... - Page 6 CRIB CHANGER COMBO DA6790 CRIB ASSEMBLY INSTRUCTION NOTE: When inserting bolts, turn clockwise until tight. Then loosen 1/2 - 3/4 of a turn. After crib is completely assembled, return to each bolt and tighten. Use wax or soap on all bolts to facilitate assembly.
- Page 7 CRIB CHANGER COMBO DA6790 STEP 1 Insert barrel nuts (6) into back panel (C ) as shown. Attach left side panel (A)and right side panel (B) to back panel (C) with bolts (1). Use Allen Key (7) to tighten all bolts (1).
- Page 8 CRIB CHANGER COMBO DA6790 STEP 2 Attach mattress support (F) to the posts with mattress support bolts (5). Use Allen Key (7) to tighten the mattress support bolts (5). INCORRECT- Raised edge should face down -this photo shows mattress support is ...
- Page 9 CRIB CHANGER COMBO DA6790 STEP 3 Insert wood dowels (4) into left side panel (A) and right side panel (B). insert barrel nuts (6) into front rail € as shown. Attach front rail (E) to left side panel (A) and right side panel (B) with bolts (1). Use Allen Key (7) to tighten all bolts (1).
- Page 10 CRIB CHANGER COMBO DA6790 STEP 4 Insert barrel nuts (6) into front panel (D) as shown. Attach front panel (D) to left side panel (A) and right side panel (B) with bolts (1 and 3) as shown. Secure front panel (D) to front rail (E) with bolts (2). Use Allen Key (7) to tighten all bolts (1, 2 &...
- Page 11 CRIB CHANGER COMBO DA6790 STEP 5 Attach top back rail (H) and top front rail (K) to right side panel (B) with bolts (3). Insert wood dowels (4) into middle back rail (I) and middle front rail (L) and attach them to right side panel (B).
- Page 12 CRIB CHANGER COMBO DA6790 STEP 6 Slide changer panels (N) into the grooves of rails as shown below. Make sure changer panels (N) rest inside the grooves of right side panel (B).
- Page 13 CRIB CHANGER COMBO DA6790 STEP 7 Insert wood dowels (4) into top back rail (H), middle back rail (I), top front rail (K), and middle front rail (L). Attach right side frame (G) to the assembled unit with bolts (3). Use Allen Key (7) to tighten all bolts.
- Page 14 CRIB CHANGER COMBO DA6790 WARNINGS: * CAUTION- ANY MATTRESS USED IN THIS CRIB MUST BE AT LEAST 27-1/4 INCHES BY 51-5/8 INCHES (69CM BY 131CM) WITH A THICKNESS NOT EXCEEDING 6 INCHES (15CM). * The day bed is not intended for children under 15 months of age or over 50 lbs (22.7 kgs). DAY BED ASSEMBLY INSTRUCTION: STARTING FROM CRIB STEP1: Follow steps backward from 7 to 5 to remove changer with Allen Key (7).
- Page 15 CRIB CHANGER COMBO DA6790 CAUTION: This unit is intended for use only with the products and/or maximum weights indicated. Use with other products and/or products heavier than the maximum weights indicated may result in instability or cause possible injury. NOTE: DO NOT throw away this instruction manual.
-
Page 16: Customer Service
MODEL #: DA6790 Customer Service PLEASE DO NOT RETURN THIS PRODUCT TO THE STORE PLEASE CONTACT CUSTOMER SERVICE REPRESENTATIVES AT THE FOLLOWING NUMBERS SHOULD THERE BE ANY MISSING OR DEFECTIVE PART(S). Customer Service Phone Number 1-800-295-1980 Email: das@dorel.com Customer Service Fax Number 514-353-7819 Request Date: Name: Shipping Address:...
Need help?
Do you have a question about the CRIB CHANGER COMBO 2 IN 1 CRIB and is the answer not in the manual?
Questions and answers